Ed Nisley's Blog: Shop notes, electronics, firmware, machinery, 3D printing, laser cuttery, and curiosities. Contents: 100% human thinking, 0% AI slop.
One of the Dripworks Micro-flow valves in Mary’s garden blew a fan-shaped spray into the air when she turned the water on for the first time this season. Fortunately, the main valve is far away and she didn’t get hosed down.
The poor thing may have frozen and cracked during the winter. Seeing as how this would have been its fifth year in the garden, we can’t kvetch too much.
There being nothing like a good new problem to take one’s mInd off one’s old problems, I set the Makergear M2 to printing TPU and made a washer for the Champion Hose Nozzle:
Champion hose nozzle – TPU vs rubber washers
It turns out PrusaSlicer can produce models for simple shapes using the Shape Gallery. Subtracting a 7.5 mm cylinder (as a “negative shape”) from a 12.7 mm = ½ inch cylinder does the trick, with the washer all of 2.5 mm thick.
The ID of the thread inside the nozzle is slightly smaller than 12.7 mm, but TPU is bendy enough to let me push it through sideways and reorient it against the front of the nozzle.
The conical part of the nozzle seals against the washer, leaving only a very slight ooze of water, and opens far enough to produce a jet. The TPU is solid enough to not vibrate in the flow and the nozzle no longer howls at low flow rates.
None of the other nozzles in the box have a washer up in there, so they all depend on a much better machined fit than I achieved.
At least the Champion nozzle is once again usable, should it ever emerge from the bottom of the box.
An email discussion suggested the Champion hose nozzle might, once upon a time, have had a washer between the conical and cylindrical sections.
So I made one:
Champion hose nozzle – rubber washer
The details:
OD = ½ inch
ID = 9/32 inch
2.5 mm stamp pad rubber
It sealed perfectly, but, just before shutting off, the washer vibrated in the water flow and gave off an ear-shattering (even to my deflicted hearing) howl.
Perhaps a stiffer and thinner washer with a slightly larger OD would work better.
A quick check of similar nozzles in the Box o’ Hydraulics shows none of them feel like they have a compliant washer in there, but any sufficiently old rubber will have long since fossilized.
This seems like a good job for a 3D printed washer with a conical face, made from slightly squishy TPU plastic to ease it past the nozzle’s internal threads. All I need is the ability to print TPU …
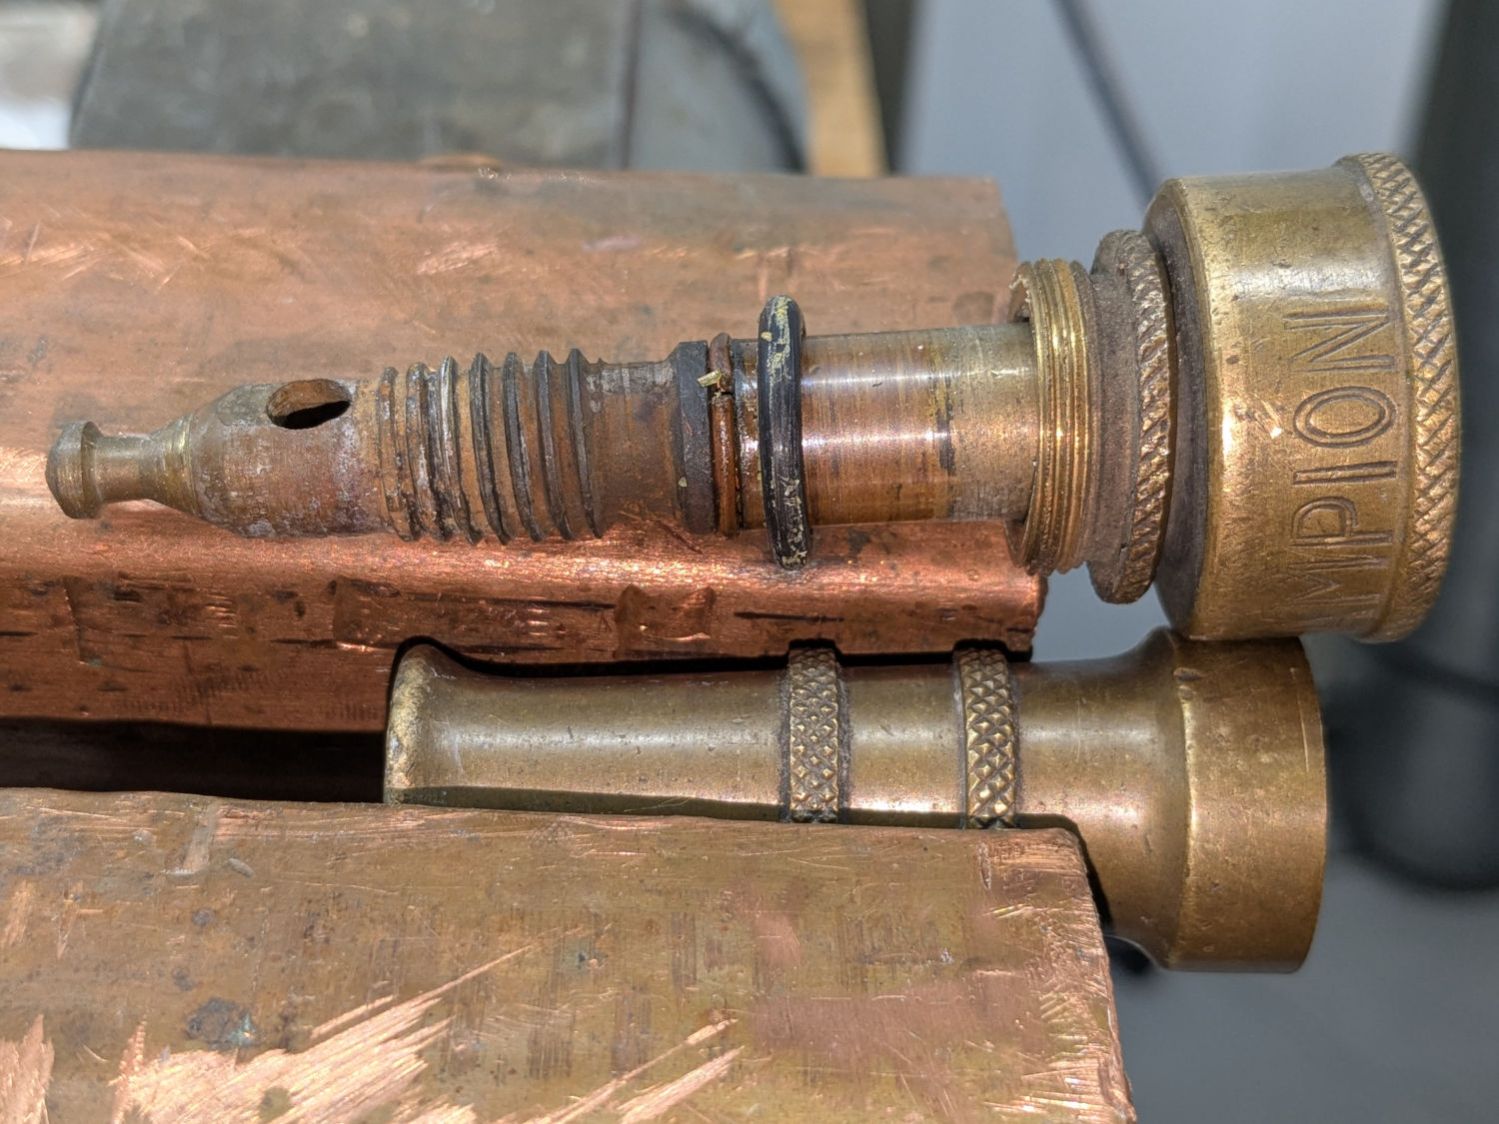
The battered Champion hose nozzle came into play last fall, leaked profusely when turned off, went to a Safe Place for the winter, and recently emerged:
Champion hose nozzle – disassembled
The conical surface (to the right of the tip) must make perfect contact with the edge of a perfect cylindrical hole in the outer shell to shut off the water, which was obviously no longer happening.
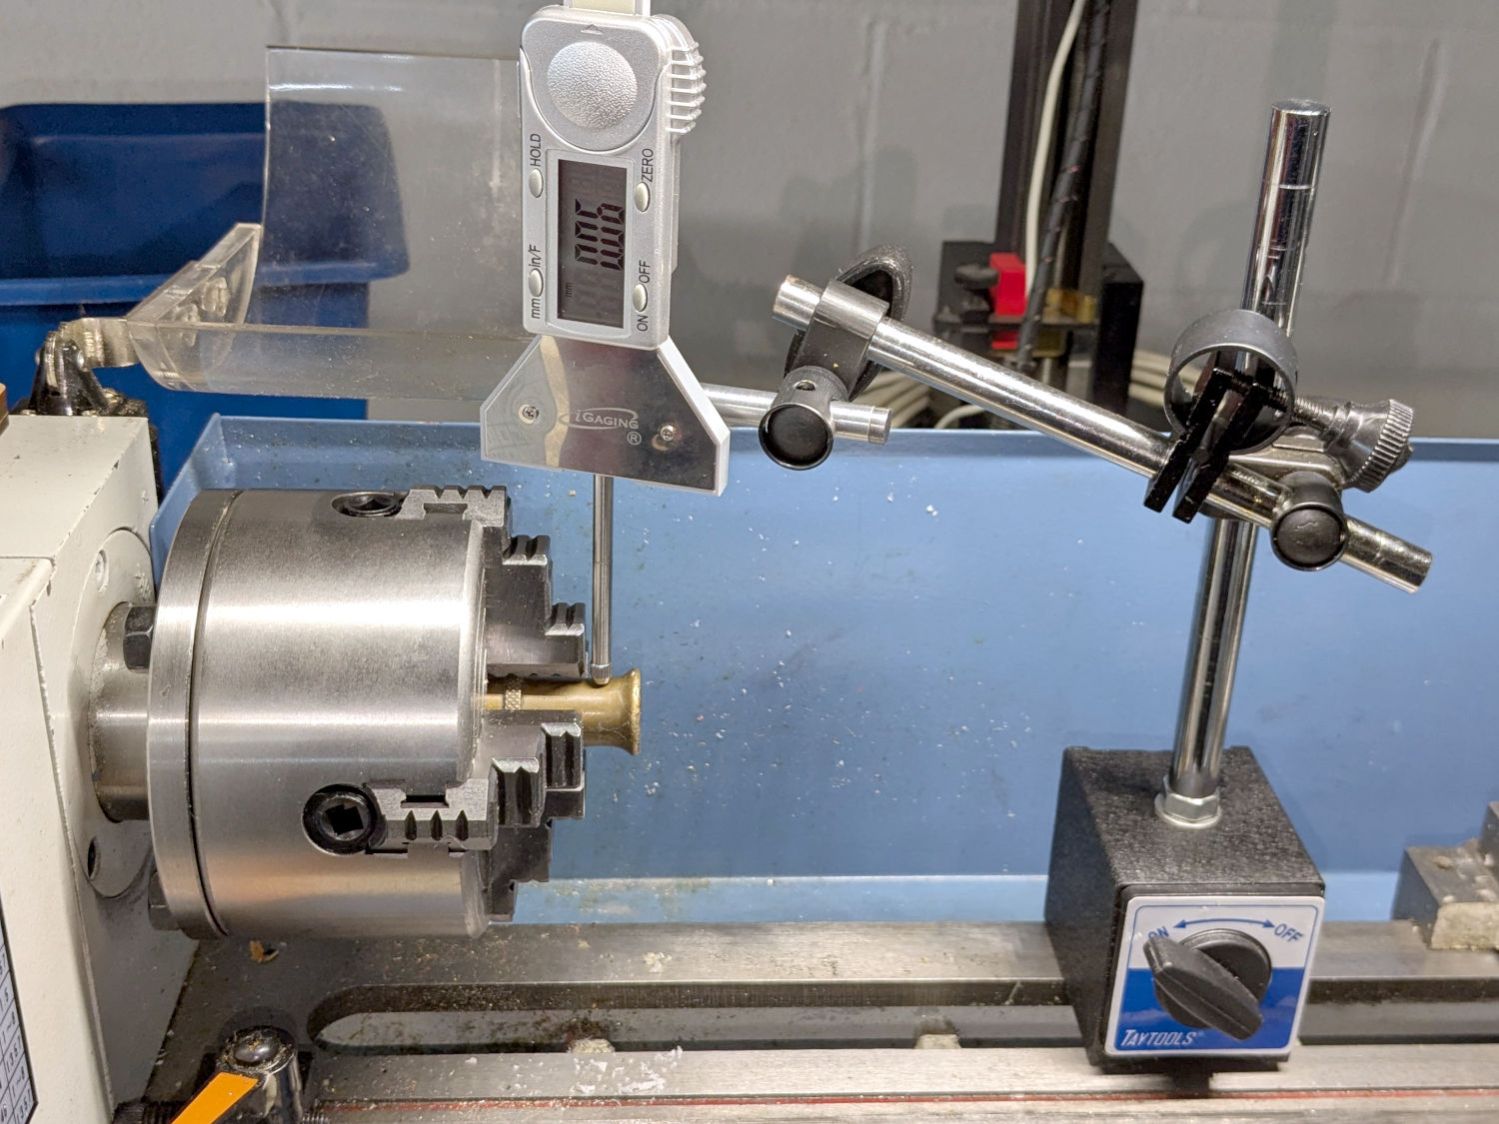
There is no reason why that hole should still be concentric with the outside of the shell, but centering the latter in the four-jaw chuck put the hole within about 0.2 mm of where it should be:
Champion hose nozzle – lathe centering
I defined that to be Close Enough™ and made the hole smooth & concentric with a teeny boring bar and sissy cuts. A drill would likely have worked well enough, too.
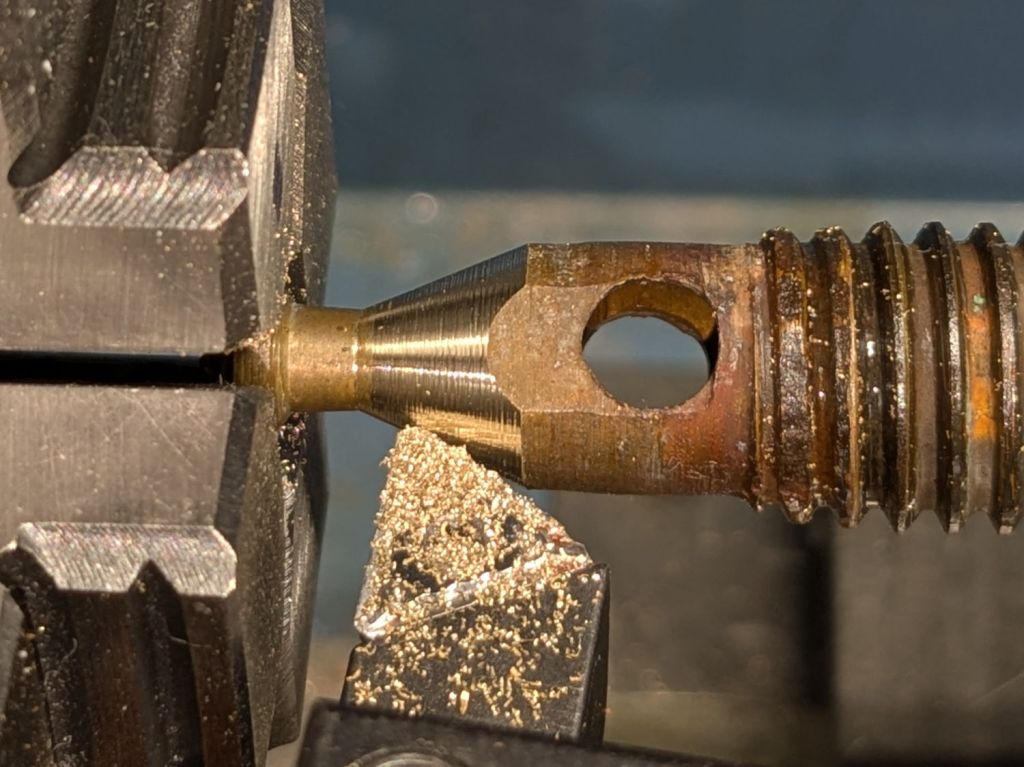
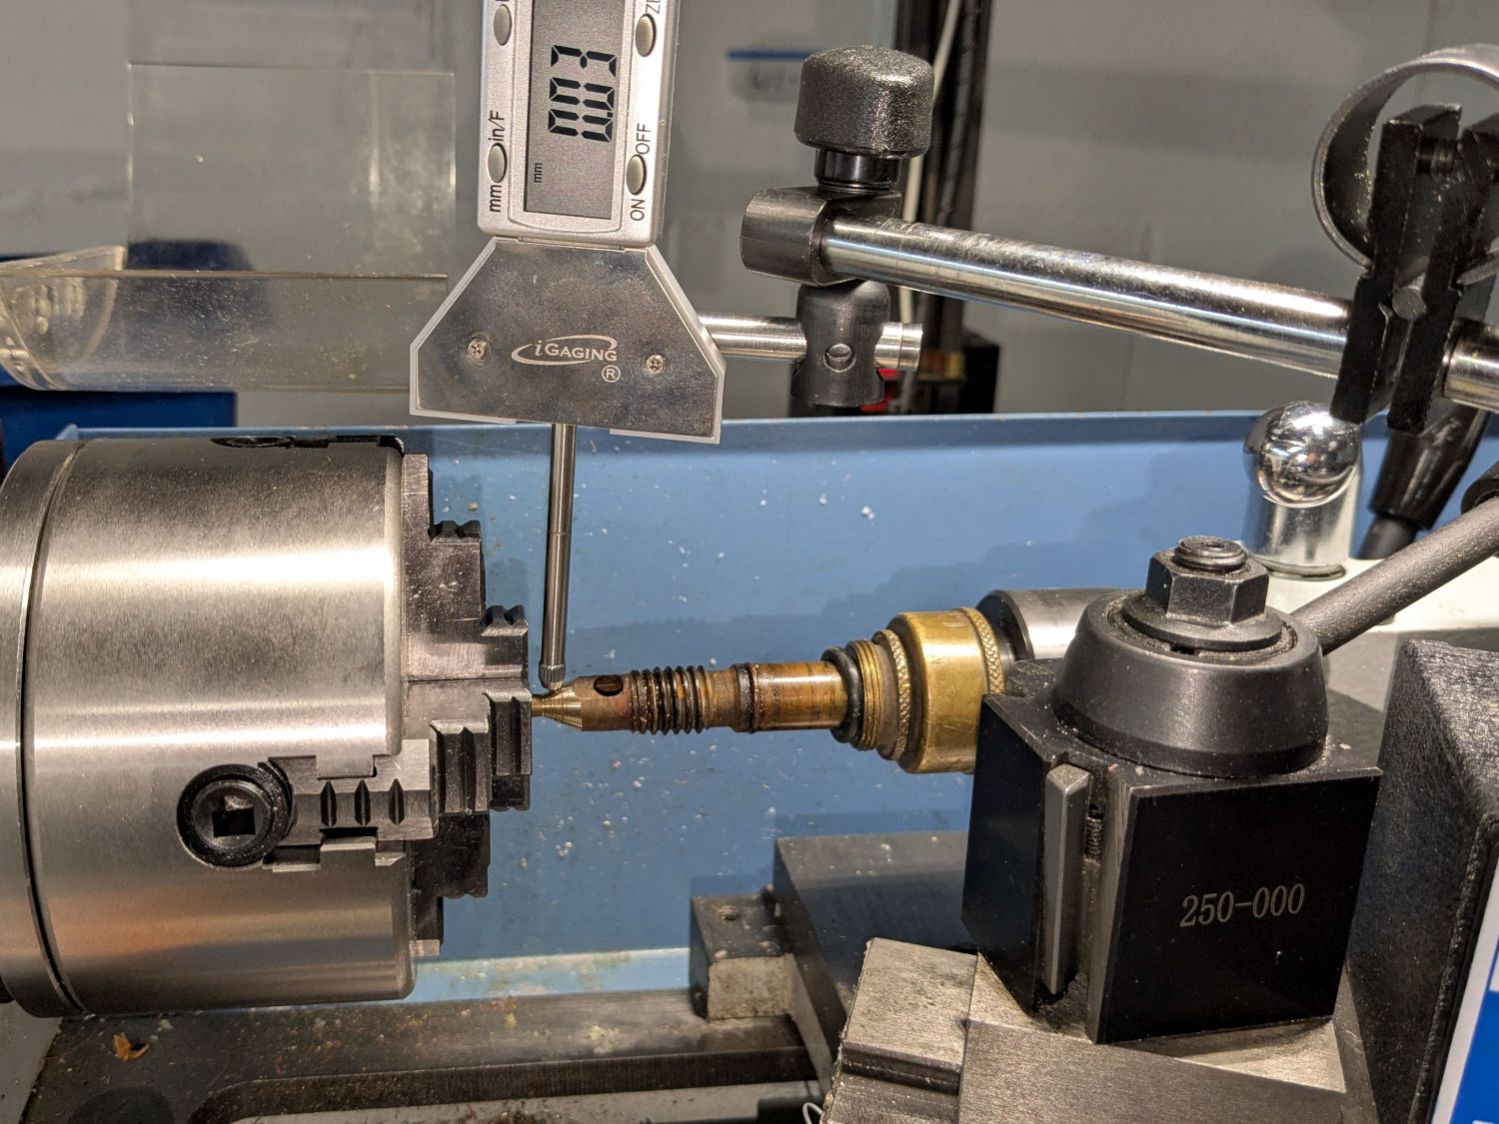
Gently filing the nastiness off the cone showed it wouldn’t suffice, so center it while noting the irregular diameter all around:
Champion hose nozzle – lathe centering cone
A skim cut revealed the need for more attention:
Champion hose nozzle – scarred cone
Another tenth of a millimeter improved its disposition:
Champion hose nozzle – improved cone
Gentle touchup with a fine file reserved for special occasions may have been a further improvement:
Champion hose nozzle – finish filed
Add a dollop of silicone grease to encourage the shell to turn much more easily on the O-ring, reassemble in reverse order, and top it off with a new hose washer.
A quick test on a reasonably warm day showed the cone met the cylinder poorly enough to consign this nozzle to the brass recycling box.
The trap boxes come in 7 quart and 3.5 quart sizes, although we expect either will comfortably accommodate a single vole.
They’re made of polypropylene plastic eminently suited for laser cuttery, so I borrowed the holes from the cardboard box setup:
Vole Box – hole cutting
The clamps on the knife bars held the angle block and boxes in pretty much the same position, so I didn’t realign anything after figuring out a pair of magnets would hold the lid to the angle:
Vole Box – lid fixture magnets
The box side is slightly sloped, so I probably should have angled the block to tilt the lid, but this isn’t a precision job:
Vole Box – lid fixture
The white smudges on the lid come from vaporized polypropylene:
Vole Box – fume deposits
The body count thus far is just one field mouse, but the season is yet young.