-
OMTech 60 W Laser: COB LED Shades
Adding LED strips around the interior of the laser platform definitely improved the visibility of things on the honeycomb platform:
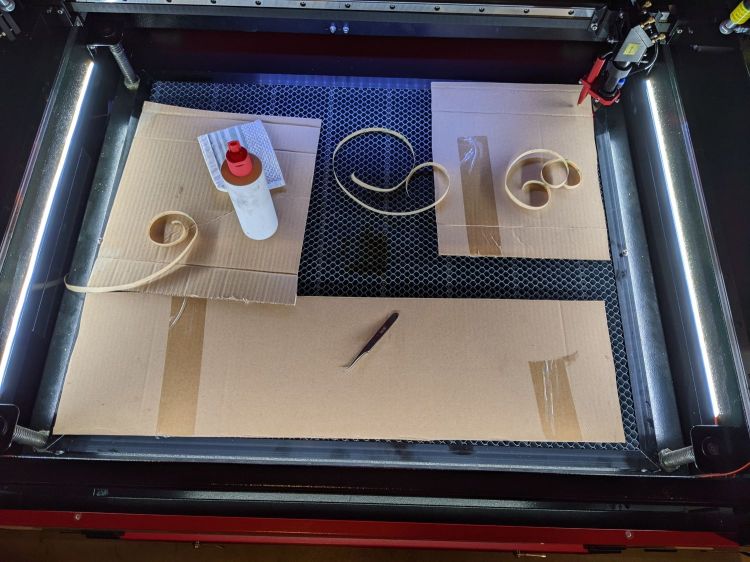
OMTech 60W laser – COB LED strips However, all that upward-directed light goes directly into my glare-sensitive eyeballs, so I added shades above the strips:
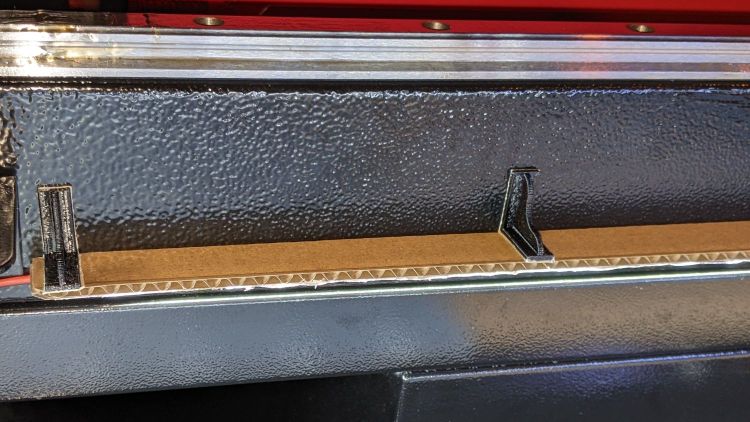
COB LED Shade – installed They’re cut from corrugated cardboard because I have an essentially infinite supply and I’m still working out speeds and intensities. Eventually they’ll become something like black acrylic.
The brackets emerged from the vasty digital deep through the miracle of 3D printing:
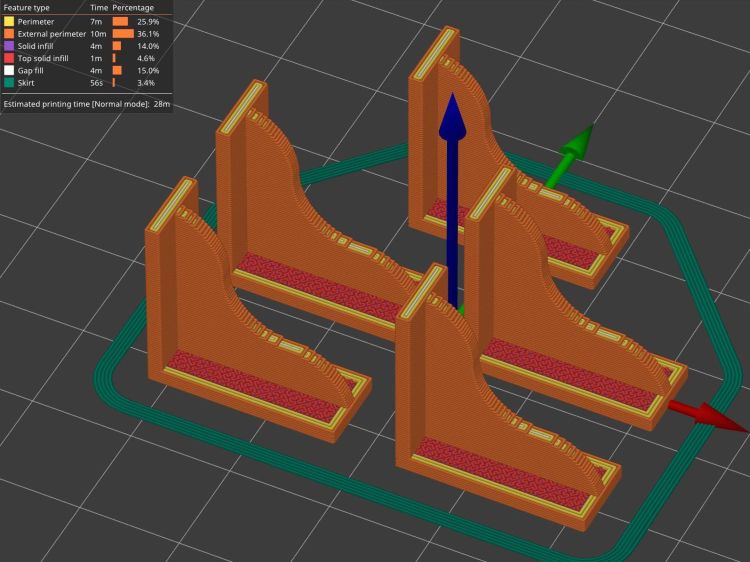
COB LED Shade Brackets – slice preview They’re stuck to the laser cabinet and the cardboard with double-sided duct tape. If you’re careful, they will line up along one edge of the tape, roll over neatly to stick their other face, then a single razor knife cut can separate each pair of neighbors.
The underside sports an aluminized mylar strip to redirect the wasted light in a more useful direction:
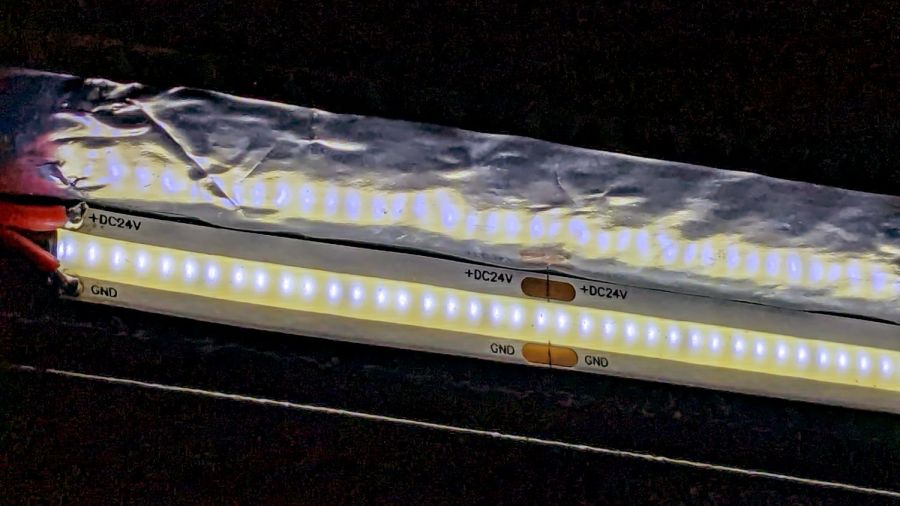
COB LED Shade – aluminized Mylar reflector The tapeless sticky shipped with the laser holds the reflector in place, while its 20 mm width sets the 21 mm shade dimension. Although you want a reasonably smooth layer, it need not be mirror-flat.
Now it’s really bright in there:
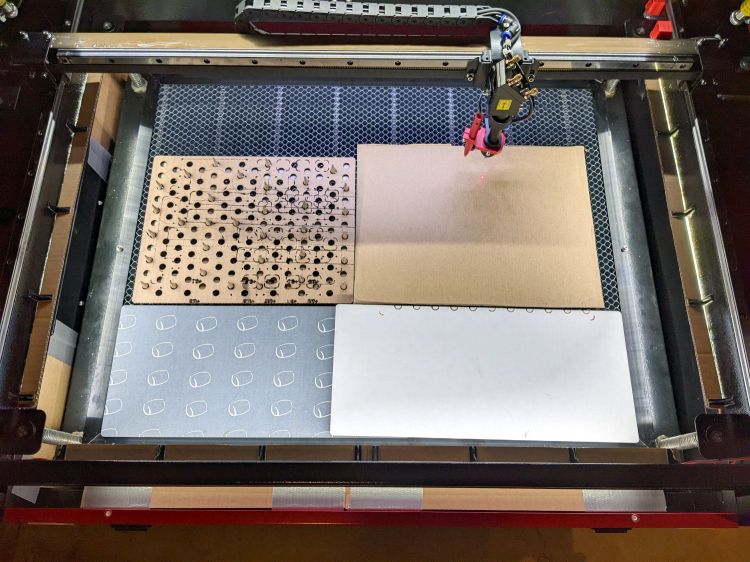
COB LED Shade – overview While I had my head under the hood, I stuck a fourth strip of COB LEDs on the lip along the rear edge of the opening; it’s bright enough to cast the shadow just forward of the laser head despite the OEM under-gantry LED strip. Because the rear strip is aimed downward, it didn’t need a shade.
The perforated cardboard sheet on the left is a spike plate: more about that later.
The SVG drawings as a GitHub Gist:
LoadingSorry, something went wrong. Reload?Sorry, we cannot display this file.Sorry, this file is invalid so it cannot be displayed.The OpenSCAD source code as a GitHub Gist:
This file contains hidden or bidirectional Unicode text that may be interpreted or compiled differently than what appears below. To review, open the file in an editor that reveals hidden Unicode characters. Learn more about bidirectional Unicode characters// Bracket for COB LED shade // Ed Nisley KE4ZNU 2022-03-24 BaseLength = 20.0; /* [Hidden] */ ThreadThick = 0.25; ThreadWidth = 0.40; HoleWindage = 0.2; Protrusion = 0.1; // make holes end cleanly WebThick = 4*ThreadWidth; BasePlate = [BaseLength,5*WebThick,WebThick]; //———- // Create parts module Bracket() { R = BaseLength/3; N = 36; union() { rotate([90,0,0]) translate([0,0,-WebThick/2]) linear_extrude(height=WebThick,convexity=2) difference() { intersection() { union () { square(2*R,center=false); translate([0,2*R]) rotate(180/N) circle(r=R,$fn=N); translate([2*R,0]) rotate(180/N) circle(r=R,$fn=N); } square(3*R,center=false); } translate([2*R*cos(180/N),2*R*cos(180/N)]) rotate(180/N) circle(r=R,$fn=N); } rotate([0,-90,0]) translate([0,-BasePlate.y/2,-BasePlate.z]) cube(BasePlate,center=false); translate([0,-BasePlate.y/2,0]) cube(BasePlate,center=false); } } //———- // Build them Bracket();
-
Subscribe
Subscribed
Already have a WordPress.com account? Log in now.
 The Smell of Molten Projects in the Morning
