Ed Nisley's Blog: Shop notes, electronics, firmware, machinery, 3D printing, laser cuttery, and curiosities. Contents: 100% human thinking, 0% AI slop.
After replacing the front wheel bearings, I replaced both pairs of brake pads. The rear brakes use holders with slide-in pads, but I’ve never been happy with the dinky little pins that retain the pads, so this time I’m using ordinary cotter pins:
V-brake pads – cotter pin retainer
The rear brake pads on a diamond-frame bike sit nearly horizontally on the seat stays, with the pin head pointed upward. On Tour Easy recumbents, the pads stand almost vertically on the chain stays, with the pins sideways:
Tour Easy rear brakes
That photo dates to 2010, when those brakes were new. Nary a pin has worked loose yet and I don’t expect they ever will, but …
If the pins rust before the pads wear out, I’ll go back to those little bitty OEM stainless pins.
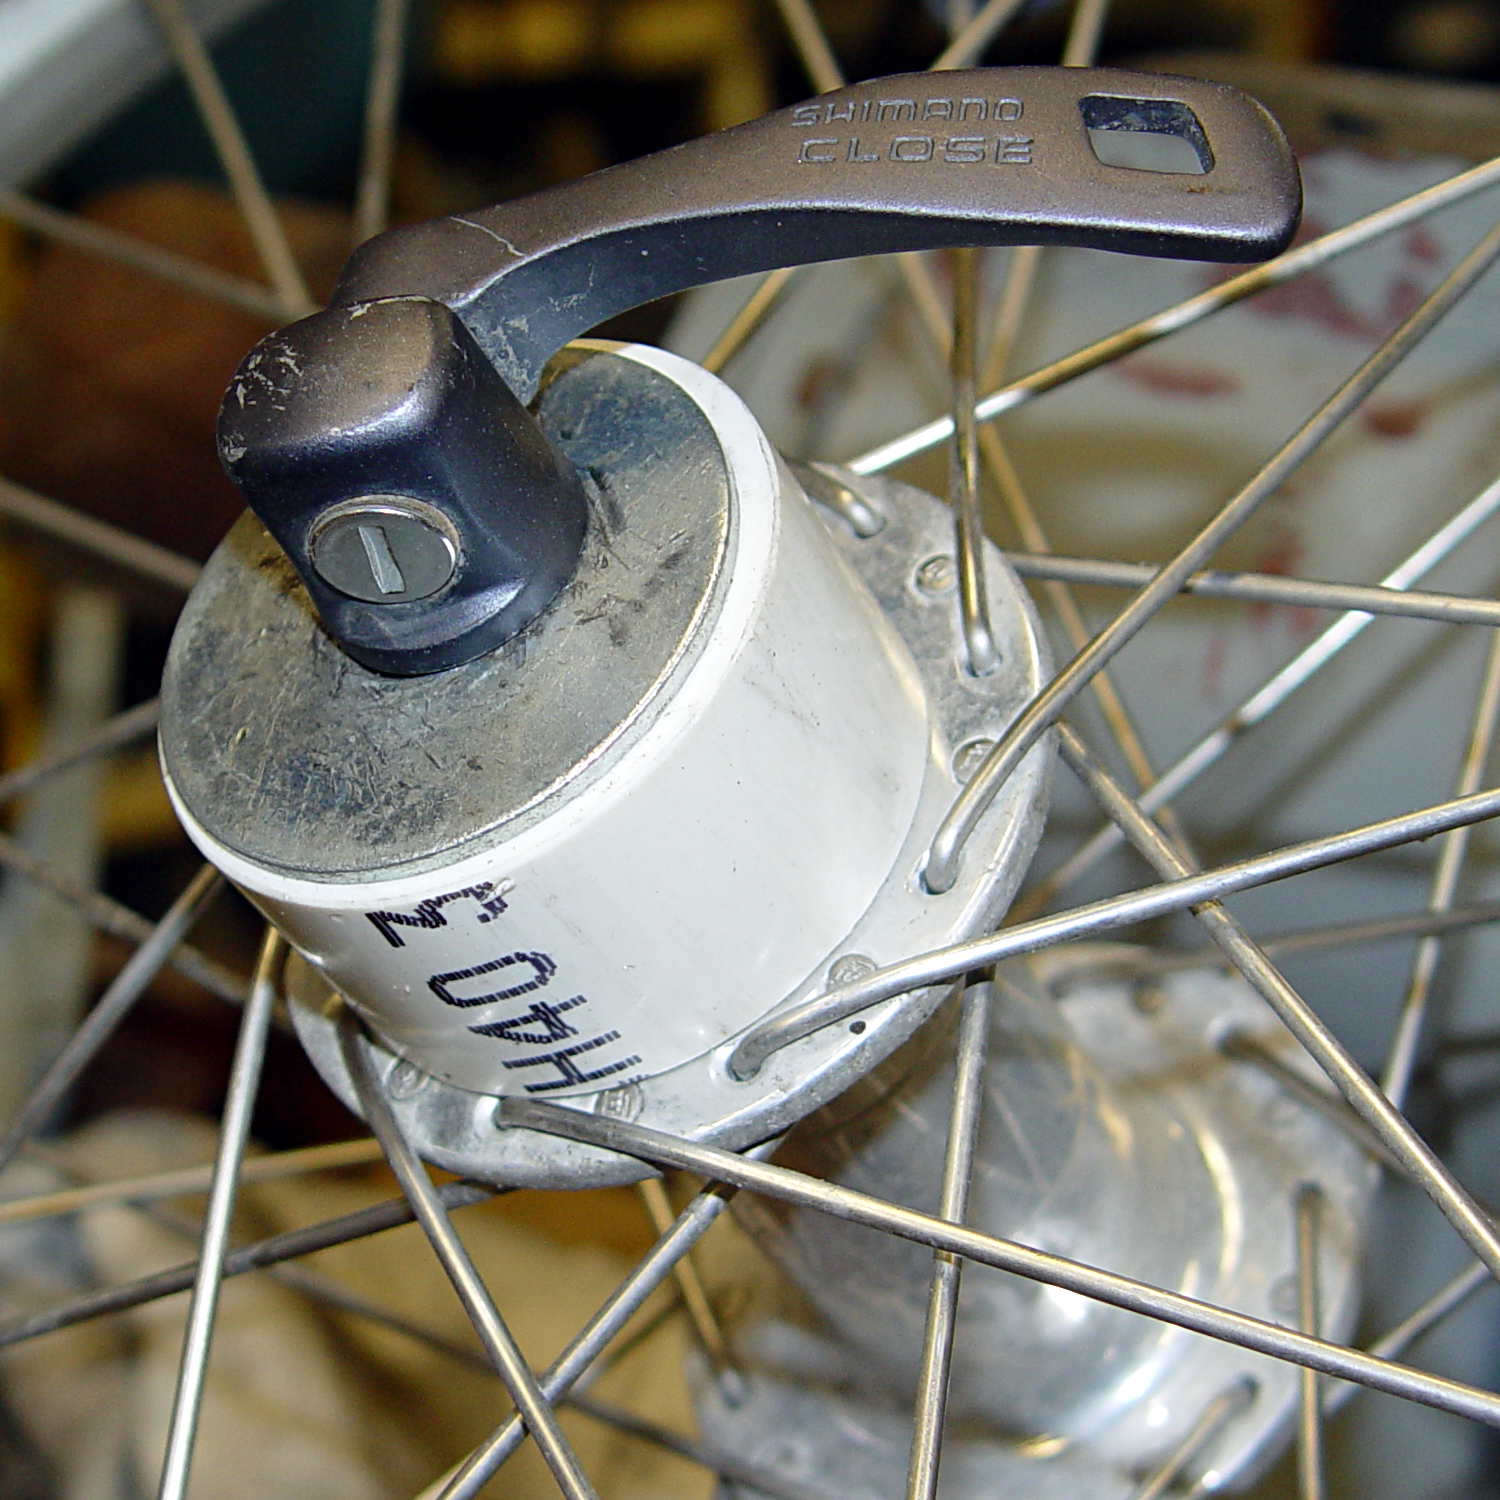
Back in 2001, I specified Phil Wood hubs for our then-new Tour Easy recumbents, as I had absolutely no interest in fiddling with wheel bearings; been there, done that, it’s no fun at all.
Fast forward thirteen years, during which time I’ve done zero hub maintenance.
A few weeks ago, while backing my ‘bent out of the garage, the front wheel stopped rolling and skidded on the asphalt. Usually, that means a brake problem or something wedged between the wheel and the fender, but in this case, the axle itself jammed: the front bearings seized. I eased a bit of penetrating oil under the seals, the bearings began turning, and we continued the ride as planned.
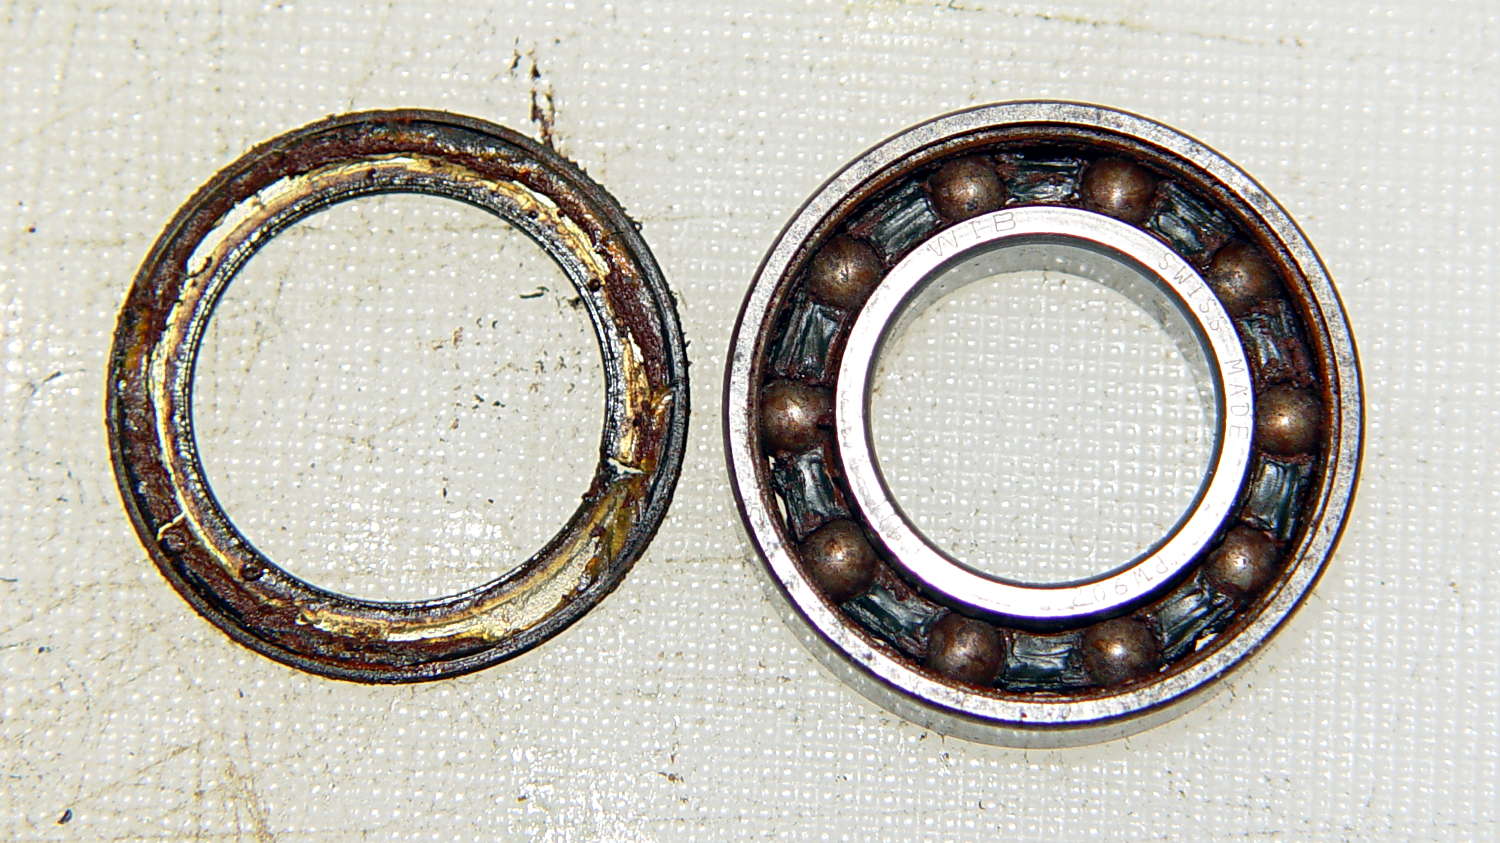
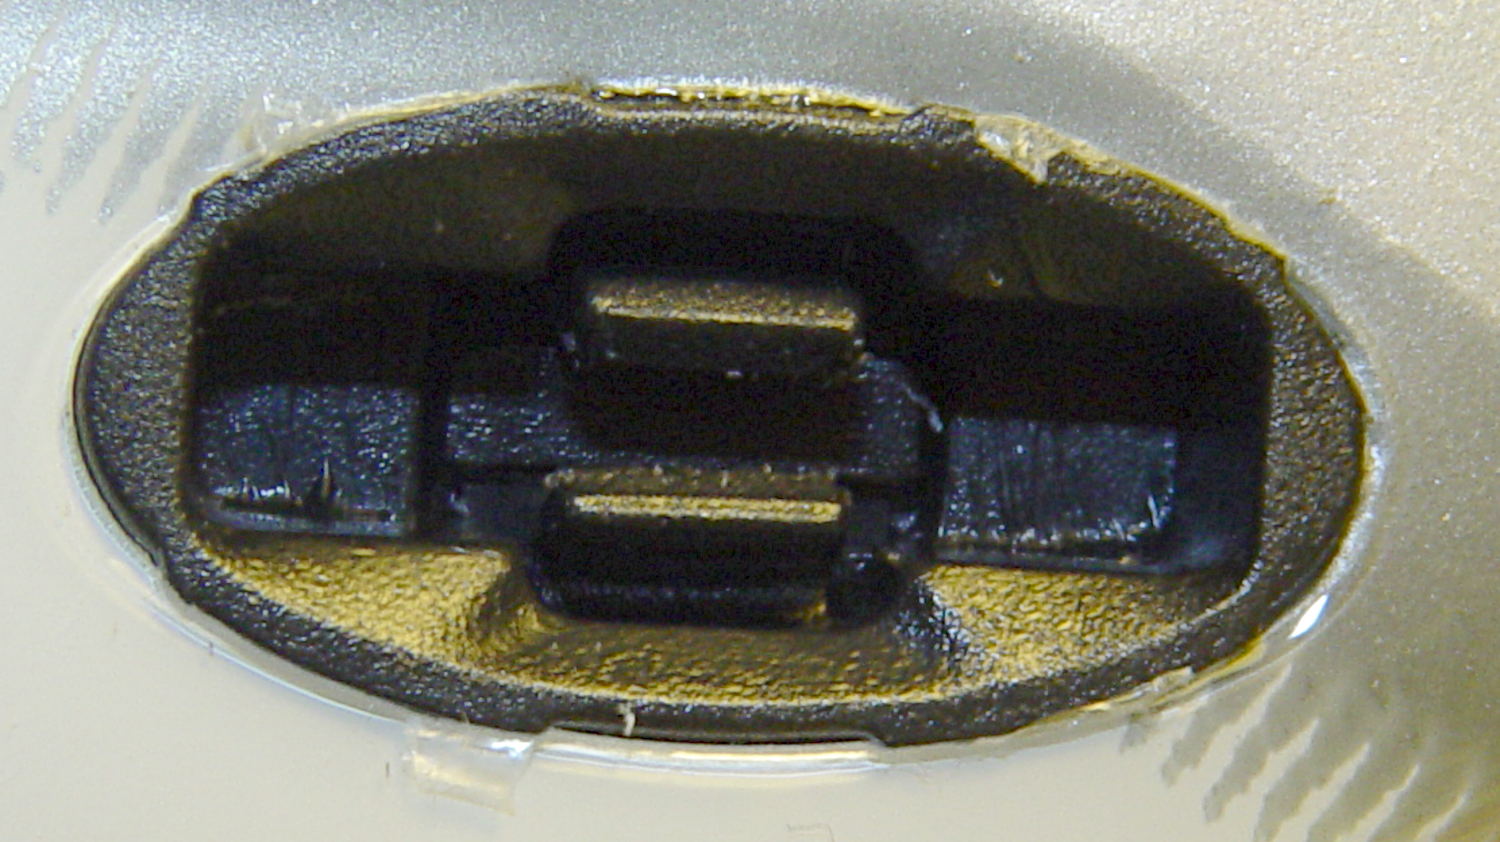
A close look at the hub shows that, back in the day, Phil Wood used personalized bearings, made in Switzerland by WIB:
Phil Wood Front Bearing – view 2
Phil Wood is still in business and a brief email exchange produced the proper bearing number: PWX92, at $17 each. I bought a pair to show my support. It turns out that the new bearings are from NSK and aren’t personalized.
The listing shows that the generic part number is 6902 and gives the dimensions:
OD = 28 mm
ID = 15 mm
Width = 7 mm
I bought a lot of 10 6902RS2deep-groove bearings from VXB for $35.90 delivered, so that I can compare their performance with The Real Thing.
Use a pair of 5 mm hex wrenches to remove one of the end caps, then gently tap the aluminum axle out of the hub:
Phil Wood front axle and bearing
The grease inside looks as good as the day they installed it: no water leaked through the seals or past the races.
Having a lathe ready to hand, I grabbed the axle in the chuck and unscrewed the other cap:
Phil Wood front axle – in lathe chuck
Everything came apart easily!
I applied grease everywhere, slid a new bearing and its wave washer into place on the axle, aligned it with the hub bore, and pushed it halfway into place.
Rather than beat on the bearings, I conjured a simple adapter that let me use the quick-release skewer as a press to persuade the outer race into the hub recess:
Phil Wood front axle – improvised press
I stacked an old bearing between the skewer nut and the new bearing on the other side, with a fender washer to distribute the pressure on the old bearing. In general, you don’t want to press the bearings into place by applying pressure to the inner race, but in this case the pressure was so low that it probably didn’t matter.
With one bearing in place, remove the press, slide the second wave washer & bearing on the other end of the axle, install the press, push the bearing into place, tighten the end caps, and … it’s done!
Flushed with success, I repeated the operation on the front wheel of Mary’s bike. Those bearings felt better, but they turned with essentially no friction at all. That’s a sign the internal grease was pretty much gone and failure loomed over the horizon.
Cutting the seals out of the worst bearing from my bike showed water had gotten into the assembly:
Phil Wood axle bearing – interior
This is not how a bearing should look:
Phil Wood axle bearing – disassembled
The other bearing looked (and felt!) much better, but you always replace ’em in pairs.
Mary’s bike now has the new Phil Wood / NSK bearings, mine has the VXB bearings, and we’ll see what transpires. Both bikes sound much quieter, mine in particular, and I’m sure they roll better…
The rear tire on my bike needs replacing early this season, at which point I’ll dismantle the sprocket and install another two VXB bearings.
The Sony HDR-AS30V camera lens has a view angle of 120° or 170°, achieved by internal image processing rather than mechanical lens adjustments. For most action-camera purposes you don’t care about fisheye distortion, but sometimes a more rectilinear picture will look better, in which case the GIMP’s Lens Distortion filter comes in handy.
A still image at 120°, which doesn’t look all that bad, really:
Sony HDR-AS30V 120 angle – as captured
Applying Main=-25 gives this:
Sony HDR-AS30V 120 angle – corrected
A frame captured from video at 170°, with the overhead wires hanging upward:
Sony HDR-AS30V 170 angle – as captured
Applying Main=-25, Edge=-12.5, Zoom=+8 flattens them enough to be acceptable:
Sony HDR-AS30V 170 angle – corrected
The main effect of the Zoom parameter seems to be discarding the severely distorted remnants around the edges of the corrected 170° view. Sometimes, those pixels around the edges can be very, very important, so I’d rather make that decision after the fact.
For the purposes of this discussion, let’s assume you wanted to report a defective traffic signal near Poughkeepsie, NY. You know, from previous experience, that it’s on a New York State Road, so you should contact the New York State Department of Transportation; you also know that you’re in DOT Region 8 and that you’re in the Poughkeepsie Residency, so you can find the right DOT branch.
In this day and age, you might think the NYSDOT website would have a conspicuous link to a form that would let you report a problem. But, no.
Failing that, you might think the website would have a link to the number you should call. But, no.
Failing that, you might think that the search box would turn up useful results when fed the obvious keywords. But, no.
Failing that, you might think calling various likely numbers in the Region 8 offices would produce the proper number. I won’t list the half-dozen numbers I’ve uncovered using that method, as none of them actually go to the right place.
It is common for such numbers within NYSDOT to ring forever, regardless of the time of day or day of week. I am told that one number isn’t actually within DOT any more, so some poor schlub gets all their repair calls; it’s probably worse than having Rachael call you every day or two.
My favorite dead end: an answering machine message telling you it’s not monitored and calls will not be returned, then giving an incomprehensible number-to-call and the usual “Leave your name and number after the beep” message, then beeping.
To make a very long story very short, the Galactic Number that you call to report traffic signal problems on NYS DOT roads is:
914-742-6100
It’s not toll-free (not a big deal in this day and age, but, still) and, of course, you’ll get a contractor, so be polite & patient. Your call should generate a work order that will, in due time, dispatch a crew to repair the offending signal.
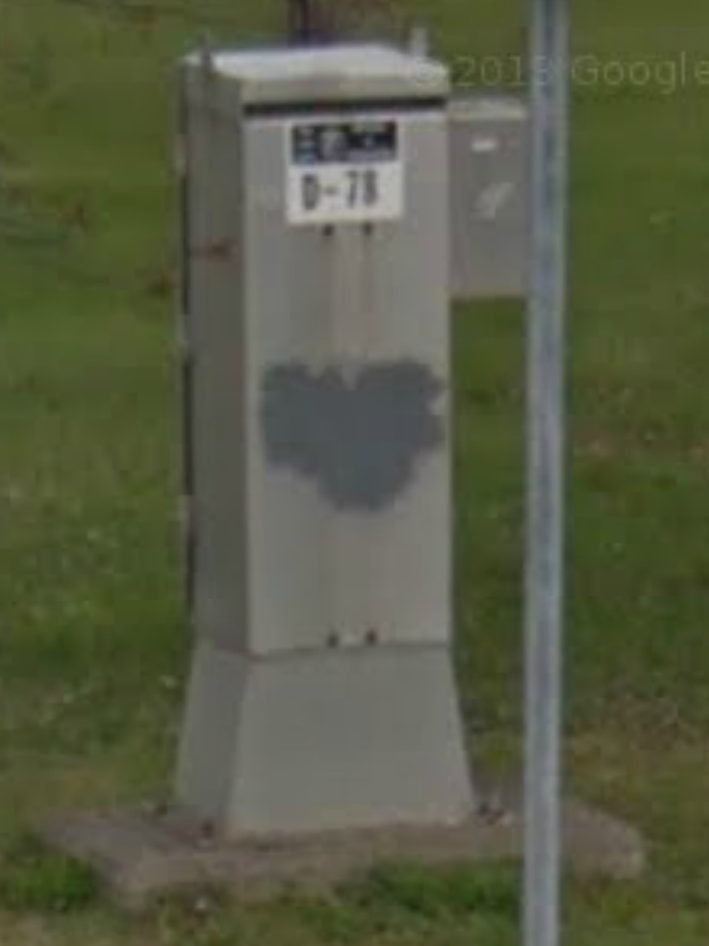
It will be exceedingly helpful if you can report the number on the side of the signal control box, for which Google Streetview may reveal what you can’t see from any legal or safe position:
Signal Control Box ID by Google Streetview
If you want to report a pothole, on the other hand, they’ve got a hotline for that:
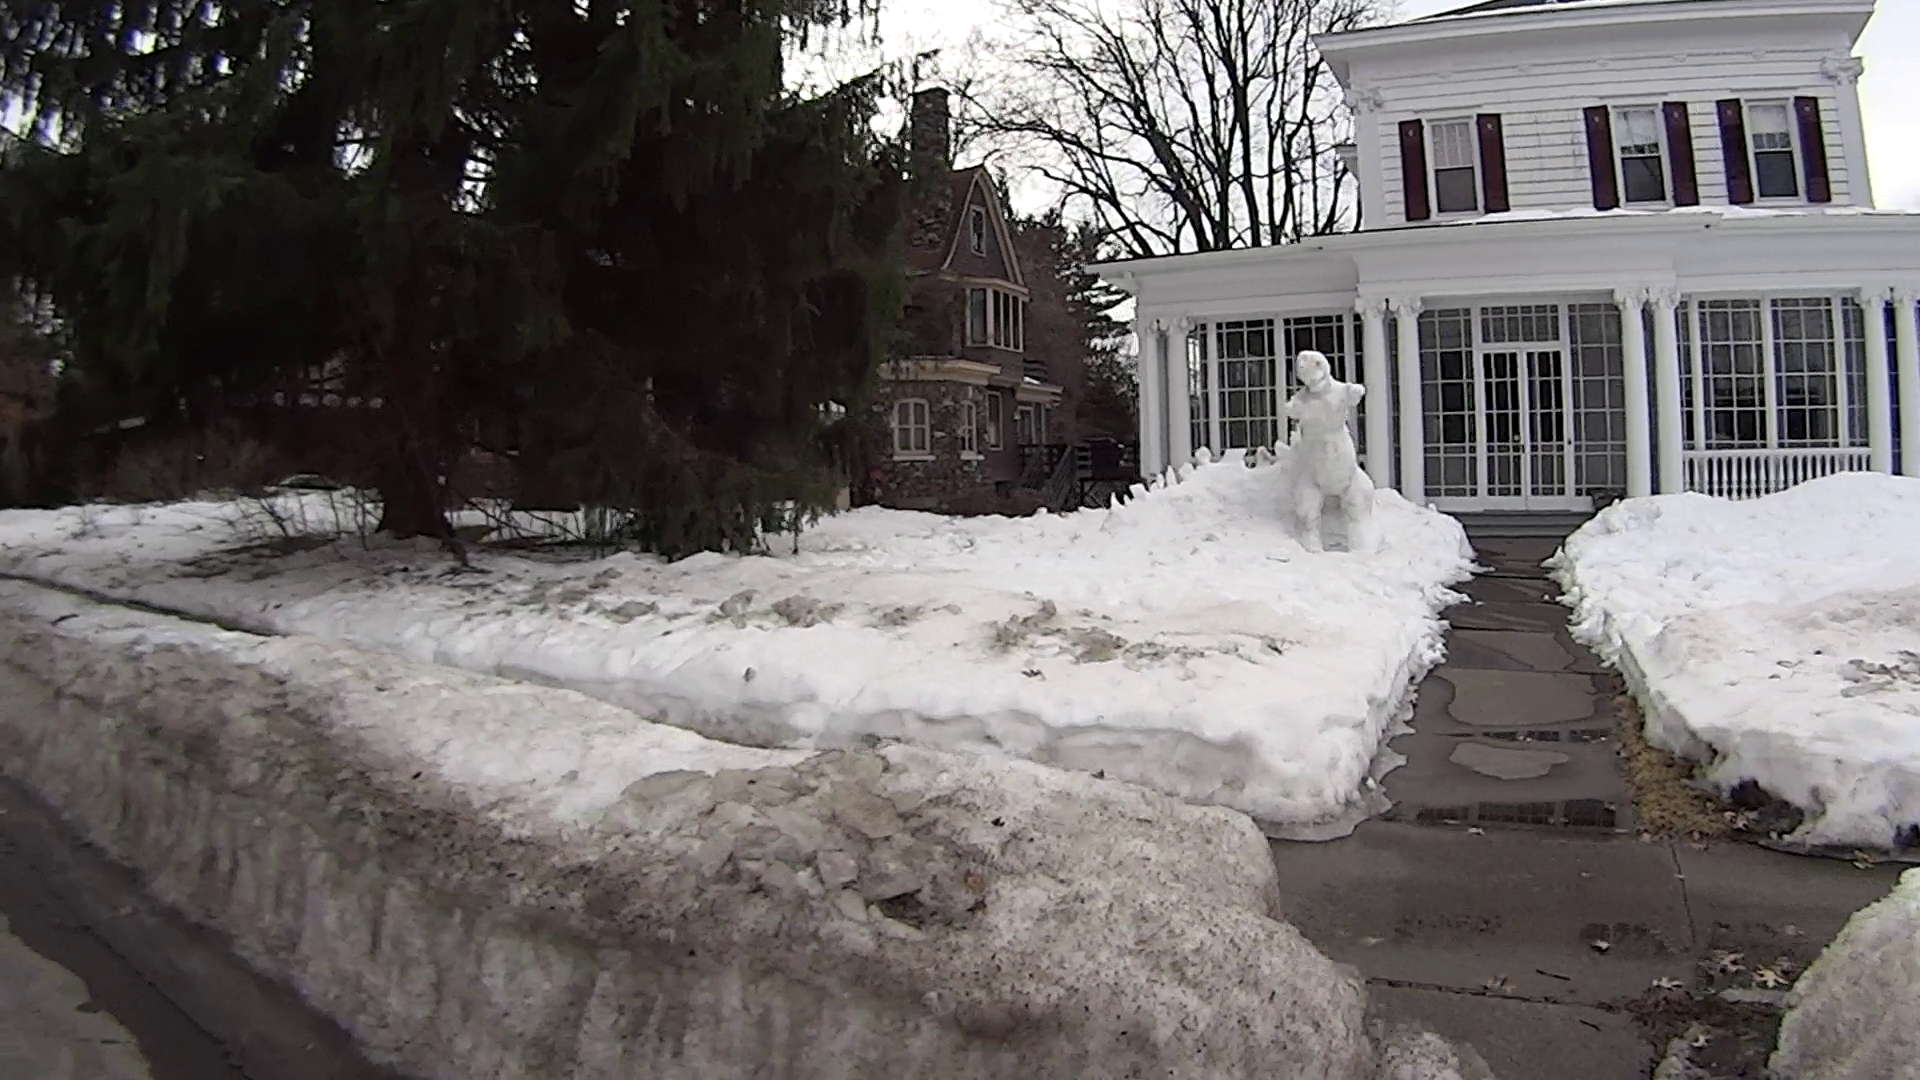
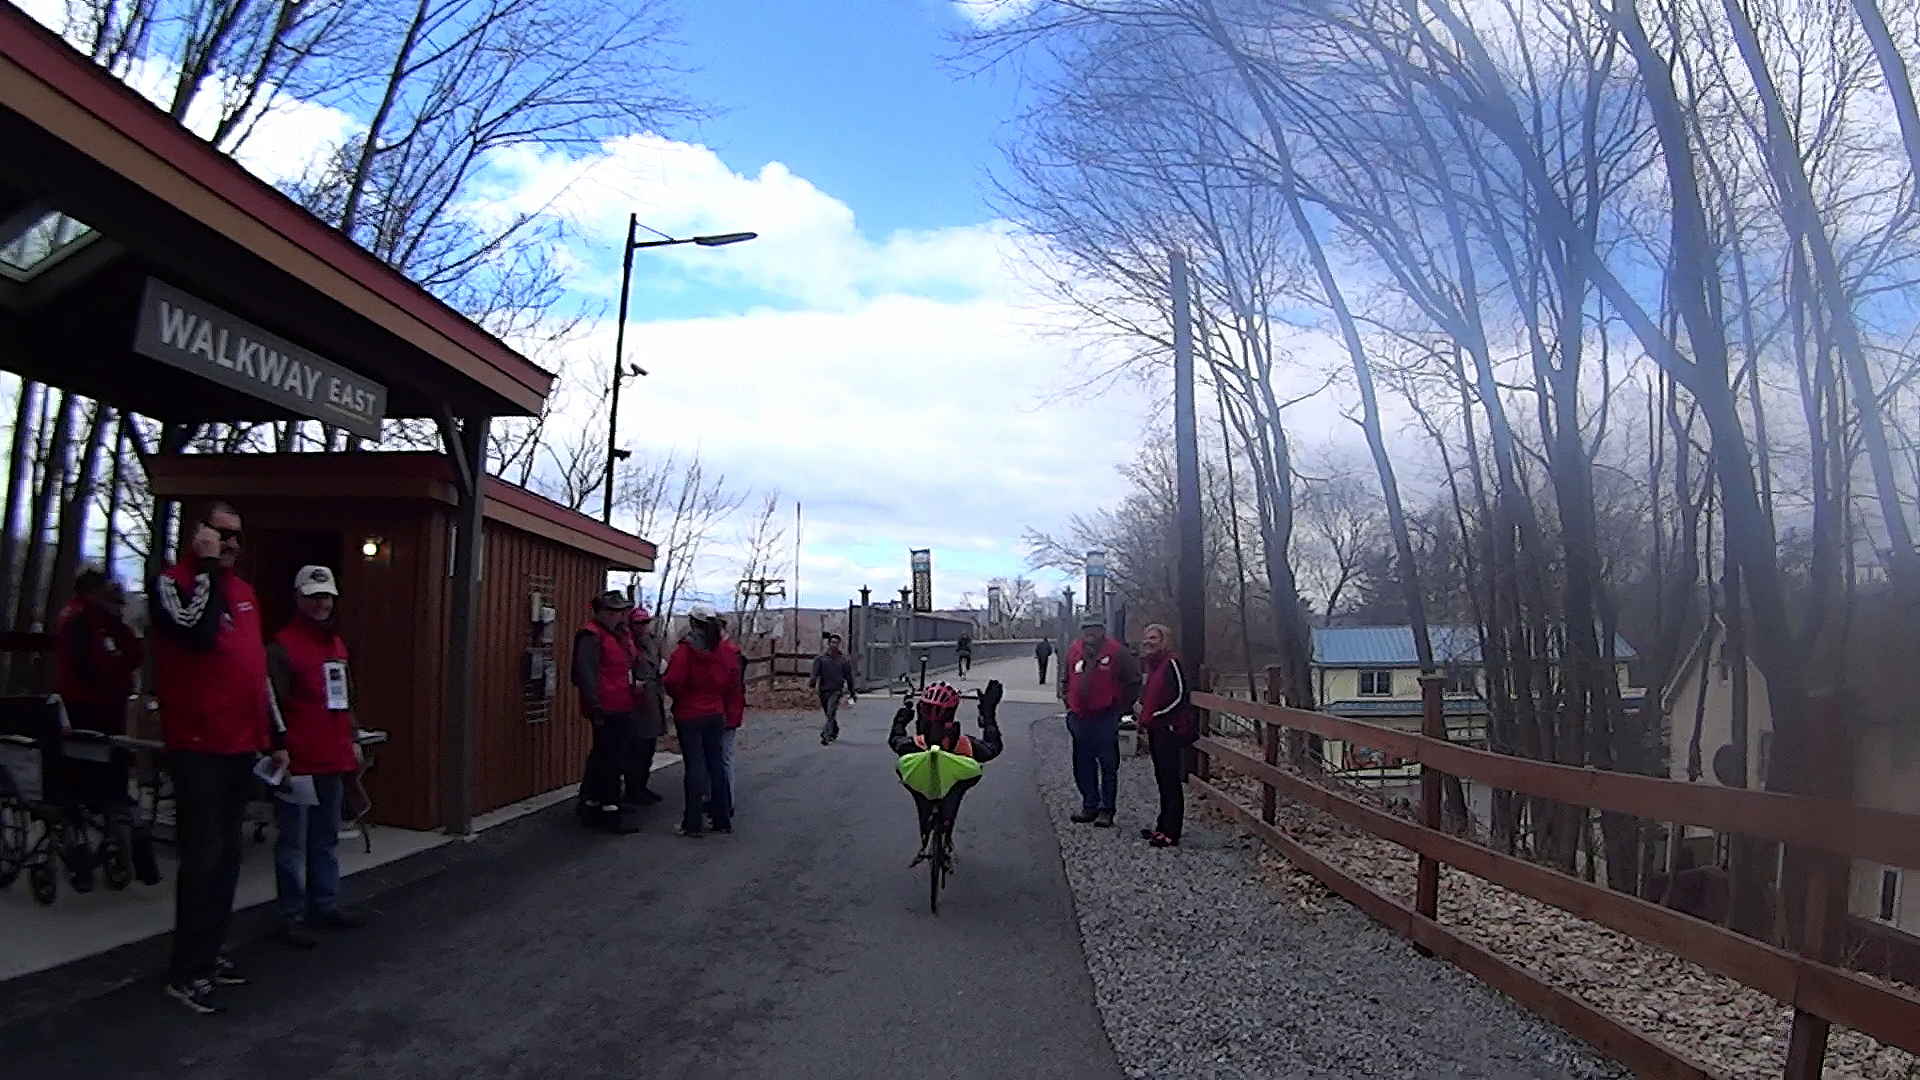
Recumbent Riders – North Grand Avenue Crossing – 2014-04-05
A highracer gingerly navigates the low-speed gauntlet to the Walkway Over the Hudson:
Recumbent Riders – Walkway Over the Hudson Entrance – 2014-04-05
The pix come from the Sony HDR-AS30V helmet camera video, set to 1920×1080 / 120° @ 60 frame/s. They’ve had a bit of refocusing and color adjustment, but nothing can dramatically improve them. The video looks better only because eyes aren’t as fussy with moving images. I’m not red-hot pleased with the resolution & compression, but the camera is what it is.
The lens carried a smear on the upper-right quadrant that shows the sensitivity of the optical path.
Memo to Self: Clean the lens and keep fingers off!
That’s harder than it may seem. The Start button is on the back of the body, recessed far enough into the skeleton frame to require an index finger rather than a thumb, and it’s remarkably easy to touch the bulging fisheye lens with your (well, my) thumb; a touch is all it takes to create a nice smear.
I started and ended at home, rather than at the Hopewell Junction end, but you get the general idea:
Santa delivered a pair of helmets that will require mirror mounts and a mic boom before the spring riding season kicks in. The visor has tabs that snap into sockets on each side of the helmet:
Bell Helmet Visor Mount – socket
It occurred to me that I could make an interposer between the helmet and the visor that could anchor the mic boom, with a tab for the helmet and a socket of some sort for the visor. While that’s still on the to-do list, the tab looks like this:
Bell Helmet Visor Mount
Those are 1 mm cubes on 10 mm centers, so this is a teeny little thing.
I don’t have a good idea for the corresponding socket, because those little grippers seem much too small for 3D printing, but now I have some tabs to play with:
Bell Helmet Visor Mount – OEM vs 3D Printed
The OpenSCAD source code puts the tab atop an oval base plate, but it’ll eventually stick out of the boom mount:
One of the battery packs powering the GPS+audio interface on our bikes has completely failed, with zero volts at the output and no charge indication. The other five chug along as well as can be expected:
Initial-brand DVD External Packs – 2013-11
The push-to-test button on Pack 4 has become increasingly erratic over the last few months, rendering the charge status LEDs mostly useless, so it has two curves: the lower capacity came directly from the bike, the higher hot off the charger.
For reference, here’s what they looked like in May 2012:
External Li-Ion packs – 2012-05
And right after they arrived:
Initial External Li-Ion packs
Given their nearly constant use and charge cycling, I’m impressed.