Ed Nisley's Blog: Shop notes, electronics, firmware, machinery, 3D printing, laser cuttery, and curiosities. Contents: 100% human thinking, 0% AI slop.
The North Residency of NYS DOT Region 8 normally does a pretty good job of clearing roadside brush, but they’re apparently daunted by the prospect of trimming shrubbery and hedges encroaching on the right of way:
Rt 376 at Red Oaks Mill – Bike Route vs ped facilitie
Truck traffic crops the overhanging branches, but the lower greenery forces pedestrians (who have nowhere else to walk) into the middle of the lane. A DOT staffer once said they didn’t design sidewalks into a project unless a clear path showed in the grass along a road.
The Red Oaks Mill intersection has no pedestrian facilities at all, although nowadays we see more walkers than ever before, and bicyclists no longer expect anything other than Bike Route markers.
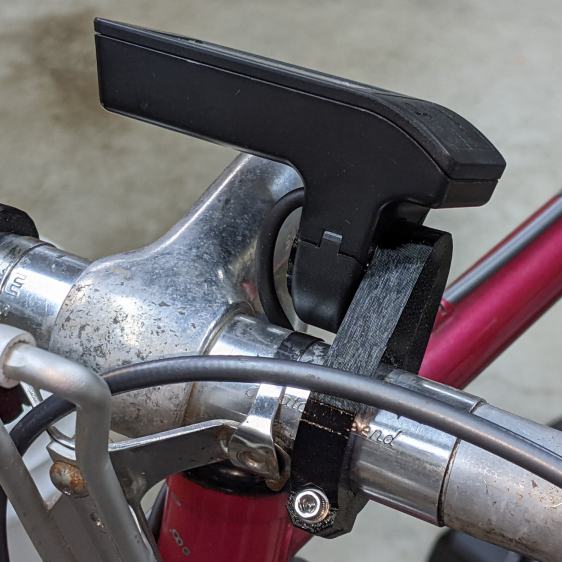
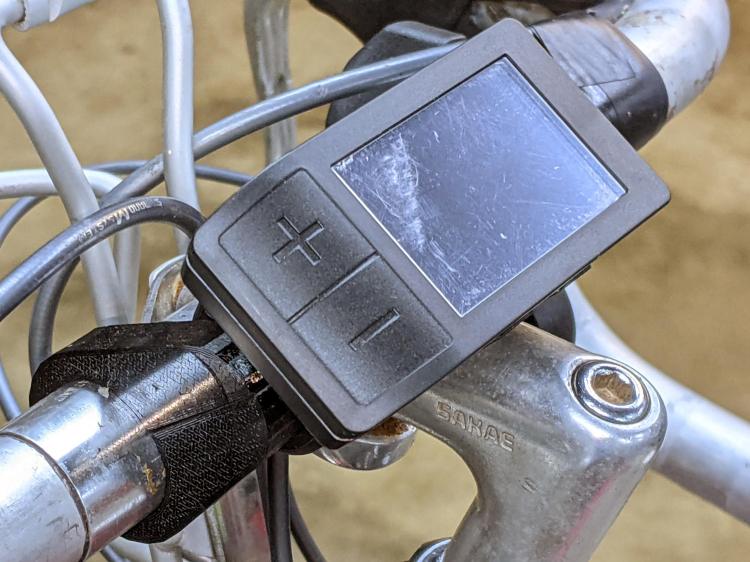
That’s the front view, so it’s on the right side in front of the handlebar. I think it’s usable with either a thumb or fingertips from a hand on the top of the bar. The handlebar lacks tape, as mounting the brake sensors poses a challenge.
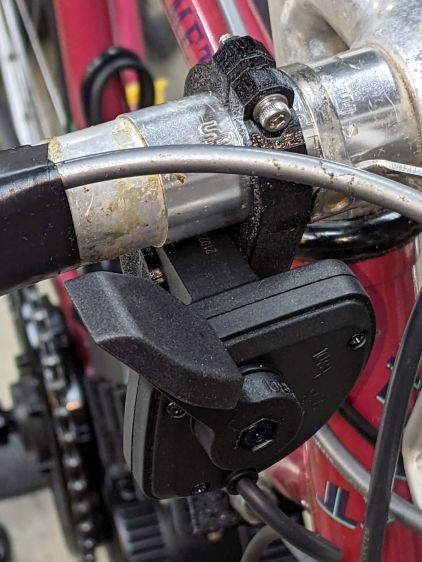
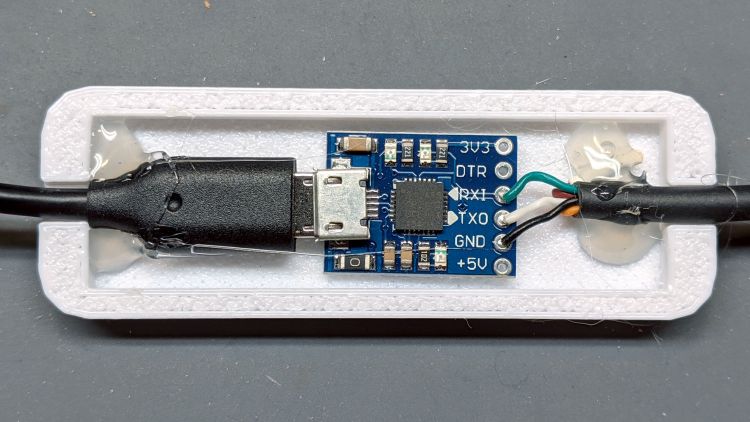
The view from the rear isn’t too revealing:
Bafang Throttle adapter – rear view
Not too unsightly, but definitely not a standard setup!
All of the Bafang BBS02 displays have a compression clamp intended for more-or-less standard 22.2 mm handlebars, as found on typical upright BMX-ish bikes suitable for conversion to e-bikes and, oddly, our Tour Easy recumbents. My friend’s bike has drop-bar handlebars with a 25.4 mm (yes, exactly 1 inch) center section that just isn’t going to fit through that hole.
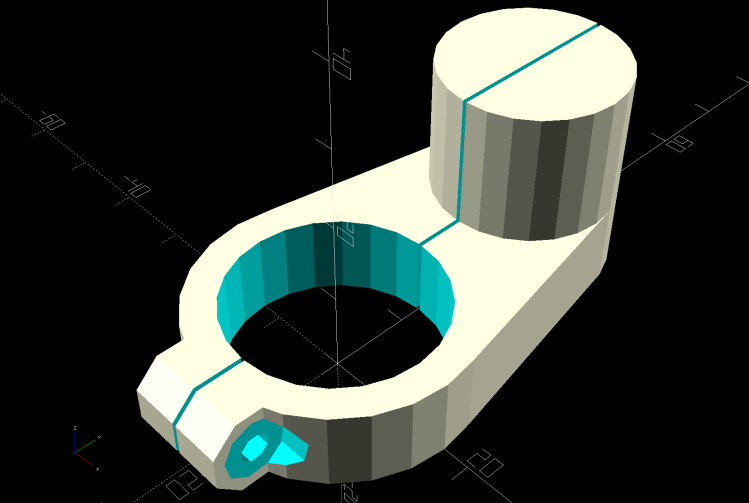
The least awful solution involved summoning an adapter from the vasty digital deep:
Display adapter mount – solid model
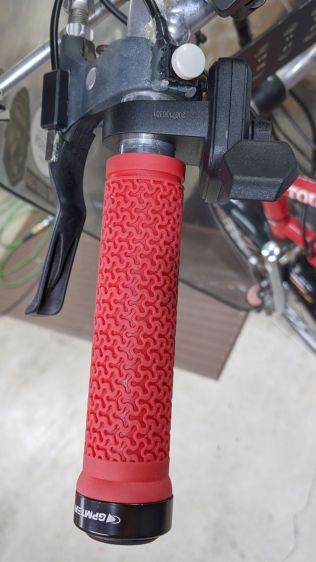
The hole clamps around the handlebar with an M3 SHCS pulling it snug and the display clamps around the peg to hold everything together:
Bafang Display adapter – front view
There’s not much to see from the side:
Bafang Display adapter – left view
Those scuffs arrived on the protective plastic film!
The OpenSCAD source code includes some cruft from an idea that didn’t work out quite right:
My friend rides about the same way we do, except from a much higher perch, so I’ll start her off with a configuration similar to the one we settled on for Mary’s Tour Easy.
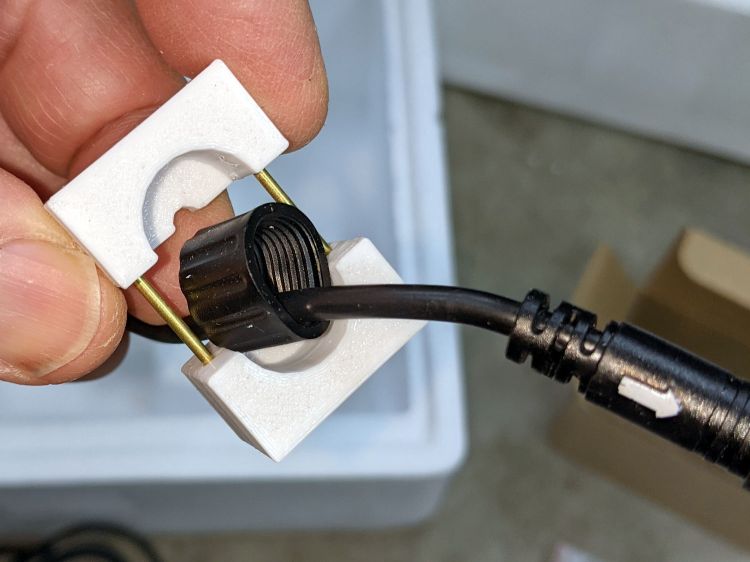
A Bafang BBS02 (for a friend’s upright bike) arrived with a deformed speed sensor nut:
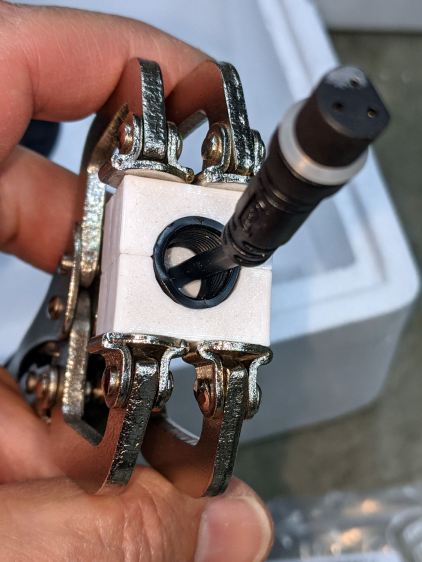
Bafang BBS02 – Deformed speed sensor nut – end view
It traveled halfway around the planet while trapped underneath the motor and, if it rode in the top layer or two of containers, the combination of pressure and heat would be irresistible.
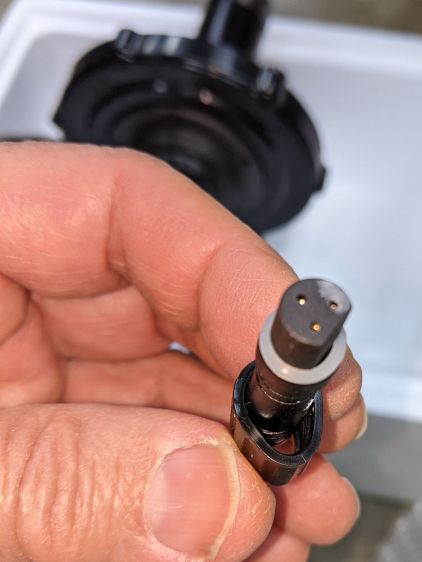
The plastic was stiff and I couldn’t force the nut over the connector using as much force as seemed reasonable:
Bafang BBS02 – Deformed speed sensor nut – test assembly
On the upside, the nut just compresses the silicone washer between the connector and the sensor to make a waterproof joint, so it need not have perfect threads or a uniform shape. Once the nut is in place, it will likely never be removed and should never bother anyone else.
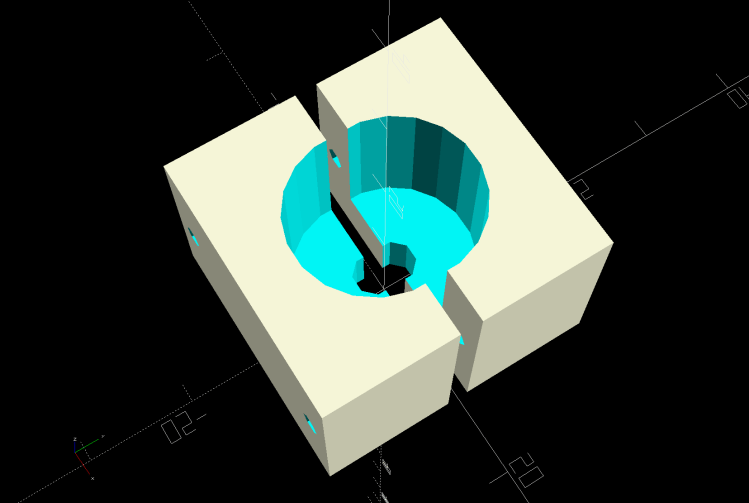
Being unwilling to apply a hot-air gun near the cable, I decided to try slowly cold-forming the nut inside a mold:
Sensor Nut mold – solid model
The gap isn’t a kerf: the two halves meet to form a cylindrical pocket. The smaller holes fit a pair of brass tubes keeping the halves lined up while I arrange things:
A few days of squashing made it round-er, whereupon I applied the clamp directly against the remaining high point with the other side cradled in the mold. It still doesn’t slide over the connector body, but I’m not in a rush.
Bafang tech support generously sent a speed sensor extension cable from which I can extract a good nut, which will require cutting and splicing the cable from the motor.
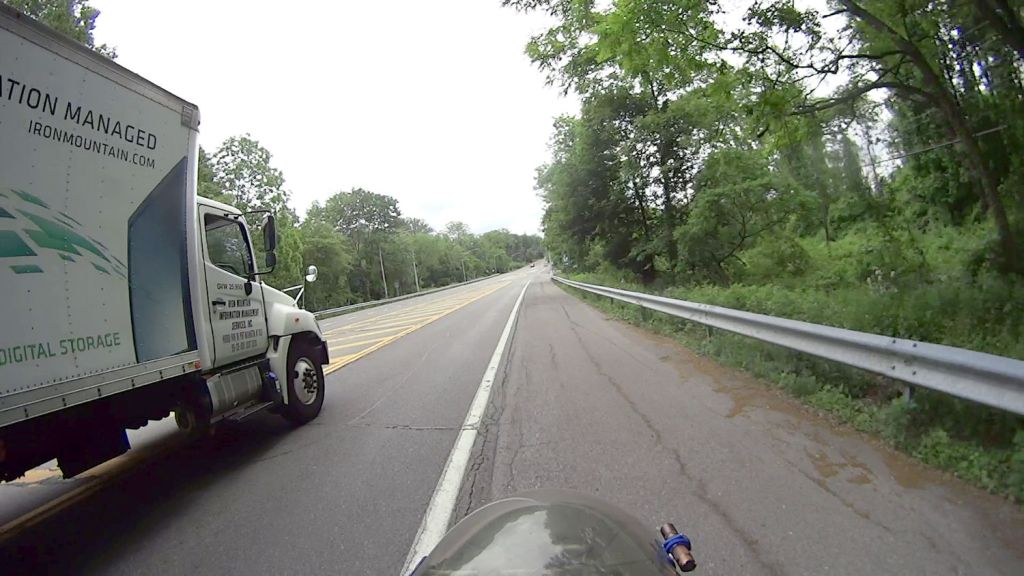
This time, however, what I know (and the driver apparently doesn’t) is that Zack’s Way has been closed for two days while a film crew does something to create The White House Plumbers along that stretch of road, with barricades and City of Poughkeepsie police cars across the entrance to prevent bystanders from wandering in.
At least I’ll have witnesses …
NYS DOT installed a pair of Variable Message Signs showing ZACK'S WAY | CLOSED | Thursday & Friday on either side of the intersection:
Rt 376 at Zacks Way – Closure VMS – 2021-06-04
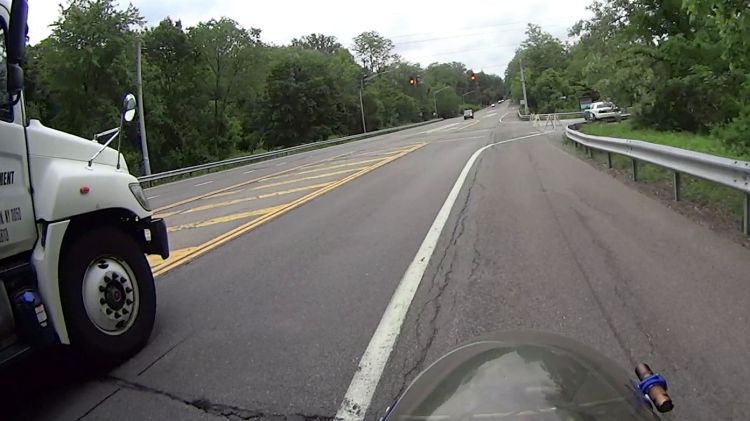
Fortunately, the driver figured it out before our paths crossed:
Rt 376 at Zacks Way – Right Hook Miss – 2021-06-04
But, hey, those signs are easy to overlook, too …
I have typed “Zach’s Way”, rather than the correct “Zack’s Way”, on several posts.
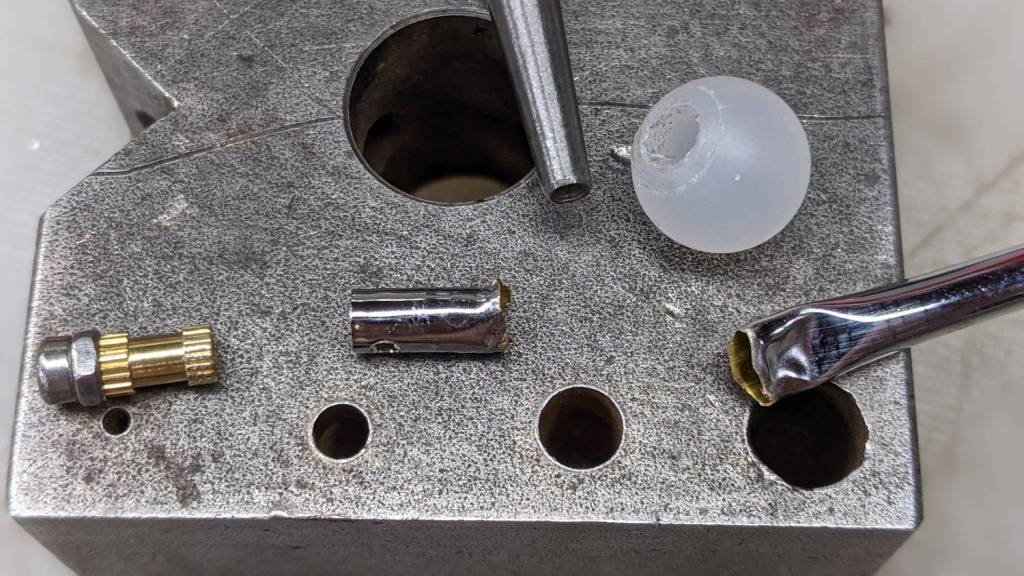
One of the good things about building your own stuff is that you have all the parts when something breaks:
Helmet Mirror – damaged parts
The decorative M2 screw and insert pulled out of the ball. The rim of the nail set punch (intruding from the top) just barely caught the edge of the stub inside the ball, so a few taps could extract it. A Dremel cutoff wheel peeled the crumpled end off the stalk.
Reassembly proceeded without incident:
Helmet Mirror – installed
The bizarrely blurred mirror over on the left comes from the Pixel phone camera app deciding this was a Portrait, applying a background blur, and running into trouble with those hard edges in the foreground. The camera app has a distinct Portrait mode that, perhaps, I inadvertently engaged while fumbling around.