Ed Nisley's Blog: Shop notes, electronics, firmware, machinery, 3D printing, laser cuttery, and curiosities. Contents: 100% human thinking, 0% AI slop.
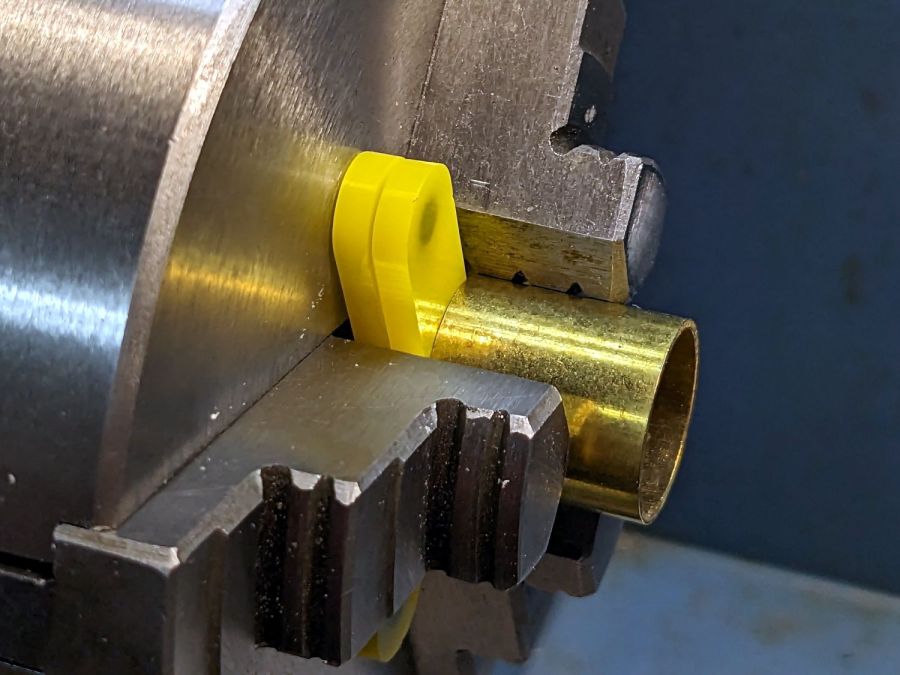
Having occasionally been in need of a lathe chuck stop, I finally cleared that project off the heap:
Lathe Chuck Stops – demo setup
These are definitely not up to commercial standards, but also don’t cost fifty bucks each. A trio of 4×2 mm neodymium disk magnets stick the stop to the chuck (and to each other) with enough force to hold it there, but not enough to make removing it a hassle.
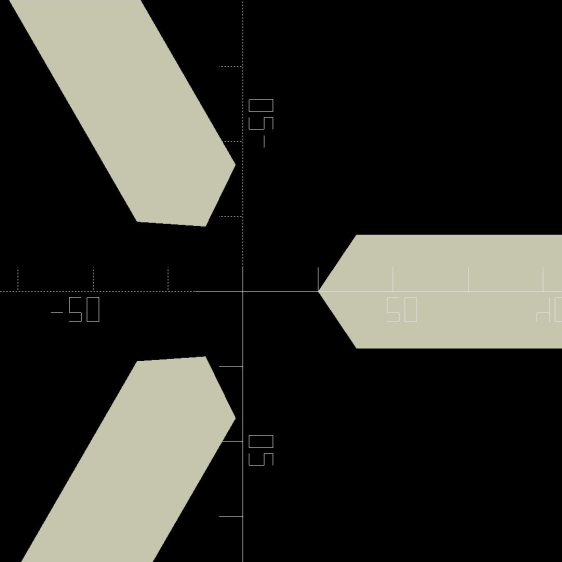
Trace the right-side jaw, clean it up, put the tip a known distance from the origin, make a circular array, and draw a comfort circle the size of the chuck OD.
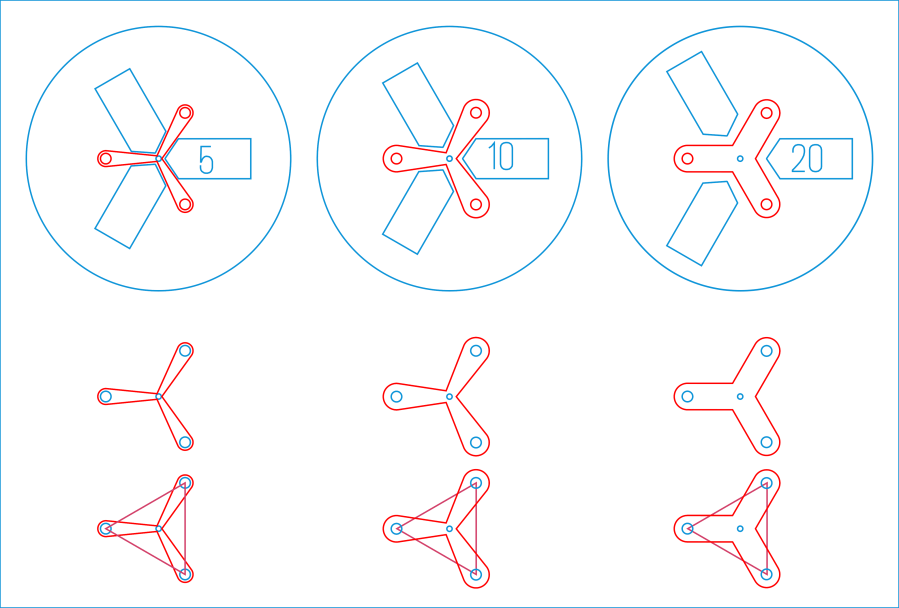
The stop geometry comes from a hull wrapped around a circle a few millimeters larger than the 4 mm magnet (out 20 mm from the center) and a circle at the center sized so the hull clears the jaws:
Lathe Chuck Stops – LB layout
Then a small circle at the center allows me to drop the stop atop a known coordinate and rotate it around the circle, because the XY coordinate center is not at the geometric center.
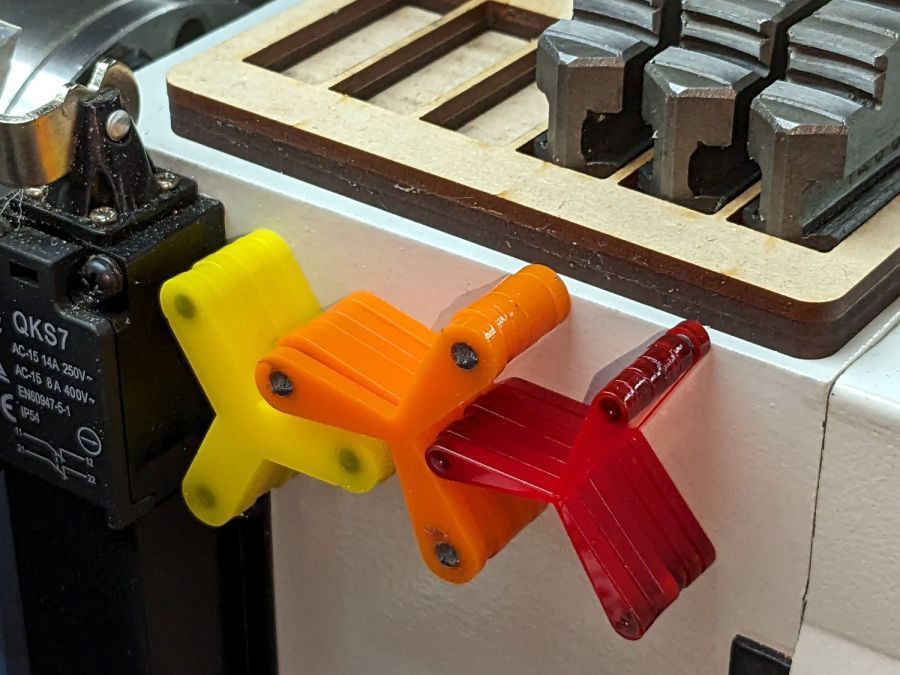
I cut out a few chipboard samples to verify the sizes, a few more from scrap acrylic to set up the pocketing operation, then half a dozen of each in cheerful kindergarten colors:
Lathe Chuck Stops – on-lathe storage
The 5 mm stop is obviously too fragile for commercial success, but I figured it’ll survive long enough around here. Worst case, I can make another handful as needed.
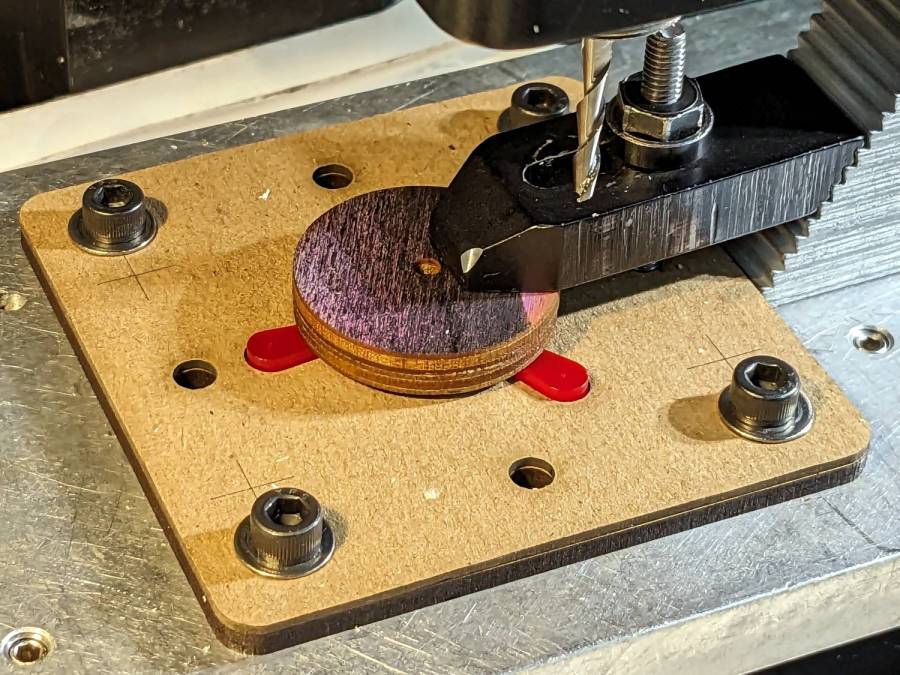
Although I have laser-engraved pockets in plywood, a few experiments in acrylic confirmed the surface finish is terrible and the depth control is iffy, at best. Given that I need a 2.2 mm deep pocket in 3 mm acrylic, a CNC mill seems the right way to poke the pockets:
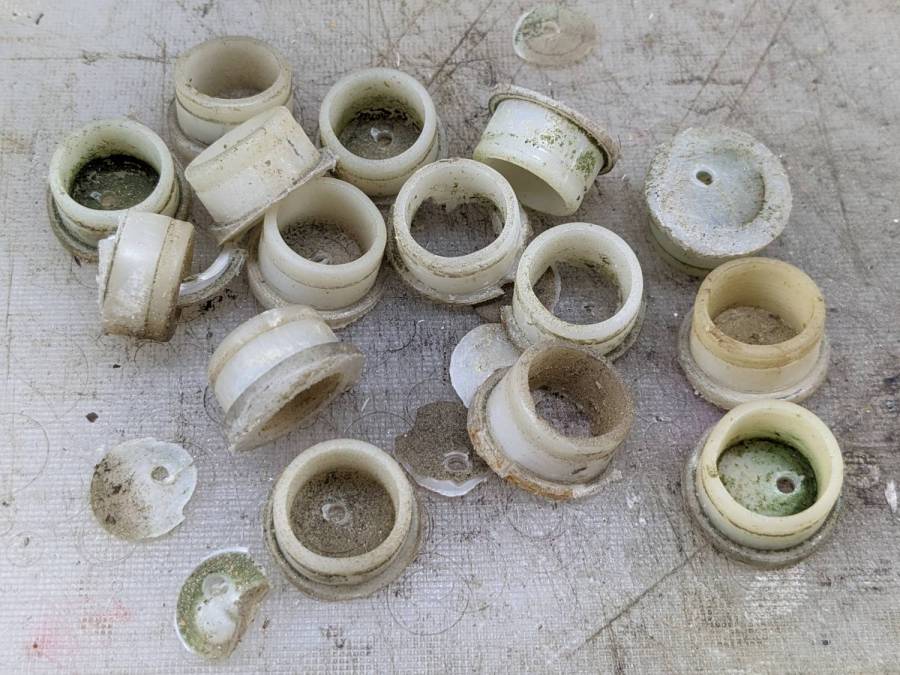
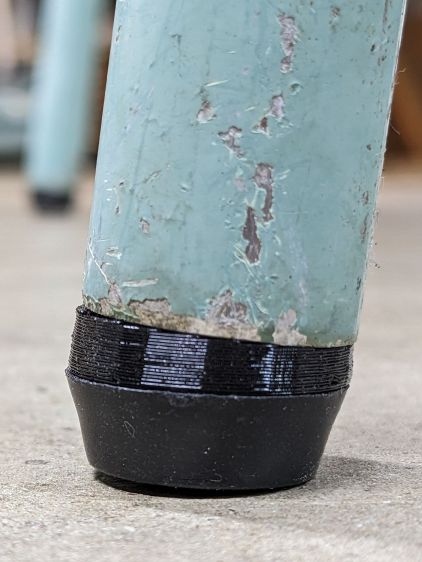
Some years ago we acquired a free quartet of aluminum-frame patio chairs in need of new straps and feet. Eventually enough straps broke to force me to re-strap the things and I finally got around to replacing the badly worn OEM feet:
Patio Chair Foot Adapter – OEM feet
The small drilled holes let me yoink most them out with sheet-metal screw attached to a slide hammer, then apply the Designated Prydriver to the most recalcitrant / broken ones.
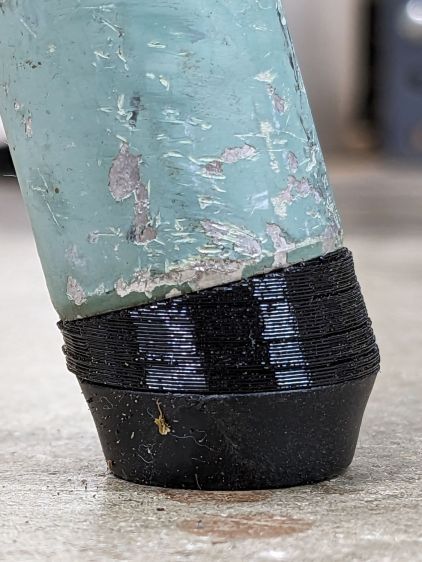
Some feet had worn enough to expose the aluminum tubes, but most had at least a thin layer of plastic:
Patio Chair Foot Adapter – OEM foot erosion
Obviously, I should have stripped and repainted the frames (if that’s possible, as they’re probably powder-coated), but a man’s gotta know his limitations and this job needed to get done.
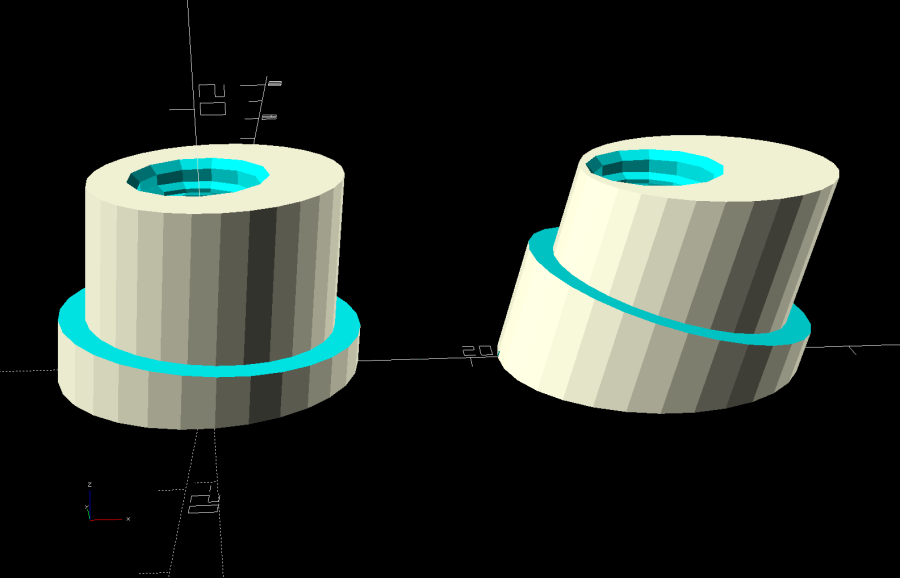
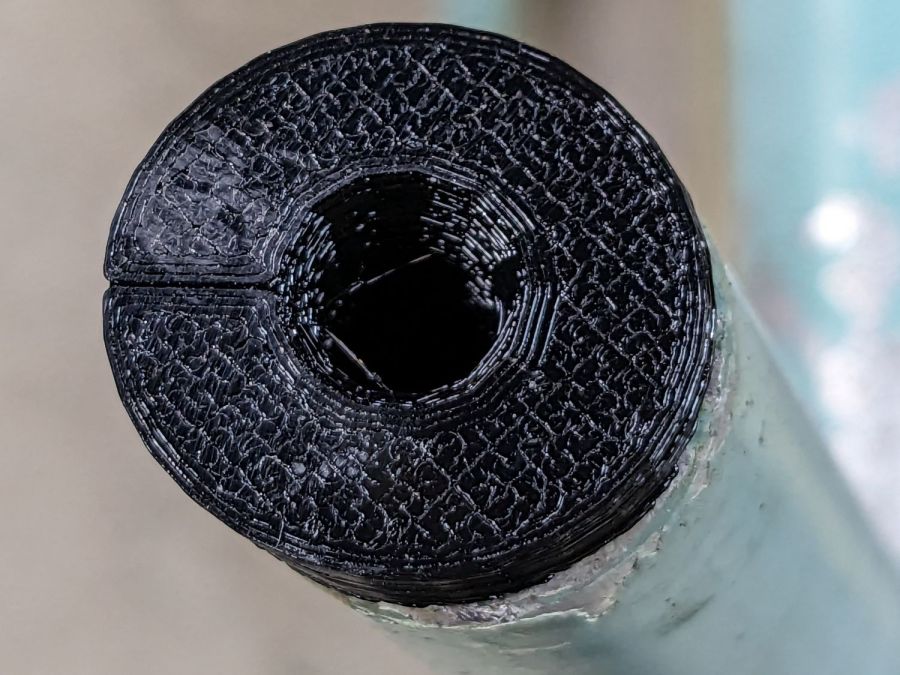
One might think patio furniture replacement feet are cheap & readily available, but no amount of keyword engineering produced search results with any degree of assured fit, so I conjured adapters for screw-in feet from the vasty digital deep:
Patio Chair Foot Adapters – solid models
This was a long-awaited opportunity to explore the BOSL2 library and it worked wonderfully well. Each adapter is whittled from a huge hex nut with threads that perfectly fit the M8×1.25 stud, which stands vertically through the middle of the (slightly oval) bottom surface parallel to the floor.
The front tubes have a 5° angle with respect to the vertical:
Patio Chair Foot Adapter – front
And the rear tubes are 15° off:
Patio Chair Foot Adapter – rear
Each adapter has an orientation notch pointing toward the front of the front leg and the rear of the rear leg:
Patio Chair Foot Adapter – orientation notch
I expected to apply adhesive on the inside and outside of the adapters, but they tapped firmly into place inside the legs and the studs screwed firmly into them, so we’ll see how they survive in actual use. I expect the studs to rust after a while, but that might not be the most awful thing ever to happen.
This file contains hidden or bidirectional Unicode text that may be interpreted or compiled differently than what appears below. To review, open the file in an editor that reveals hidden Unicode characters.
Learn more about bidirectional Unicode characters
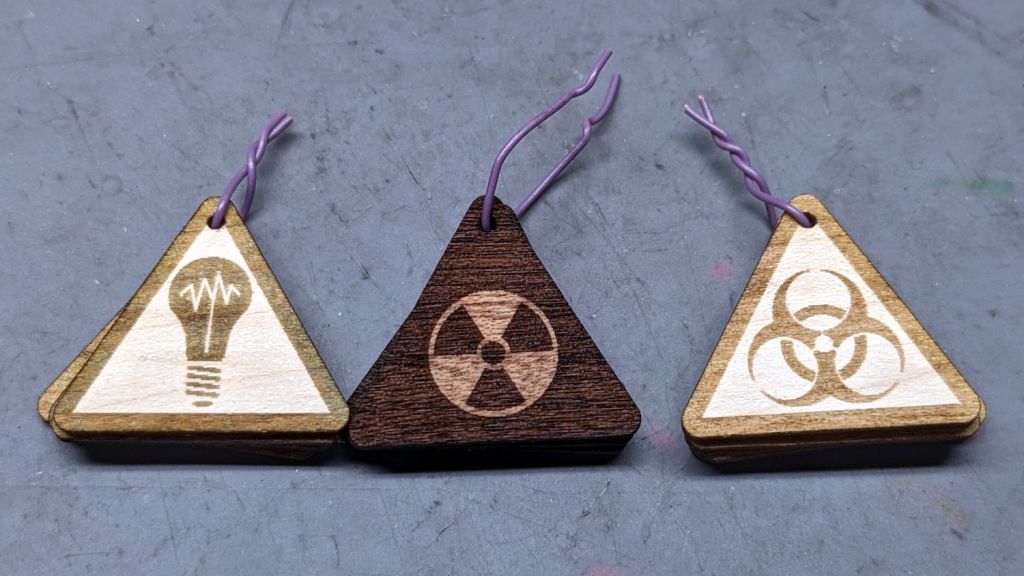
They’re not fancy marquetry, but they look pretty good:
SCP Earrings – wood veneer
The darker areas are laser-engraved with the usual SCP warning label geometry.
The left set was engraved through blue masking tape, which increased the exposure, added no benefit, and required fiddly cleanup. Won’t make that mistake again.
The middle one has the darkest wood of the set with the lighter part not exposed to the laser.
Rather than make another fixture for the backside branding, I cut adapters using the two outlines and dropped the hollow triangles into the fixture:
SCP Earrings – wood cutting fixture
Two layers of veneer feel about right, although the layers should not have their grains oriented in parallel as these do. The PSA sheet on the back veneer holds them together, but they’re too flexy for confidence.
The contrast between gentle natural wood (using a generous interpretation of “natural” for veneer with a PSA layer) and the SFnal SCP warning label symbology is definitely amusing.
Laser cutting the Danger Zone coasters with the proper kerf offset for a good fit produced a pile of waste pieces from the other side of the kerf that seemed too nice to throw out. A bit of rummaging in the Basement Shop Warehouse Wing produced a battered magnetic sign that fell off the side of another truck and some casual searching suggested the material was laser-cuttable, whereupon this happened:
Laser-cutting magnetic sheet
The trick is to cover the label side of the sign with adhesive sheet and the refrigerator side with blue painter’s tape, thereby simplifying the inevitable cleanup. Cutting through the adhesive produced poor results, perhaps due to molten adhesive or the sign material (which is almost certainly non-laser-safe PVC, alas) flowing into the cut and contaminating the process. Cutting through the blue tape worked reasonably well, albeit with a disconcerting shower of sparks.
The cutting pattern is the shape outline inset by about 0.5 mm.
Peel off the blue tape, remove the adhesive cover layer, align the outermost shape, press it down, add the rest, then admire the results:
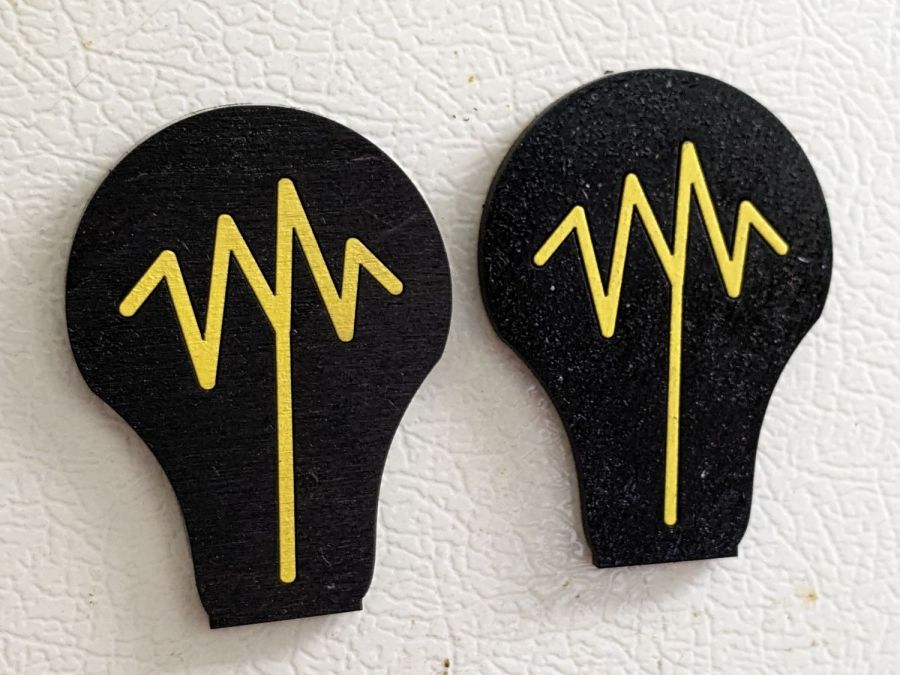
SCP Cognitohazard – refrigerator magnets
The obvious difference in the “filament” size comes from two different kerf offsets, both on the order of 0.15 mm. It makes a big difference in narrow objects!
The Autonomous Object coaster created its own pile of scrap and you can see the gaps created by the mismatched kerf offsets:
SCP Autonomous Object refrigerator magnet
Not works of art, but they came out nicely given where they started.
I recently replaced the hack-o-matic icemaker + fountain pump cooler with a LightObject Q600 water chiller, an entirely uneventful process. The Q600 has a back panel “aviation connector” with an alarm output for water flow (more precisely, lack thereof) or over / under temperature: pins 1 and 3 are closed during normal conditions and open during alarms (and when the power is off).
I finally wired the chiller into the OMTech 60 W laser’s internal water flow switch circuit, so that should either flow sensor have a problem with the water or the chiller detects an out of bounds temperature, the laser won’t fire.
You may recall the laser’s HV power supply arrived with its Water Protect input jumpered to ground, which I then wired to the lid interlock switch to (presumably) reduce the likelihood the replacement power supply will fail hot. The laser’s water flow switch goes to the Ruida controller’s WP input, where it behaves as it should.
Pin 2 of the chiller’s alarm connector is not connected to anything, so I added a safety ground wire for no good reason:
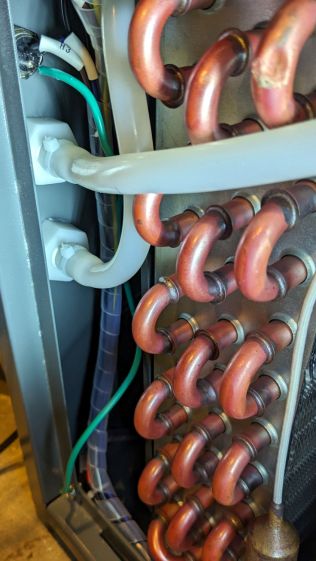
Laser Water Chiller – safety ground wire
The dent in the evaporator tube (upper left) is worrisome.
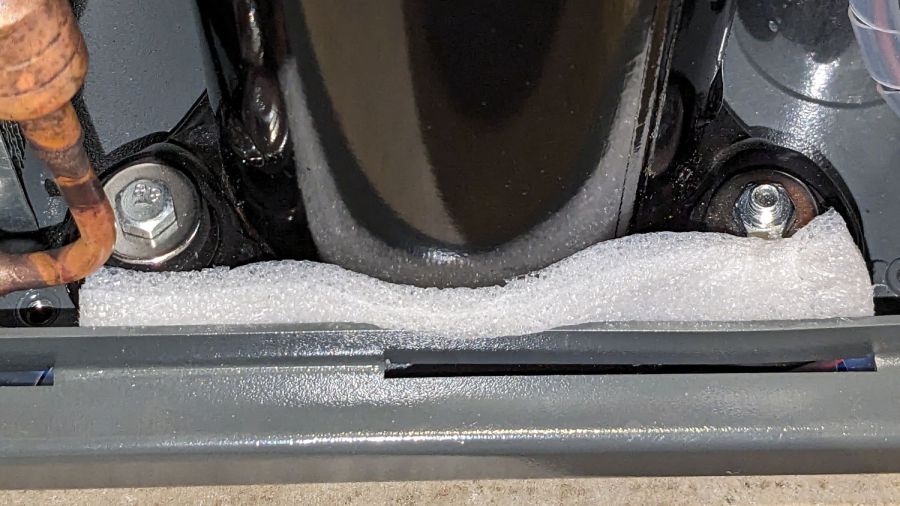
While I had the side panel off, I jammed a strip of closed-cell foam around the base of the compressor to silence a truly spectacular rattle:
Laser Water Chiller – compressor vibration suppression
I think the three mounting screws (yes, of these two: one up, one down, for no reason I can see) are looser than they should be, but I’m reluctant to tip the whole thing over with a tank full of water to get at the nuts / bolt heads on the bottom.
The connectors have a twist-lock notch that you must release after removing the screw (on the far side) holding the shell to the body:
Laser Water Chiller – connector shell keyway
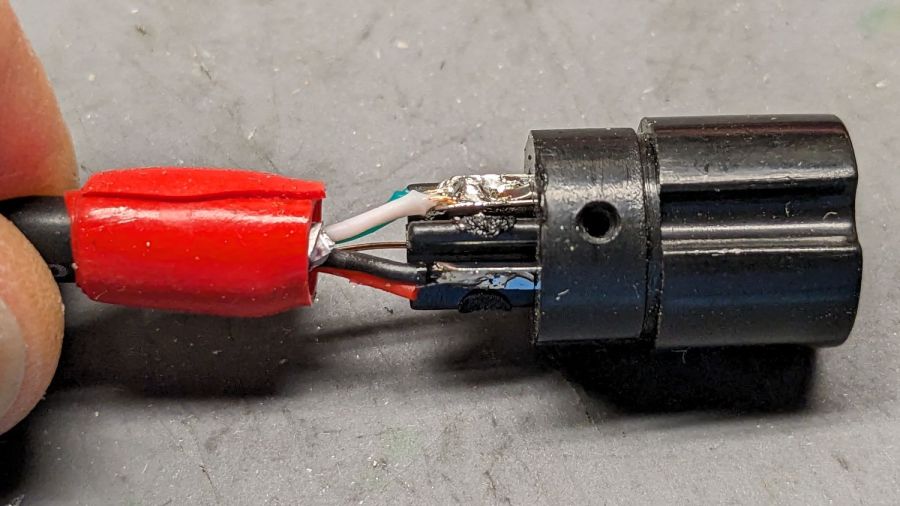
I repurposed a USB cable from the Big Box o’ Cables, wrapped with enough silicone tape to fill the cable clamp:
Laser Water Chiller – connector closeout
In retrospect, I should have paired the red + green and black + white wires, but nobody will ever notice. The drain wire carries the safety ground from pin 2 to the shielding, not that it matters. Both ends of the cable have identical connectors.
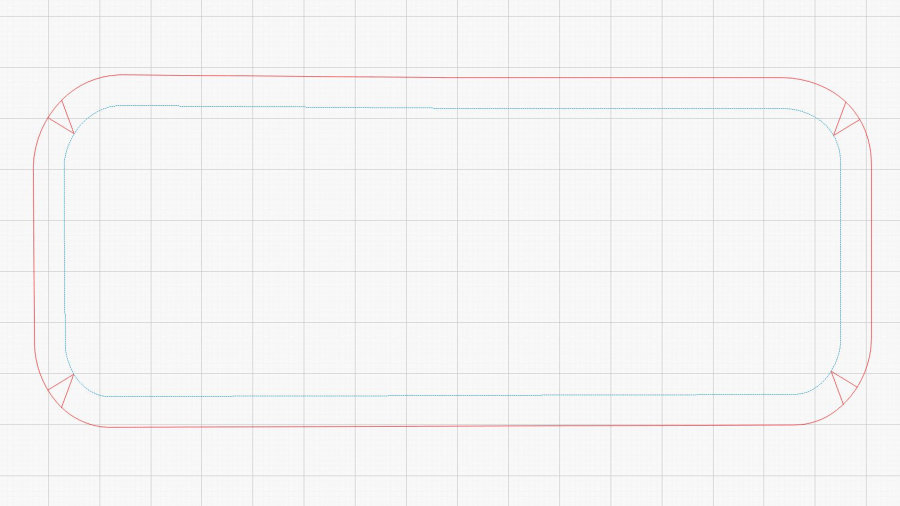
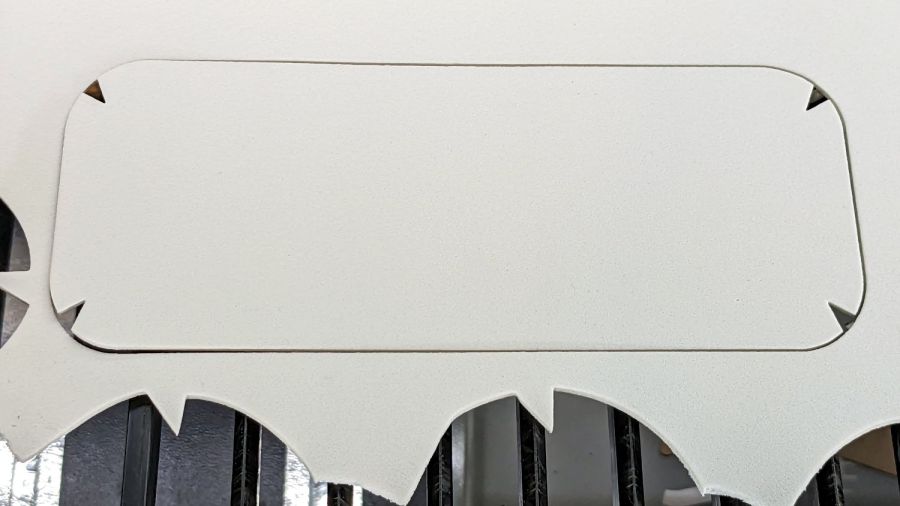
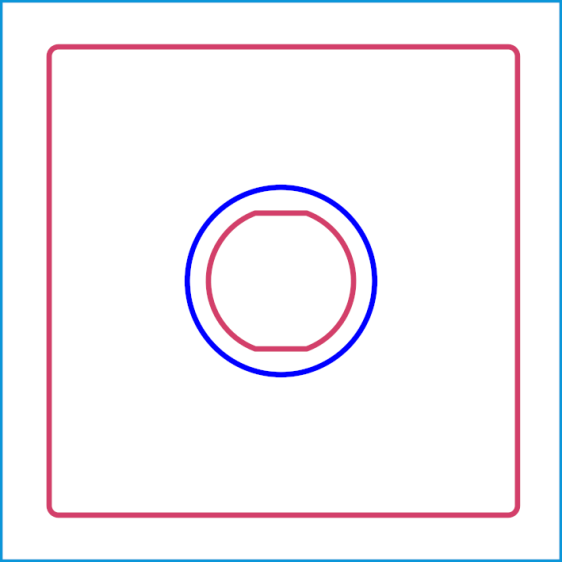
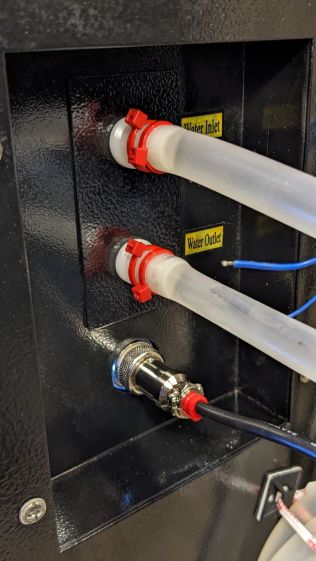
The laser cabinet has a convenient hole, albeit just a bit larger than required, which now has a simple adapter plate with the proper flats:
Laser Chiller Alarm Connector Plate
The blue ring is the same size as the hole, so as to ease lining it up, and the red perimeter surrounds the connector with strips of good double-sided foam tape for maximum sticktivity. Done in clear acrylic from the scrap pile, the platform’s internal lights give it that subtle blue-white hi-tech glow:
Laser Water Chiller – laser connector installed
The doubled-up cable ties on the water hose barb connectors are a Good Idea™ due to the somewhat higher pressure of the chiller’s water pump. The bottom of that recess had traces of water on it and, of course, having a hose pop off its barb is a Bad Thing™.
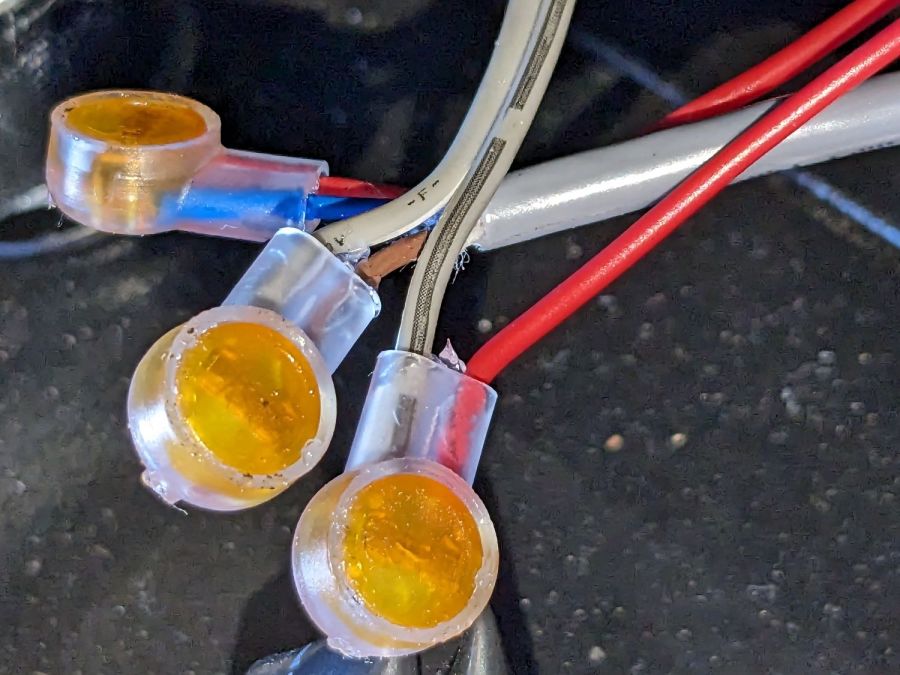
The new connector is wired in series with the internal flow switch, using a trio of grossly overqualified silicone-filled splices:
Laser Water Chiller – laser flow switch splices
I did not connect the safety ground from the chiller to the laser’s frame, because they do not share a common breaker circuit and I have better things to do than chase ground loops.
For whatever it’s worth, the gray cable that came with the laser might also be a repurposed USB cable, too: it has two fat wires and two thin wires, although it’s not wearing USB livery.
The laser is happy when the chiller is running and unhappy when it’s off, so life is good.


