Ed Nisley's Blog: Shop notes, electronics, firmware, machinery, 3D printing, laser cuttery, and curiosities. Contents: 100% human thinking, 0% AI slop.
The motor driver box on my Sherline mill started out as a stock unit, but I’ve tweaked the circuitry to improve the analog performance. Those adventures formed the basis of my Above the Ground Plane columns in Circuit Cellar magazine columns for August & October 2004.
Because the firmware for the PIC microcontrollers wasn’t available, I wrote a clean-room version so I could show how it all worked for the column. My code won’t run on a stock Sherline board, though, so it’s not a drop-in replacement for the stock firmware.
One of the reasons I attacked the controller was to reduce the audible noise coming from the motors. That’s an inescapable part of chopped-current stepper motor drive circuitry, but the noise was modulated by all manner of things that shouldn’t have affected it; just touching the box shouldn’t make any difference at all. The fact that it did meant the circuit board had some, well, infelicitous layouts.
Although the final result was much more stable, I decided to turn off each motor if it didn’t move for at least five seconds; that’s a simple firmware tweak when you write your own code. As a result, the shop was quiet when I wasn’t actively milling.
Solar Measurements Circuit Board – Top Side
Now, having a motor be completely turned off while milling is going on isn’t generally a good idea, because milling forces from the other axes can push the table against the leadscrew and, perhaps, turn the screw against the unresisting motor. I figured that on a Sherline mill, what with the sissy little cuts I take, that wouldn’t be a problem.
And I was right for the better part of four years!
A benefit of turning the driver circuitry off was that I could easily twist the knobs by hand to fine-tune the XYZ position during setup. That worked out really well.
However, drilling the seemingly simple circuit board pattern you see here (for my February 2009 CC column) produced exactly the right collection of forces (while drilling? Huh?), vibration (maybe) and motor pauses (for sure) to introduce an absolutely repeatable positioning error that Went Away when I tweaked the firmware to keep the motors enabled at all times.
I’ve since made another tweak that reduces the current to an idle level after five seconds. That both reduces the audible noise and drills the board correctly, so I’ll keep an eye on it for a while before declaring victory.
The PCB has a few unused (in my code, anyway) chip-to-chip connections that I could employ to let them all decide when nobody’s moving. I think turning the motors off 20 seconds after the last axis stops moving should work Just fine; my G-code doesn’t wait around that long except for manual tool changes.
This is the dingus that attaches the crossbeam to the central pipe rising up from the table for my counterweight gantry. I discarded a whole bunch of elaborate construction ideas in favor of just jamming a plug in the pipe and cranking down on a nut to tighten it.
Expanding plug overview
It’s pretty much self-explanatory; I cut everything to fit, cleaned up the cuts with a file, and added some lube to the tapers so as to make it nice & slippery.
The need for an O-ring to hold the halves together occurred to me after I’d bandsawed a 1 mm trench in the side of the plug. I chucked it up in the lathe again and used a round-nose tool to carve a groove around its belly. If you try this, do the groove first: an interrupted cut is murder on what’s basically a parting-off tool.
Expanding plug parts
While I know (thanks to Guy Lautard’s invaluable Machinist’s Bedside Reader books) that a self-releasing plug must have a taper angle with a tangent greater than the joint’s coefficient of friction, that really wasn’t much help here. I picked 40 degrees and, yup, it’s self-releasing, but not really slippery enough. Takes a bit of torque to expand the plug enough for a good grip.
Perhaps my grubby surface finish has something to do with it?
Memo to self: find out how to figure the taper angle correctly, then do better finishing.
It’s a simple fact of life that a CNC’ed Sherline mill requires a counterweight pulling the head upward, because, without some help, that poor little Z-axis motor has a hard time lifting the head’s nine-pound dead weight. The fact that it’s cantilevered way out from the Z-axis dovetails is another problem: there’s plenty of torque binding those ways.
For the last few years I’ve hung a random hunk of iron from a pair of pulleys attached to the floor joists overhead, but that’s not portable and I’m planning to bring the mill to the Cabin Fever Expo again this year. So I hacked out a sort of gantry that works reasonably well and, when I get back, it’ll replace my crude pulley lashup on the joists.
Mill counterweight gantry center support
The main beam is an aluminum extrusion that looks like it started life as a traffic sign post; it came with the house and Ol’ Gene was tight with the town DPW, so that seems reasonable. The center support is actually a pipe clamp that I’ll crunch on the edge of the table at the expo, with two plywood scraps to keep from embossing their furniture: the pipe sticks straight up from the table.
There’s an expanding plug inside the top of the pipe that I must go into more detail about later, but the general notion is that the beam becomes one with the pipe when I crank on the nut. I faced off the top of the pipe and cleaned out the graunched metal at the end of the threads.
The gray strap should hold electrical conduit to a wall, yet fits perfectly on iron pipe; who knew? Given that no plumbing size matches any physical property you can actually measure, specifying a match like that is impossible.
Counterweight pulley with Loctite
I made a pair of pulleys around 26 mm OD ball bearings, mostly because I couldn’t find anything else that would work. Yes, they’re open to shop crud, but I’ll add side shields before I screw it to the ceiling. I know I’ll be explaining how they work at Cabin Fever, so there’s no point in hiding the things.
The shaft is a steel rod, turned to fit and drilled out for a 10-32 screw. The greenish dab on the shaft is Loctite; I slid the pulley over the dab, aligned the cable with the hole, and let it cure in place. Loctite gets me out of making a quartet of fussy little spacers: better living through chemistry.
The outer ring is polycarbonate, chosen because the sheet was the right thickness. This ought to be a lathe project, but it was easier to clamp it on the mill, so I helix-milled the center hole to fit the bearing OD.
Spiral-milling the pulley OD
I hammered a piece of copper pipe into a mandrel / jaw pad, put a thin chunk of acrylic under the polycarb as a spacer, grabbed the whole affair in the three-jaw chuck, and helix-milled the OD. No drive dog to hold it in place, no special prep, no nothing: it Just Worked. Of course, I’m taking sissy little cuts on the thing, but you best do that on a Sherline anyway.
The copper pipe mandrel trick doesn’t give great precision, which, fortunately, isn’t needed in this application. I found a chunk of EMT in the heap with the right OD and walloped the copper pipe around it with a rubber mallet to beat it into shape.
The reason you need a mandrel is that thin ring of plastic deforms under the pressure of the jaws, producing a three-lobed effect: pleasing in an art project, yet strangely inappropriate in a nominally circular machined part. I discovered this exquisite little inconvenience a few years ago and haven’t forgotten the lesson yet.
I planned to use a slitting saw to cut a groove for the wire rope around the OD, but then I came to my senses: ‘way too much leverage on that poor little chuck and not enough traction from the jaws. A bit of rummaging came up with a 3/16-inch ball-end mill burr, which was just slightly larger than the wire rope.
[Update: What I’ve been calling a “ball-end mill” is actually a “ball-end burr”. A “ball-end” or “ball-nose” mill is basically an end mill with a hemispherical end. Sometimes “burr” is spelled “bur”.]
Ball-end mill used the wrong way
Then I screwed up: I mounted the chuck on the rotary table, the table on a right-angle plate, the plate on the mill, and zeroed the ball at the top of the pulley.
The right way to use a ball-end mill burr is along its equator, so I should have zeroed it at either the left or right side of the pulley. The ball doesn’t have really great cutting edges around its South Pole.
Fortunately, it cut a 1.5-mm trench around the polycarb just fine. I suspect if I was using aluminum, this would not have had a happy outcome.
The parts heap yielded a pair of lead blocks, a sturdy eye screw, and some humongous heat-shrink tubing that made a tidy counterweight. I lashed everything to the countertop supporting the mill, added a 2×4 post and a machinist’s jack to support the countertop, and it passed the smoke test.
Lead counterweight
The Sherline seems happier with a counterweight that slightly outweighs its head. The lead blocks weigh 13 pounds, about 3 pounds more than the head, and Z-axis travel is nice & smooth.
It’s said that the disadvantage of removing all the weight from the head is that there’s less weight to press drill bits into the workpiece. I haven’t seen that problem yet; methinks a few pounds really don’t make that much difference compared to the forces generated by the motor through the leadscrew. We shall see when this thing is installed in its permanent home on the floor joists.
Counterweight hook on Sherline mill head
Real machinists make all sorts of lavish clamps to attach the counterweight rope to the Sherline mill head. I favor the Orc Engineering approach: a random hook from the heap, firmly attached with a big hose clamp, more-or-less over the head’s center of mass. What’s not to like?
Incidentally, one nice feature of a hook on the head is that you can hang the head out of the way under a nearby shelf. I have both the 3k rpm and 10k rpm heads and it’s really nice to have the other head conveniently located, yet out of the way.
Something that’s obvious in retrospect: that pipe’s gotta be very close to vertical, lest the cable drag on the side of the holes. I may need some shims on the Cabin Fever table to make the answer come out right.
Here’s the heart of the helical-milling rough-cut routine for the OD. We start at a safe Z-axis traverse level and the first pass is at Z=0 on the surface to reveal any gross alignment errors…
G0 X[0 - #<_Pulley_Radius>] Y0 (set up for cutter comp)
G41.1 D[#<_Tool_Dia> + #<_Cut_Finish>] (cutter comp on left)
G2 X[#<_Pulley_Radius>] I[#<_Pulley_Radius>] F#<_Traverse_Feed> (CW entry arc to right side)
G0 Z0
F[#<_Mill_Feed> / 2]
#<_Pass> = 0 (iteration counter)
#<_ZLevel> = 0 (current Z-axis level)
O100 DO
G2 X[#<_Pulley_Radius>] I[0 - #<_Pulley_Radius>] Z#<_ZLevel> (helix down)
#<_ZLevel> = [#<_ZLevel> - #<_Cut_Depth>]
#<_Pass> = [#<_Pass> + 1]
O100 WHILE [#<_Pass> LE #<_Num_Passes>]
G2 X[#<_Pulley_Radius>] I[0 - #<_Pulley_Radius>] (remove ramp to final level)
G40 (comp off)
G0 X#<_Pulley_Dia> Y0 (move away from part)
G0 Z[#5163 * 25.4] (get air)
Memo to self: use the ball mill’s equator next time.
Update: The thing fit perfectly on the floor joists over the mill; more info there.
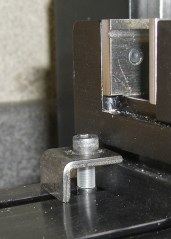
The drawbar bolts on a Sherline mill (and, presumably, the lathe) have a fitting that adapts the bolt head to the top of the spindle. There’s nothing to keep it from sliding right off the bolt, which happens 100% of the time when you just pick up the drawbar.
The fix is easy: a short length of heatshrink tubing applied near the bolt head.
I happened to have some tubing with an internal hot-melt glue lining that stick like, well, glue to the bolt. Pretty nearly any heatshrink tubing will work, although you might need two layers to catch the fitting’s ID.
Sherline drawbar bolts with heatshrink tubing to capture the fitting
This is a nuisance you gotta do once in a while. The symptom today was that the mill axis didn’t line up at all with the laser aimer I have mounted on the ceiling; it’s supposed to point right down the spindle bore, but the bore wandered all over the place. Took me a while to realize it was really that bad…
Basically, you must take the headstock off, unplug the axis motors, and put the mill on the workbench so you can get convenient access to the back of the column. Unscrew the cap screw holding the Z-axis backlash lock plate and disconnect the saddle nut. Make sure the lock doesn’t engage.
Loosen the gib lock, remove the gib, clean the crap off the mating dovetail surfaces & gib, add a touch of their approved silicone lube, slide the gib back & lock it in place. Slide the saddle up & down (that’s why you want the saddle nut disconnected) and tweak the gib until it slides more-or-less freely along the entire length without binding or being too loose. My saddle gets stiff near the very bottom of the column, but it never gets that low in actual use. Make sure the gib lock is tight.
Run the saddle nut to the top of the leadscrew, slide the saddle in place, back those two tiny setscrews out, secure the saddle nut to the saddle with a short cap screw, then turn the setscrews until they just touch the nut.
At this point, the nut should be in its nominal position, centered on the leadscrew and aligned concentric with its axis. If you turn the Z-axis knob and it binds, then you get to loosen the cap screw, futz with the setscrews, tighten the cap screw, check for binding, and iterate until it works properly.When it’s OK at the top, crank it all the way to the bottom and verify that it doesn’t bind elsewhere.
Mine took one iteration this time, which is just sheer blind good fortune. Or maybe the saddle nut is wearing out and getting sloppy?
Then adjust the backlash lock to reduce the backlash to whatever you think is appropriate. My Z-axis has a few mils unless that thing is way too snug.
Sherline’s instructions for aligning the saddle nut screw that connects the leadscrew to the saddle are on Sherline’s site, hidden in the instructions for the “new” Z-axis backlash adjustment: http://www.sherline.com/4017Zinst.htm.
Ever notice how, when you take your car in for inspection, it always comes back with the wheel lug nuts tightened beyond the ability of mere mortals? I think it’s because they have their pneumatic impact wrenches turned up to 11, just to make sure the nuts never, ever come loose and expose them to liability.
Broken wheel lug with attached SocketLug
Found this yesterday while walking back from the store with two gallons of milk. The shiny bit in the background is labeled SocketLug, which is evidently a trademark associated with Gorilla (but with no Web presence), and sports patent number 5797659. The stud in the front evidently snapped out of somebody’s wheel, probably flush with the surface. Gonna be trouble getting that out!
The lug is a threaded 9/16-inch steel stud, with a root area of maybe 0.18 square inches. Let’s suppose the yield strength is 100 kpsi, so breaking that thing required 18 k pounds. The thread looks to be 18 TPI for a 1.8 degree helix angle; call it 3%. If they lubed the threads and lug (ha!), letting us assume 20% friction, then the wrench was applying 700 pounds at a 9/32″ moment arm: call it 2.5 k lb-in or 30 k lb-ft of torque. Pretty impressive, given that typical pneumatic wrenches weigh in at around 500 lb-ft of torque.
Which says it really wasn’t the wrench doing the breaking, which should also be obvious because it was lying at the side of the road rather than on the shop floor. Even a 1000 lb-ft wrench would create only 5% of that yield load in the stud, so something else was wrong.
That orange patch in the upper left looks like rust in a crack, with the gray area in the lower right revealing the final fault. Maybe the shop monkey (or owner?) managed to whack it while installing the tire, create a small crack that let in the usual NYS road salt, and after a season or two the stud failed after being cranked tight once again.
There’s likely another four on that wheel: safety in numbers! Unlike those old Citroens with but a single nut securing each wheel…
In CNC machining, at least the kind I do on my Sherline CNC mill, you can’t mill around acute inside corners: a round milling bit doesn’t fit into a straight-sided angle. You must add a fairing arc that smoothly connects the two sides; the catch is that “smooth” means it’s tangent to the sides. And EMC2 is really, really fussy about smooth, to the point where you can’t just wing it with a calculator and type in the numbers.
Fairing arc doodles
There are nice analytic geometry methods for finding the intersection of two line segments, then laying in the arc that connects them, but this example weighs in at over two pages of G-Code. Mostly, what I need is an arc that connects a vertical or horizontal edge to an angled edge, so some simplification is in order.
Herewith, the quick-and-dirty…
The cutter enters from the left side, moving horizontally to the right, and will depart along the line toward P1, which might be the next corner of the part. The two material edges meet at P0, the vertex of the angle. The fairing arc is tangent to the two edges at PA and PB, centered at PC, and with a radius R.
We know the coordinates of P0 and P1 and the arc radius. That radius must be larger than the cutter radius, as you can’t tuck a fat cutter into a narrow corner.
The problem is to find PA, PB, and PC, so that we can write the G-code commands that travel along the sides & the arc.
The first step is finding Φ (Phi), the angle between the outgoing edge and the X axis:
I’m pretty sure if you use a 4-quadrant arctan, as shown in the doodle, all the angles will work out perfectly on either side of the axis, but it’s easy enough to fake the signs to get the right answer in any specific case. If you wanted a general solution, you’d have a two-page subroutine, right?
You’ll need the complement of that angle, hereinafter known as Theta:
Θ = 90 – Φ
Find the distances between various points using good old trig and right triangles:
CBx = R · sin Φ
CBy = R · cos Φ
P0PBy = R · (1 – cos Φ)
P0PBx = P0PBy · tan Θ
Then the coordinates fall out thusly:
Plastic Spring with Faired Corners
PCy = P0y + R
PBy = PCy – CBy
PBx = P0x + P0PBx
PCx = PBx – CBx
PAx = PCx
PAy = P0y
Remember, you do not figure all this out with your calculator and plug the numbers into the G-code, not if you have any sense. If you have just a few corners, write the commands directly, otherwise gimmick up a little subroutine. Earlier versions of EMC2 used numbered parameters (#100), but now that you can have named parameters (#<_Fairing_Radius>), what’s holding you back?
For example:
#<_CBy> = [#<_Fairing_Radius> * COS [#<_Phi>]] (Y distance PC to PB)
If your edge doesn’t come in from the left, then manual 90 degree rotations apply.
If you’re using a CAD program to lay out your parts, all this is largely irrelevant. I hammer out the G-code for the simple 2-1/2-D parts I make by hand, so rounding off a few corners comes in handy.
Because the lines & arc define the material edge contour, you can mill on either side of it and use cutter radius compensation to make the answer come out right. Works like a champ!
For what it’s worth, the arc is tangent at PA and PB, making the line from PC to the corner (a.k.a. vertex) P0 the bisector of angle Φ. That’s not directly useful here, but keep it in mind when you solve similar problems.
Update: As of mid-January, the newest trunk version of EMC2 can automagically insert fillets when cutter comp is turned on. That’ll be in the stable version in a while, after which I’ll need this math only for decorative fillets. That’s fine with me!