Ed Nisley's Blog: Shop notes, electronics, firmware, machinery, 3D printing, laser cuttery, and curiosities. Contents: 100% human thinking, 0% AI slop.
While using a Dremel cutoff wheel to shape a lathe bit, the flexible shaft sounded not quite noisy, if slightly less smooth than before, so easing some oil into the drive shaft might be a Good Idea. The springy shaft slides out of the motor end without disassembly, but, just for completeness, I took a look inside the handpiece:
Dremel flex shaft – handpiece internals
Before removing the two obvious screws holding the handpiece together, remember to remove the steel ring at each end. The tail ring is obvious:
Dremel flex shaft – tail ring
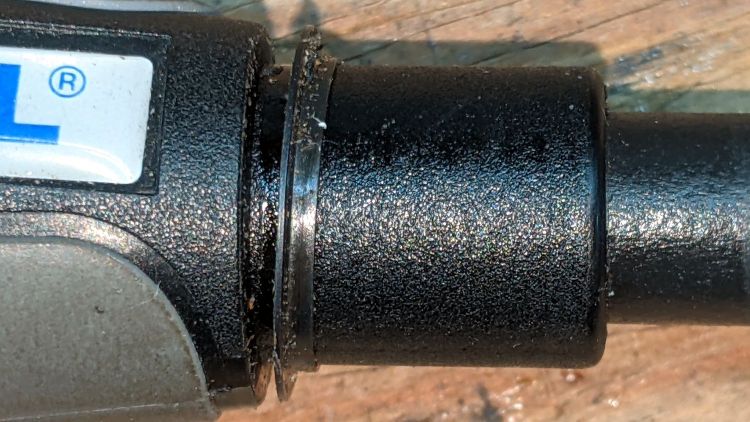
The nose ring wasn’t where I expected it, but released easily after the obvious mistake revealed itself:
Dremel flex shaft – nose ring
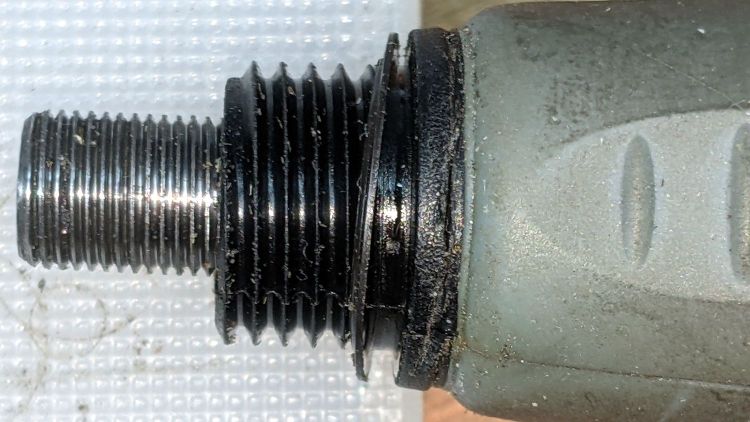
The steel shaft spun freely in its bearings and the matching end of the flex drive shaft had plenty of grease:
Dremel flex shaft – drive detail
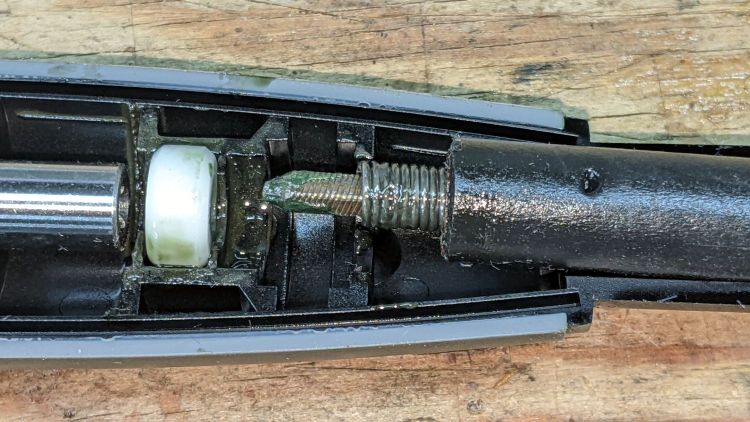
So I just reassembled everything in reverse order. The trick is to line up the existing indentations in the outer sheath with the bumps inside the handpiece shell:
Dremel flex shaft – housing detail
After all that, spreading a few drops of high-speed spindle oil along the spring drive shaft seemed appropriate.
Didn’t make the least bit of difference to the sound, but I feel better.
The top pair of screw heads aren’t quite flush with the cover, so the knobs have 1 mm extensions:
Micromark Bandsaw – cover screw knobs – upper
The bottom pair sit inside 4 mm recesses, so those knobs get matching extensions:
Micromark Bandsaw – cover screw knobs – lower
Attacking an anonymous 5 mm hex wrench with a Dremel cutoff wheel produced a quartet of 12 mm shafts and reduced drawer clutter by one unit.
In retrospect, I should have dismantled the cover, grabbed the screws in a vise with their shafts vertical, and epoxied all the knobs with perfect alignment. Next time, maybe.
One of the Tekronix AM503 current probe amplifiers arrived without the panel bushing for the Balance trim pot. Back in the day, you could presumably order part number 350-0301-02 and have it delivered (most likely) by your local Tek representative:
Balance pot panel bushing – Tek part listing
Those days are over.
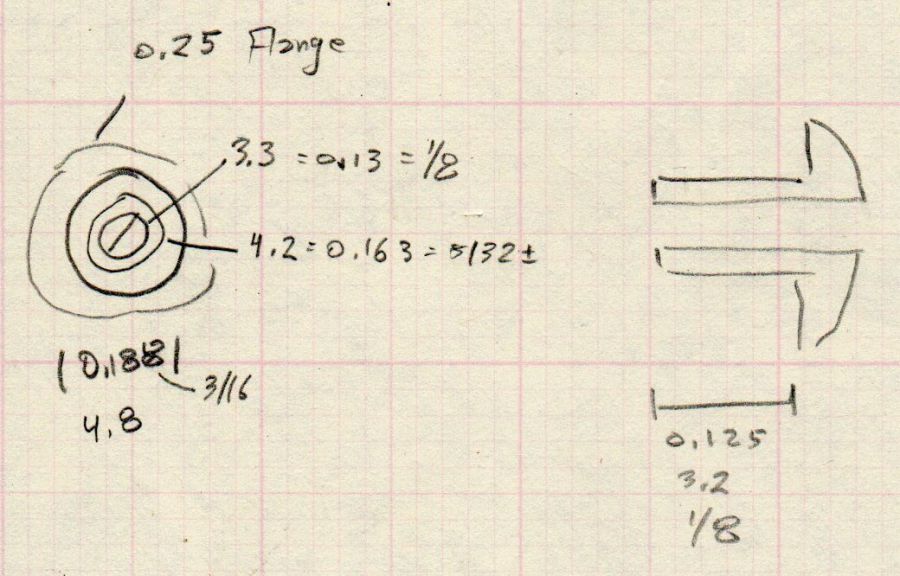
A few minutes produced a doodle with pretty-close measurements:
Balance pot panel bushing – dimension doodle
The as-built bushing turned out just a smidge too long, so make yours a scant eighth of an inch. Maybe the Tek dimension is the overall length?
An SLA resin printer might crank out such a thing, but it’s well below the looks-good / fits-well resolution limit of an ordinary fused-filament printer.
Applying the mini-lathe to a 1/4 inch white acrylic rod produced a reasonable facsimile:
Tek AM503 Balance pot bushing – front
The side view:
Tek AM503 Balance pot bushing – side
Acrylic is definitely the wrong material for the job, but it came readily to hand while pondering the Shelf o’ Rods. Acetal would be better, as you could easily trim off the aforementioned excess length with a knife.
All’s well that ends well:
Tek AM503 Balance pot bushing – installed
A dab of white acrylic adhesive around the raw opening holds the bushing in place and it looks good enough to me.
The motivation for this boils down to having the bushing center the pot twiddler required to set the balance, which I must do every time I fire up the amps, even after waiting for the half-hour required to stabilize them at their operating temperature.
There’s not much left of the central pin: the nugget hanging on its side is much larger than I expected. Most of the pin melted into that nugget, with a bonus droplet on the near side.
The rectangular chunk (upper right) is the switch terminal, with the tab from the side contact (on the right) welded to it.
Fortunately, none of the mayhem (including a few small sparks during the connector replacement) damaged the battery management circuitry or triggered a shutdown, so the reset tool wasn’t needed.
It’ll make a great 3D printing show-n-tell exhibit, in the unlikely event I ever do an in-person talk …
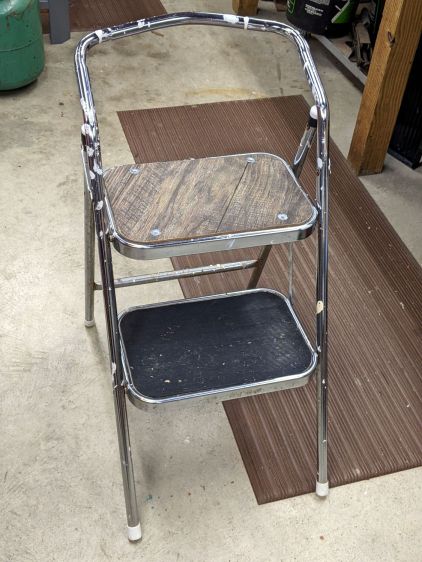
The top step of a folding step stool we’ve been (ab)using forever finally wore out, mostly because it was covered in vinyl and intended as a seat. We always used it as a step, despite knowing you should never stand on the top rung of a ladder: “Do not stand on or above this level”.
I tossed the ripped vinyl and warped particle board, cut a random chunk of wood-textured paneling (which Came With The House™) to fit, match-drilled four holes, and it looks OK:
Folding step stool – reseated
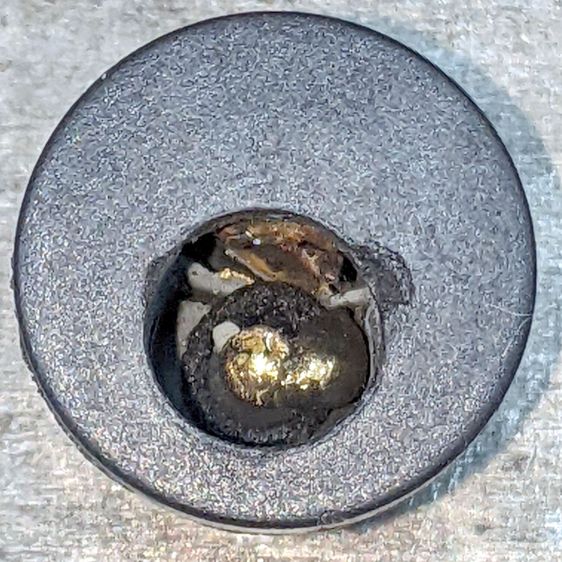
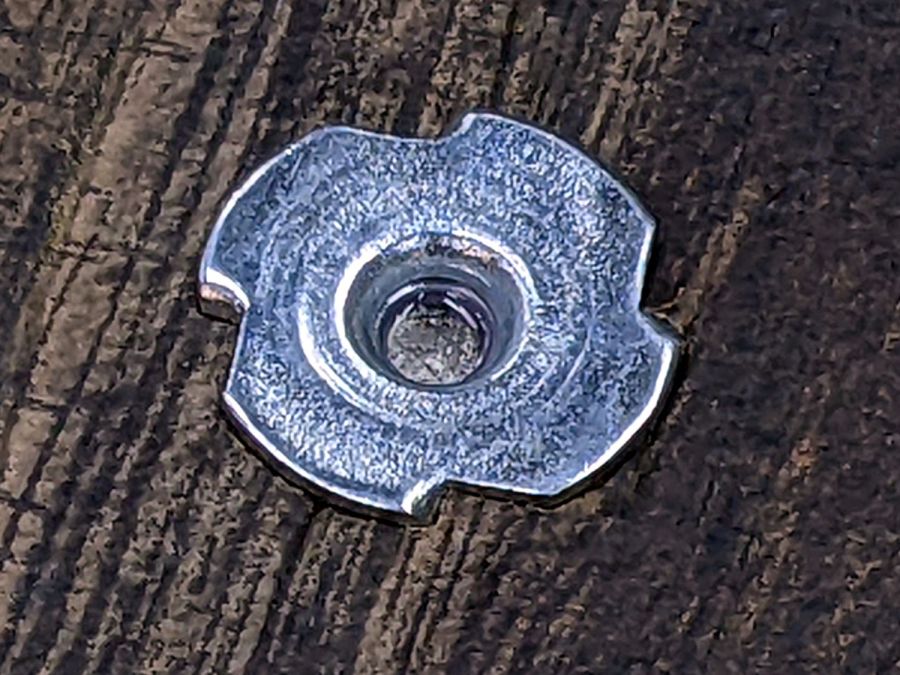
The original seat / step / whatever used press-fit studs with a flat flange covered by the vinyl, but I just slammed 10-32 tee nuts into the paneling:
Folding step stool – tee nut installed
That’s a ring of low-strength threadlock around the inside of the nut; I do not expect the screws to come out ever again.
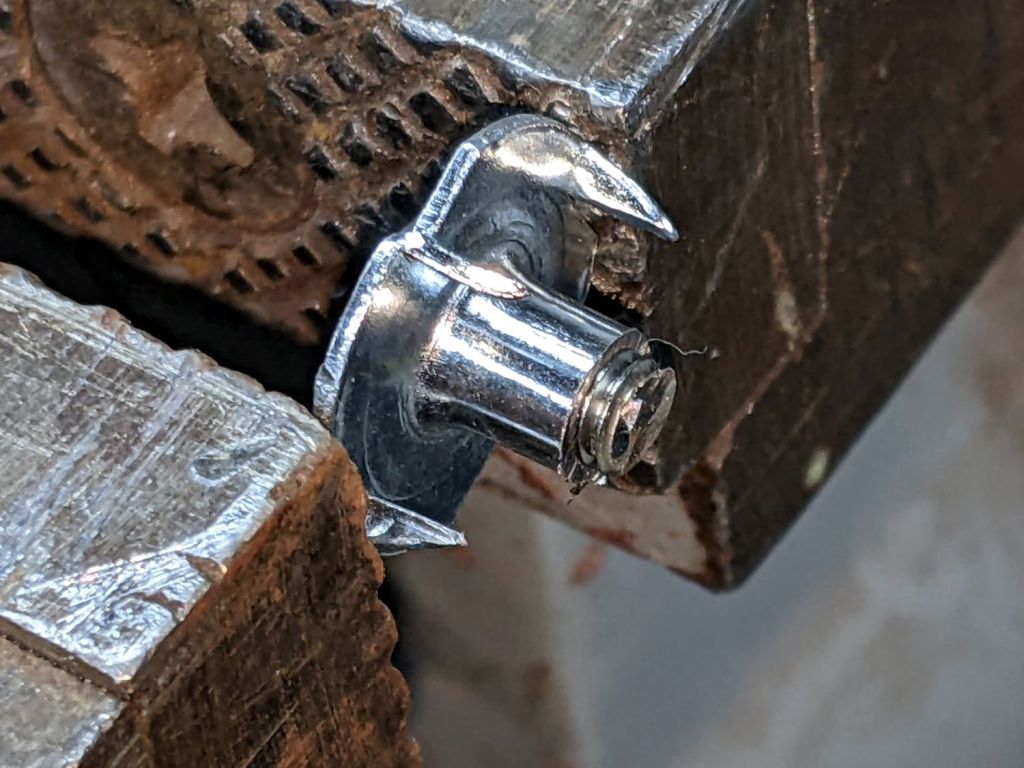
I cut the screws to length with a Dremel cutoff wheel using a slightly shortened tee nut as a fixture:
Folding step stool – screw shortening fixture
Not visible: the vacuum hose clamped to the vise sucking up all the abrasive + metal dust.
Good for an hour of Quality Shop Time™ on a cold winter morning!
A lithium battery management system can (and should!) disable the battery output to prevent damage from overcurrent or undervoltage, after which it must be reset. The inadvertent charge port short may have damaged the BMS PCB, but did not shut down the battery’s motor output, which means the BMS will not should not require resetting. However, because all this will happen remotely, it pays to be prepared.
For this battery, the positive terminal is on the right, as shown by the molded legend and verified by measurement.
A doodle with various dimensions, most of which are pretty close:
Bafang battery – connector dimension doodle
Further doodling produced a BMS reset adapter keyed to fit the battery connector in only one way:
Bafang battery – adapter doodle
Which turned into the rectangular lump at the top of the tool kit, along with the various shell drills and suchlike discussed earlier:
Bafang battery tools
Looking into the solid model from the battery connector shows the notches and projections that prevent it from making incorrect contact:
Battery Reset Adapter – show front
The pin dimensions on the right, along with a mysterious doodle that must have meant something at the time :
Bafang battery – adapter pin doodle
The pins emerged from 3/16 inch brass rod, with pockets for the soldered wires:
Bafang battery – reset tool – pins
The wires go into a coaxial breakout connector that’s hot-melt glued into the recess. The coaxial connectors are rated for 12 V and intended for CCTV cameras, LED strings, and suchlike, but I think they’re good for momentary use at 48 V with minimal current.
I printed the block with the battery connector end on top for the best dimensional accuracy and the other end of the pin holes held in place by a single layer of filament bridging the rectangular opening:
Bafang battery – reset tool – hole support layer
I made a hollow punch to cut the bridge filaments:
Bafang battery – reset tool – pin hole punch
The holes extend along the rectangular cutout for the coaxial connector, so pressing the punch against the notch lines it up neatly with the hole:
Bafang battery – reset tool – hole punching
Whereupon a sharp rap with a hammer clears the hole:
Bafang battery – reset tool – hole cleared
A dollop of urethane adhesive followed the pins into their holes to lock them in place. I plugged the block and pins into the battery to align the pins as the adhesive cured, with the wire ends carefully taped apart.
After curing: unplug the adapter, screw wires into coaxial connector, slobber hot melt glue into the recess, squish into place, align, dribble more glue into all the gaps and over the screw terminals, then declare victory.
It may never be needed, but that’s fine with me.
[Update: A few more doodles with better dimensions and fewer malfeatures appeared from the back of the bench.]
This file contains hidden or bidirectional Unicode text that may be interpreted or compiled differently than what appears below. To review, open the file in an editor that reveals hidden Unicode characters.
Learn more about bidirectional Unicode characters