I bought my Bose Hearphones in late August 2017, so they’re just shy of two years old, and have used them more-or-less daily since then. Although the innards still improve my hearing, the exterior is falling apart:
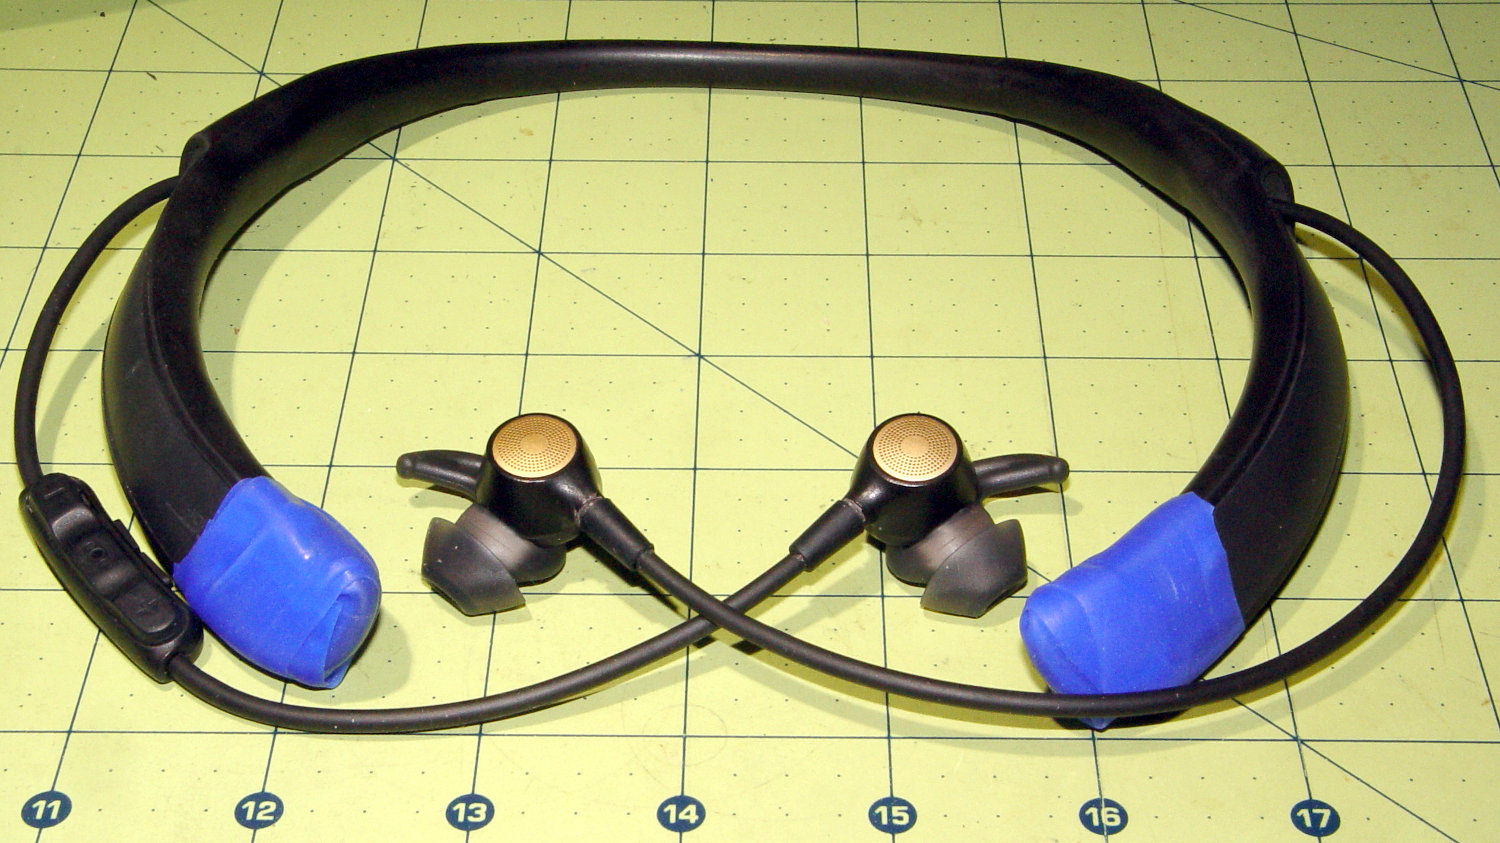
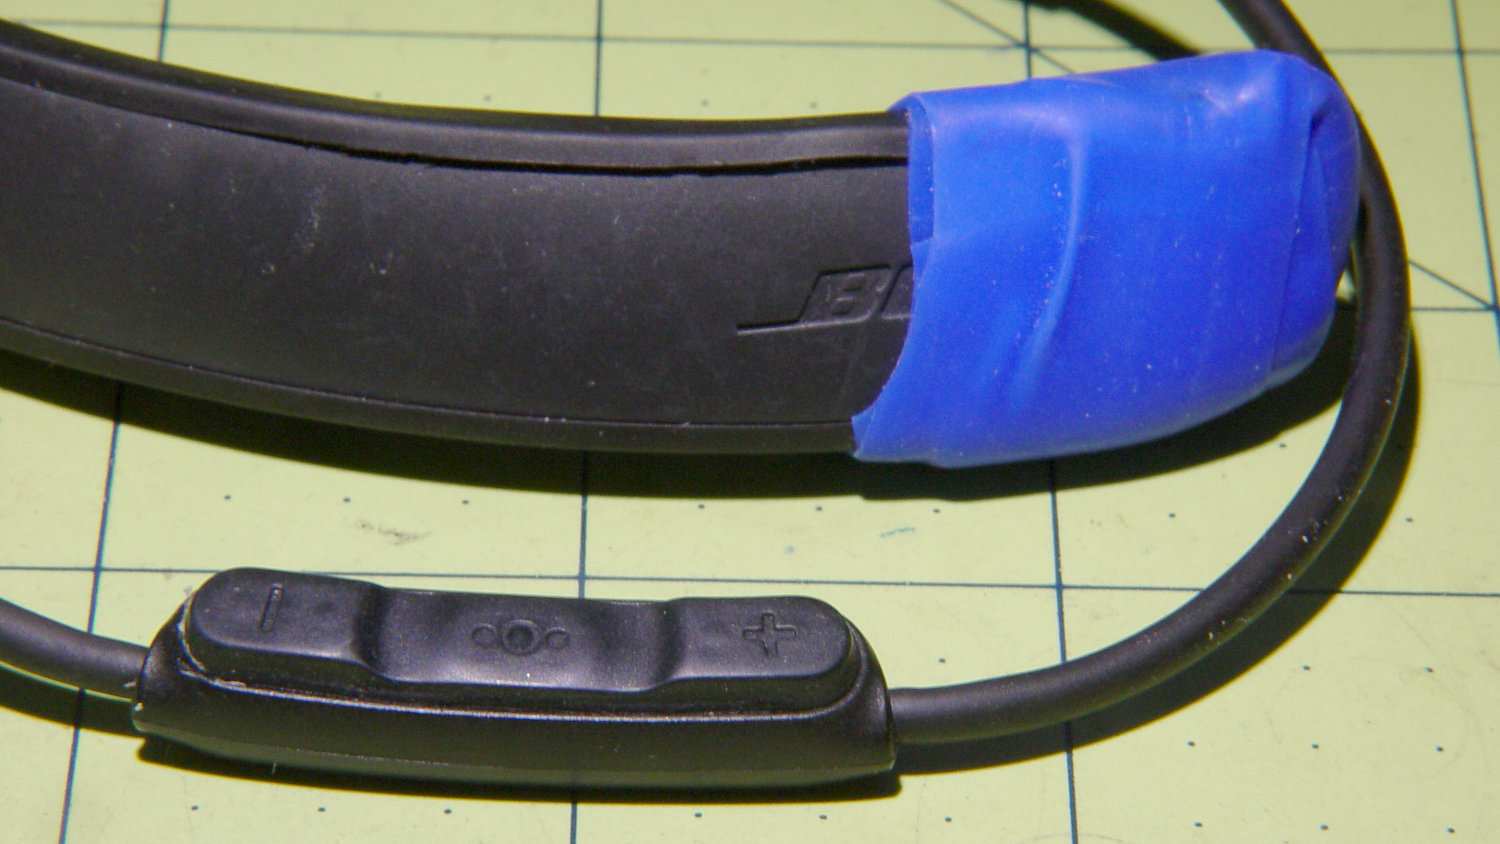
The conspicuous blue tips come from silicone tape holding the “soft touch” silicone shell together:

The white line seems to be silicone glue holding the hard cover plate to the equally hard base. So far, it’s working, but the two-piece soft cover is peeling away from the very thin adhesive (?) holding it to the hard parts.
The silicone glue under the flexy cover on the control pod along the right earbud cable hasn’t fared as well:

I blobbed ordinary RTV silicone under the cover, ignoring the caveats about acetic acid corrosion, because I don’t have any platinum-cure silicone on the shelf.
When the blue tape wears out / falls off, I’ll replace it with black silicone tape going further up the ring to hold the rest of the soft cover in place:
The ear buds have soft silicone strain relief tubes around the cables. The friction holding them in place failed long ago and, because no adhesive will work with silicone, I wrapped enough double-sided tape around the cables to produce a sticky lump jamming them in place:

A bit of the muck sticks out on both ends and I expect to replace the tape every now and again:

I also expect to replace the non-replaceable lithium battery / cell in about a year, as they’re now barely adequate for a day’s use.
Fortunately, I can’t see any of this hackery while I’m wearing the things:
my face I don’t mind it,
Because I’m behind it —
‘Tis the folks in the front that I jar.
https://www.azquotes.com/quote/1243103
[Update: Bose apparently had a QC failure on the silicone covering and, much to my surprise, swapped me entirely new Hearphones. The new covering feels slightly different, the USB cable hatch is a distinct piece of plastic, and maybe it’ll survive until the battery gives out. Color me satisfied! ]