Ed Nisley's Blog: Shop notes, electronics, firmware, machinery, 3D printing, laser cuttery, and curiosities. Contents: 100% human thinking, 0% AI slop.
For reasons not relevant here, Mary asked for a bunch of small cloth wipes cut to a particular size. A few minutes with LightBurn for rectangle-drawing and array-fiddling produces a useful result:
Laser-cut wipes – cutting
The part about peeling away what you don’t want just never gets old:
Laser-cut wipes – on honeycomb
It turns out this is even faster than rotary cutter action, because you need not worry about the old T-shirt sliding around while you’re slashing away at it. Bonus: a free 2 mm radius on all the corners!
Let the pieces air out for a day on the patio and they’re ready for use.
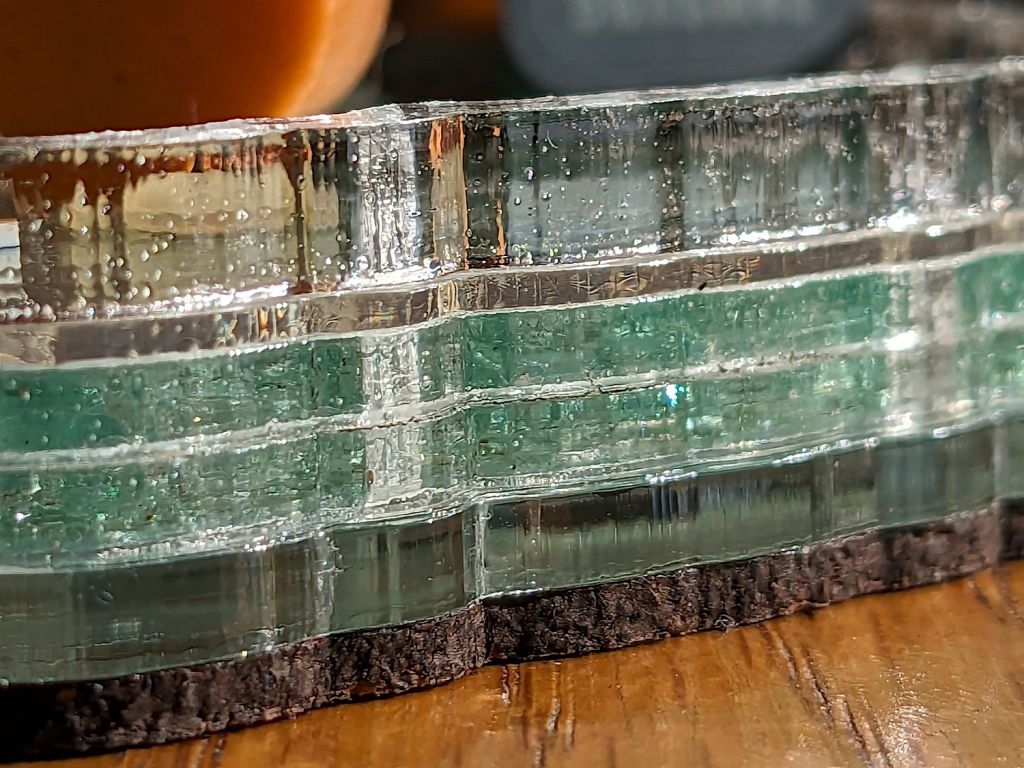
It’s a test piece with adhesive sheets between acrylic layers:
Layered Acrylic Desk Junk Collector – edge detail
From top to bottom:
Acrylic 4.3 mm – sidewall to corral the junk
Acrylic 1.5 mm – top plate
Acrylic 2.4 mm – two layers
Acrylic mirror 3 mm
Cork 2 mm – PSA backing
The pair of 2.4 mm layers add up to just an itsy more than the 4.8 mm thickness of the shattered glass atop the mirror. Unlike previous epoxy sealed coasters, the glass sits on a sheet of 3M LSE adhesive film to keep the pieces together, with the top 1.5 mm acrylic layer containing any slivers. Because there’s no epoxy involved, the project is finished with no muss, no fuss, no curing time, and no drippy edges.
The geometry comes from a scan of the glass piece:
Desk Clutter plate – smashed glass – Quick Mask
That’s the GIMP Quick Mask result of manually drawing around the perimeter with the center of a 25 pixel diameter pencil, thus creating a 12 pixel gap to ensure the glass will fit inside the cut shape: at 300 dpi, the 12 pixel gap is about 40 mil = 1 mm wide. Slightly less would work as well, although I’ve discovered some of the glass cuboids have non-vertical walls sticking out to the side above the scanner’s depth of field.
Scribbling over the interior with a bigger pencil clears it out and a few fill operations produce a binary mask perfectly suited for LightBurn’s Image Trace tool:
Desk Clutter plate – smashed glass – binary mask
Trace that outline into vectors, throw away the mask, and use the outline for a conformal cut.
The rings of acrylic and adhesive are 3 mm wide, generated from the outline by offsetting it 3 mm outward:
Desk Clutter plate – LB perimeters
The tooling circle around the perimeter simplifies drag-and-drop alignment, because the geometric center of the perimeter shape isn’t quite in the middle of where you’d (well, I’d) want to align it. Grouping the outline with the circle keeps the center snap point where it should be.
Narrow rings of adhesive sheet turned out to be even more unmanageable than I expected. Perhaps a better way:
Cut the ring with tabs holding it to the center area
Stick the ring + center to vinyl transfer tape
Peel the protective paper off the adhesive ring
Stick the acrylic ring atop the adhesive ring
Sever the tabs to release the adhesive ring
Peel the transfer tape off the ring
The “adhesive tape sheets for craft” are paper-based, rather than a plastic film, and are neither transparent nor durable. I used it mostly to get an idea of how well it sticks to acrylic, as it’s primarily intended for paper crafts.
The 3M LSE backing layer is plastic and the sheet becomes nearly transparent as the glass squishes down, although you wouldn’t want it on a mirror where you cared about the optical quality of the reflection. Underneath a chunk of smashed glass, it’s just fine.
All in all, it turned out well.
Next: how long does that craft adhesive last in abnormal conditions?
Nuheara predicts two to three years of battery lifetime for their IQbuds² MAX not-really-hearing-aids and, indeed, after 2-½ years of more-or-less steady use, the right bud developed a bad case of not charging fully and discharging quickly. The batteries are not, of course, customer-replaceable, so one can:
Buy a single bud
Buy a complete new pair + case + accessories
Ask about their repair service
Unsurprisingly, a single bud costs more than half the cost of the full set and the repair service is a complete mystery. Given that the left bud’s battery will likely fail in short order, let’s find out what’s inside.
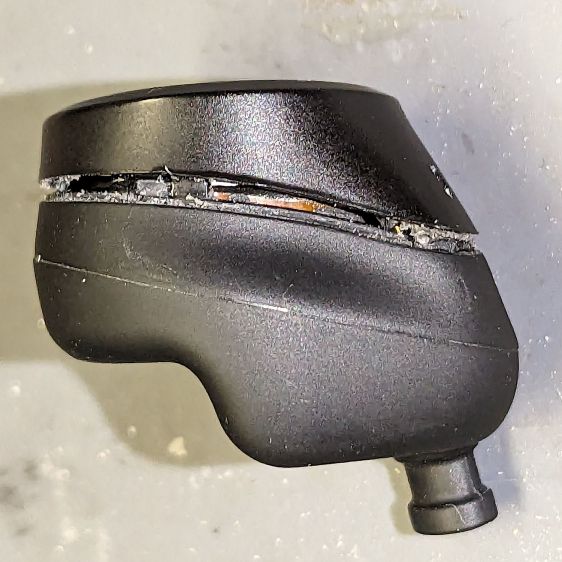
Your ear sees this side:
Nuheara IQbud – bottom view
The dark oval is a (probably IR) sensor telling the bud when it’s jammed in your ear.
Everybody else sees this side:
Nuheara IQbud – top view
The small slit over on the right and the two holes around the top seem to be for various microphones.
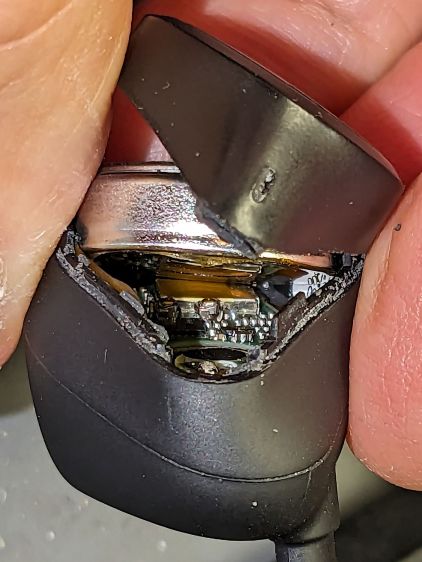
Jamming a plastic razor blade into the junction between the two parts of the case, just under the mic slit, and gently prying around the perimeter eventually forces the adhesive apart:
Nuheara IQbud – case splitting
Do not attempt to yank the two pieces apart, because a ribbon cable joins the lower and upper PCBs:
Nuheara IQbud – ribbon cable
The metallic disk in the lower part is the lithium battery.
Ease the upper part away, being very careful about not tugging on the ribbon cable:
Nuheara IQbud – raising battery
The battery has moved upward, revealing the lower PCB.
Rolling the upper part toward the ribbon cable eventually produces enough space to extract the battery:
Nuheara IQbud – battery freed
Note the orientation:
The rebated end is the negative terminal and faces outward
The wider end is the positive terminal and faces inward
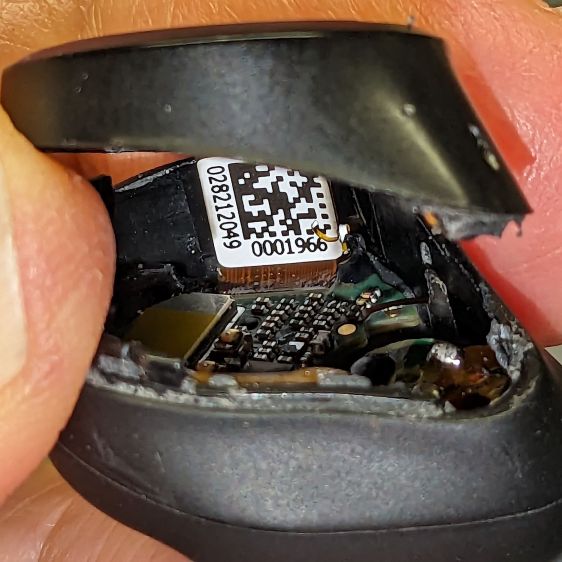
With the battery out, you can admire the PCBs and ribbon cable:
Nuheara IQbud – interior view
What is not obvious from the picture: two pairs of spring-loaded pogo pins contacting the battery. There is no actual battery holder, as it’s just tucked into the structure of the bud, with the perimeter adhesive providing the restraining force for the pogo pins.
The 1654 cells I got came with wire leads welded to the cell and a complete Kapton enclosure; apparently other devices use soldered connections rather than pins. They proudly proclaim their “Varta” heritage, but I have no way to prove they actually came from Germany.
I snipped off the wires, carved a pair of holes through their Kapton for the contact pins, tucked the cell in the bud, pressed the halves together, applied a clamp, then wrapped a strip of Kapton tape around the perimeter:
Nuheara IQbud – reassembled
It seems remarkably easy to wrap the tape over the front microphone, but don’t do that. Conversely, sealing the entire perimeter is the only way to prevent acoustic feedback, so I added a snippet of tape just under the front mic opening.
Do that for the other bud and declare victory.
That is, fer shure, not the most stylin’ repair you’ve ever seen, but I was (for what should be obvious reasons) reluctant to glue the halves together. I expect the tape to peel off / lose traction after a while, but I have plenty of tape at the ready. Worst case, I can glop some adhesive in there and hope for the best.
Because the buds lost power during their adventure, they required a trip through their charging case to wake them up again. After that, they work as well as they did before, with consistently longer run time from both buds.
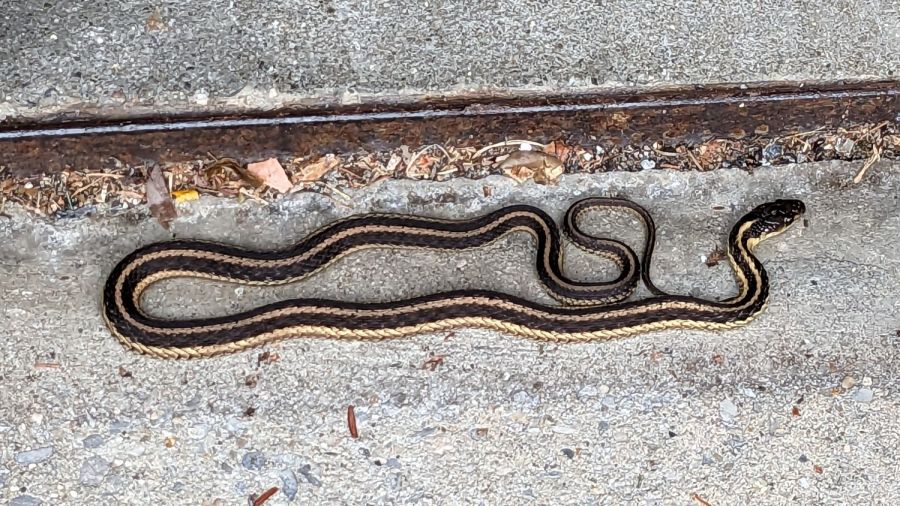
It was a cool morning and the snake hadn’t yet reached operating temperature, but it eventually flowed off into the garage and we went on our way.
A few hours later we returned:
Garter snake under garage door seal – B
Apparently that was the best place for a snake.
Mary lined up a four-cell seedling pot ahead of the critter, encouraged it to flow forward, and much to our surprise it tucked neatly into one of the cells:
Garter snake under garage door seal – C
We carried it to the herb garden, wished it well, and a few hours later it had uncoiled and gone about its business.
While pondering what to do with the shattered kitchen scale, I got a bottom-dollar replacement touting its rechargeable lithium battery. After giving it the obligatory charge-before-using, I put it in service. Five days later, its battery was dead flat discharged.
So I gutted it to extract the battery:
Cheap digital scale – lithium cell
It’s a cute little thing, isn’t it?
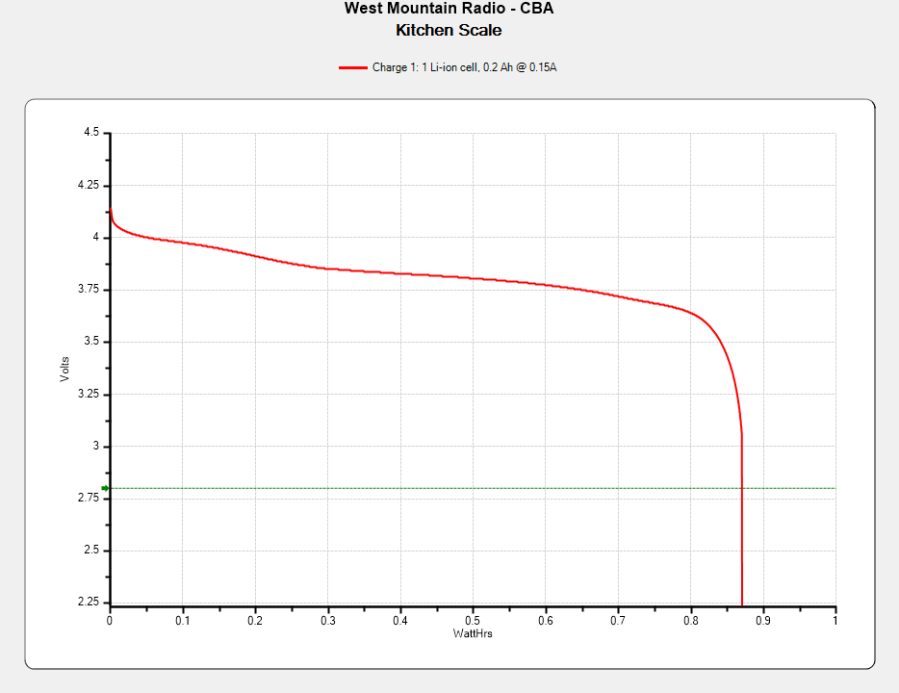
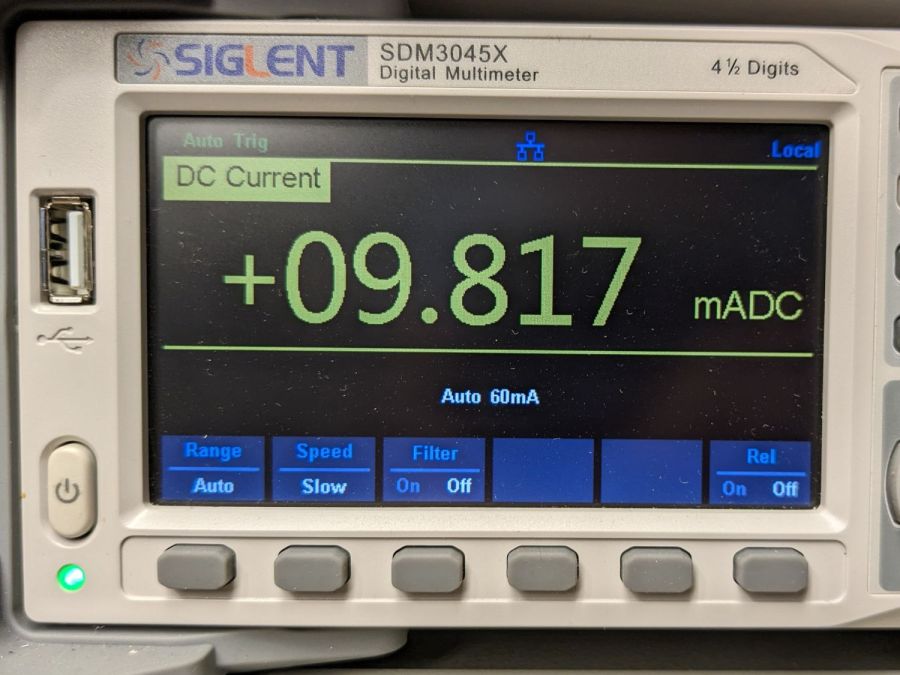
Much to my surprise, the obligatory battery rundown test showed it matches its 0.74 W·hr label:
Kitchen Scale – Charge1
We all know where this is going, right?
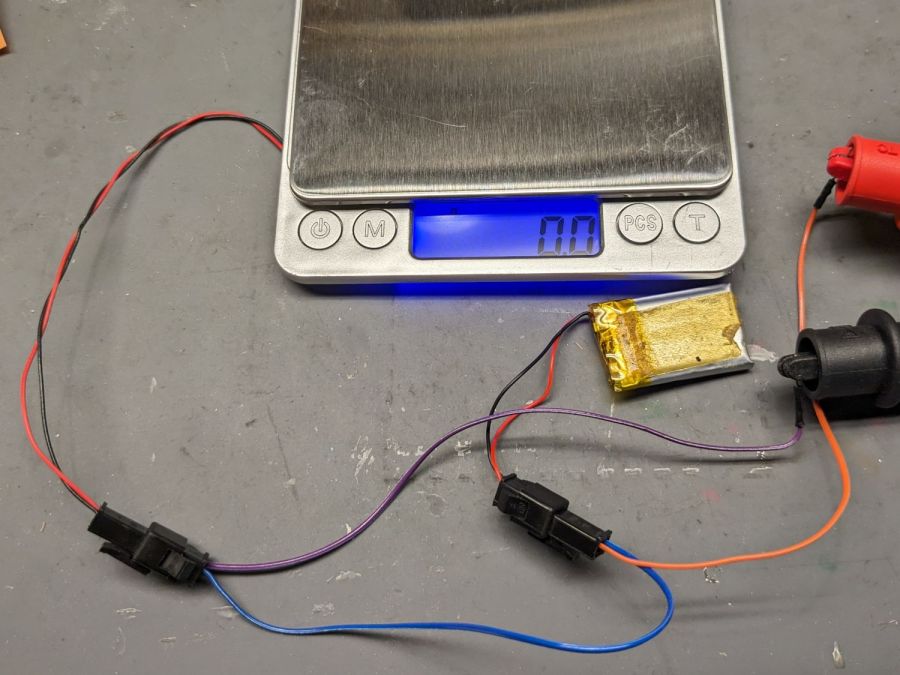
Crunche a connector on the battery, another on the scale, and make up a suitable current tap for a meter:
Cheap digital scale – current measurement setup
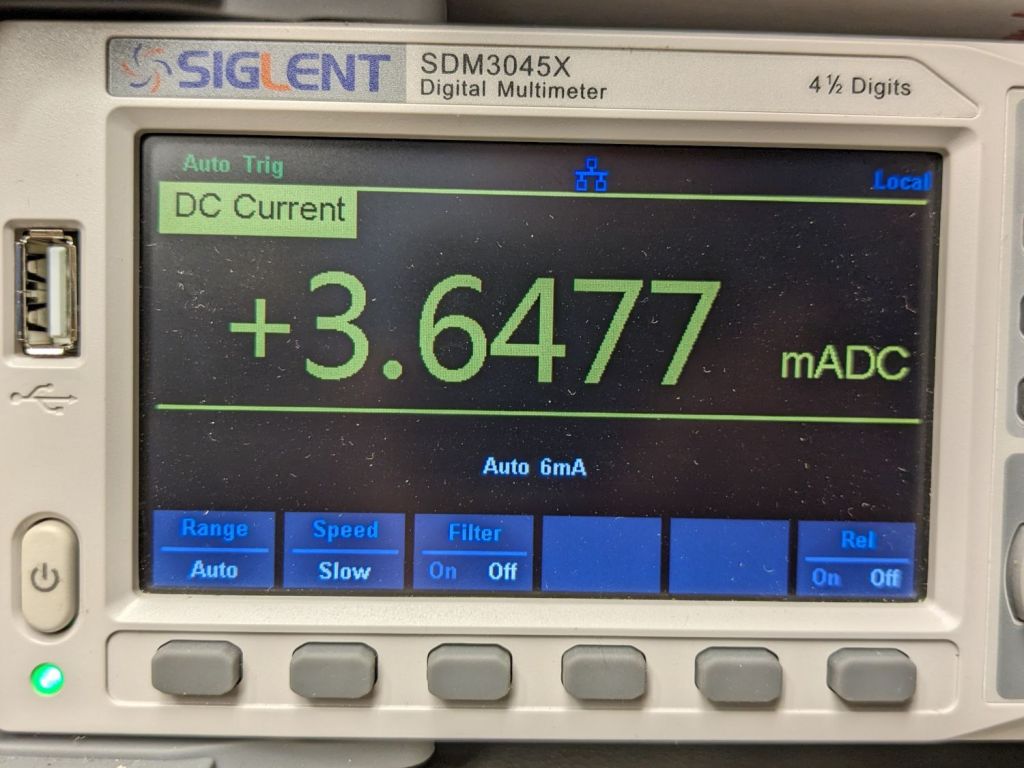
Which looked like this:
Cheap digital scale – active current
That’s about what I found for the craptastic scale running from a pair of CR2032 primary cells, so it’s not out of line.
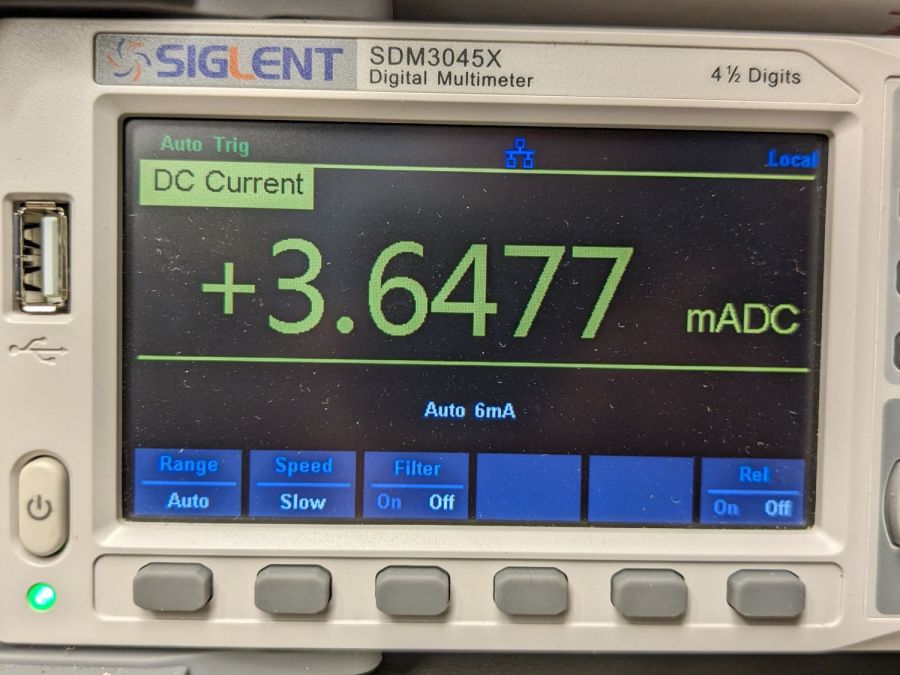
Turn off the scale and measure the idle current:
Cheap digital scale – inactive current
Do you think I got a dud?
For all I know, the little microcontroller under the epoxy blob is running a continuous attack on my WiFi network, with the intent of siphoning off all my sensitive bits. Ya never know.
Dividing the battery’s 200 mA·hr rating by 4 mA says it really should be dead in 50 hours, which is close enough to five days: diagnosis confirmed!
Rather than fight, I switched to a battery with more capacity:
Cheap digital scale – NP-BX1 replacement
It’s long past its prime, but ought to last for a month, which is about as long as the shattered scale survived on a similar battery.
If that isn’t a smug smile, I don’t know what one might look like.
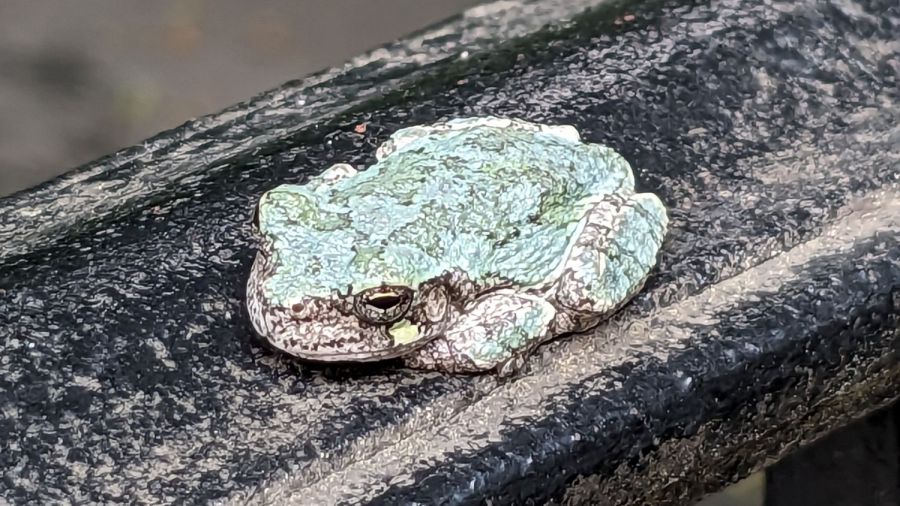
When she related this tale at a Master Gardener meeting, one of her cronies said a similar frog commandeered a shoe and refused all offers of a new home, so apparently tree frogs and shoes just go together.
Anybody that persistent deserves whatever it wants; Mary will get a new pair of shoes and keep them indoors.
Being a guy of a certain age with a diagnosis of Low Bone Density, I must increase my calcium intake. Rather than add a few hundred calories a day of calcium-rich food that my waistline does not need, I’ll see what adding 600 mg of calcium citrate can do.
Being a guy of a certain type, I prefer to fill my own capsules, which of course involves Quality Shop Time:
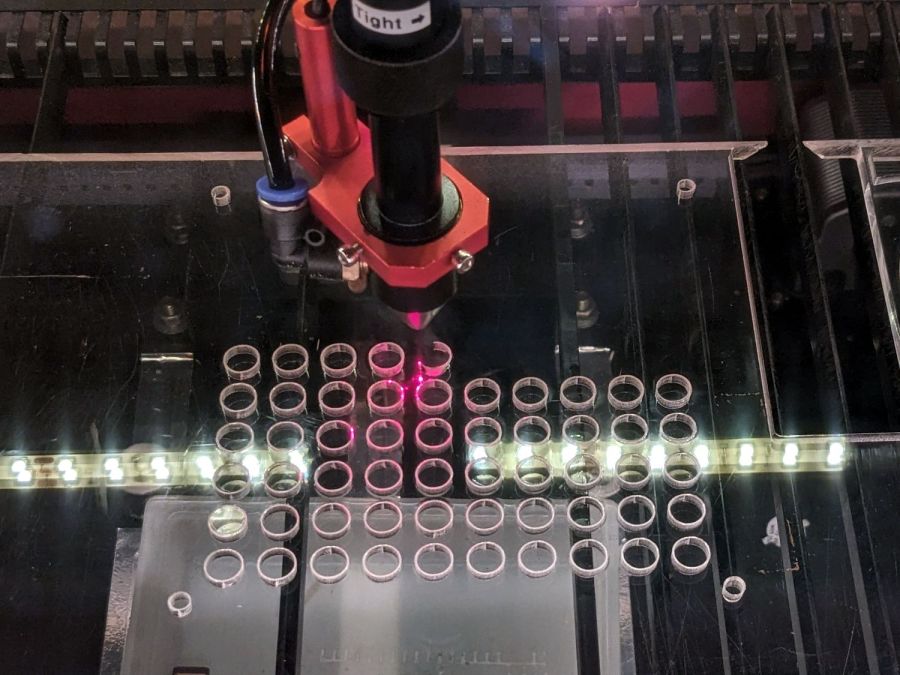
Gelatin 000 Capsule Fill Plate – cutting
Quite some years ago, for reasons not relevant here, I acquired several of what were called “manual capsule filling machines” from the usual online sources. During the ensuing years, such devices have fallen under the purview of the DEA and vanished from the import market, leaving (AFAICT) one USA-ian supplier.
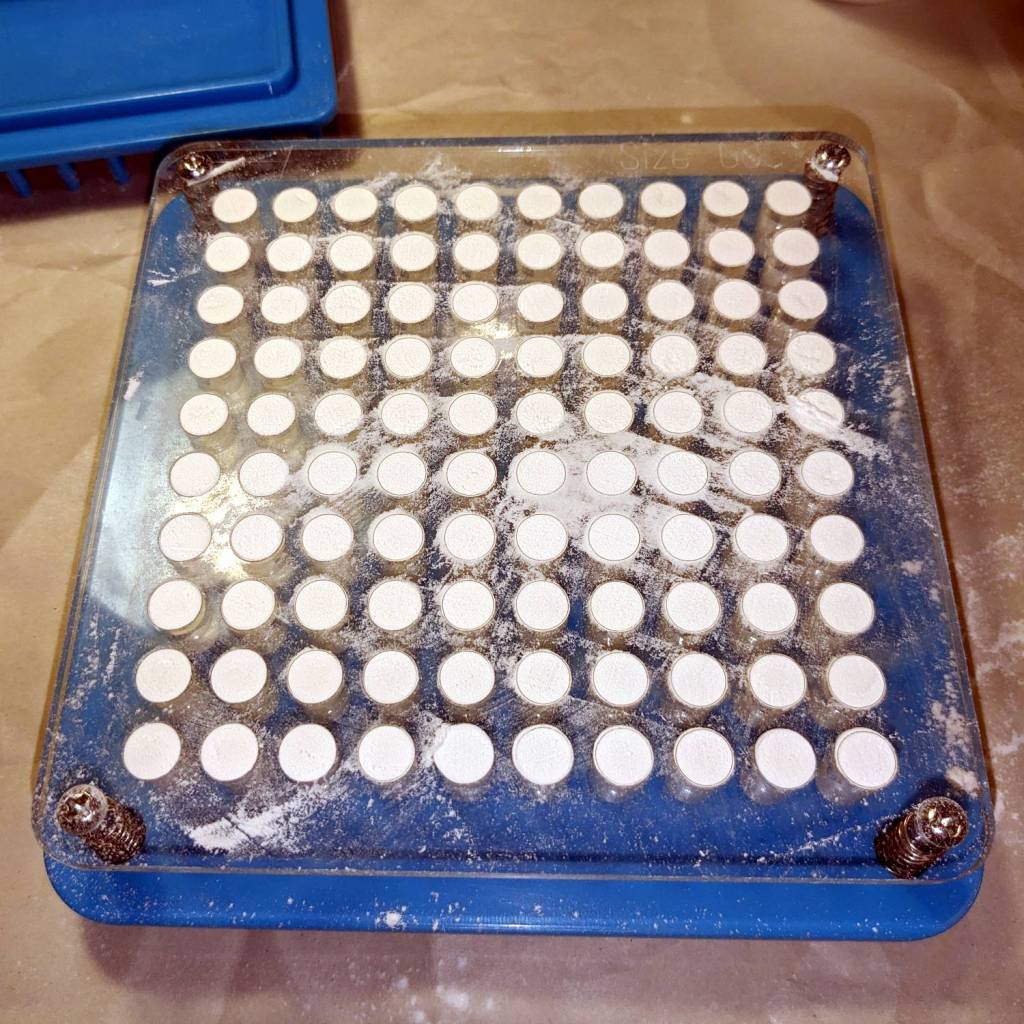
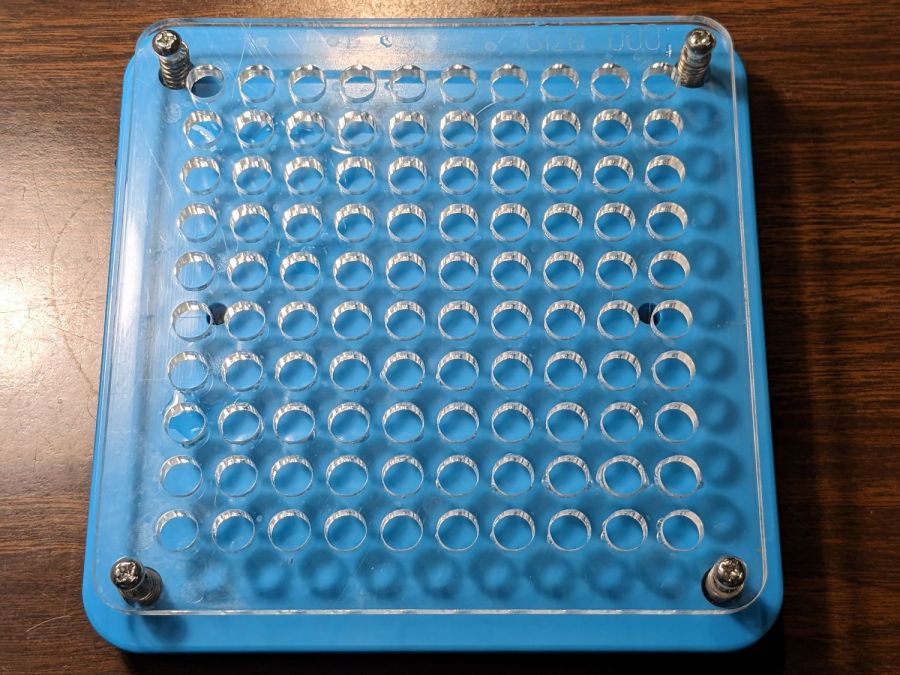
The key difference between “machines” for different capsule sizes is the plate holding the capsule bodies:
Gelatin 000 Capsule Fill Plate – installed
A complete machine includes three other capsule-size-related parts:
A plate holding the caps
A plate with conical holes used to shake caps & bodies into their respective plates
A guide plate helping mate caps with bodies
In normal use, you put the “shake plate” on the body or cap plate, dump a pile into it, and shake until most of the caps / bodies fall into the holes. Then you manually insert the rest, invert any that fell in backwards, and generally mess around until they’re all properly oriented in their sockets. After filling the capsules, you put the cap + guide plates atop the bodies, press down firmly, and (ideally) produce 100 filled and sealed capsules.
It turns out Size 000 capsules are sufficiently chonky that I have no trouble capping the bodies by hand without those other parts, so making just the body plate seemed Good Enough™. The story might be different for Size 1 capsules.
The external dimensions and screw holes match the original plate, so this one fits the same base:
Gelatin 000 capsule plate – LB layout
Make one plate and four spacing clips from 6 (-ish) mm acrylic.
If you can think of anything to do with 100 3/8 inch cylinders of 1/4 inch acrylic, clue me in.
Size 000 bodies are close enough to 3/8 inch that I cleaned up the holes with a step drill for a nicer fit. Perhaps making the plate from 3 mm acrylic would produce better results.
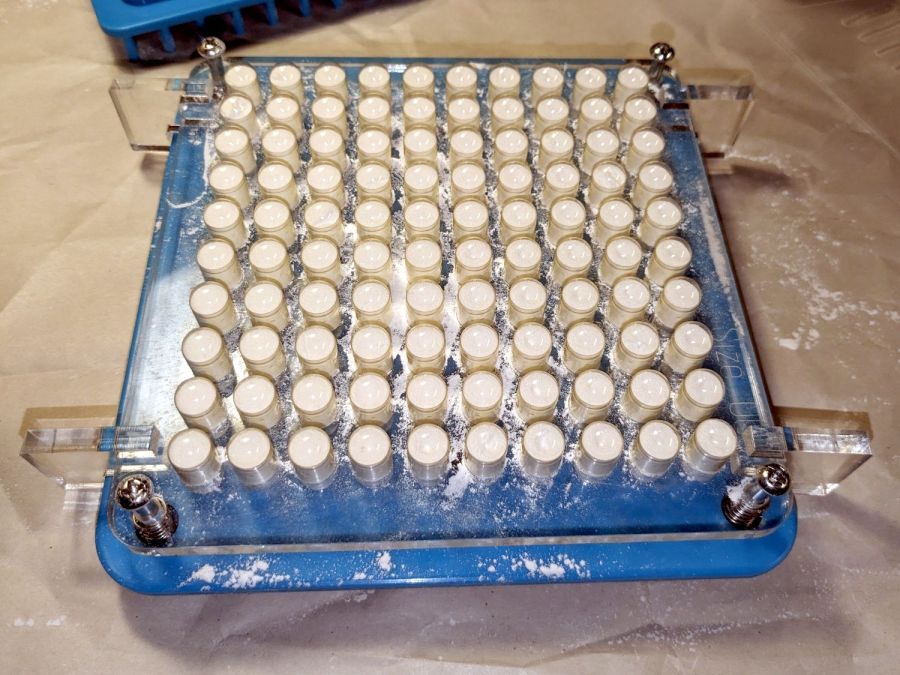
Four springs around the screws in the corners support the plate to allow pressing the caps in place. I adjusted the screws to put the top of the plate at exactly the height of the bodies above the blue base place, producing a smooth surface for scraping suspicious white powder into the bodies:
Gelatin 000 Capsule Fill Plate – filled
Iterate filling and tamping until the capsule contents are firm-but-not-overstuffed, then press the plate downward and secure it with the spacer clips:
Gelatin 000 Capsule Fill Plate – capped
The clips hold the plate at the proper distance to let the caps slip over the bodies and lock in place. This is tedious, but much faster than doing the entire process on individual capsules one-by-one.
With the caps locked in place, flip the whole thing above a bowl, remove the clips, press the plate against the base, and 100 finished capsules shower into the bowl.
You could build a complete filler without having the blue base plate & springs, but I’ll leave that project to your imagination.


