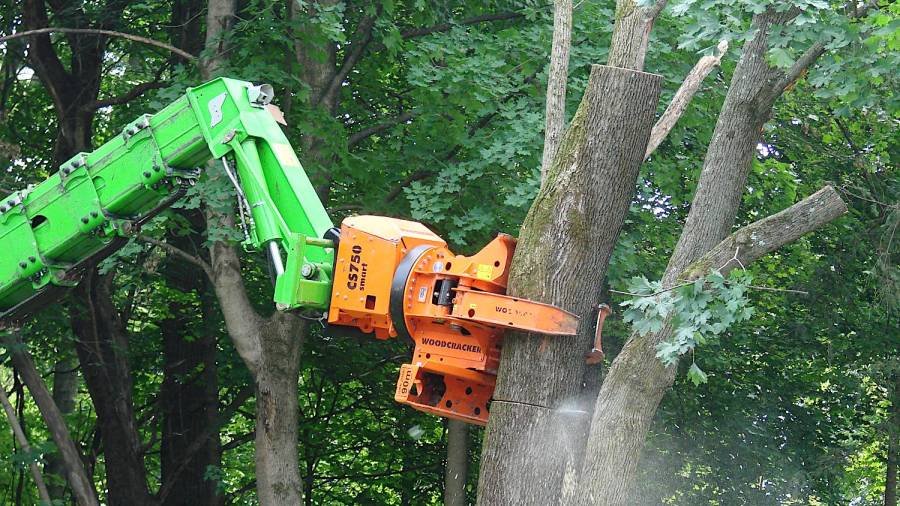
[Edit: It’s a “Woodcracker”.]
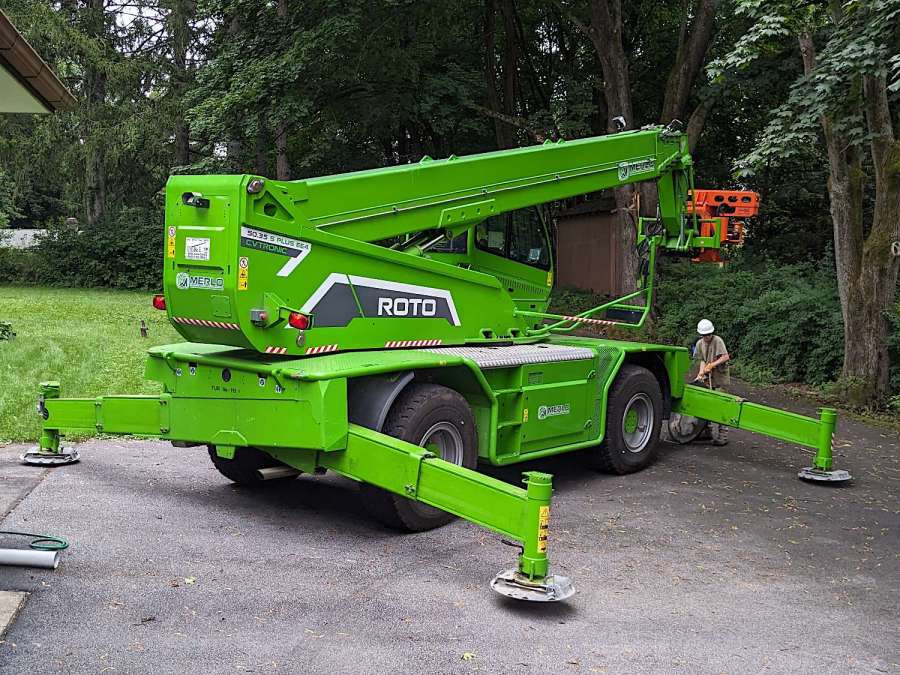
The best bid on a recent tree removal project replaced most of the usual crew with a Merlo Roto telehandler:
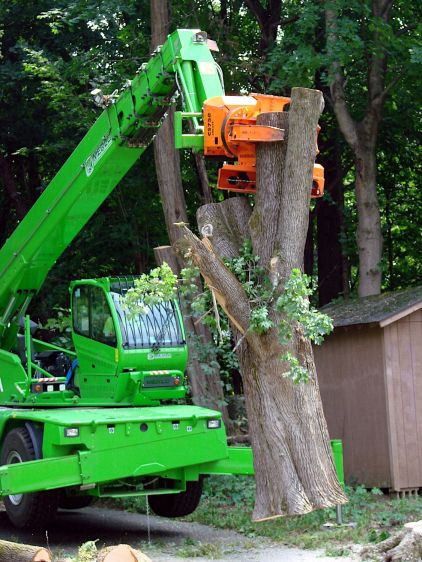
The orange gadget on the end of the boom is a Woodcracker manipulator with a terrifying switchblade chainsaw:

The saw has hydraulic motors, so you can hear the blade ripping through the wood.
The jaws above the saw hold the piece during the cut:
Then lift it away:
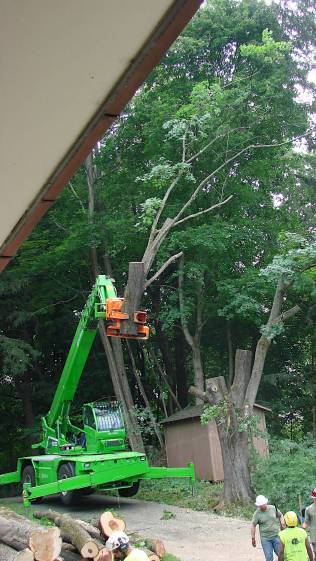
The boom has a 115 foot vertical reach, so it can remove entire treetops:

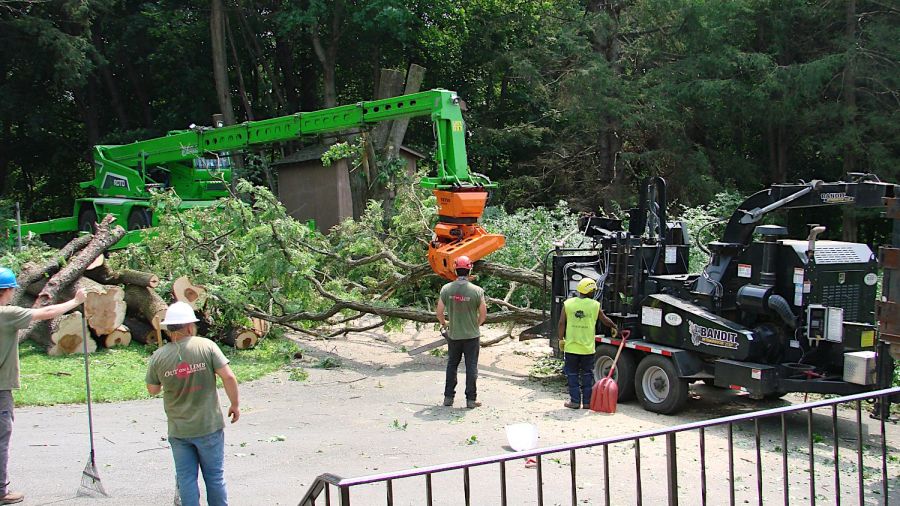
Then align the branch with the chipper’s gullet and ram it into the feed rollers, with no intervention from the ground crew:
The Woodcracker chainsaw isn’t quite long enough for the trunk, so the jaws stabilize the trunk during a manual cut:

Then haul the whole thing away:
The Merlo can lift 11,000 pounds near the middle of its range, with a 1600 pound limit at the maximum horizontal reach and 5500 pounds at 115 feet vertically. As far as I can tell, nothing about this project came anywhere close to the machine’s limits.
The day arrived with a severe thunderstorm watch, but the main part of the storm passed far north of us. The local power company keeps this company on speed dial and called them for emergency work in the wake of the storm, so the Merlo left early and the remaining crew used a bucket truck to take down the last tree in old-school style.
The Merlo is staggeringly expensive, but lets one operator take down an entire tree without any climbers or riggers. I suspect the reduction in crew size (and insurance premiums) pays for the machine in short order; the crew was less than half the size involved in a neighbor’s project with another contractor.
Highly recommended!
Merlo’s promotional video has comparisons with similar machines and I’m sure you could waste an entire afternoon on such things. For sure, I didn’t get anything else done that day.