A bit of laparoscopic surgery on the front yard unearthed the drain line from the septic tank to the leach field. Drilling a 1-1/2 inch hole in the top of the pipe revealed that it’s 3/4 full of sludge, which is a Bad Thing: the leach field should get only liquid from the middle of the septic tank.
On the other paw, the house was built a bit over half a century ago and the records that came with it showed the tank was pumped two decades before we arrived. So it goes.
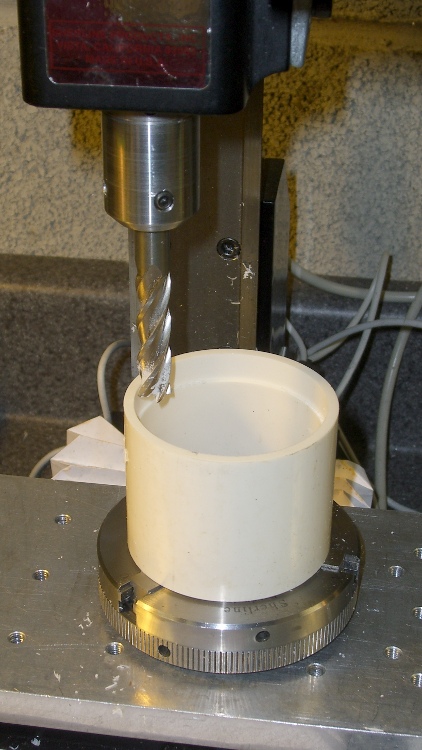
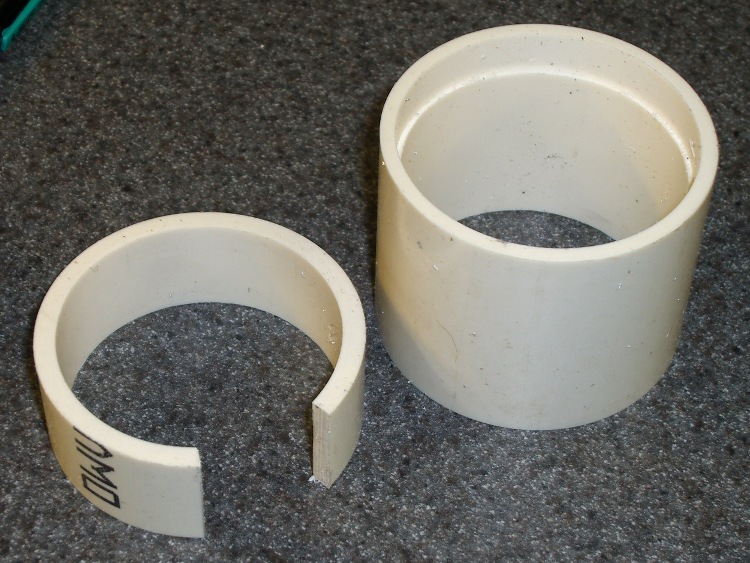
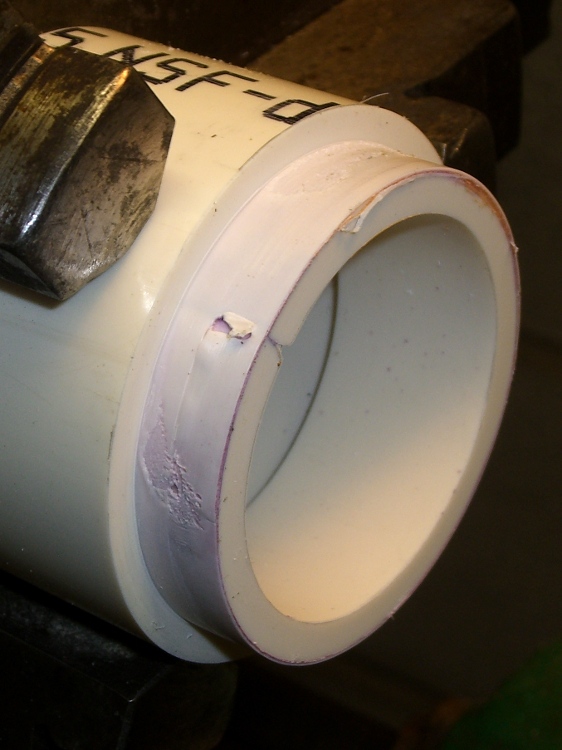
Rather than leave the hole in the pipe open until we get a new drain field, I built a plug that fit the 5 inch OD drain pipe and the 1-1/2 inch drilled hole.

The aluminum build plate produces a smooth surface that’s entirely irrelevant on this part. The ABS film covers the blind hole in the middle that will serve as a drill guide in the unlikely event I must remove the plug.

I’ll admit it looks a bit out of place down there, though. I slobbered urethane adhesive around the central pillar and across the saddle, plugged it in, put a rock on top, and the adhesive foamed into a sludge-tight seal. At least I hope that’s how it worked out; I’m not going to pop it off just to find out.

The solid model looks about like you’d expect:

Never let it be said that a Thing-O-Matic lacks practical applications…
The OpenSCAD source:
// Plug for septic drain field pipe hole
// Ed Nisley - KE4ZNU - Mar 2011

include </home/ed/Thing-O-Matic/lib/MCAD/units.scad>

// Extrusion values

ThreadThickness = 0.33;
ThreadWT = 1.75;
ThreadWidth = ThreadThickness * ThreadWT;

HoleWindage = ThreadWidth;			// enlarge hole dia by extrusion width

// Pipe dimensions

PipeOD = 5 * inch;					// which is *4* inch cast iron pipe
PipeWall = (3/8) * inch;
PipeID = PipeOD - 2*PipeWall;

PipeLength = 2*PipeOD;				// for ease of viewing

HoleDia = (1 + 1/2) * inch;			// from a 1-1/2 inch hole saw

PatchOD = 2*HoleDia;
PatchThick = 10.0;					// a burly patch for a big old pipe

DrillDia = (1/4) * inch;			// pilot hole for removal, just in case

// Convenience settings

Protrusion = 0.1;					// extend holes beyond surfaces for visibility

// The central plug

module PlugBody() {
  difference() {
	cylinder(r=HoleDia/2,h=(PipeOD/2 + PatchThick));
	rotate([90,90,0])
	  cylinder(r=PipeID/2,h=PipeLength,center=true);
  }
}

// The shell on the pipe

module PlugShell() {
  difference() {
	cylinder(r=PatchOD/2,h=(PipeOD/2 + PatchThick));
	rotate([90,90,0])
	  cylinder(r=PipeOD/2,h=PipeLength,center=true);
  }
}

// Build it, with rotate/translate to put it flat on its back

rotate([0,180,0])
  translate([0,0,-(PipeOD/2 + PatchThick)])
	difference() {
	  union() {
		PlugBody();
		PlugShell();
	  }
	  translate([0,0,PipeOD/2])
		cylinder(r=DrillDia/2,h=(PatchThick + Protrusion));
	}