The Smell of Molten Projects in the Morning

Ed Nisley's Blog: Shop notes, electronics, firmware, machinery, 3D printing, laser cuttery, and curiosities. Contents: 100% human thinking, 0% AI slop.

Category: Electronics Workbench

Electrical & Electronic gadgets

  • SJCAM M20 Camera: Car Mode Battery Hack

    SJCAM M20 Camera: Car Mode Battery Hack

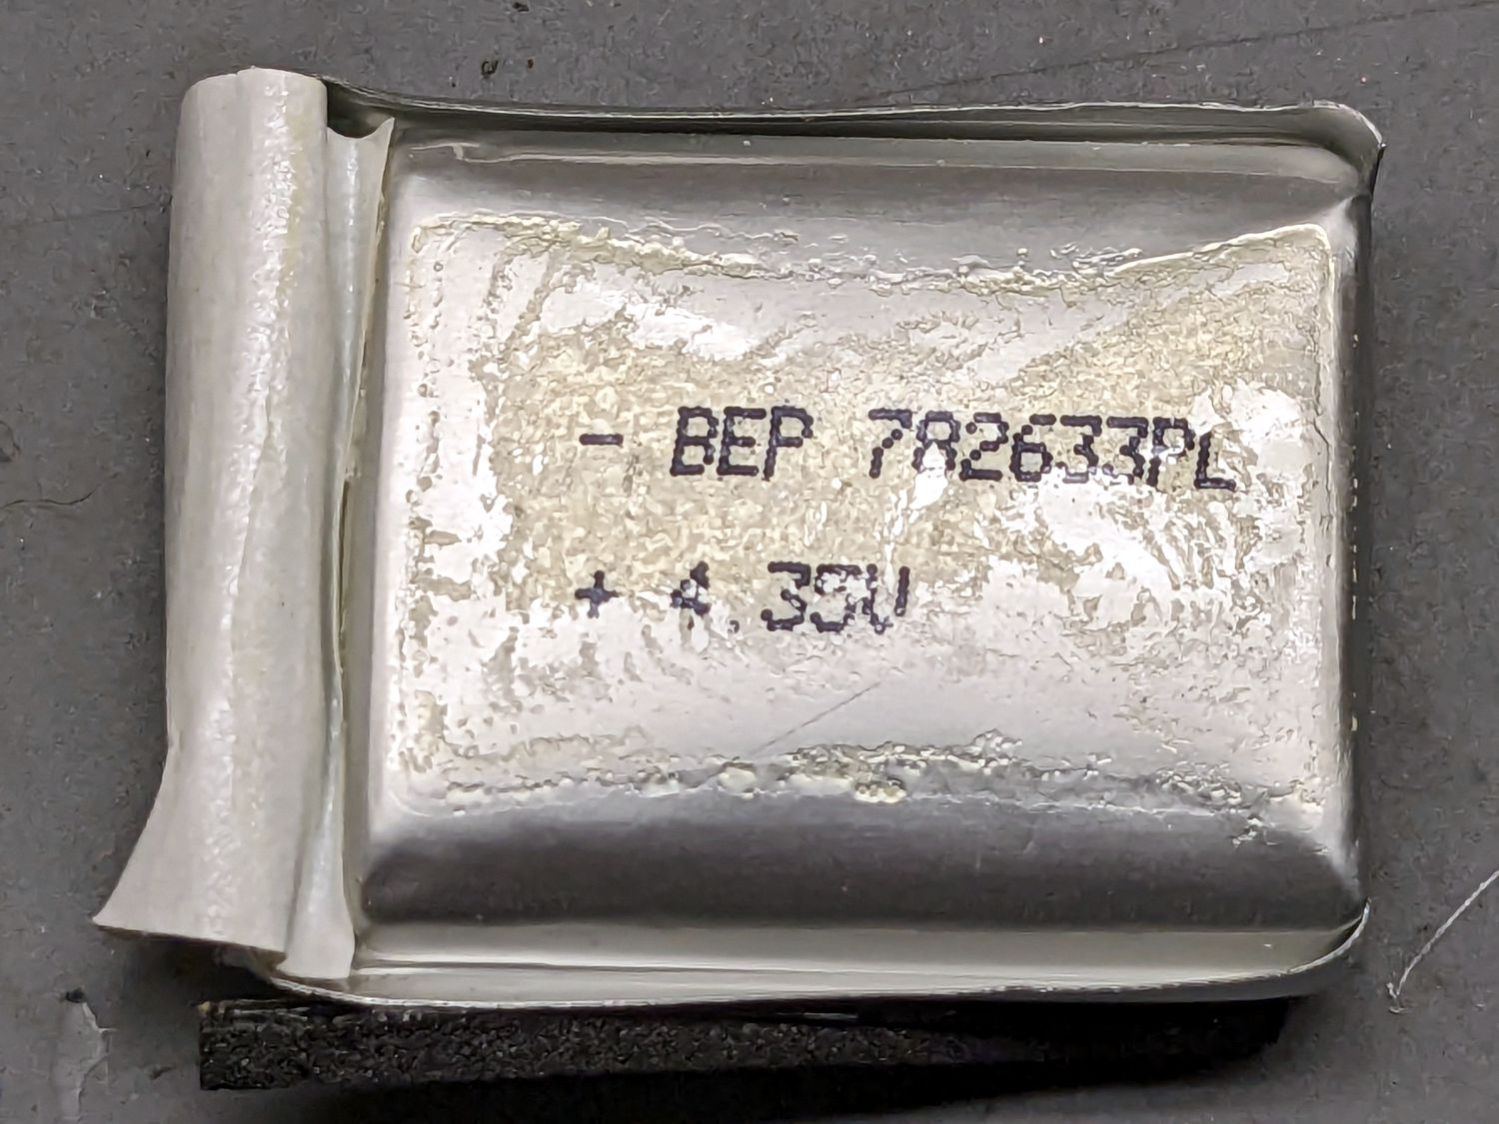
    The last lithium cell (a.k.a. battery) for the longsuffering SJCAM M20 transformed itself into a spicy pillow:
    SJCAM M20 - spicy pillow lithium battery
    SJCAM M20 – spicy pillow lithium battery

    SJCAM no longer sells those batteries and nobody else does, either, surely because the +4.35V marking shows they’re a special-formula high-voltage lithium mix that doesn’t work with ordinary chargers. Worse, you can’t substitute an ordinary (i.e. cheap) battery, because applying a high-voltage charger to a 4.2 V cell makes Bad Things™ happen.

    Putting the M20 camera in Car Mode makes it begin recording when it sees 5 V on its USB input and shut down a few seconds after the USB input drops to 0 V. Without the internal battery, the camera’s clock doesn’t survive when the external power vanishes, which seems critical for a camera sitting on a dashboard.

    Mashing all that together, I wondered if I could use one of the many leftover low-voltage NP-BX1 batteries from the Sony AS30V helmet camera without starting a dashboard fire, by preventing the camera from charging the battery, while still using it when the USB input is inactive (which, for our car, is pretty nearly all the time).

    The circuitry, such as it is, uses a cheap 1S USB charge controller and a Schottky diode:
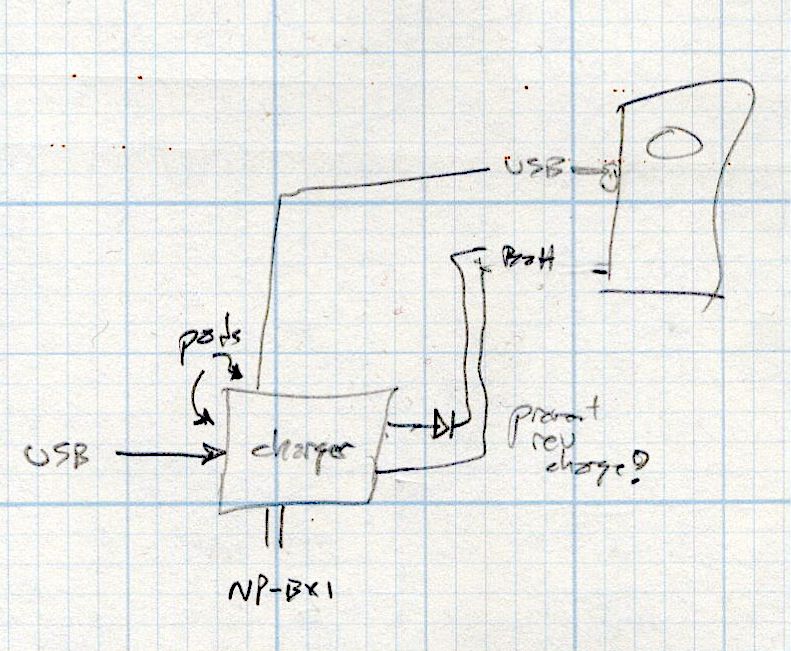
    SJCAM M20 Car-Mode Battery Hack - circuit doodle
    SJCAM M20 Car-Mode Battery Hack – circuit doodle

    Power comes in on the left from a USB converter plugged into the Accessory Power Outlet in the center console and goes out to the camera’s USB jack, using a butchered cable soldered to the charge controller’s pads in the middle. The controller manages the NP-BX1 battery as usual, but a diode prevents the camera from trying to send charge current into the controller.

    This should just barely work, as the diode reduces the battery voltage by a few hundred millivolts, so the camera will see the fully charged low-voltage battery as a mostly discharged high-voltage battery.

    Suiting action to words:
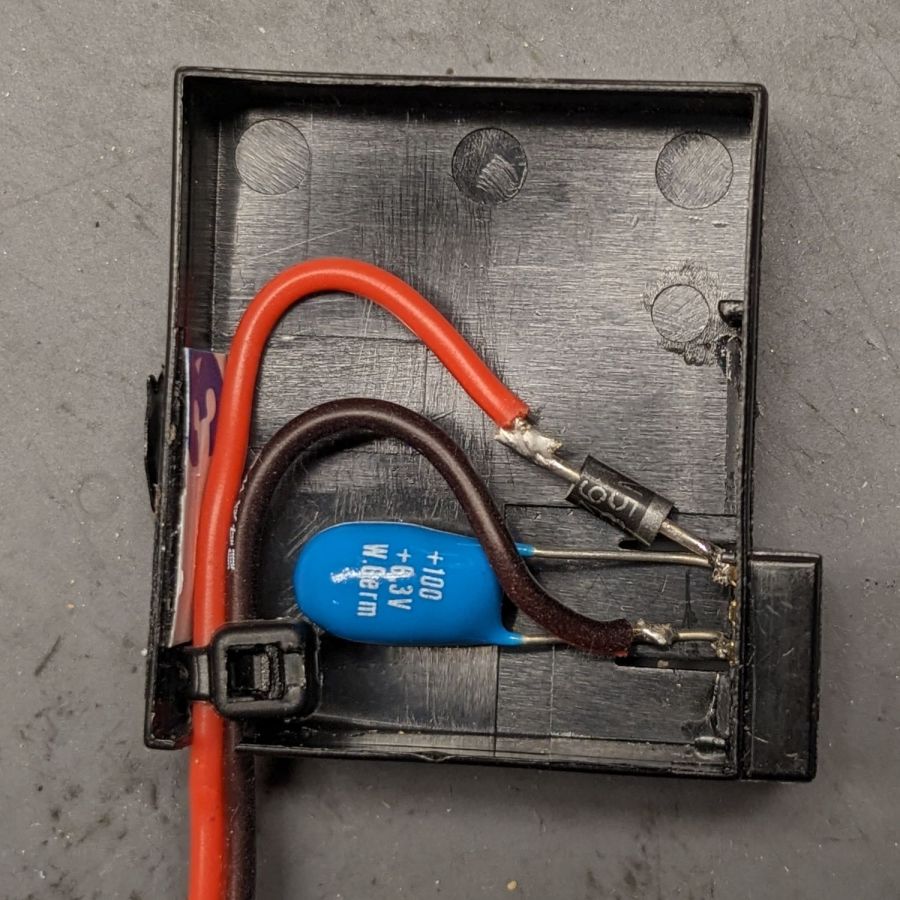
    SJCAM M20 Battery Replacement - circuitry
    SJCAM M20 Battery Replacement – circuitry

    It’s built inside the gutted remains of an M20 battery case. The 100µF tantalum cap provides local buffering to prevent the camera from browning out during bursts of file activity while recording. The wire emerges through holes gnawed in the battery case and the camera housing:
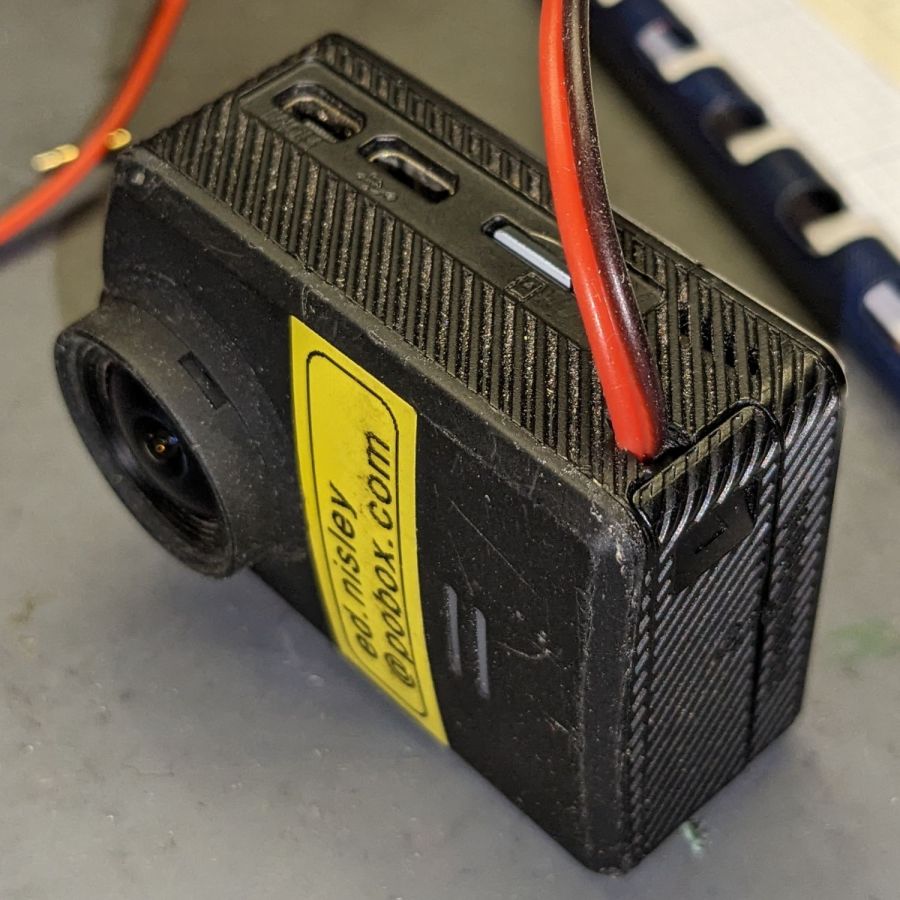
    SJCAM M20 Battery Replacement - camera cable exit
    SJCAM M20 Battery Replacement – camera cable exit

    The charge controller on the other end of the wire lives in a layered laser-cut acrylic case attached to a modified version of the venerable 3D printed NP-BX1 battery holder:
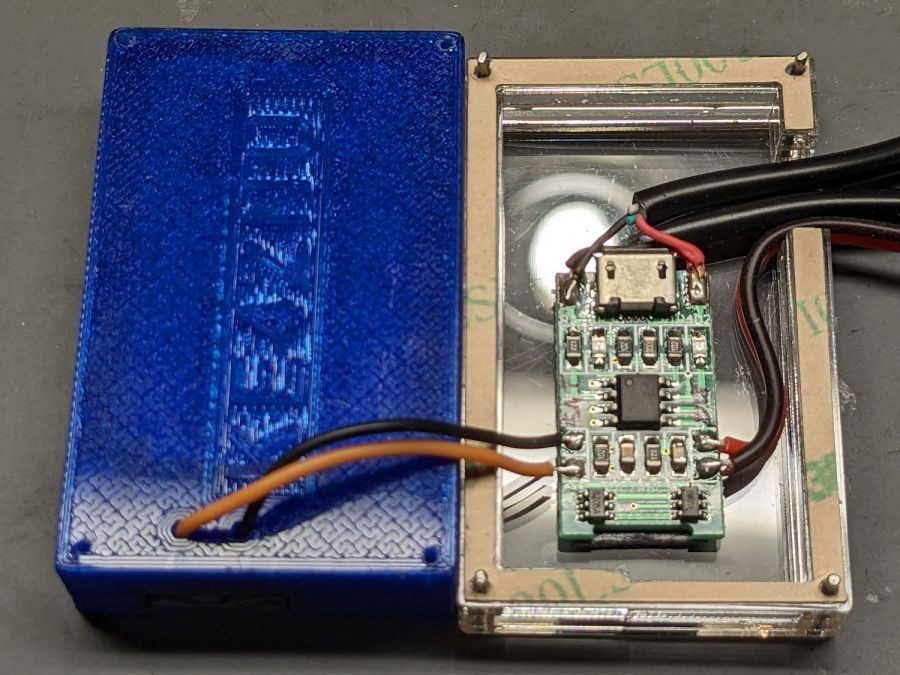
    SJCAM M20 Battery Replacement - charger wiring
    SJCAM M20 Battery Replacement – charger wiring

    More on the cases tomorrow.

    Putting it all together, the lashup goes a little something like this:
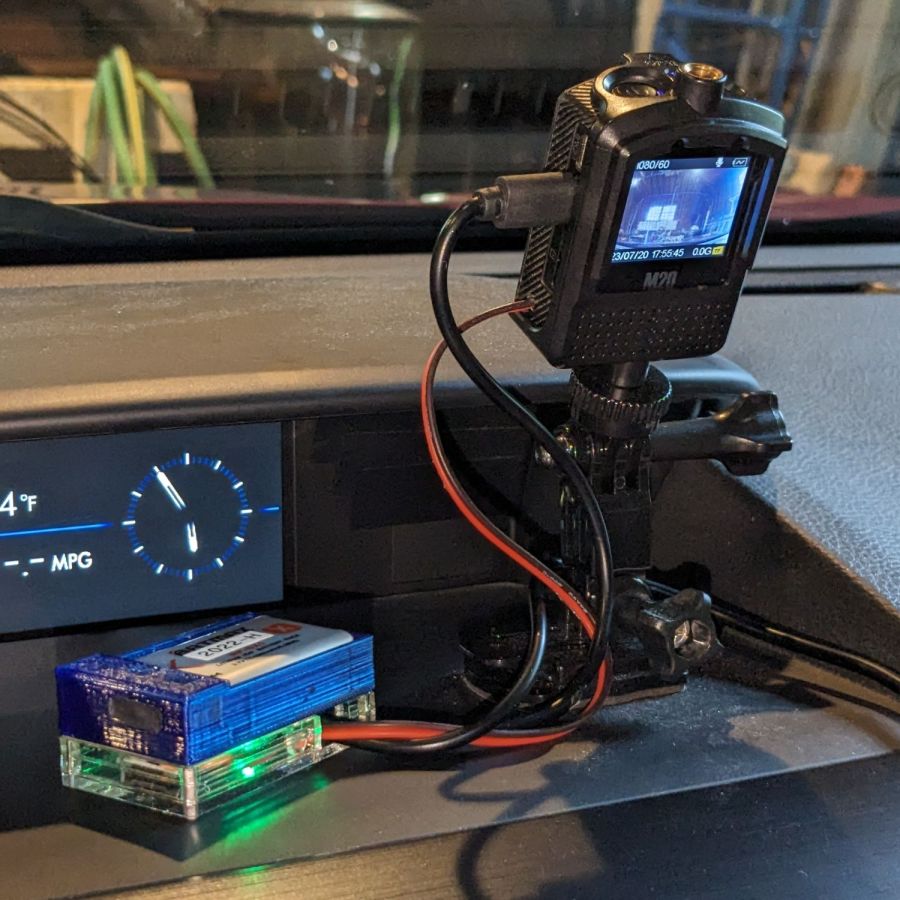
    SJCAM M20 Battery Replacement - trial install
    SJCAM M20 Battery Replacement – trial install

    The battery pack will eventually get stuck to the dashboard underneath the overhang, out of direct sunlight. Things get hot in there, but with a bit of luck the battery will survive.

    The rakish tilt puts the hood along the bottom of the image, although raising the camera would reduce tilt and cut down on the skyline view:

    SJCAM M20 Car-Mode Battery Hack - test ride
    SJCAM M20 Car-Mode Battery Hack – test ride

    The battery icon instantly switches from “charging” to “desperately low” when the USB power drops, which is about what I expected, but the camera continues to record for about ten seconds before shutting down normally.

    The NP-BX1 battery in the holder comes from the batch of craptastic BatMax batteries with a depressed starting voltage. An actual new cell with a slightly higher voltage would keep the camera slightly happier during those last ten seconds, but … so far, so good.

    Another possibility would be a trio of 1.5 V bucked lithium AA cells, with the diode to prevent charging and minus the charger.
  • Gooseneck LED: First Failure

    Gooseneck LED: First Failure

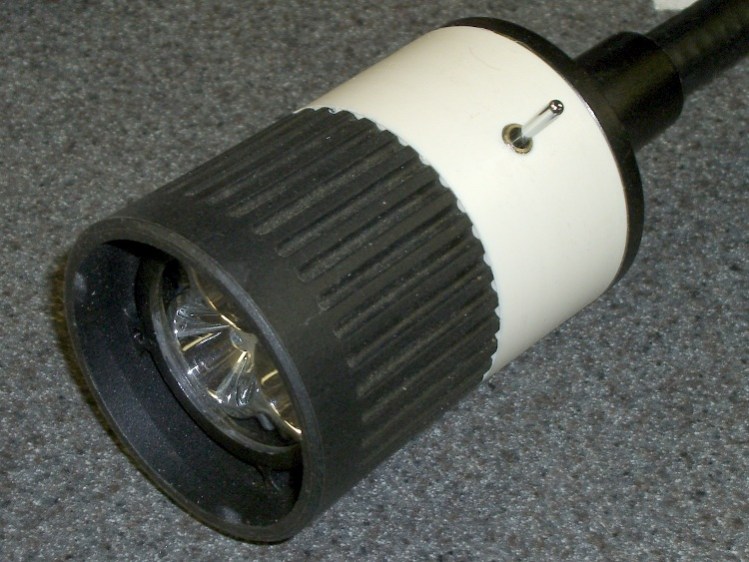
    Twelve years ago I rebuilt a gooseneck lamp to carry a surplus LED head:

    Finished LED Floodlight
    Finished LED Floodlight

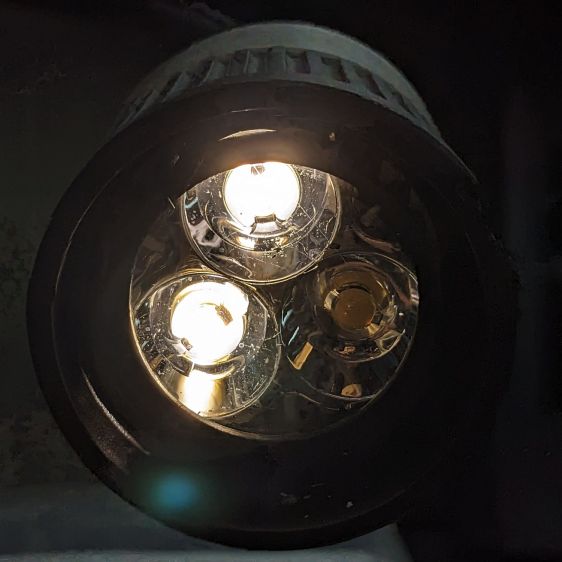
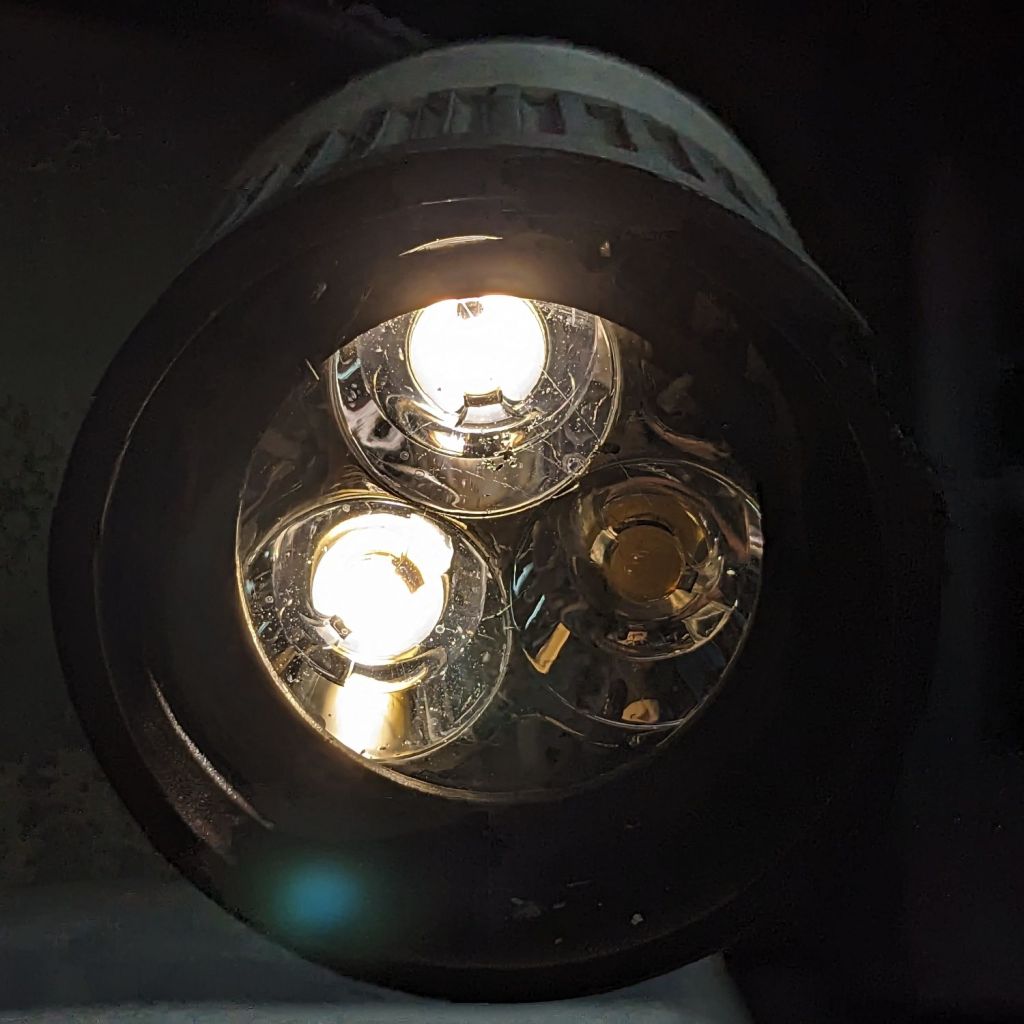
    One of its three LEDs just failed:

    LED Gooseneck lamp - first failure
    LED Gooseneck lamp – first failure

    Given that I very deliberately glued the whole thing together in the sure knowledge “the lamp should outlast me” and much later built the other LED head into a desk lamp, well, it’s like that and that’s the way it is.

    The Sherline will be just a little bit dimmer in all those photos …

  • Laser Power Measurement: Geometric Beam Absorber

    Laser Power Measurement: Geometric Beam Absorber

    CO₂ laser power meters seem to depend on a flat-black absorbing surface to soak up a (typically unfocused) beam pulse, backed by a known metal mass with a thermocouple to measure the temperature rise above ambient. Knowing the pulse width, the temperature rise, the absorber mass and specific heat capacity, you can compute the pulse energy and average power during the pulse.

    Previous tinkering with an old Gentec ED-200 showed this works well, although the absorber surface took something of a beating because it was definitely not rated for the OMTech’s 60 W (claimed) beam power.

    Rather than using a spendy absorber surface with a durable coating, perhaps a geometric absorber using reflective surfaces arranged to channel the energy into the material, rather than away from it, might suffice.

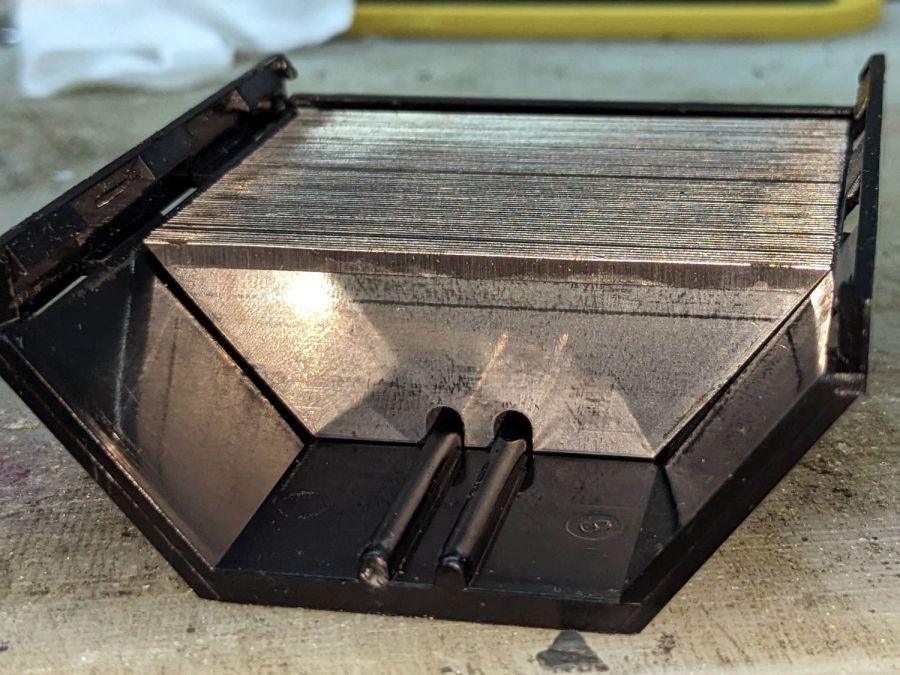
    Consider a pack of ordinary utility knife blades:

    Beam absorber - utility blades - overview
    Beam absorber – utility blades – overview

    Seen kinda-sorta perpendicular to the sharpened side of the blade edge, they’re wonderfully reflective:

    Beam absorber - utility blades - edge flat
    Beam absorber – utility blades – edge flat

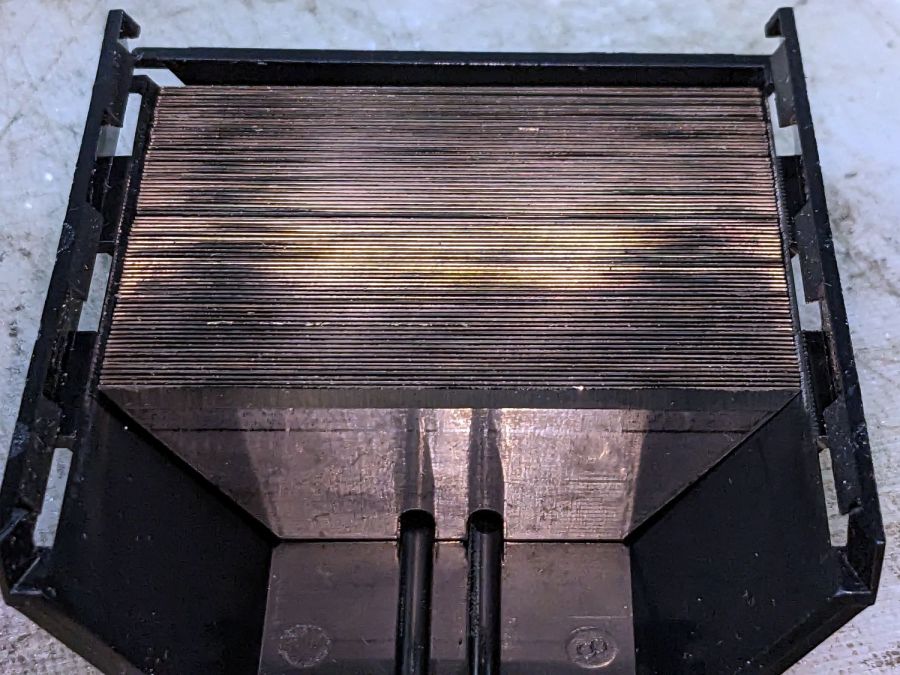
    Seen perpendicular to the edge itself, they’re dead black:

    Beam absorber - utility blades - edge-on
    Beam absorber – utility blades – edge-on

    Well, pretty close to dead black. It’s darker in real life, with glimmers along the edge and the rest of it a deep black. The edges are sharp, but utility knife blades will lead a rough life and they don’t start out Scary Sharp.

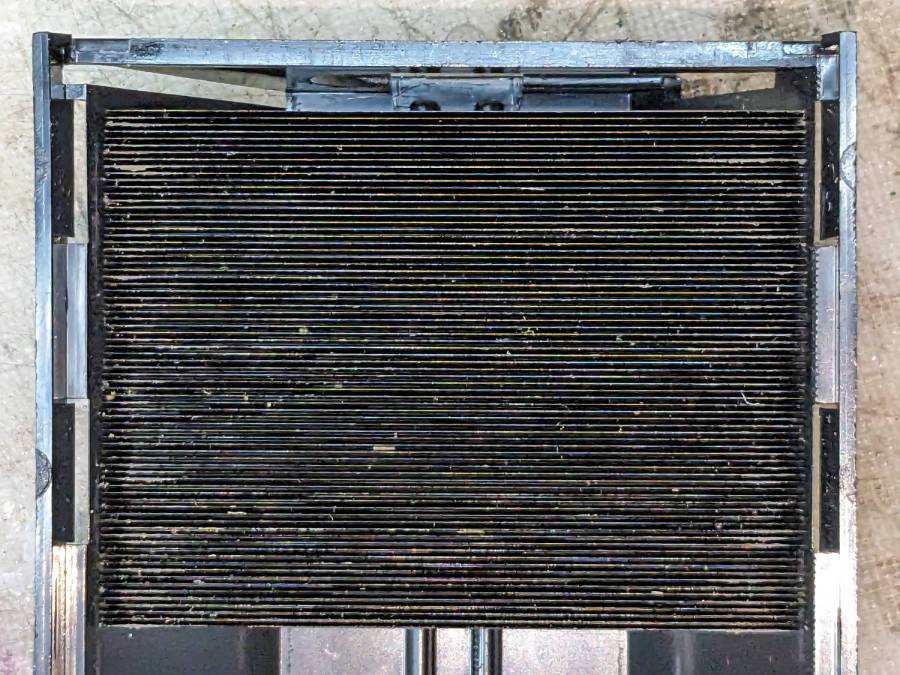
    Xacto blades come closer to an ideal razor edge:

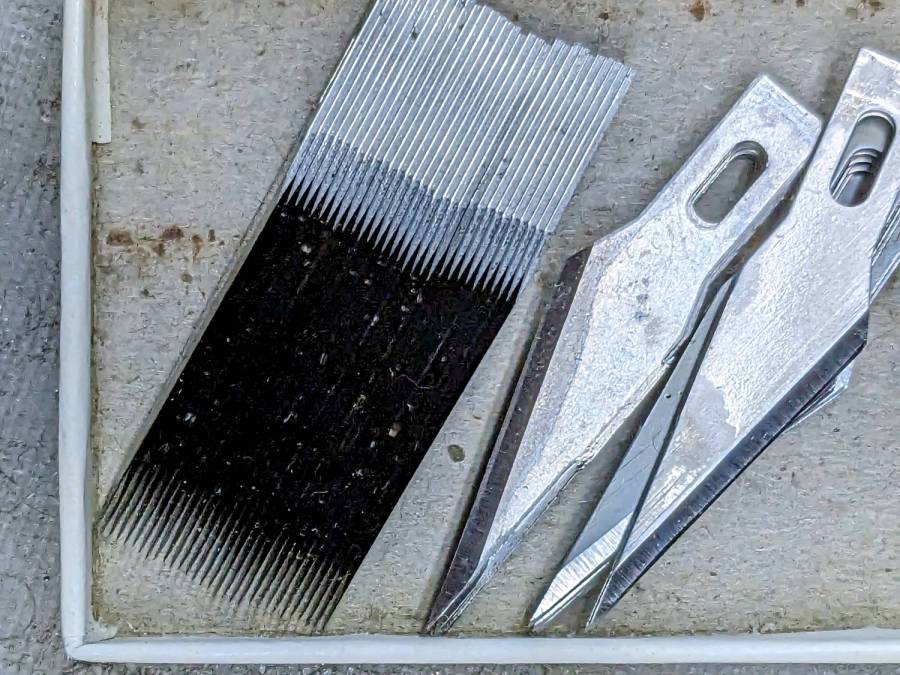
    Beam absorber - Xacto 11 blades - edge-on
    Beam absorber – Xacto 11 blades – edge-on

    The only things you (well, I) see is dust on the edges. The rest is dead black, because light hitting any shiny surface is reflected deeper into the notch between two blades and eventually absorbed.

    Double-edge razor blades are sharper and would likely be even blacker, particularly cheap ones without fancy lubricating coatings.

    Bonus: the wavelength of CO₂ laser IR light is 10-20× that of visible light, which makes the surfaces that much more reflective. The geometry still channels the reflections into the block and nothing comes out.

    There are some fairly obvious reasons why nobody uses a stack of razor blades as a beam absorber in real life:

    • Lethally sharp cutting hazard
    • Impossible to clean without wrecking the edge

    But for personal use, why not?

    Some doodles:

    Steel has a specific heat around 0.47 J/g·K and a stack of utility blades weighing 140 g is 23 mm across. Soaking up a 60 W beam will raise the temperature of the stack by:

    0.91 K/s = 60 J/s / (0.47 J/g·K × 140 g)

    Which seems reasonable: fire a 10 s burst, measure the temperature rise, and multiply by 0.91.

    Similarly, a stack of Xacto #11 weighing 15 g is 11 mm across and the temperature will rise 8.5 °C/s. You’d use that for lower power beams.

    You could clamp the blades into a larger heatsink, perhaps with a thermocouple / thermistor in a hole drilled into the block.

    Calibrate the stack / heatsink with an embedded cartridge heater: voltage × current × pulse width gives the power dumped into the block, so measuring the temperature rise gives you the temperature-power relation.

    This feels like a great Arduino project, although it’s nowhere near getting started.

    At least I got that scrap of paper off my desk …

  • Kenmore 362.75581890 Oven Igniter: Third Contestant

    Kenmore 362.75581890 Oven Igniter: Third Contestant

    Although the oven igniter I just installed worked, its 3.0 A current fell below the gas valve’s minimum 3.3 A, which, based on past experience, suggested it would fail in short order. Just to see what happened, I sent a note to the seller, who offered a warranty swap and, after a bit of fiddling, the replacement arrived:

    Oven Igniter B - 3.3 A initial current
    Oven Igniter B – 3.3 A initial current

    This one draws exactly 3.3 A, so it just barely meets both its product description and the gas valve’s minimum current.

    We’ll see how long this lasts …

  • SJCam M50 Condensation

    SJCam M50 Condensation

    I put the camera in the front yard to monitor a new groundhog hole, then mowed the lawn. Although smoke drifting in from the Canadian fires has posed a problem, the air quality wasn’t this bad:

    SJCam M50 camera condensation - foggy image
    SJCam M50 camera condensation – foggy image

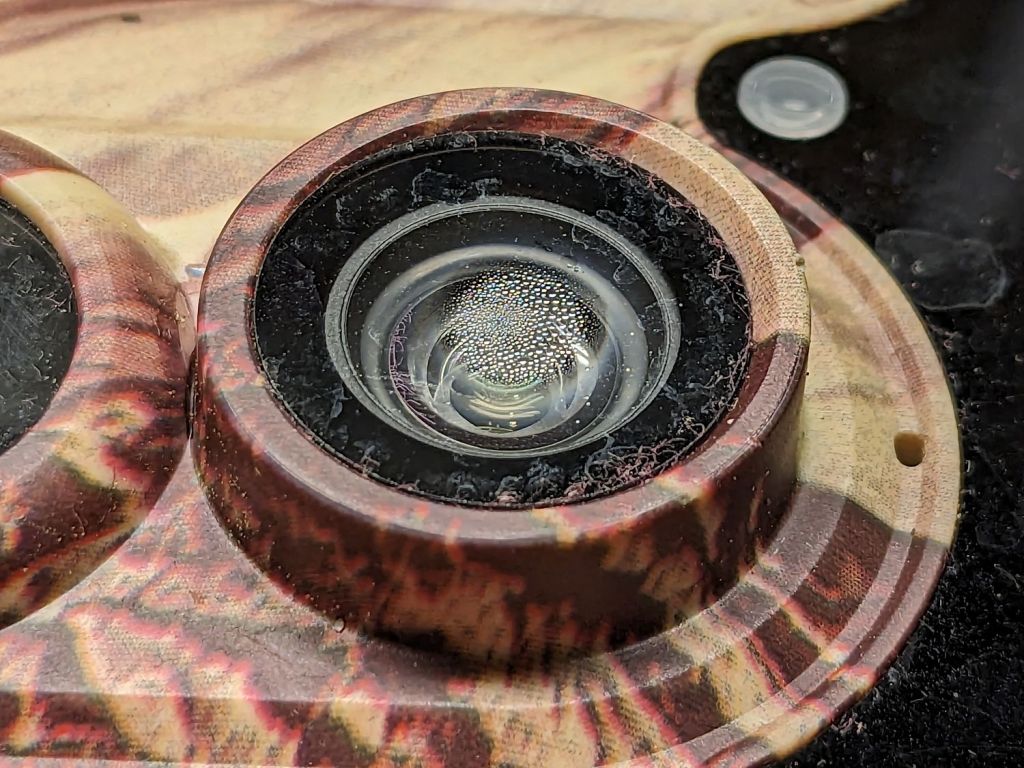
    It turns out the camera’s case seal isn’t quite up to the task:

    SJCam M50 camera condensation - detail
    SJCam M50 camera condensation – detail

    The lip around the front half of the case presses against a rubber gasket around the rear half, which means the water on the electronics chassis is inside the camera case:

    SJCam M50 camera condensation - case edge
    SJCam M50 camera condensation – case edge

    Fortunately, the water condensed on the inside of the glass lens protector, rather than on the camera itself:

    SJCam M50 camera condensation - interior
    SJCam M50 camera condensation – interior

    I let the whole thing dry out on the bench for a few days and all seems right again.

    The leak does make me think leaving it out in the rain is a Bad Idea™, which isn’t the sort of thought one should have about a trail camera.

    Diurnal pumping can explain many electronic failures. For the record, the monitoring station on the Walkway Over the Hudson vanished a while ago, probably due to rampant electronic corrosion.

  • Sunbeam Clothes Iron Salvage

    Sunbeam Clothes Iron Salvage

    For just under twenty bucks, Mary has a new clothes iron and I harvested the heating element from the longsuffering Sunbeam iron:

    Sunbeam clothes iron - heater connections
    Sunbeam clothes iron – heater connections

    Per the notations:

    • AC Line enters on middle terminal to thermostat
    • Thermostat controlled Line on left terminal to heater
    • AC Neutral to heater terminal on right

    The heater measures 12.6 Ω cold, so 9.5 A → 1.1 kW.

    The iron had an insulating sleeve on the thermostat shaft capped with a plastic dial, which makes perfect sense for something in contact with the hot side of the AC power cord.

    The IC date codes suggest it’s been around since 2002, so it’s about two decades old. In that time, one of the two electrolytic capacitors succumbed to the plague:

    Sunbeam clothes iron - capacitor plague
    Sunbeam clothes iron – capacitor plague

    I think the relay and electronics implemented the iron’s timed shutoff function, but it does seem rather complex for that.

  • Kenmore 362.75581890 Oven Igniter: That Didn’t Take Long

    Kenmore 362.75581890 Oven Igniter: That Didn’t Take Long

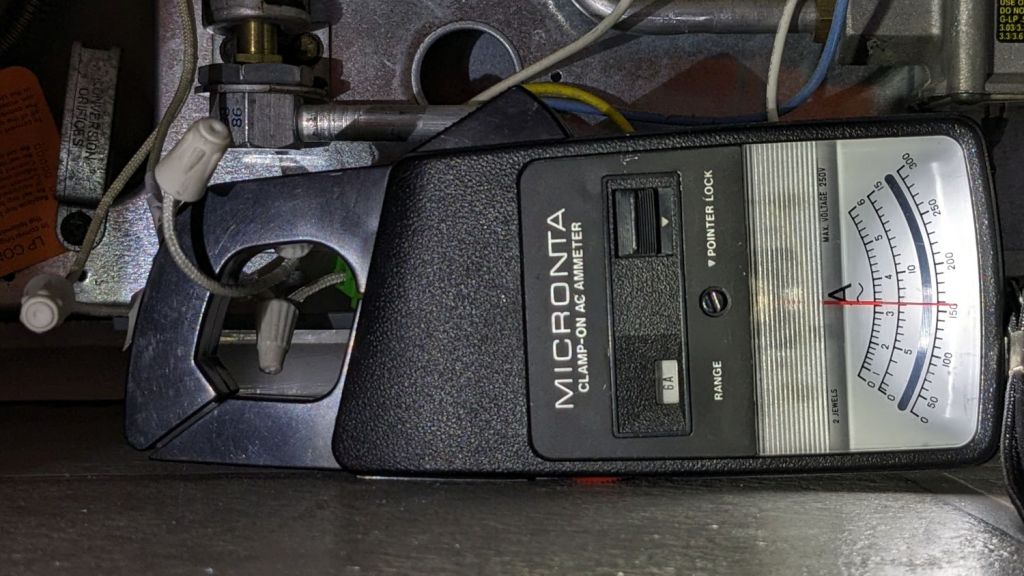
    So the oven igniter I installed in January failed to ignite the oven when its current draw fell far enough below the valve’s 3.3 A minimum:

    Oven Igniter - 2.3 A current
    Oven Igniter – 2.3 A current

    Of course, the seller no longer offers that particular igniter.

    I described the problem:

    The igniter just failed. The oven gas valve requires 3.3 to 3.6 amps to open, but this igniter now draws only 2.3 amps, as shown by the clamp-on current meter.

    Because of the low current, the valve does not open and the oven does not heat.

    The igniter should last more than five months!
    How do I go about getting a replacement or a refund?
    Thanks …

    Which generated pretty much the reply you’d expect:

    We are very sorry, because your product is 5 months from the date of purchase, we cannot offer you a refund.
    Please purchase another replacement.

    Which made me a bit salty:

    ” the best quality for greater power connection, higher load and longer service life “

    ” We stand by our products, and our customers are our focus as a business. If you have any quality problem, please contact Funmit customer service team in time, and we will try our best to solve your problems “

    So five months is “longer service life” with “the best quality”.

    Bonus: now I understand what “try our best” means, too.

    But to no avail:

    Have a nice day! We are glad to serve you.
    We are very sorry that you are not satisfied with our products.
    Amazon.com Return Policy:Amazon.com Voluntary 30-Day Return Guarantee: You can return many items you have purchased within 30 days following delivery of the item to you. Our Voluntary 30-Day Return Guarantee does not affect your legal right of withdrawal in any way.
    However, the product has passed the return and exchange period, so it cannot provide you with a warranty.
    If you have other questions, please contact us in time, we will serve you wholeheartedly. Thank you.
    Sincere wishes,
    –By Funmit

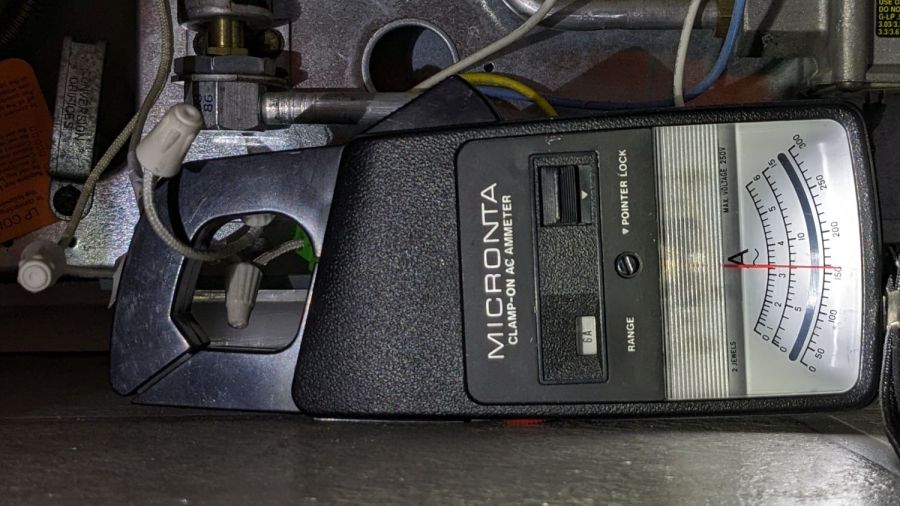
    So I bought a slightly more expensive igniter from a different randomly named seller that draws a slightly under-spec but entirely typical 3 A:

    Oven Igniter - 3.0 A initial current
    Oven Igniter – 3.0 A initial current

    This one, however, allegedly comes with a one year warranty:

    Quality you can Trust – All Snap Products are made with premium materials and are tested so they last
    Buy with Confidence – Snap Supply Parts always come with a 1 Year Warranty

    Which surely requires the seller remaining in business until then.

    We shall see how this works out.