The Smell of Molten Projects in the Morning

Ed Nisley's Blog: Shop notes, electronics, firmware, machinery, 3D printing, laser cuttery, and curiosities. Contents: 100% human thinking, 0% AI slop.

Author: Ed

  • Tour Easy Running Lights: UPP Battery Mount

    Tour Easy Running Lights: UPP Battery Mount

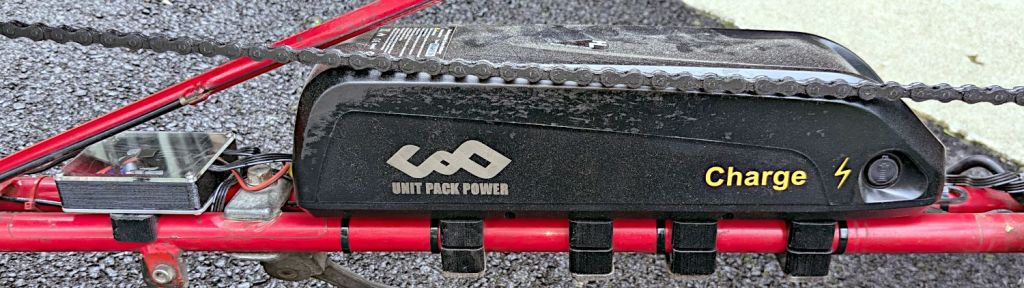
    The new Unit Pack Power ebike battery uses 21700 cells, so its mounting plate lacks the internal space I used for the buck converter and optoisolator used by the running lights on my bike:

    Tour Easy Running Light - Bafang battery base circuitry - wired
    Tour Easy Running Light – Bafang battery base circuitry – wired

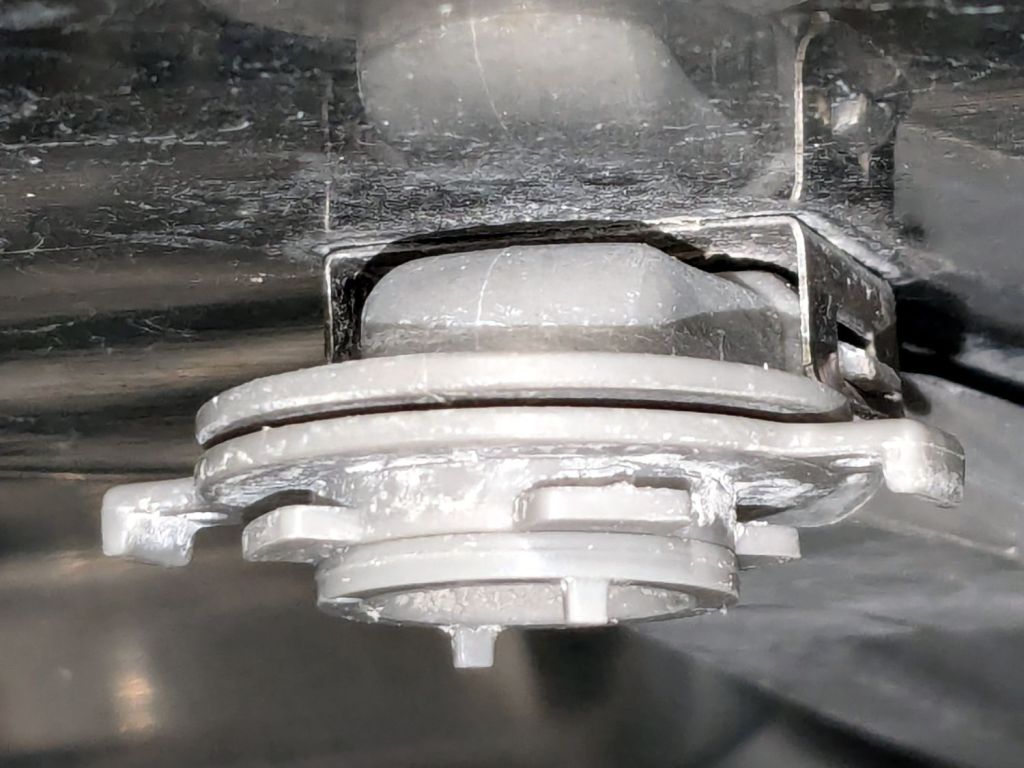
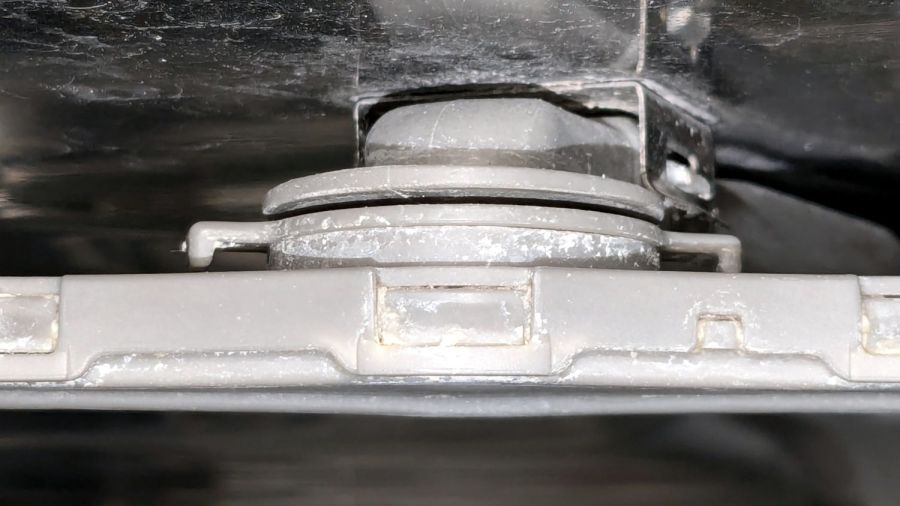
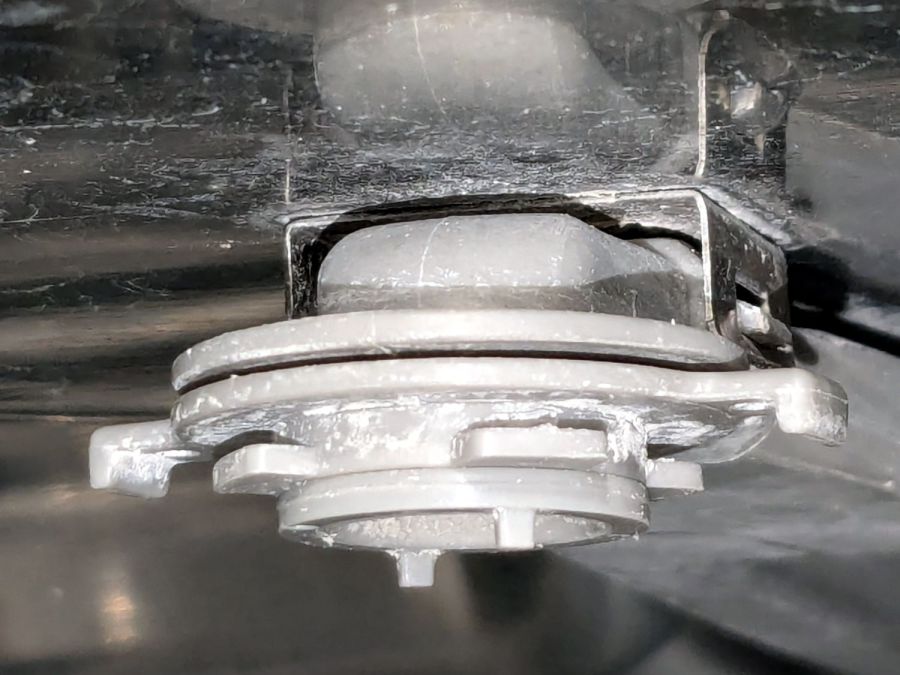
    The new mounting plate required new mounting blocks descending from the ones already on our bikes:

    UPP Battery Mount - build layout
    UPP Battery Mount – build layout

    Their top profile matches the bottom of the new battery plate:

    UPP Battery Mount - trial fit
    UPP Battery Mount – trial fit

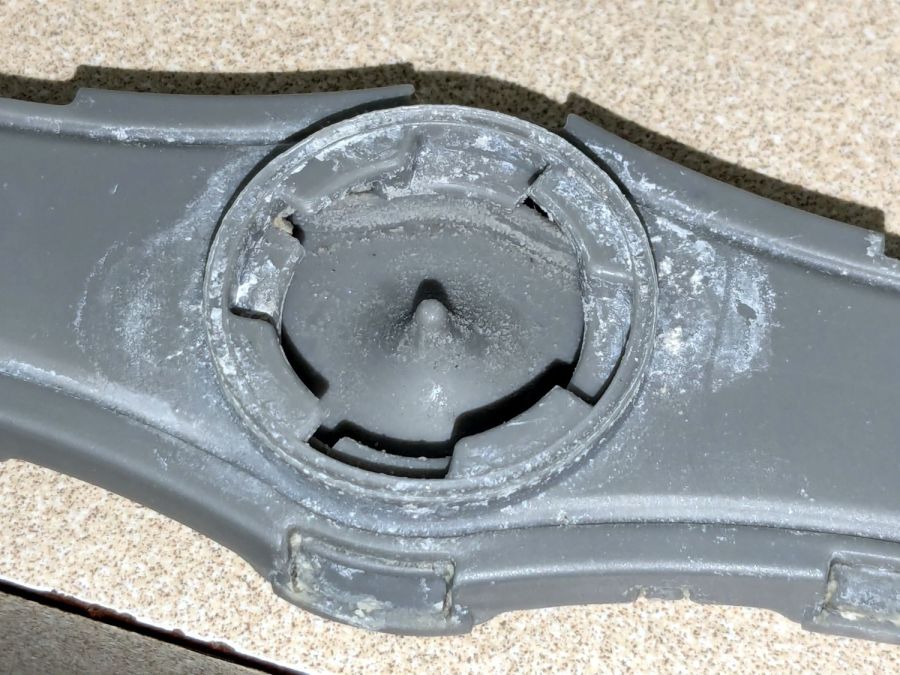
    I pulled the load spreading plates off the bottom of the old blocks, stuck them to the new blocks, and screwed everything in place:

    UPP Battery Mount - installed
    UPP Battery Mount – installed

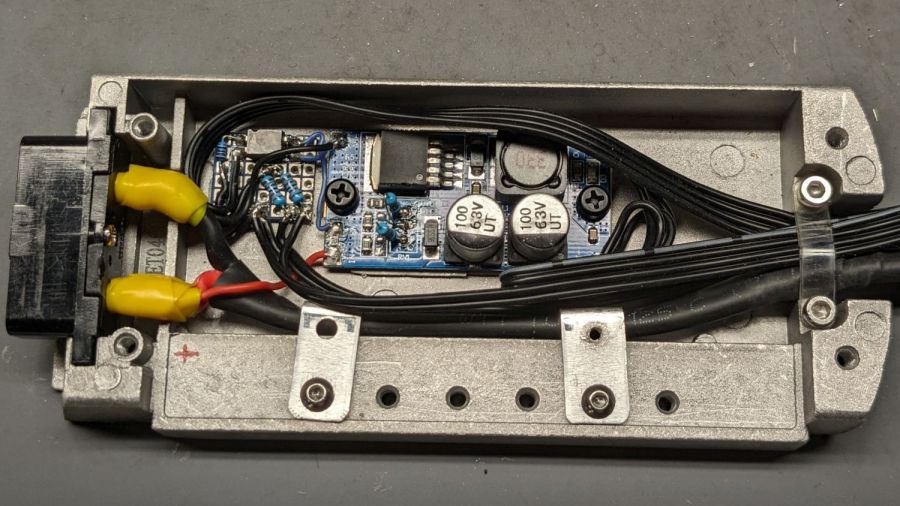
    The small box holds the buck converter that steps the 48 V battery down to 6.3 V for the running lights & the optoisolator that turns the converter on when the DPC-18 display’s USB port goes live:

    Tour Easy Running Light - electronics box interior
    Tour Easy Running Light – electronics box interior

    The baseplate is aluminum for (probably unnecessary) heatsinking under the buck converter, which sits atop an aluminum snippet isolated by heatsink tape, with a pair of nylon M3 screws holding everything together.

    The solid model looks about like you’d expect:

    Running Light - power box - Show view
    Running Light – power box – Show view

    I planned to run the mounting screw through the lid with the nut on top, so the central pillar would prevent crushing the lid. As it turned out, it was easier to put the nut inside the box on the aluminum plate and be done with it:

    Tour Easy Running Light - electronics box nut
    Tour Easy Running Light – electronics box nut

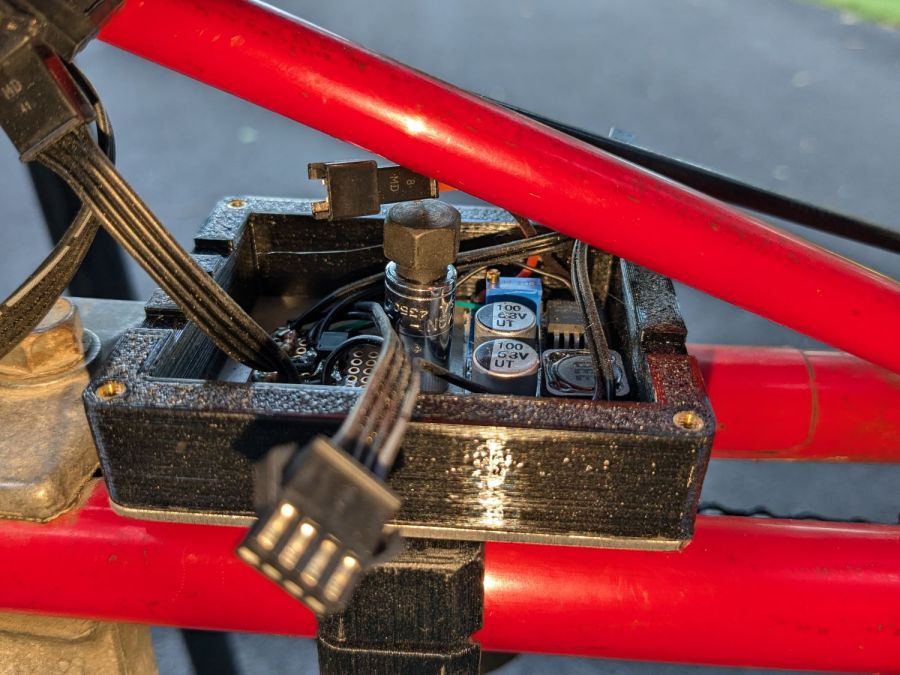
    The frame tube was too close to get a socket wrench in there, so I deployed a 1/4 inch square drive to 7/16 inch hex adapter and cranked the nyloc nut down with an open end wrench.

    As before, all the connectors are non-waterproof JST-SM, but at least they’re jammed tucked inside the box under its acrylic lid:

    Tour Easy Running Light - electronics box installed
    Tour Easy Running Light – electronics box installed

    Which has a square of electrical tape over its unused central hole. Le sigh.

    The mounting plate cable had an XT60 bullet connector pigtail that I chopped off and replaced with 45 amp Powerpoles to match the Bafang motor:

    UPP Battery Mount - Powerpoles
    UPP Battery Mount – Powerpoles

    Mostly because I have a box of Powerpoles and their crimper.

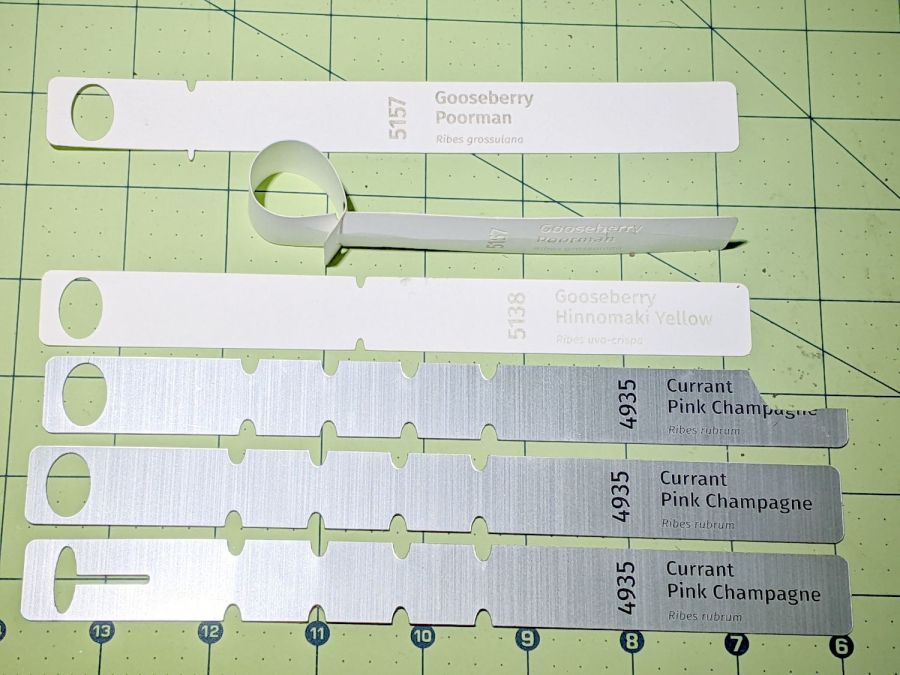
    Now Mary’s bike has the freshest battery and I get to run the three older ones in sequence on my bike. Yes, we now have four color-coded battery keys.

  • LightBurn Slot Resizing

    LightBurn Slot Resizing

    LightBurn includes a Slot & Tab Resizer tool that automagically finds and resizes joints to adapt a design for whatever material thickness you might be using. To judge from the LightBurn forum threads, it doesn’t deal well with random designs fetched from the Interwebs, which suggests those designs were either never intended for laser cuttery or just badly laid out.

    So I fetched a sheep from a typical sketchy source and attempted to resize its slots:

    Sheep DXF import - slot resize problem
    Sheep DXF import – slot resize problem

    The tool looks for rectangular shapes within the Tolerance of the Old Material Thickness width, then marks their narrow ends with red highlights and their length with blue. Obviously, not all of the slots we humans see count as slots.

    A closer look at one of the body shapes with a slightly larger Tolerance shows some of the problems:

    Sheep DXF import - body
    Sheep DXF import – body

    Using the Node Editor tool reveals two stray nodes near the bottom of the second slot from the left:

    Sheep DXF import - slots
    Sheep DXF import – slots

    Zooming in and blowing out the contrast:

    Sheep DXF import - slot bottom
    Sheep DXF import – slot bottom

    Manually deleting those nodes doesn’t solve the problem, because two more errant nodes lurk at the top of the slot:

    Sheep DXF import - slot top
    Sheep DXF import – slot top

    You probably didn’t notice those at first glance, either. Those nodes may be very close together, but they still confuse the issue.

    Rather than tracking down and deleting / adjusting those nodes one by one, you can apply the Optimize Shapes tool to squash the superfluous nodes into straight lines:

    Sheep DXF import - optimized
    Sheep DXF import – optimized

    Don’t smooth the shapes or fit them to arcs at this point, because both of those operations will round off the corners.

    That may still leave a few nodes requiring manual intervention, as on the face shape:

    Sheep DXF import - optimized leftover
    Sheep DXF import – optimized leftover

    But at least the problem becomes tractable:

    Sheep and dinosaur flock
    Sheep and dinosaur flock

    As the Bard put it, all’s well that ends well.

  • LED Light Switch: FAIL 2

    LED Light Switch: FAIL 2

    Another switch for the temporary basement LED light strips failed the same way:

    T8 LED power switch - failure 2
    T8 LED power switch – failure 2

    As always with such things, I suspect the only reason it has a UL mark on the back is because somebody else hasn’t missed theirs yet.

    So I got a three-pack of inline switches with cute little indicator lights and set about replacing all of them:

    Inline T8 power switch - internal
    Inline T8 power switch – internal

    These switches carry absolutely no regulatory approval markings, although they do claim to carry 10 A at 250 V, which I take with another load of salt.

    At least here in the US-of-A, a 240 VAC outlet has two “hot” wires carrying 120 VAC 180° out of phase, which means both conductors must be switched. Despite the voltage rating, only the L path goes through the clicky switch, with the N path along a strap just below the switch toggle. Using it on a 240 VAC circuit will kill you stone cold dead should you assume whatever it controls is turned off.

    I secured the Line and Neutral conductors with crimp connectors, rather than just wrapping the 20 AWG wires around the screw terminals, because the case halves join without perimeter nesting: a bare millimeter of air in the gap between the halves separates the terminals from my fingers. A layer of good electrical tape on each side improved that situation, but not by much.

    The complete lack of strain relief clamping on the cords prompted me to route the wires around the screw bosses. After a function check, squirts of hot melt glue anchored the two cords somewhat better.

    Aaaaand I secured that loose strap on the right with an (identical to the others!) screw from the Tray o’ Random Screws. The other switches had both screws installed, so this one must have been a QC escape.

    They suffice for the purpose, but … caveat emptor!

  • Drilled Sunflower Seeds

    Drilled Sunflower Seeds

    It seems the best bait for voles is to tie sunflower seeds to the trap trigger, but poking a needle through the seeds tends to split them.

    Well, I can fix that:

    Sunflower seeds - drilled
    Sunflower seeds – drilled

    This is “shell drilling” of a kind I had not previously encountered:

    Sunflower seeds in shell - drilled
    Sunflower seeds in shell – drilled

    Those are #52 drill holes, 63-ish mils in diameter, and pass a standard sewing needle with ease.

    The traps have been baited and deployed amid a plague of voles and I await customer feedback …

  • Tyvek Engraving: FAIL

    Tyvek Engraving: FAIL

    Spurred by Jason’s comment on the laser test paper trials, I engraved some Tyvek:

    Tyvek engraving
    Tyvek engraving

    You probably can’t see the “Test!” engraved below the blue logo, as it just changed the texture of the envelope without producing a visible mark.

    The upper-right “Test!” ran at 10% (of 60 W) at 400 mm/s, with the others at 15% and 20%. The results suggest that it’s possible to remove ink and leave a visible mark, but it’s neither pretty nor dependable.

    Somebody’s gotta have a weather-stable, super-flexy, dual-color, laserable material, but so far it’s hidden below my horizon.

  • Samsung Dishwasher: Upper Sprayer Disassembly

    Samsung Dishwasher: Upper Sprayer Disassembly

    The Samsung dishwasher has an upper rack with a rotating sprayer that was thoroughly clogged with debris from its damaged screen filter:

    Samsung dishwasher top nozzle - assembled
    Samsung dishwasher top nozzle – assembled

    The whole assembly is readily available, although it seems any discrete part of the dishwasher costs about fifty bucks and this one wasn’t exactly broken.

    It comes apart by rotating the lock ring (the one with right-angle ears sticking out on either side) 1/8 turn in the other direction from whichever way you think it should rotate. Hold the spray bar, shove the ears, and the spray arm will drop off:

    Samsung dishwasher top nozzle - unlocked
    Samsung dishwasher top nozzle – unlocked

    The inside of the spray bar shows the locking details:

    Samsung dishwasher top nozzle - sprayer
    Samsung dishwasher top nozzle – sprayer

    Now, here’s the tricky part.

    The small ring under the locking ring, the one with two square nubbins pointing downward, snaps onto the pipe carrying the water. There’s a shallow notch around the pipe, the inside of the ring has a shallow lip, and the ring holds the whole affair onto the pipe.

    Contrary to what I thought, the two nubbins do not latch onto anything. Apparently, they hold the ring in the proper position relative to the arm’s interior and that’s it.

    The only way to reassemble the arm is to snap the small ring into place, with the lock ring above it, then install the arm and turn the lock ring 1/8 turn the other way. You (well, I) cannot snap the assembled arm into place, because the nubbins don’t provide enough oomph to seat the small ring on the pipe.

    Unless I write that down, I will never remember it …

    Protip: Needle nose tweezers are invaluable for picking crud out of the nozzles. Iterate on picking and flushing with water until nothing more comes out, then expect to repeat the process several times as more crud emerges from the depths of the plumbing.

    Although it is apparently possible to disassemble the spray arm by unlatching all the snaps along the edge, I’d reserve that for a moment when lives depended on unclogging the nozzles.

  • Laser Test Paper: Outdoor Testing

    Laser Test Paper: Outdoor Testing

    “Laser test paper” is, of course, intended for testing lasers, but I thought it might make a outdoor plant tag. A while ago I tried some Trolase Thins acrylic for that job:

    Plant tags - Trolase Thin - prototypes
    Plant tags – Trolase Thin – prototypes

    Which turned out to be entirely too stiff, which wasn’t surprising given that Trolase Thin is intended for signage stuck on flat or slightly curved surfaces.

    Despite being “paper”, laser testing paper is also too stiff:

    Laser test paper - outdoor labels - 2024-06-22
    Laser test paper – outdoor labels – 2024-06-22

    The wrinkles and cracks on the left end of the tags shows the plastic coating makes it basically impossible to shape / bend the paper enough to wrap around a plant stem, then push it through the hole (offscreen to the left). I was not surprised too much by this discovery.

    Those two strips now hang outside the kitchen window (left end upward), where they’ll get enough sun and rain to keep a plant happy, and I’ll see how well the engraved / damaged plastic coating stands up to that sort of abuse.

    For Science!