Ed Nisley's Blog: Shop notes, electronics, firmware, machinery, 3D printing, laser cuttery, and curiosities. Contents: 100% human thinking, 0% AI slop.
This seemed like a good idea for dispensing small drops of acrylic solvent while gluing spiders together:
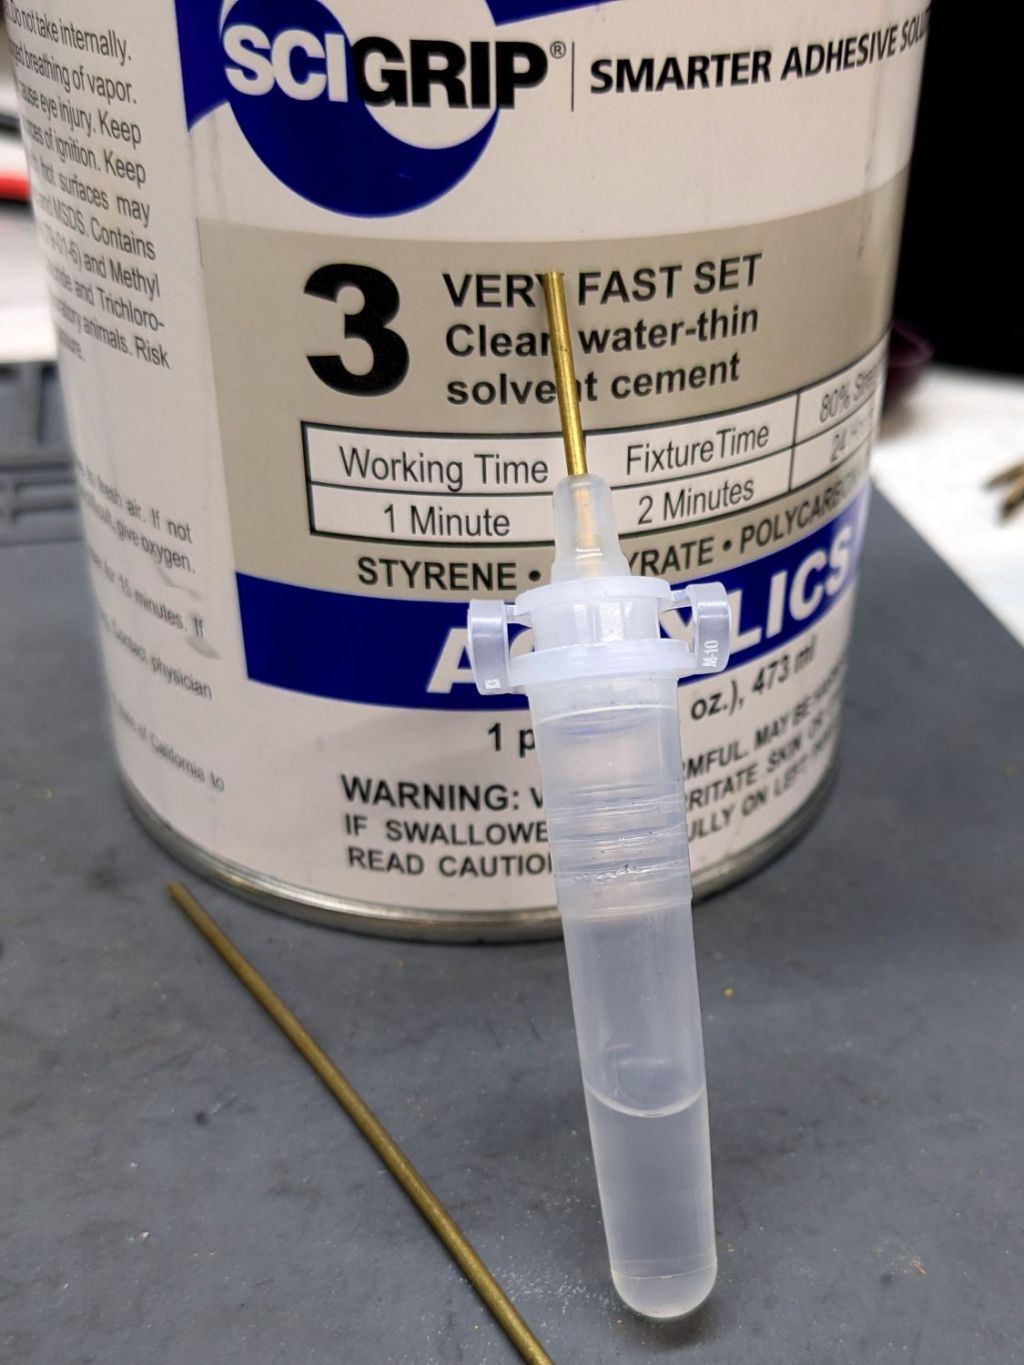
COVID test Buffer Extraction Tube – adhesive hack
It’s the Buffer Extraction Tube from a COVID-19 rapid test kit with a short brass tube jammed in its dropper tip. The longer brass tube let me suck that dose of solvent into the tube without any of the hassle required to pour the liquid from a big can into a little tube.
Tell me you didn’t save those things because you thought they didn’t look like they might come in handy for something.
Well, that turned out to be a Bad Idea™, because whatever plastic that tube is made out of cracks when exposed to the hellish mixture in SCIGRIP #3 solvent adhesive. The tube didn’t dissolve or melt, it just cracked when you (well, I) squeezed the sides.
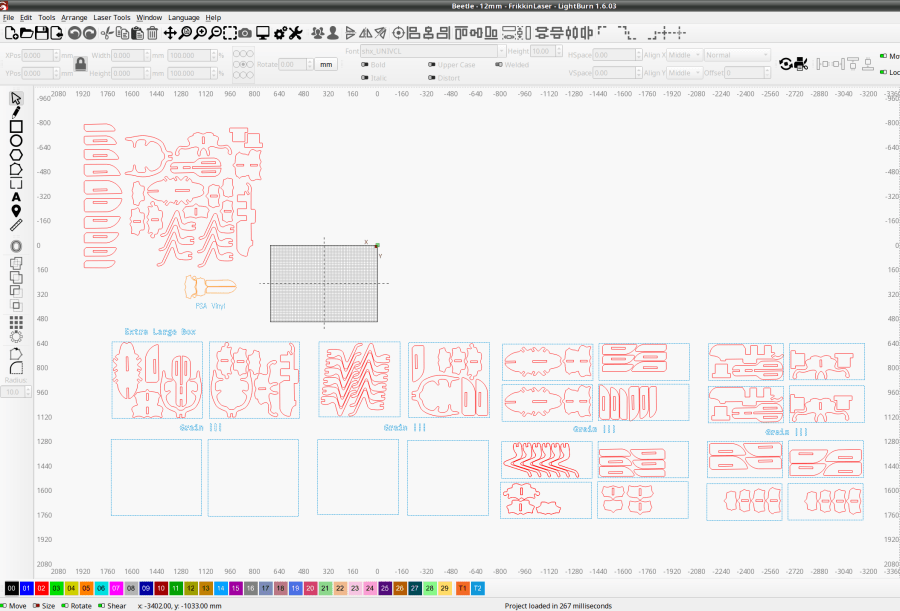
Starting from an SVG file set up for 3 mm material, apply the usual optimizations & tweaks to get a usable LightBurn file, then go nuts:
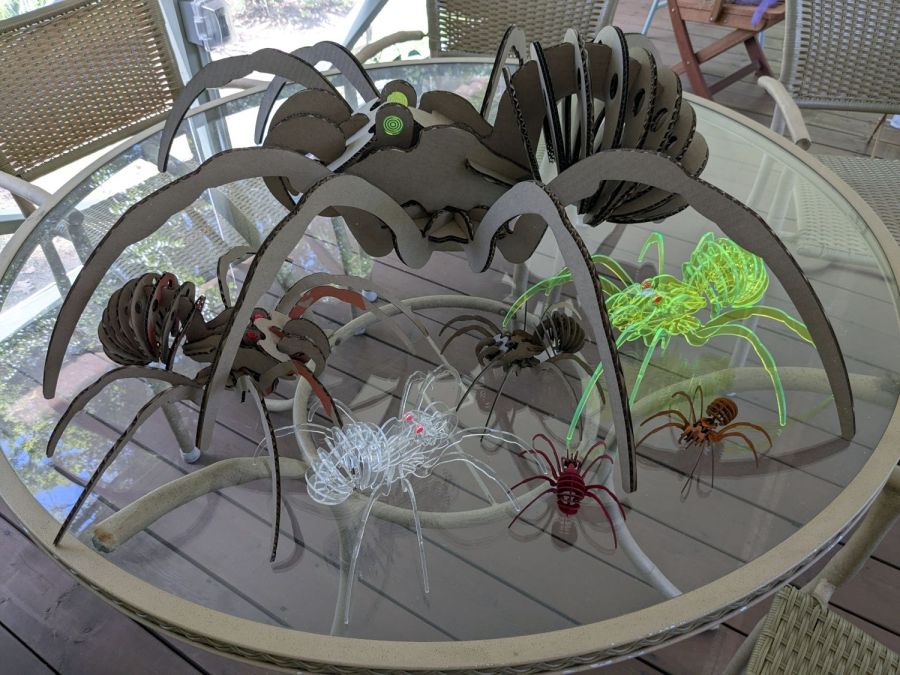
Spider Collection
The big one is two cross-laid layers of corrugated cardboard using up the better part of three Home Depot Large moving boxes:
Spider – LightBurn layout – 2x cardboard
That little bitty grid is the 700×500 mm laser cutter platform, so I just slap a sheet of cardboard in place, update the workspace from the camera, select the next layout, drag it over the cardboard, and Fire The Laser.
The smaller cardboard spider over on the left is built with a single cardboard layer and succumbed to the square-cube law: the legs are entirely too bendy for the weight of the body. Although it’s not obvious from the pictures, both cardboard spiders have a keel plate I added under the body to support most of their weight.
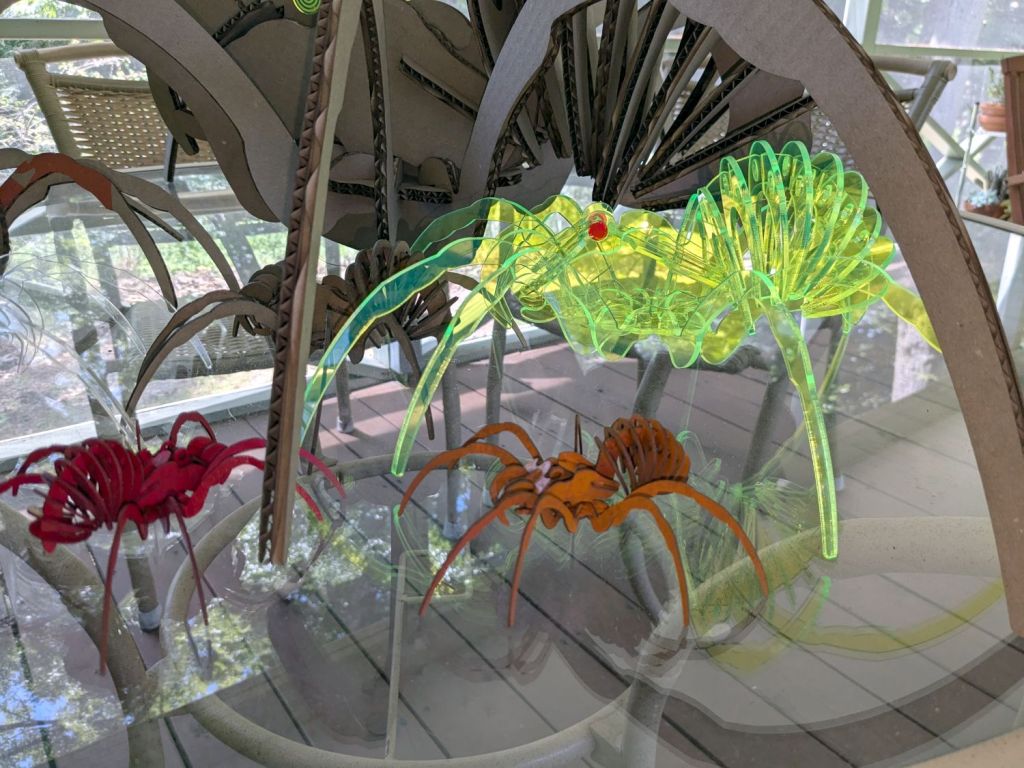
The brightly colored little spiders got a coat of rattlecan paint without any underlying primer and definitely look like that happened:
Spider Collection – detail 2
The edge-lit fluorescent green spider is sized around 2.9 mm material, the clear spider uses 2.3 mm acrylic, and the chipboard one in the background is at 1.8 mm:
Spider Collection – detail 1
The eyes are fluorescent red or green acrylic with concentric circles engraved to catch the light. They’re more effective than I expected, although they won’t look like much after dark.
We now live in a neighborhood with youngsters and Halloween this year will be so much fun …
The WordPress AI image generator caught the general idea of “cardboard spiders”:
Everything is held together by ordinary wood glue, squeezed together for a few moments until the two parts no longer slide around.
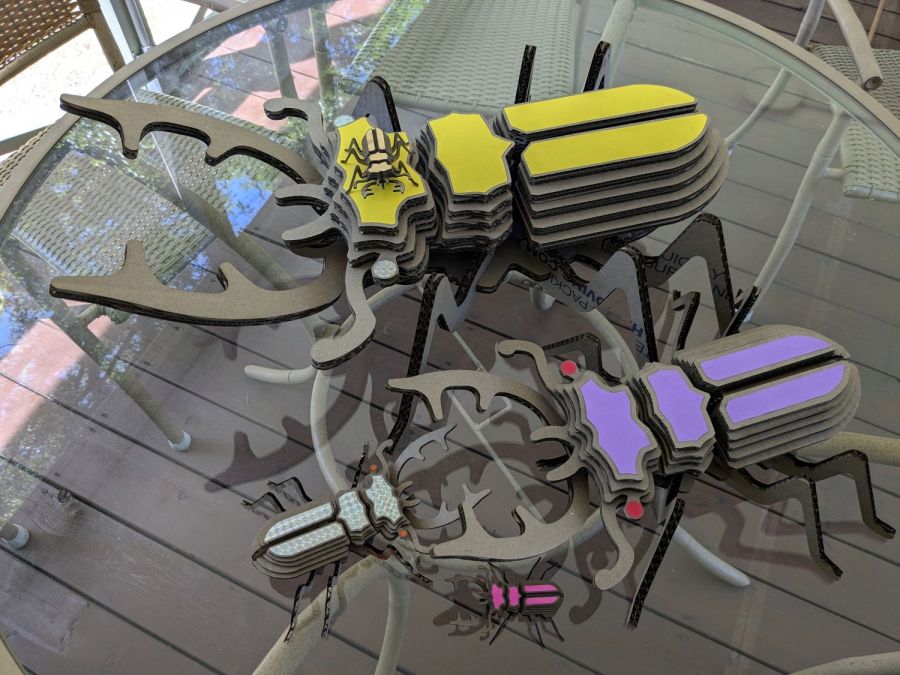
One layer of 3.9 mm corrugated cardboard:
Beetle – 1x cardboard
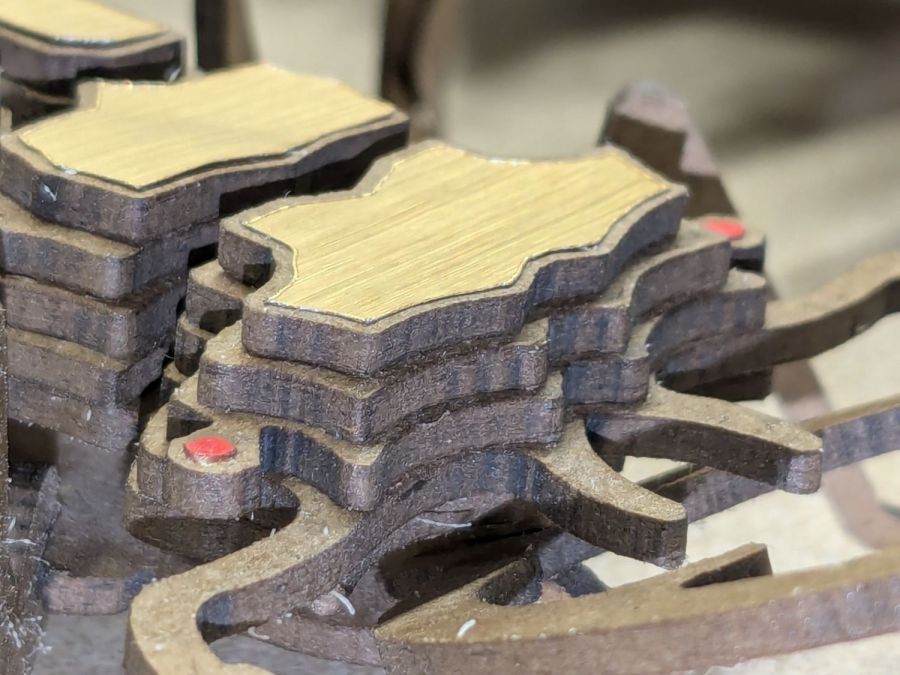
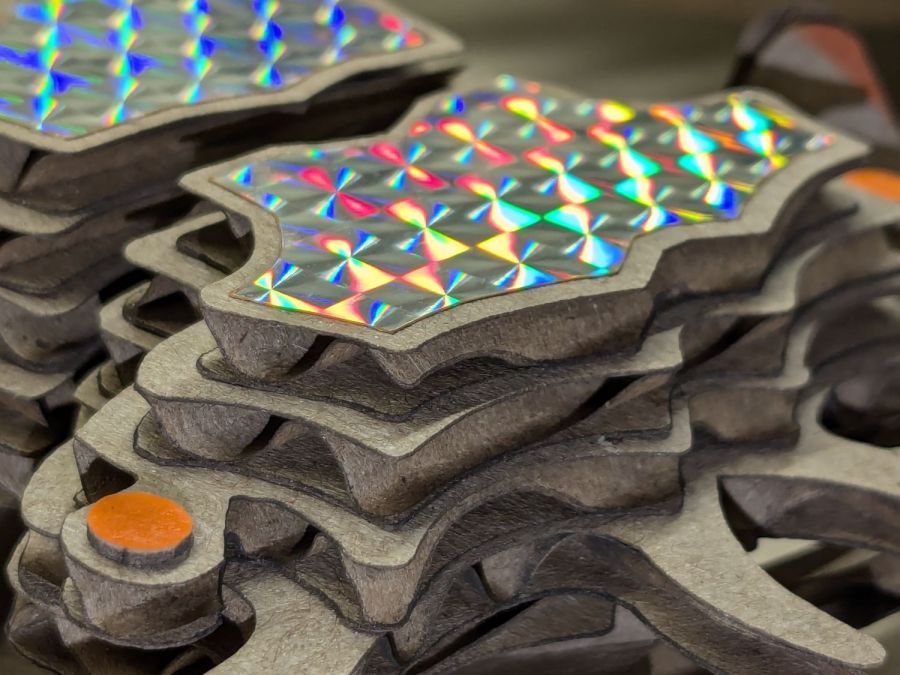
The fancy gold & hologram decorations come from what’s surely non-laser-safe PSA vinyl sheets, cut by offsetting the top layer shapes inward a reasonable amount. The eyes come from random colored paper or painted chipboard.
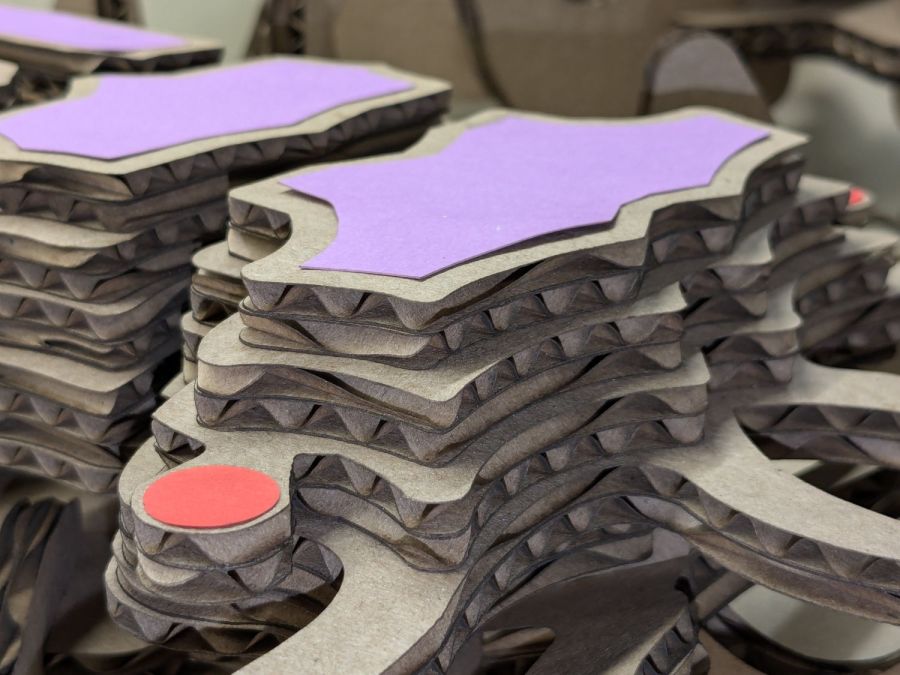
Two layers of cardboard add up to 8 mm:
Beetle – 2x cardboard
That’s purple paper left over from the layered paper quilt blocks and, obviously, my glue stick hand is weak.
Three layers of cardboard makes each part half an inch thick:
Continuing the theme of slot resizing for various materials:
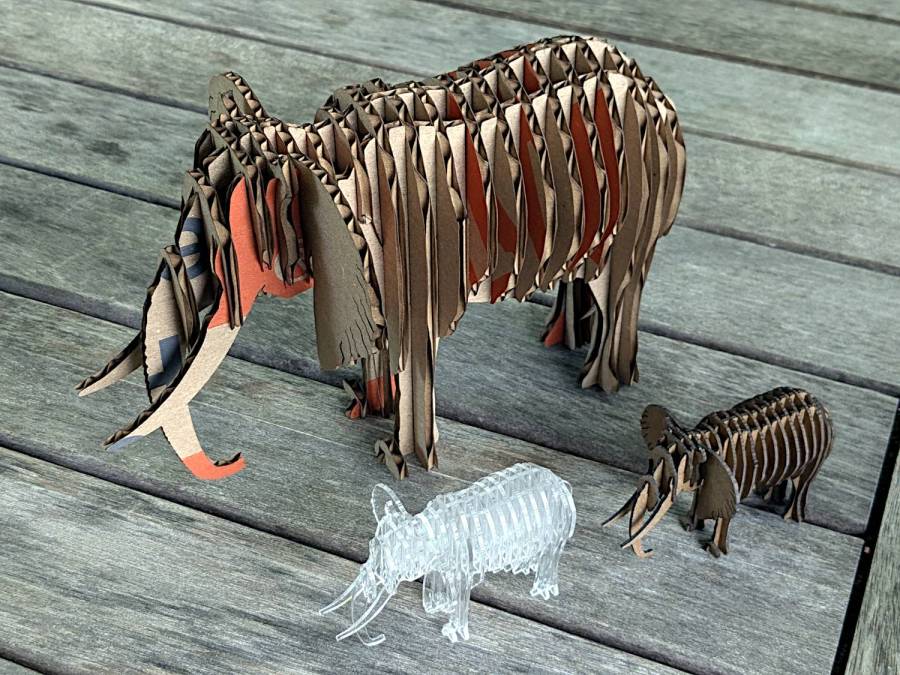
Elephants – 3.8 and 1.5 mm
The DXF pattern imports directly into LightBurn and requires the usual joining / closing / optimization before all the slots resize in unison. Doing the resize changed the slots from the original 3.0 mm to the 3.9 mm required to convert a cardboard moving box into a pachyderm.
The leg sections turned out to be a bit too thin for corrugated cardboard, so the corrugations came loose from the surface sheets, although the tail looked much more realistic. Stipulated: corrugated cardboard is the wrong material, but I really didn’t need a big MDF elephant looming over everything else.
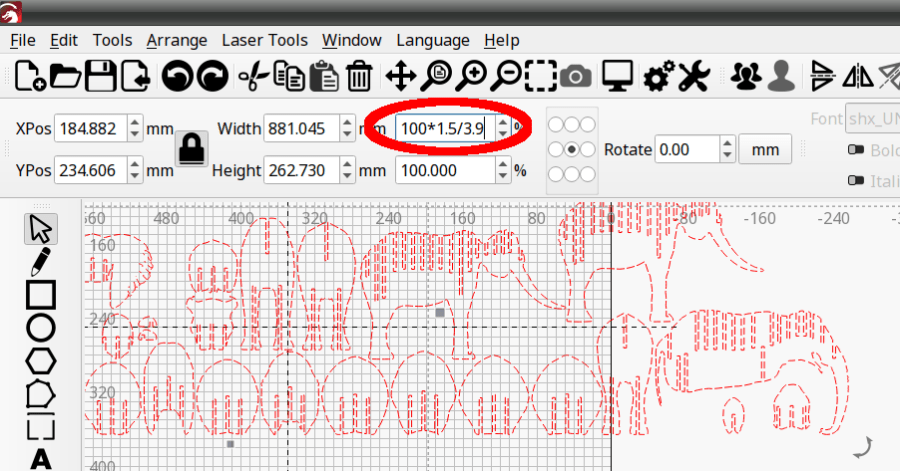
The smaller elephants, both in 1.5 mm thick materials, come from a global resize applied through the LightBurn Numeric Edit toolbar:
LightBurn Numeric Edit – percent resize
The ratio makes the slots become the new size, with the entire rest of the design scaled around them. This works if you don’t much care about the overall size, but is rare in actual practice where you need a model “that big” with the slots fitting “that material”.
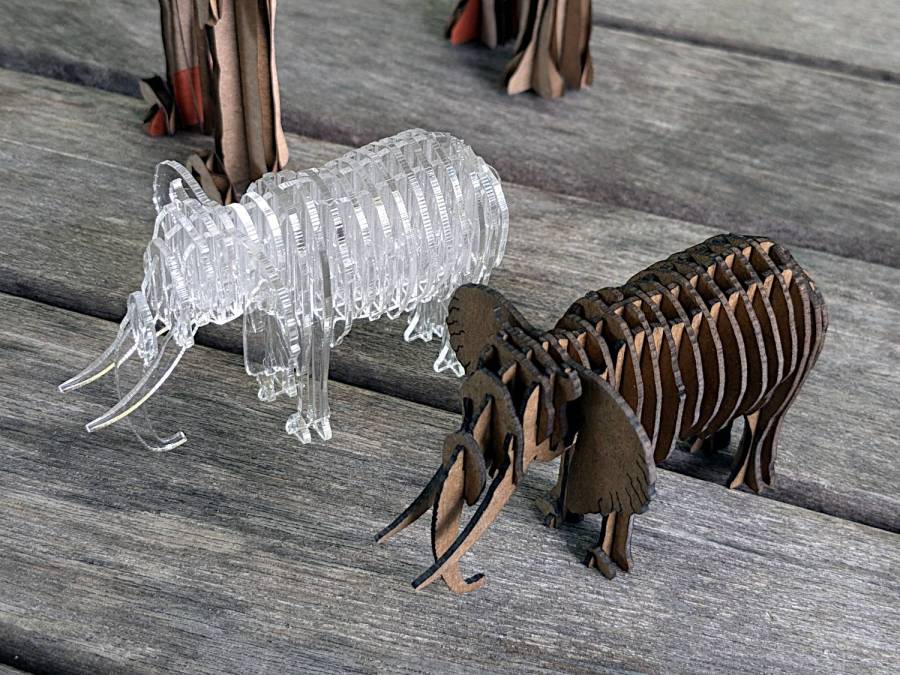
But the pieces just slid together:
Elephants – 1.5 mm detail
I put dots of cyanoacrylate in the acrylic joints, although the vapors scarred the surface enough to remind me why that’s the wrong adhesive for the job when you care about surface quality. Dots of wood glue hold the chipboard elephant together, with a quick shot of clear rattlecan paint to knock down the smell of the charred edges; I’d say the color came out about right.
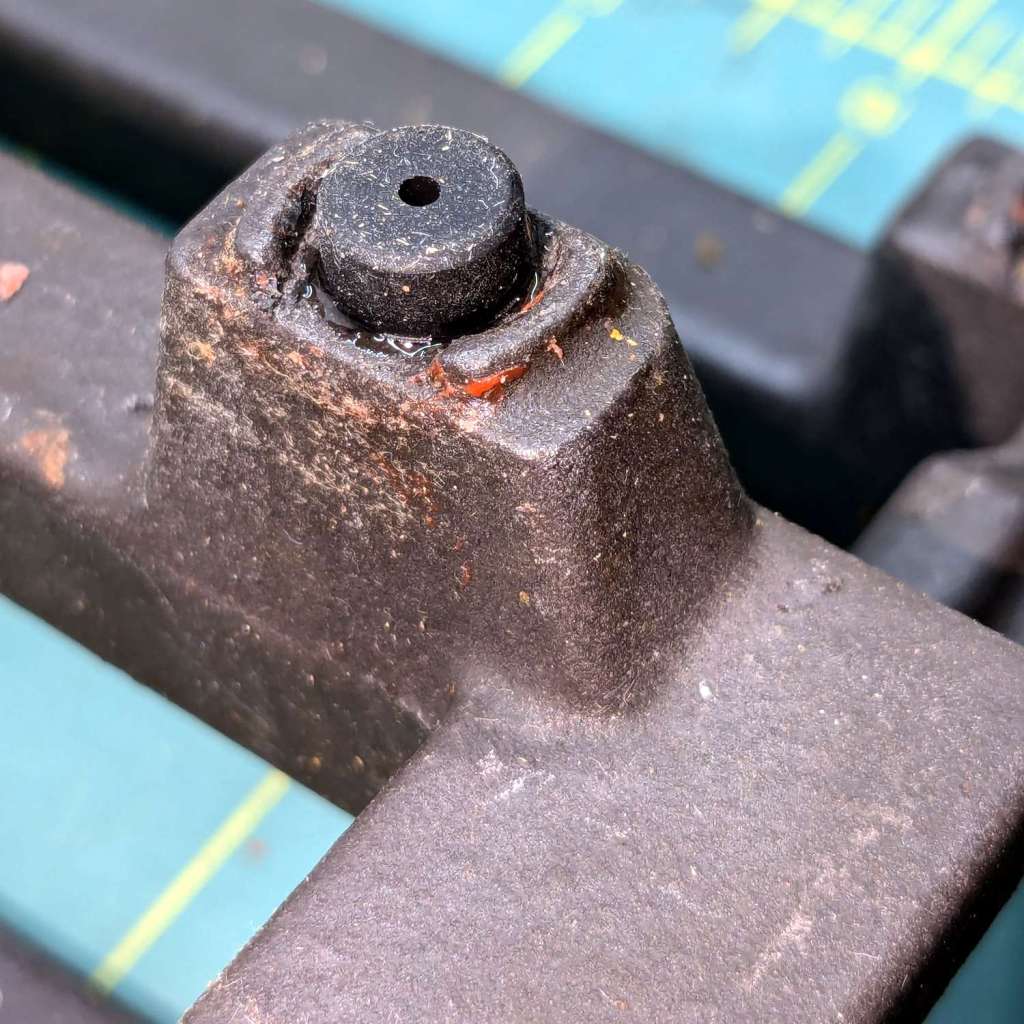
The Samsung range has ungainly cast-iron (or some such) grates that have long since worn out / lost their original Genuine Samsung rubber bumper feet. The grates had glued-on feet that looked very much like they belonged under something else, affixed with mystery adhesive that stuck firmly in some corners and let go in others:
Samsung grate – old foot
It seems Samsung no longer sells replacement feet, which may be an indication they don’t want customer complaints, so I got a bag of nominally compatible rubber feet from the usual source and broke out the cyanoacrylate glue:
Samsung grate – new foot
The red flecks are traces of a previous generation of adhesive, with the new cyanoacrylate peeking out around the base of the new foot.
The grates have holes for the stems of the feet, so in principle they have plenty of resistance to being shoved around. In practice, tipping the grates up to clean underneath them dislodged the feet with depressing regularity. The grates are too heavy and too awkward to remove and plunk somewhere else, which suggests this sort of range is better suited to a kitchen that’s never used or, perhaps, comes equipped with a support staff.
You’re supposed to use high-temperature adhesive and, in fact, the red flecks look remarkably like high-temp silicone gasket compound, but all the missing feet were along the back of the grates where the small & simmer burners live, so I figured cyanoacrylate was certainly worth a try.
When & if they fall out, I’ll know when they went in.
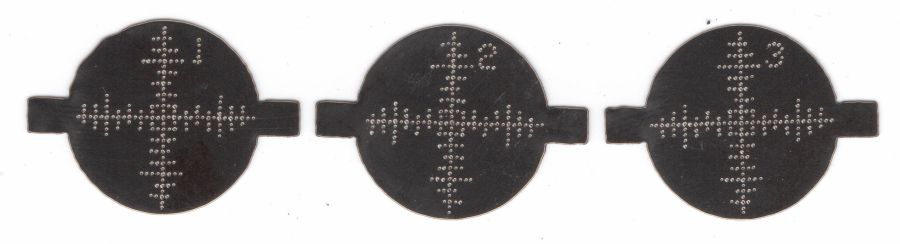
The dots just barely punch through the back side (open in a new tab & zoom for more dots):
Test paper – target patterns back side- 2024-07-03
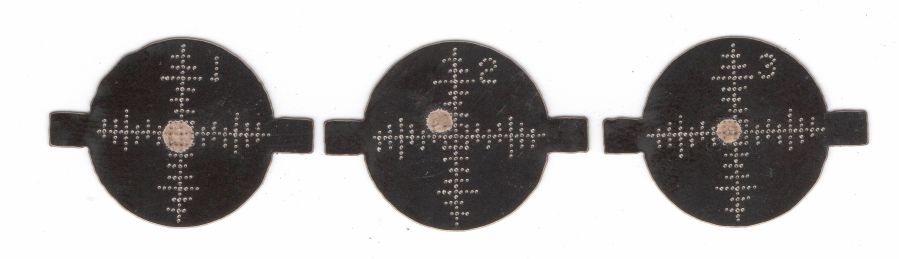
The plastic coating chars and buckles with each pulse, but remains in place:
Test paper – 2 shot – uncleaned – 2024-07-03
Wiping the surface removes the loose coating / ash / debris to expose the underlying charred paper core:
Test paper – 2 shot – wiped – 2024-07-03
Those are two pulses marking the ends of each axis, so the machine remains well aligned after the fourth-quarter tweak.
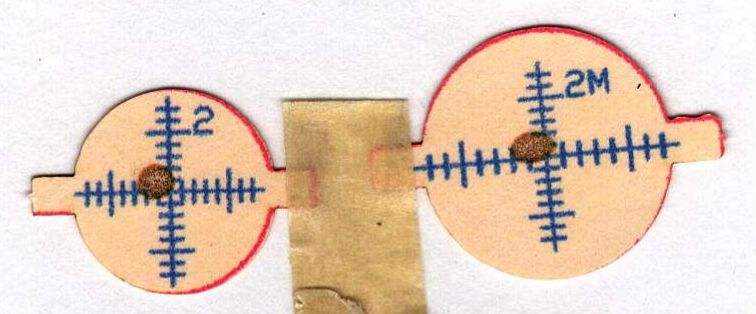
A single pulse shows the beam has a nice round shape with well-defined edges:
Test paper – 1 shot – wiped – 2024-07-03
In principle, the beam should be more intense toward the middle, but I suspect that’s beyond the paper’s ability to resolve the energy; the beam either burns through the coating or it doesn’t. In all those targets, the back surface of the paper remains undamaged.
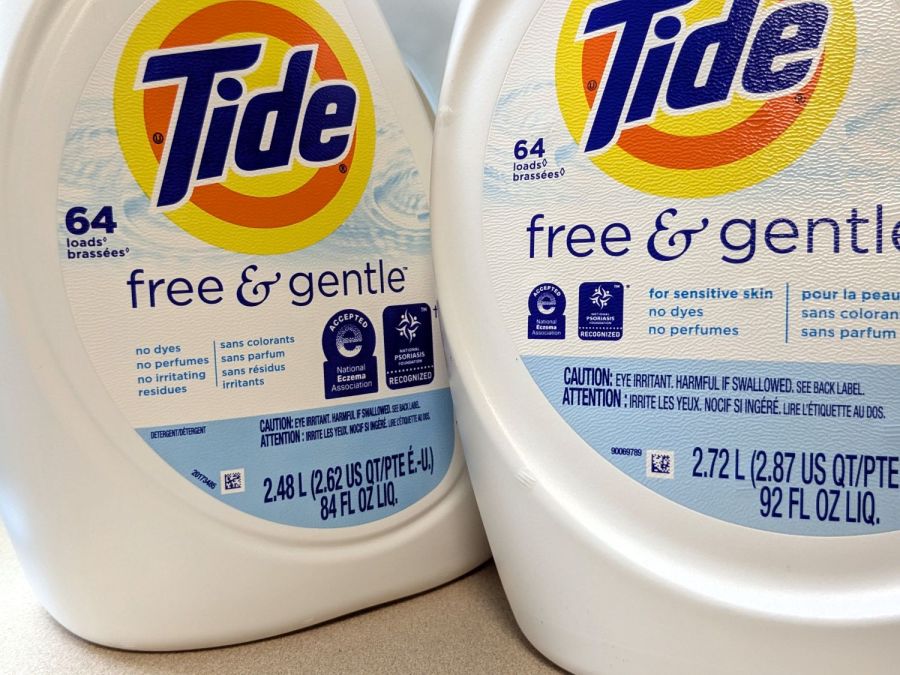
The most recent Tide HE Laundry Detergent bottles seemed smaller than the one we were about to empty and, indeed, they were:
Tide HE shrinkflation – bottle labels
Call it 9% smaller, based on the volume in liters. I suspect the price was also 9% higher, but that would require more digging in the file cabinet than seems justified.
Note that both bottles claim “64 loads”, each with an asterisk (well, a lozenge ◊ symbol) explained on the label:
Tide HE shrinkflation – new load bars
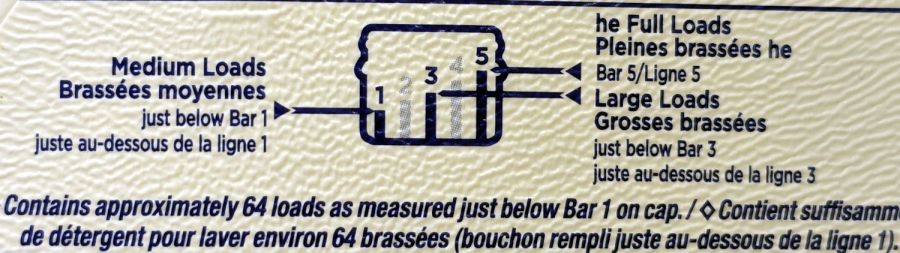
That’s the new chart. The old chart was more explanatory:
Tide HE shrinkflation – old load bars
Note the “just below Bar 1 on cap” weasel wording. The term “meniscus” enters the chat, although laundry detergent doesn’t have much in the way of surface tension.
One might reasonably assume the bars on the new cap have gotten shorter, so that the volume of detergent used for each load would be smaller.
One would be wrong:
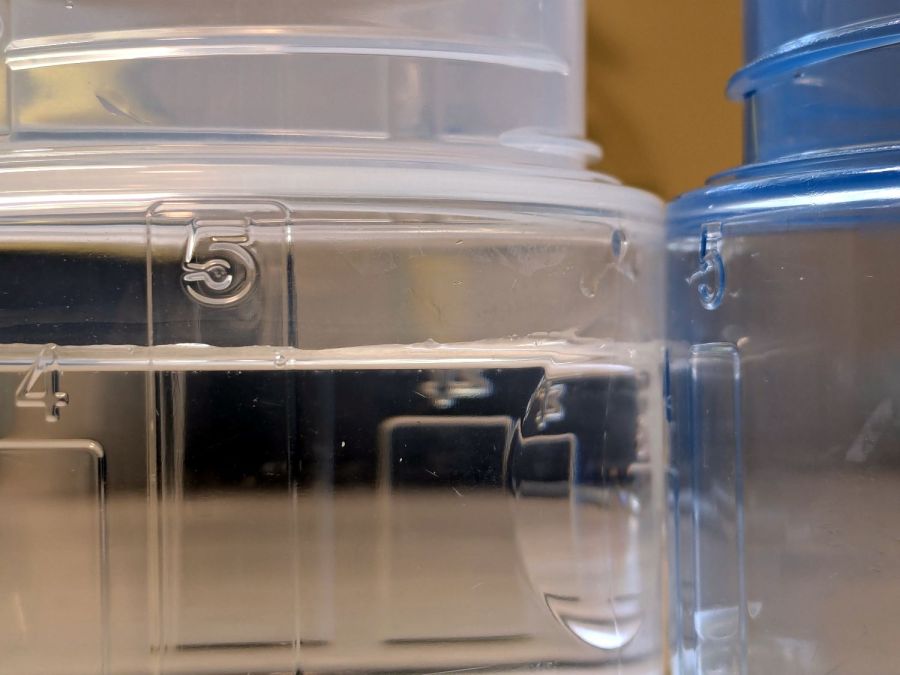
Tide HE shrinkflation – cap capacity marks
The blue cap on the right is one we’ve been using for the last few years, because I put black tape at the level of the first bar to match our “Medium” loads. I cannot imagine how much dirt would require filling the cap to Bar 5.
The clear cap on the left is the new cap. I filled the blue tap to the top of Bar 5 with water and poured it into the clear cap, where it comes about 3/4 of the way to the top of the new Bar 5. Evidently, the amount of detergent required to get grubby clothes clean has increased by 33%.
The old cap holds just shy of 4 fluid ounces to the top of Bar 5:
Tide HE shrinkflation – old cap bar 5 capacity
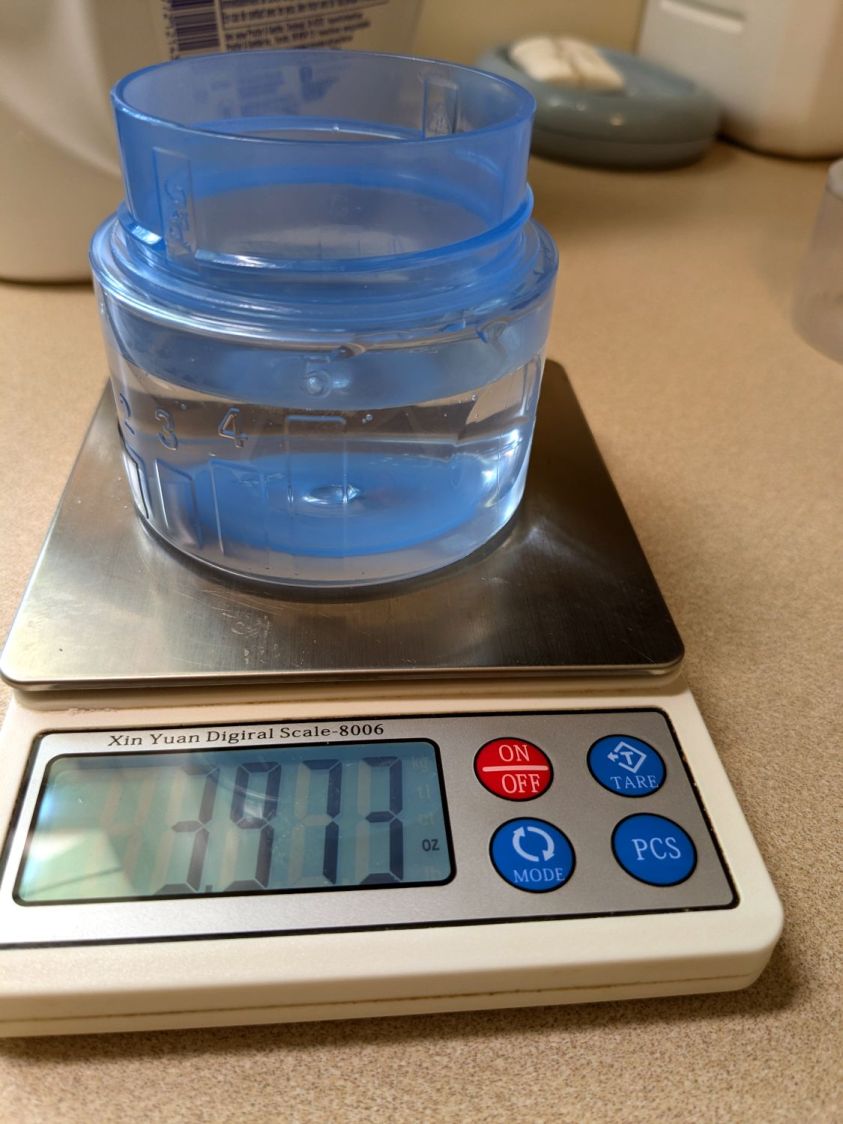
The new cap holds 5.5 fluid ounces to the top of its Bar 5:
Tide HE shrinkflation – new cap bar 5 capacity
If you have really crusty clothing, you’re now using 36% more detergent per load.
The obvious arithmetic shows the old bottle holds 23 “Bar 5” loads and the new bottle holds 15.
To the limit of my measuring ability, both caps hold 1.3 fluid ounces to the top their respective Bar 1 levels. I cannot vouch for the “just below” level, but I suspect more accurate measurements would show the new caps have slightly lower volume at that level, juuust enough to make the “64 loads” weasel wording come out right.