The Smell of Molten Projects in the Morning

Ed Nisley's Blog: Shop notes, electronics, firmware, machinery, 3D printing, laser cuttery, and curiosities. Contents: 100% human thinking, 0% AI slop.

Author: Ed

  • GripStic Shortening

    GripStic Shortening

    We’ve been using GripStic Bag Sealers on bags around the kitchen with good results, but the “XLarge” pink sticks far exceed the largest bags we have. While not the worst problem I’ve encountered in the last year, I can fix that:

    Gripstic - shortened assortment
    Gripstic – shortened assortment

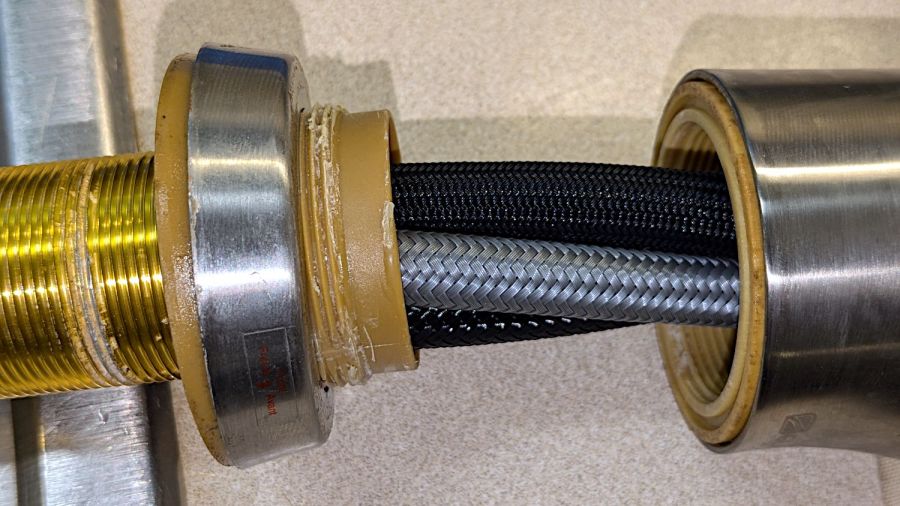
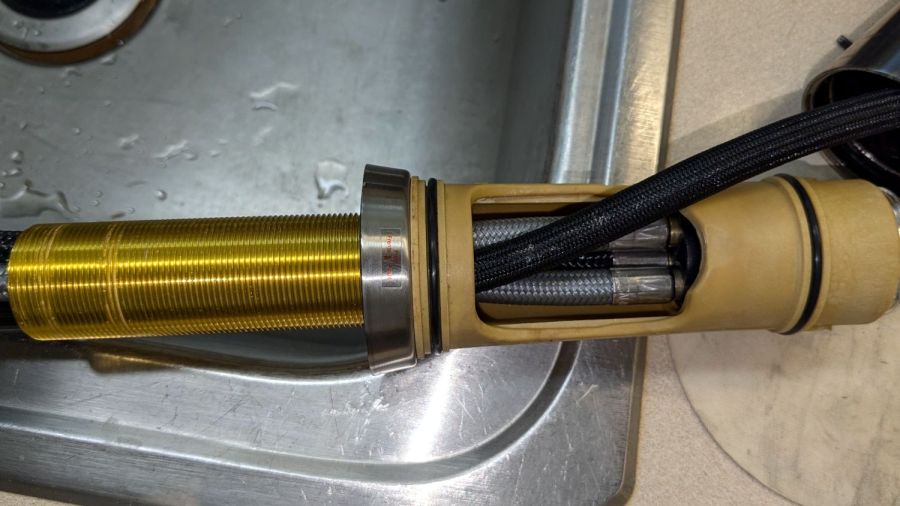
    An elaborate latch aligns the yellow rod along the axis of the outer shell:

    Gripstic - rod end feature
    Gripstic – rod end feature

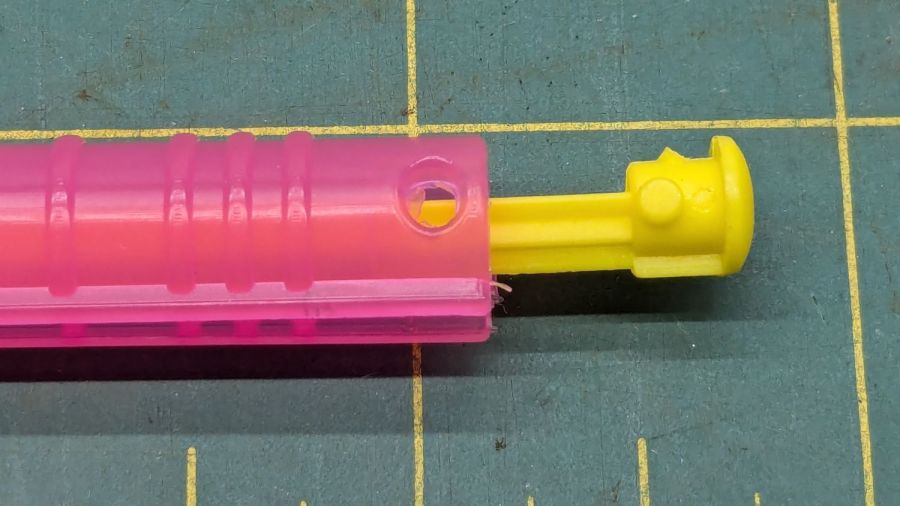
    I shortened the stick with Tiny Bandsaw™, cleaned up the ends, squirted hot melt glue into the shell, set it on a bench block, rammed the yellow rod into the glue, and paused for contemplation:

    Gripstic - shortened glue
    Gripstic – shortened glue

    Trim off the blob and it’s all good.

    The WordPress AI suggests “Additionally, including tips for handling the Tiny Bandsaw™ and hot melt glue would be beneficial.” So, as always, use your tools carefully, OK?

    Adding the preceding paragraph changed the AI suggestion to “To further improve the content, consider adding tips for handling the Tiny Bandsaw™ and hot melt glue for the readers’ benefit. Always prioritize safety when using tools.” I recommend not juggling Tiny Bandsaw™ and a hot melt glue gun, particularly went they’re running.

  • Prusa MK4 Y Motor Shim

    Prusa MK4 Y Motor Shim

    Having been viciously nerd-sniped by The Great Dragorn of Kismet, I’m in the process of building a Prusa MK4 3D printer with an MMU3. This has been a generally pleasant experience, although I am beginning to loathe Genuine Haribo Goldbären.

    Anyhow, the Y axis motor position puts the belt too close to one side of the pulley, with no further adjustment possible:

    Prusa MK4 Y axis motor mount - as-built
    Prusa MK4 Y axis motor mount – as-built

    The stepper motor stator laminations are the striped gray area on the far left, the 3D printed motor mount is the striped black area on the right, and the belt pulley is snugged up against the motor as far as it can go on the shaft.

    Pushing the motor a little more to the left requires a shim:

    Prusa MK4 Y axis motor mount - shim
    Prusa MK4 Y axis motor mount – shim

    Rather than fiddle with scanning the motor mount, I imported its STL model from the Prusa MK4 files:

    Prusa MK4 Y Axis Motor mount - solid model
    Prusa MK4 Y Axis Motor mount – solid model

    Importing the STL into OpenSCAD and converting the motor face into an SVG file is basically a one-liner:

    projection(cut=true)
    translate([0,0,-5.0])
    import("/mnt/bulkdata/Project Files/Prusa Mk4/Calibration/y_motor_holder_R3.stl");
    

    Import the SVG into LightBurn, round the corners a little, set it up for 1.5 mm Trocraft Eco, Fire. The. Laser. and it fits perfectly and stands out nicely:

    Prusa MK4 Y axis motor mount - shimmed
    Prusa MK4 Y axis motor mount – shimmed

    Having the right tools for a job makes it easy …

  • As If Your Life Depended On It

    As If Your Life Depended On It

    Spotted on a scissors lift outside a grocery store being remodeled:

    Skyjack scissors lift warning labels
    Skyjack scissors lift warning labels

    The SkyJack instruction manual explains the symbols, although some of the Quick Start instructions remain baffling.

    We had great fun making up captions to suit the pictures …

  • Bathroom Faucets: User Interface FAIL

    Bathroom Faucets: User Interface FAIL

    The sink faucet in our motel room worked the way you’d expect:

    Grohe sink faucet
    Grohe sink faucet

    It pivots left-right to adjust the temperature and lifts to control the flow, which is Off when the handle is parallel to the sink countertop.

    Evidently, everybody assumes that’s the way the identical faucet handle works in the shower, despite the helpful label:

    Grohe shower faucet
    Grohe shower faucet

    Did you notice the minuscule red dot below-and-left of the handle or the corresponding blue dot just to its right? Absent the label, those provide all the hints you’ll get as to how the handle operates.

    The faucet body & plumbing were loose in the wall, as though many previous people had given it a firm yank to get water out of it.

    I’m 3.5 diopters nearsighted and can’t see those little dots. Mary is 2 diopters farsighted and can’t see the label or the dots.

    What did they think would happen with different valves having identical affordance?

  • Home Depot Glacier Bay Kitchen Faucet: Round 2

    Home Depot Glacier Bay Kitchen Faucet: Round 2

    The kitchen faucet worked its way loose again. Attempting to shut off the water revealed a pair of leaky valves under the sink, so I shut off the house water in the basement, cut the valve pipes below the solder drips, and installed a pair of push-connect shutoffs:

    Kitchen faucet shutoff valve - push connection
    Kitchen faucet shutoff valve – push connection

    I loves me some good push-connect fitting action, which is new news to me. Back in the Bad Old Days™, I’d be under the sink with a propane torch, trying to solder a pair of wet pipes and failing miserably.

    With that out of the way and the faucet dismantled for the first time (by my hands, anyway), the threads holding the base to the spout column may have been damaged during factory assembly:

    HD Glacier Bay kitchen faucet - damaged threads
    HD Glacier Bay kitchen faucet – damaged threads

    I thought the gunk was thread lock compound, but it’s shredded plastic from the base fitting threads. The corresponding female threads inside the spout column are undamaged, so I think somebody tried screwing it together with the threads misaligned, backed off, then muscled it together.

    It’s worth noting there are no keys or stops fixing the correct orientation of any of these parts. In particular, the trim ring bearing the small Front label (facing you in the picture) has no fixed orientation: whoever assembles the faucet in the factory must position it correctly on the fly as the base screws into the column and jams tight.

    So I cleaned up the damaged threads as best I could, flipped the threaded brass tube end-for-end to put the cleanest part into the base, and reassembled everything with careful attention to starting the threads correctly:

    HD Glacier Bay kitchen faucet - flipped brass tube
    HD Glacier Bay kitchen faucet – flipped brass tube

    Tightening the base fitting into the column is much easier with everything on the kitchen counter, although centering the label on the molded opening required several tries.

    Protip: a pair of grippy gloves and rubber sheets help a lot.

    I want to find out how secure the original design, properly tightened and aligned, will be, so I did not apply any threadlocker.

  • Laser-cut Paper Pad Hooks

    Laser-cut Paper Pad Hooks

    Mostly because I could:

    Laser-cut MDF paper hooks
    Laser-cut MDF paper hooks

    Another pair of hooks support the far end of the sketch paper pad, all hanging on the end of the shelves holding laser materials & tooling.

    MDF isn’t particularly well-suited as a hook for anything weighing more than a dozen sheets of paper, but that pad is now out of the way where it won’t get curled.

    The shape comes from a bunch of rectangles welded together in LightBurn, with the obvious corners rounded off for stylin’.

  • Subaru Forester Taillight Bulbs

    Subaru Forester Taillight Bulbs

    I finally got around to replacing the Forester’s taillight bulbs:

    Subaru Forester taillight bulbs
    Subaru Forester taillight bulbs

    The clear bulbs don’t have the same thermal damage as the headlights I replaced a year ago, but the new bulbs should be much brighter.

    Subaru calls them W21/5W and WY21W, respectively, but the rest of the world says 7443 and 7440NA (or 7440A).

    For the record, the taillight assembly comes off (after removing the obvious pair of screws not shown here) by pulling straight back with grippy gloves:

    Subaru Forester taillight mount
    Subaru Forester taillight mount

    Aligning the locating pins with those two latching sockets (why is one green?) requires a flashlight and a bit of dexterity, but easing the slot over the white post first helps a lot. Practice makes perfect: it’s easier on the other side of the car.