Ed Nisley's Blog: Shop notes, electronics, firmware, machinery, 3D printing, laser cuttery, and curiosities. Contents: 100% human thinking, 0% AI slop.
Turns out that there’s no difference between the Mac and PC versions of the Logitech Dual Action Gamepad:
Logitech Dual Action Gamepads – Mac vs PC
I picked up a Mac version cheap from the usual eBay seller and discovered that LinuxCNC / HAL was perfectly happy. That wasn’t too surprising; they have the same model and part numbers. Most likely, the only difference was the CD and maybe the Quick Start Guide that I didn’t get in the opened retail box…
So now I have either a hot backup for the Joggy Thing or one for a different box.
Most likely, it was cheap because nobody wants a blue-and-black peripheral next to their shiny white Mac…
The active ingredient involved in PLA bonding is tetrahydrofuran, which makes up anywhere from 10 to 40% of the primer (the MSDS gives a broad range). The primer immediately marred the PLA surface, which is exactly what you want in a solvent adhesive.
After an overnight clamping, I couldn’t pull or peel that joint apart: the two slabs had become one. That’s unlike the paint stripper test that didn’t bond well at all. Good enough for me.
Obviously, you’d prefer Clear Primer for natural PLA, but Purple Primer is what I had on hand.
Given that this stuff has no solid content, I think it’s more suitable as a PLA adhesive that the thicker PVC Cement. However, clear cement would be less likely to run along the thread seams and ruin the surface finish outside the joint than water-thin primer.
Tradeoffs, tradeoffs… but now I can build things from PLA subassemblies!
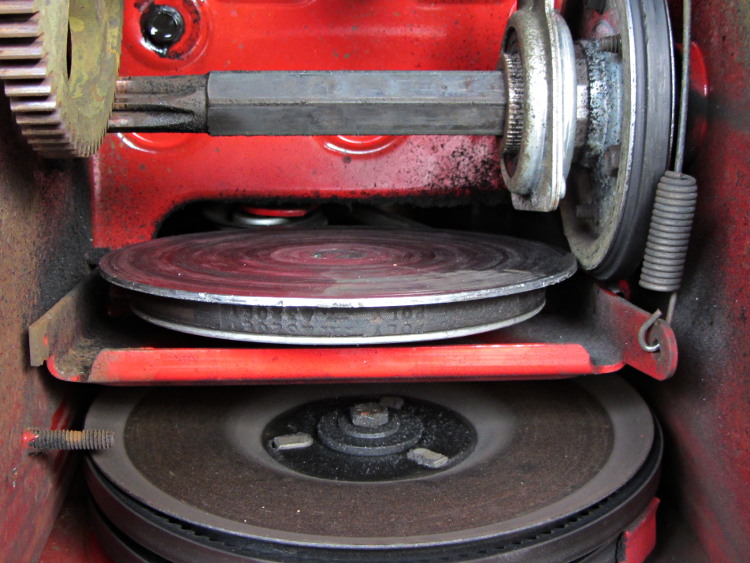
During the next-to-last snowfall, the gearshift on our MTD snowthrower jammed in high gear, but the wheels turned much more slowly than usual. Slightly before the last snowfall, I removed the cover over the transmission and discovered what went wrong:
MTD Snowthrower – transmission failure
That rubber wheel should be resting on the circular transmission plate, but somehow it slid off the far right edge. The spring-loaded clutch cable then pulled the plate upward, so that the side of the wheel drove the edge of the plate. Ouch.
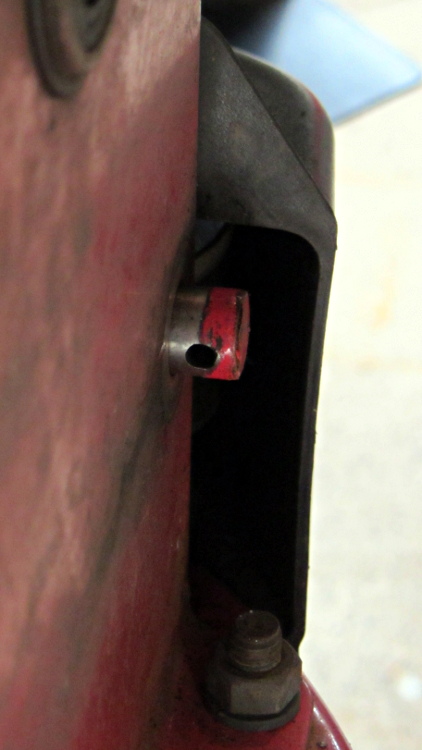
The plate rotates on a bearing around a post on the folded red steel support structure underneath it, which pivots on a rod across the transmission housing behind everything that’s visible here. That rod used to protrude through the housing, but it had slipped inside and moved the plate to the left enough to let the wheel fall off. Some awkward maneuvering got it back through the hole, which made the real problem obvious:
MTD Snowthrower – missing hitch pin clip
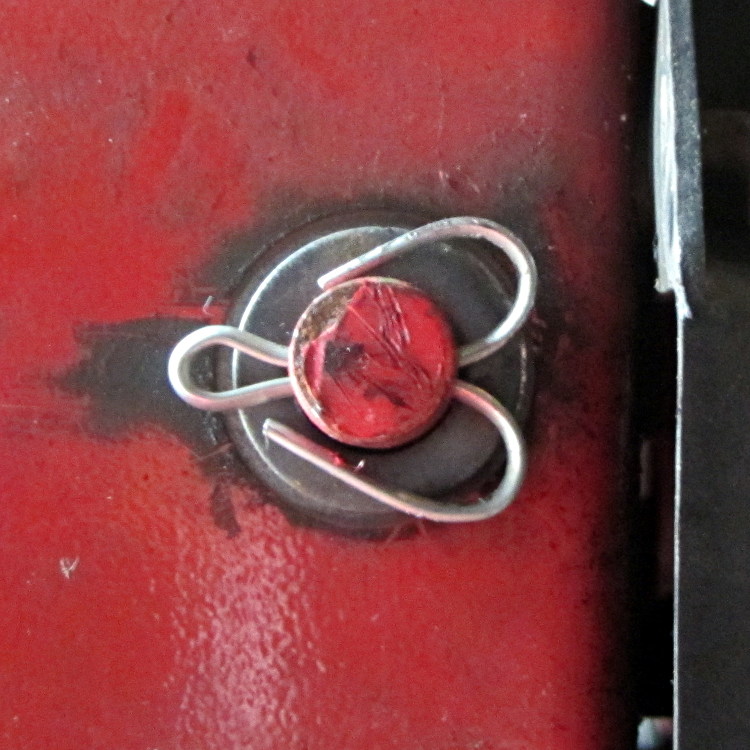
There’s supposed to be a cotter pin or hitch pin clip through that hole, with a washer matching the obvious wear marks:
MTD Snowthrower – replacement cotter pin
That’s actually a spacing shim from a collection that I’ve used rather infrequently over the years, but it’s exactly the right thickness to make the answer come out right.
A few weeks later, we found the missing washer on the driveway at about the point where I first noticed the transmission wasn’t working. It’s in the box of parts, waiting for the new cotter pin to wear out.
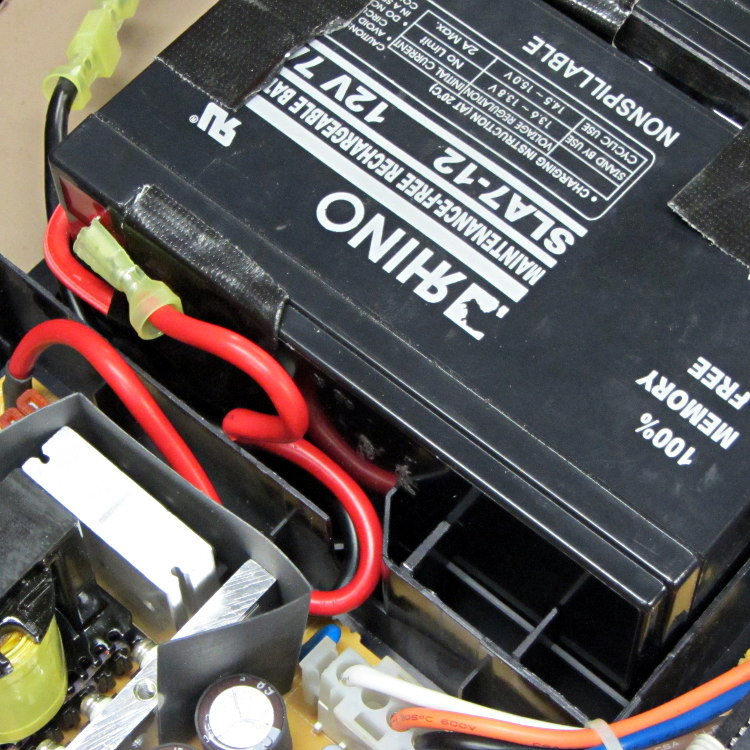
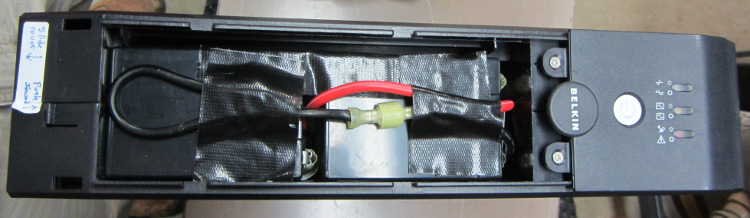
Given the length of the battery wires inside a Belkin F6C1500 UPS, you might think any arrangement will work. Not so. The wires from the guts of the UPS must exit to the batteries exactly like this:
F6C1500 Battery wires from UPS
There’s a black wire tucked under the red wire, both of which must exit though the angled slot and run toward the front of the battery compartment.
Seen from the front, the red wire connects the positive terminal of the lower (left) battery to the negative terminal of the top (right) battery and the black wire connects the negative terminal of the lower battery to the UPS circuitry:
F6C1500 Battery interconnect wires
Trust me on this: there is no other arrangement of those wires that will simultaneously connect everything properly and fit within the case.
As for disassembly, the small tab on the left end of the case holds the front panel in place. Press that inward with a flat screwdriver, then slide the cover toward the tab. Four locking slots along the sides will disengage and you can then lift the panel off.
With that out of the way, there’s a screw hidden under the BELKIN label in the middle of the removable cover:
The only commonly available PLA adhesive seems to be methylene chloride, which is common only because it’s part of really nasty paint stripper that actually works; I suspect you can’t buy the pure stuff anywhere.
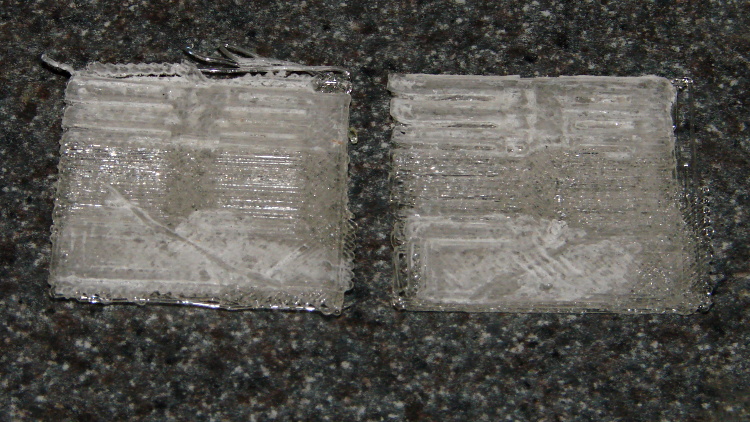
Anyhow, I picked a pair of flat line width test plates from the PLA scrap pile, dabbed paint stripper on each, and clamped them together overnight:
PLA test coupon – clamping
Unlike acetone on ABS, paint stripper doesn’t actually combine the parts into a single fused unit; I could peel the two plates apart with some effort:
PLA test coupon – paint stripper adhesion
That picture shows the results of two glue-and-peel tests, with much the same result along the top and bottom edges. Some solvent damage appears as a thin white line around the edge of the glued joint, but with some care that wouldn’t be too bad.
I think paint stripper makes an acceptable adhesive for PLA, at least for joints that aren’t subject to peeling loads. You must design an interlocking mechanical joint, perhaps filled with epoxy, to withstand peeling loads, which isn’t nearly as good as the ABS option of just fusing the parts together.
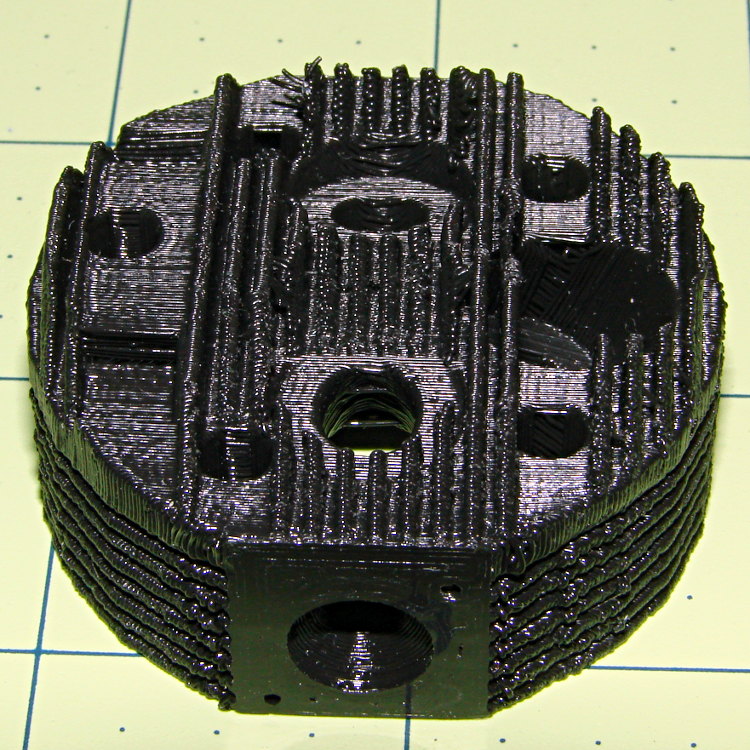
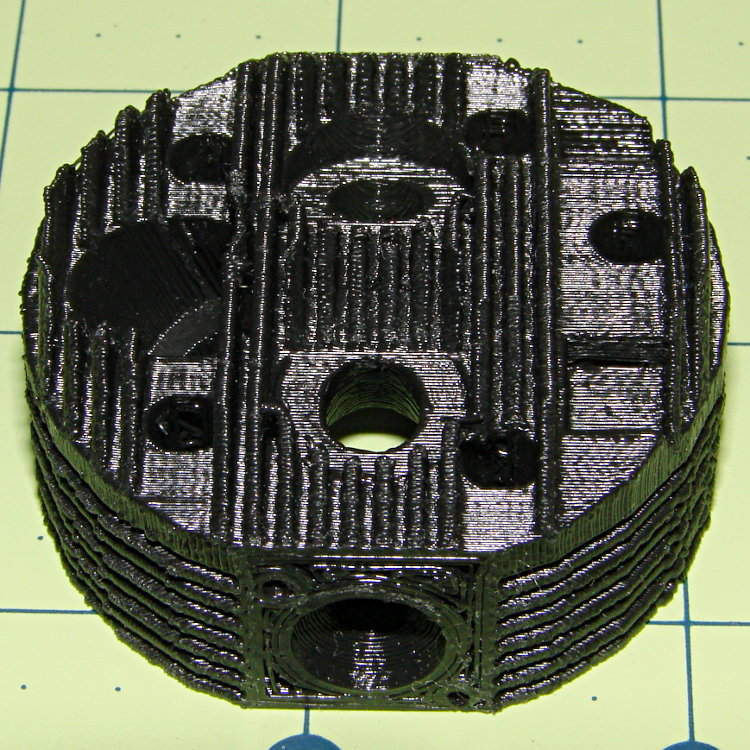
The side fins came out nicely, but the top fins had a few misplaced threads (far side to the left of the valve):
Radial engine cylinder head – intake
The view from the other port:
Radial engine cylinder head – exhaust
Seen directly from the spark plug side, you can barely make out the impossibly thin fin section arching over the plug hole:
Radial engine cylinder head – plug side
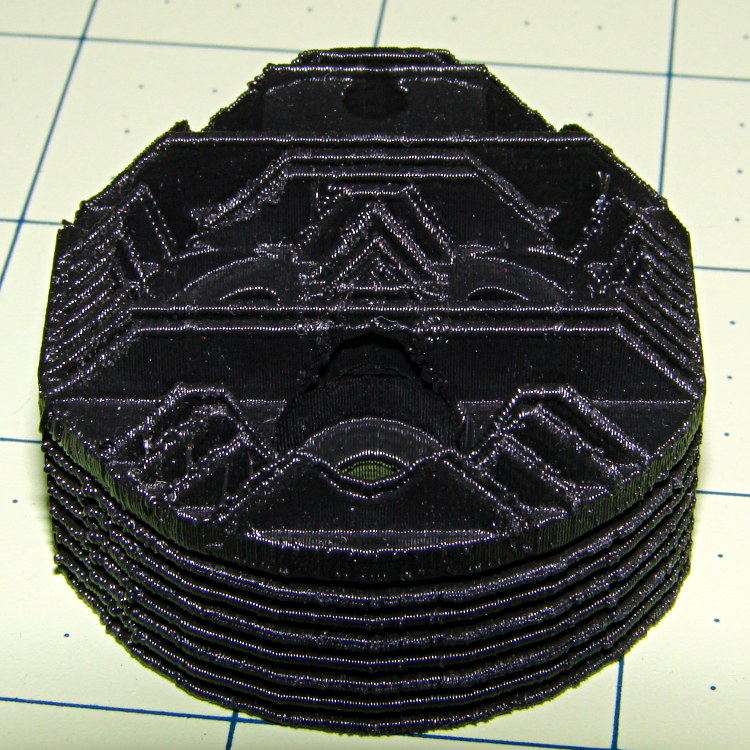
The cylinder side looks OK:
Radial engine cylinder head – bottom
I built it standing on one of the ports with the fins vertical, as shown above, which is probably the only way to do it without soluble support material. If I were doing it for real with non-soluble support, I’d be tempted build it flat on the cylinder side with support under the piston head and thin support blocks inside the side fins. It’d look about the same, but with better finish on the top fins.
The STL file came direct from Thingiverse, riddled with the reversed normals and holes common to solid models generated by Sketchup, but a pass through NetFabb’s cleanup made it printable. The original STL positioned it far, far out on the X axis, so if you don’t see it right away, rummage around a bit.
Part of becoming an engineer involves discovering the difference between what works and what doesn’t, with the goal of doing more of the former and less of the latter. In tech fields, gaining such knowledge requires observations, records, and graphs.
The alert reader may recognize the understated presence of a guiding hand, here and there, in some projects. I needed one, too, back in the day, even if I didn’t appreciate it (by at least the same amount). Fortunately, blogs hadn’t been invented, so you’ll never know.