The Smell of Molten Projects in the Morning

Ed Nisley's Blog: Shop notes, electronics, firmware, machinery, 3D printing, laser cuttery, and curiosities. Contents: 100% human thinking, 0% AI slop.

Author: Ed

  • Storm Door Brace: Now, With Inserts!

    The mid-1950s wood doors on our house have wood storm doors with interchangeable wood-framed glass and screen panels. Twice a year, the diligent homeowner will swap the panels to match the season; during the last 60+ years, the glass panels remain undropped.

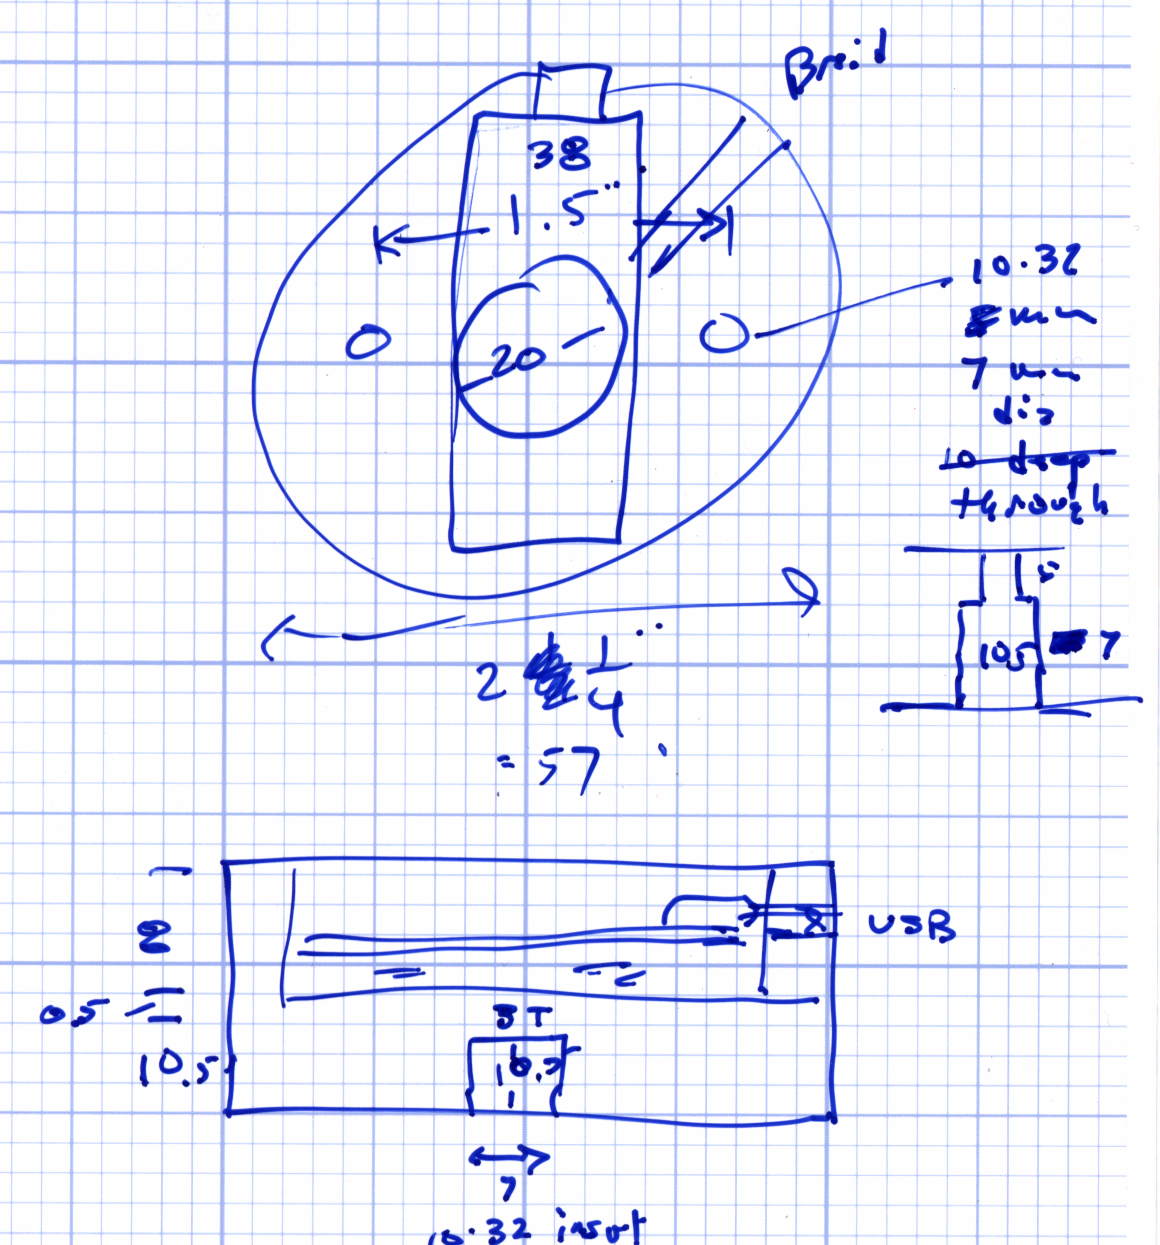
    The back door has a diagonal tension brace to hold the door in shape; the door may be slightly distorted or the frame slightly out of square. In any event, the brace obstructs the panel, so the semiannual ritual includes loosening the brace and removing four screws. During the last 60+ years, the screw holes have required repair / filling several times; about five years ago, I plugged them with epoxy putty and drilled them to fit the screws.

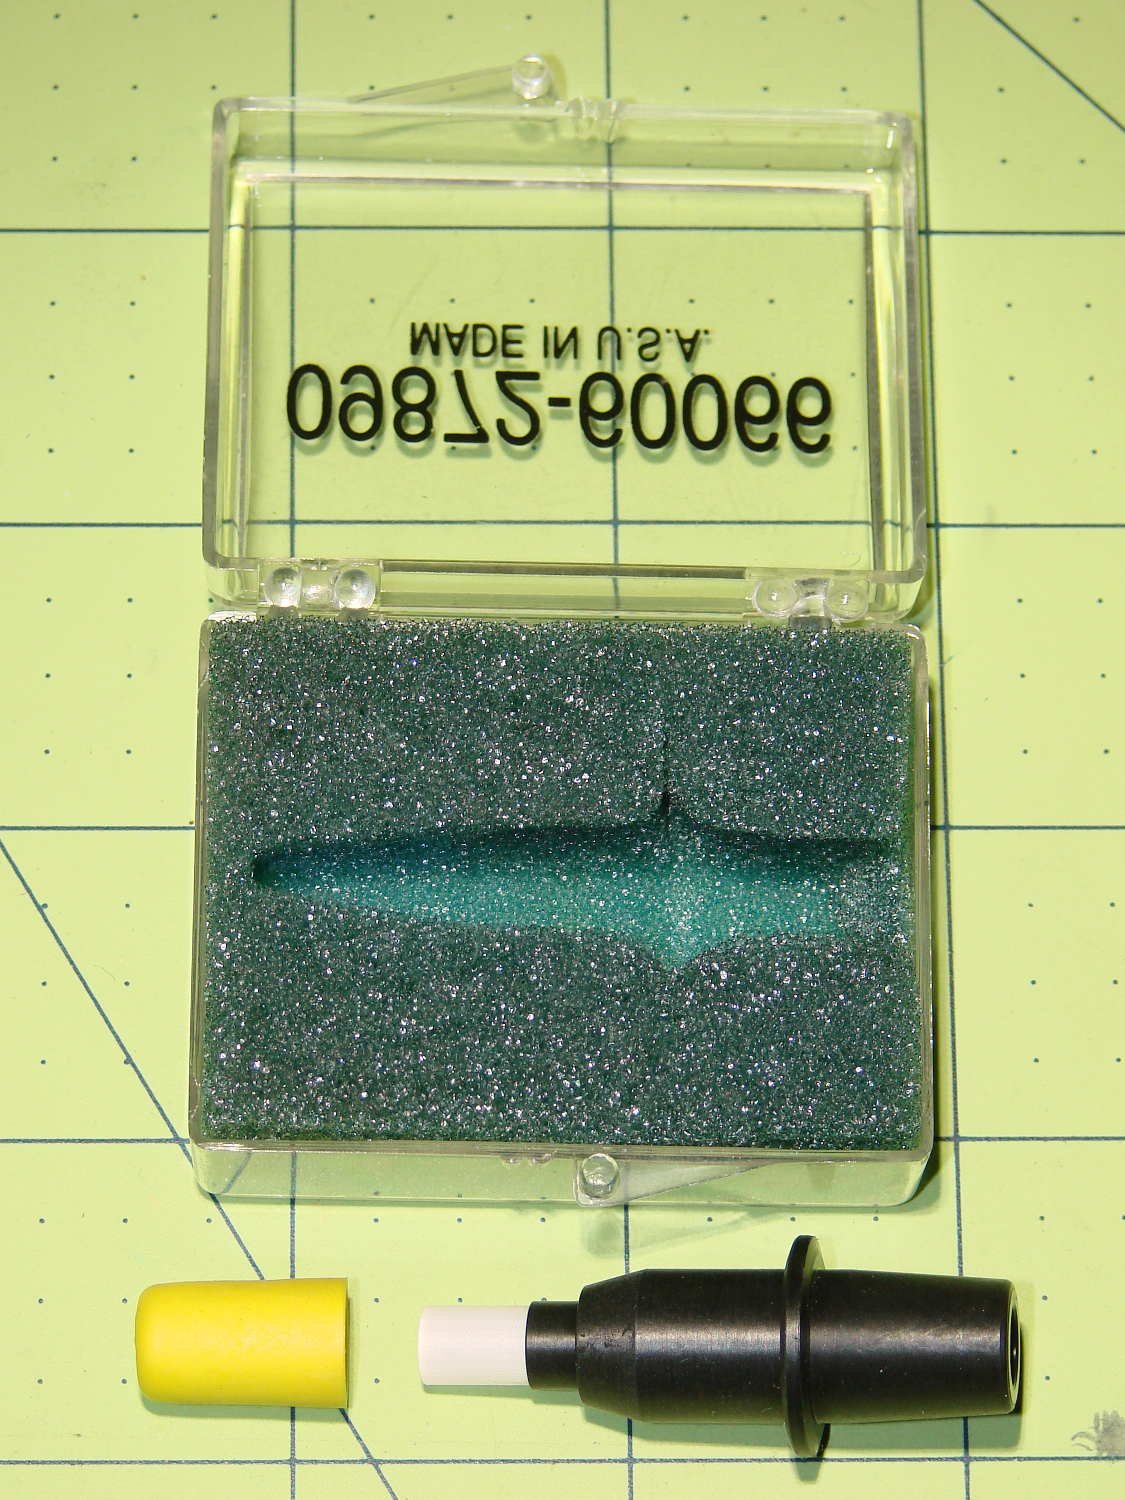
    That repair having aged out, I was about to renew the epoxy when I realized that I now have brass inserts that would work even better, if I replaced the original wood screws with 10-32 machine screws.

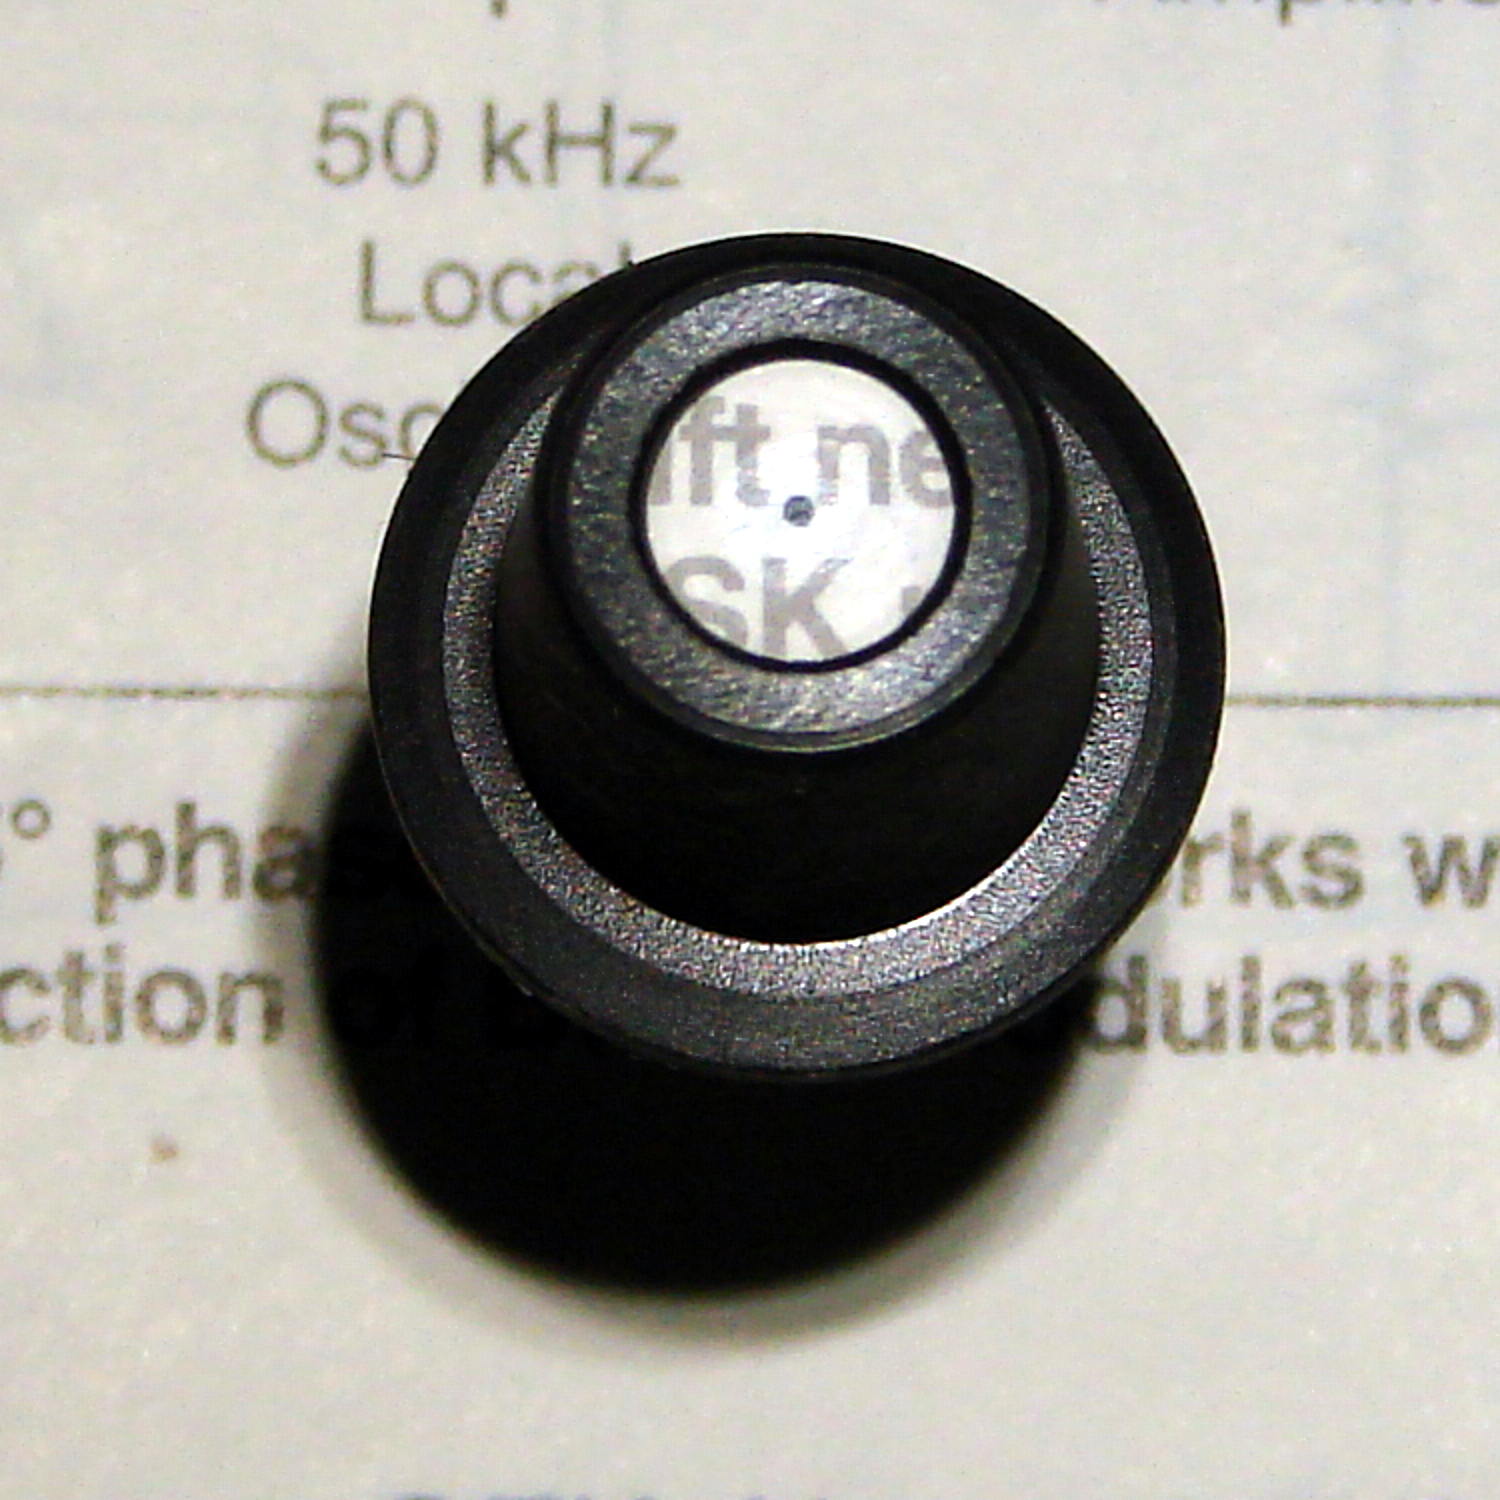
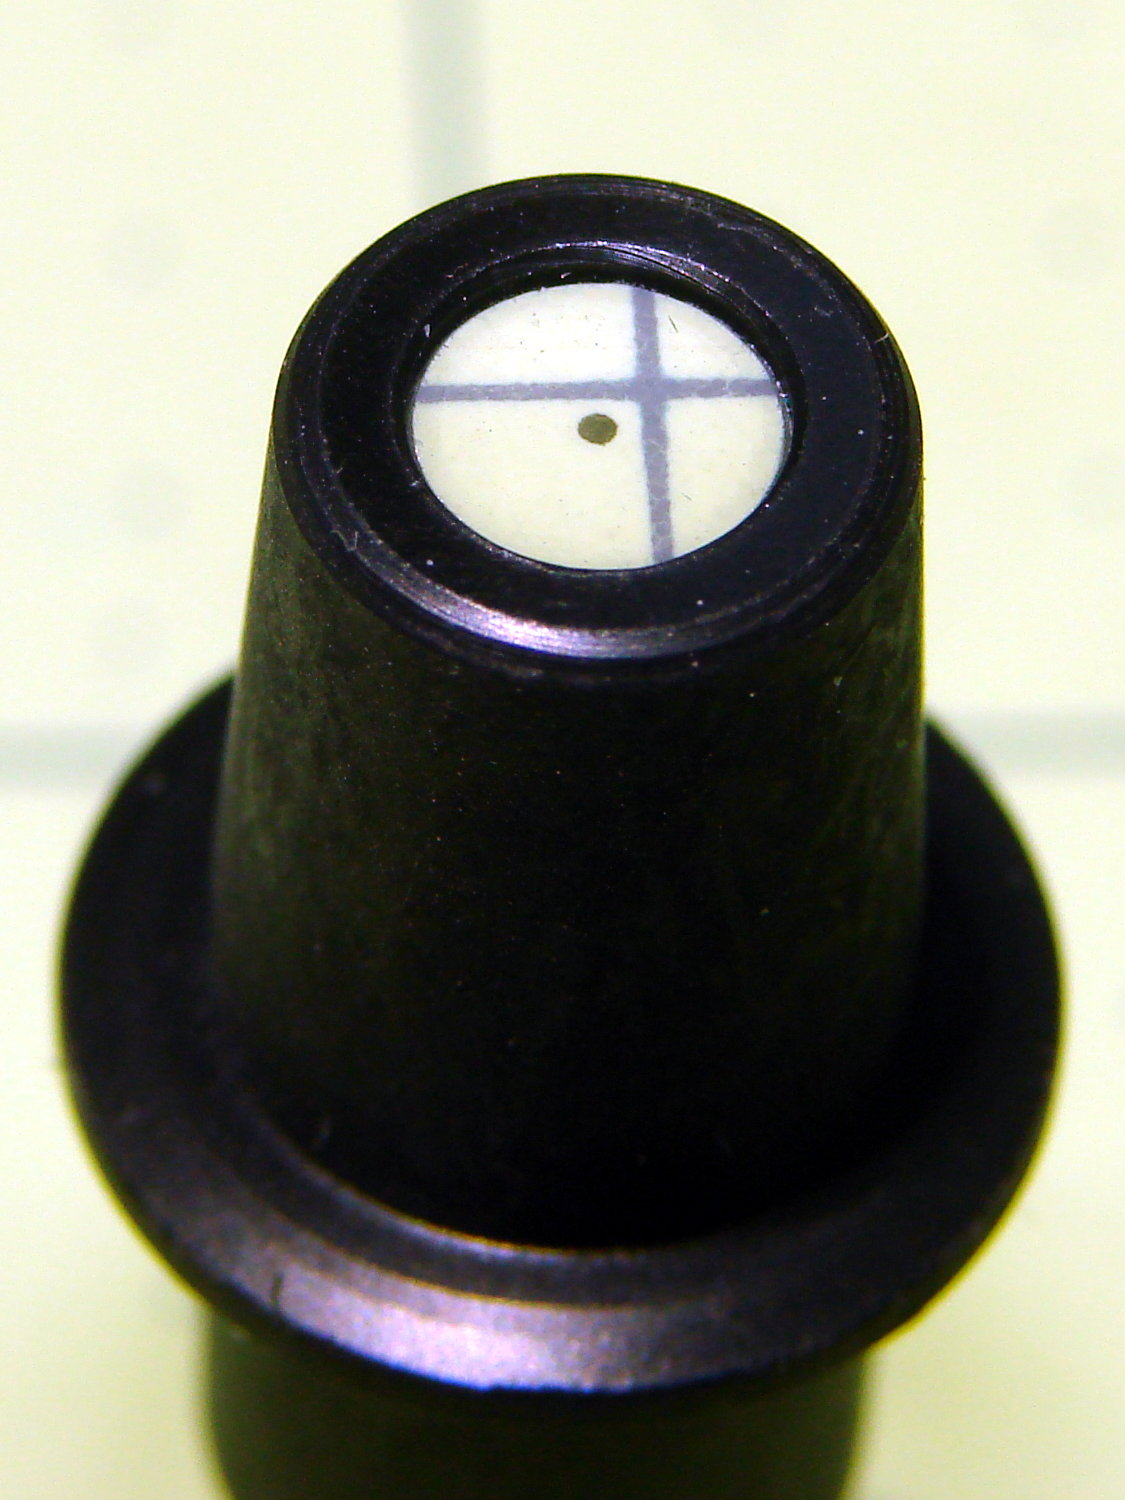
    I cut the screws to the exact length using the brace and brass insert as a fixture:

    Storm door - screw cutting
    Storm door – screw cutting

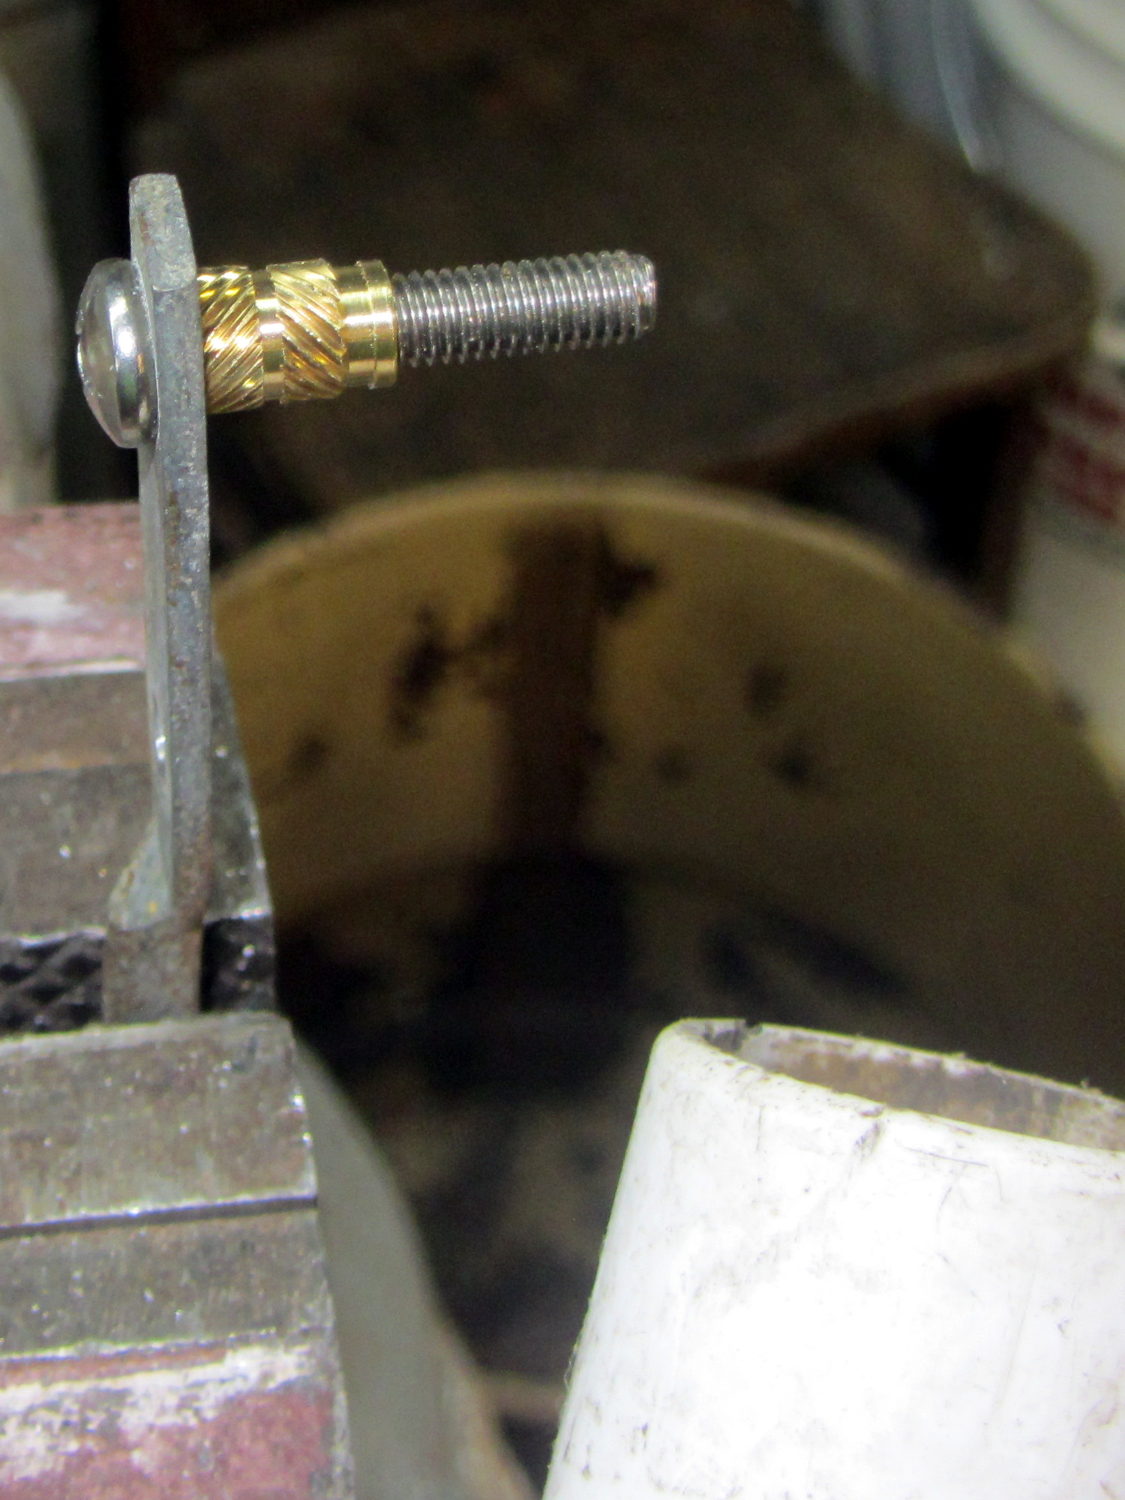
    The vacuum cleaner nozzle to the lower right inhales the debris from the Dremel cutoff wheel that would otherwise fill the shop; I used up the last half of a wheel on four stainless steel screws.

    Because each end of the brace has two screws, I knew that I couldn’t just drill out the four holes, plant four inserts, and be done with the job: the first insert on each end could go pretty nearly anywhere, but the second insert must match the brace hole spacing. The only way I know how to do that is to epoxy the first two inserts in place and let them cure, drill the other two holes slightly oversize, mount those inserts on the brace, butter them with epoxy, put the brace in place, tighten the first two screws, snug the brace, and hope I didn’t epoxy the brace to the door or the screws to the inserts.

    Slips of waxed paper between the brace and the door prevented the first problem and oiling the screws prevented the second. It’s not the best-looking job I’ve ever done, but nobody will ever see the inserts behind the brace:

    Storm door - inserts
    Storm door – inserts

    Now, we’re ready for winter and I’m ready for spring!

    Most likely, the new owners (whoever and whenever they may be) will never use these inserts, as they’ll replace all the windows & doors, plus sand & refinish the hardwood floors, before moving in …

  • Vacuum Tube LEDs: Mogul Base for 500 W Incandescent Bulb

    This obviously wasn’t ready for prime time, but it demonstrated feasibility with a socket on a base assembled for something else:

    500 W Incandescent - backlit light
    500 W Incandescent – backlit light

    I recently salvaged a heavy aluminum lid that looked like a perfect complement for that bulb:

    Mogul base - bulb - blue phase
    Mogul base – bulb – blue phase

    The light comes from a rectangular knockoff Neopixel in a sidelight mount:

    Mogul base - sidelight curing
    Mogul base – sidelight curing

    That’s epoxied to the rear of the bulb, below the equator, where it casts the best-looking shadow of the filament and support structures on the inside of the bulb. Actually, it’s taped in place for a week’s worth of burn-in to see if it survives.

    The Arduino Nano fits inside a small base below the ceramic Mogul socket:

    Mogul base - Arduino Nano holder
    Mogul base – Arduino Nano holder

    The braid exits through a hexagonal trench recessed into the top surface, with a dollop of epoxy holding it in place:

    Vacuum Tube Lights - Mogul Base - top - solid model
    Vacuum Tube Lights – Mogul Base – top – solid model

    The underside has holes for three 10-32 brass inserts:

    Vacuum Tube Lights - Mogul Base - bottom - solid model
    Vacuum Tube Lights – Mogul Base – bottom – solid model

    The center insert is the only thing holding the entire assembly to that aluminum base; I’m not convinced that’s enough, but it’ll suffice for now.

    The “computer” certainly gets lost under the ceramic:

    Mogul base - ceramic socket connector
    Mogul base – ceramic socket connector

    The base is slightly smaller than the ceramic to match the flat part of the lower surface; if it came all the way to the OD, you’d see an unsightly notch.

    The two screw heads buried down in the recesses thread into the outer brass inserts in the printed base. The ceramic Mogul socket mounts atop that connection block, with another pair of screws making both electrical and mechanical connections to the metal plates-with-screws that used to terminate the incoming power wires.

    It’s running the same Morse code firmware as before, with the Morse output turned off, because who needs a giant blinking bulb?

    The OpenSCAD source code of the base as a GitHub Gist:

    //———————-
    // Base for Mogul ceramic socket
    module MogulBase() {
    Insert = [5.0,7.0,10.5]; // 10-32 brass insert, used for socket and chassis mounting
    PCB =
    [45,18,7.5] // Arduino Nano
    ;
    BaseOD = 57.0;
    BaseOAH = Insert[LENGTH] + 3*ThreadThick + PCB[2];
    ScrewOC = 1.5 * inch;
    difference() {
    cylinder(d=BaseOD,h=BaseOAH,$fn=16*4); // overall shape
    translate([0,0,-Protrusion]) // central mounting insert
    PolyCyl(Insert[OD],Insert[LENGTH] + Protrusion,6);
    for (a=[90,-90]) // socket studs
    rotate(a)
    translate([ScrewOC/2,0,-Protrusion]) {
    PolyCyl(Insert[OD],Insert[LENGTH] + Protrusion,6);
    PolyCyl(Insert[ID],2*BaseOAH,6);
    }
    translate([(BaseOD – PCB[0])/2,0,BaseOAH – PCB[2]/2 + Protrusion/2])
    cube(PCB + [0,0,Protrusion],center=true); // Arduino PCB
    rotate(45)
    translate([0,0,BaseOAH – Ferrule[ID]/2 + Protrusion/2])
    rotate([0,90,0]) rotate(180/6)
    PolyCyl(Ferrule[ID],BaseOD,6);
    }
    }

    The original doodles with some dimensions:

    Mogul base - dimension doodles
    Mogul base – dimension doodles
  • HP 7475A Plotter: 09872-60066 Digitizing Sight

    I found this antique on eBay for (somewhat) under HP’s 1980-era $35 price:

    HP 09872-60066 Digitizing Sight - overview
    HP 09872-60066 Digitizing Sight – overview

    The prevailing price for HP 09872-60066 Digitizing Sights seems to be $100 and upwards, with outliers in both directions, so I just couldn’t pass it up.

    Anyhow, the fiber optic pipe still works just like it did, back in the day:

    HP 09872-60066 Digitizing Sight - text target
    HP 09872-60066 Digitizing Sight – text target

    The small dot in the middle is actually a paint-filled indentation on the bottom surface:

    HP 09872-60066 Digitizing Sight - bottom detail
    HP 09872-60066 Digitizing Sight – bottom detail

    With the bottom flat on the target, the relayed image is in perfect focus:

    HP 09872-60066 Digitizing Sight - top detail
    HP 09872-60066 Digitizing Sight – top detail

    The bezel recesses the top surface by 25 mil to protect the imaging plane.

    OK, it’s a gadget gloat; I have absolutely no intention of ever chucking a piece of paper in the plotter and digitizing any points.

  • Kitchen Spatula Search

    A long long time ago, we bought a kitchen spatula that’s served us well ever since:

    Spatula Search - original
    Spatula Search – original

    To give you an idea of how old that poor thing is, the back of the handle bears a Japan stamp. I’ve re-set the rivets several times, the blade has rusted as badly as you think, and we recently, very reluctantly, decided it has passed its best-used-by date.

    The 3 x 4.5 inch blade is 19 mil = 0.45 mm plated carbon steel, stiff enough to remain flat and springy enough to bend a little, with a 9 inch = 230 mm steel handle ending in a plastic overmold.

    These days, it’s essential to the cutting, flipping, and serving of the morning’s omelet-like substance, made of eggs, bacon, veggies, green leafy things, plus this-and-that, in the cast-iron pan. Mary chops the disk into quarters with the reasonably sharp edge, maneuvers the reasonably bendy blade under each quarter, flips them over, tops with bacon & cheese, pauses for consolidation & melting, then pops them onto plates. Yum!

    Omelet in cast-iron pan
    Omelet in cast-iron pan

    So we set out to buy a replacement.

    Here’s what we’ve tried and rejected so far:

    Spatula Search - overview
    Spatula Search – overview

    I’ve used this one for many years to flip pancakes on a succession of non-stick griddles, a service at which it excels. The edge isn’t sharp enough to cut the green-and-leafy and the completely inflexible blade cannot be maneuvered under the omelet quarters:

    Spatula Search - heavy solid plastic
    Spatula Search – heavy solid plastic

    This one gets deployed for burgers and their ilk, also in the cast-iron pan. The blade, although sharp enough, is completely rigid:

    Spatula Search - heavy slotted metal
    Spatula Search – heavy slotted metal

    On the other paw, a slightly concave 7 mil = 0.18 mm spring steel blade is much too thin and, well, springy. Although very sharp, you cannot apply enough cutting force without suddenly bending the blade and, if the omelet quarter isn’t positioned exactly right, the blade will bend underneath it and dump breakfast on the stovetop. The alert reader will notice a missing weld between the blade and the bottom wire handle:

    Spatula Search - thin spring steel
    Spatula Search – thin spring steel

    This very thin plastic blade has similar problems with poor cut-ability and excessive flexibility:

    Spatula Search - thin springy plastic
    Spatula Search – thin springy plastic

    This one looked really promising and worked almost perfectly. Regrettably, its nylon blade bears a 400 °F rating and the bottom of the omelet reaches nearly 450 °F. You can see what happens to the reasonably sharp edge as it scrapes across the pan:

    Spatula Search - heavy slotted nylon
    Spatula Search – heavy slotted nylon

    The omelet cooks at the temperature it cooks at, which part of the specifications is not subject to further discussion.

    So, we’re stumped. Having trawled the usual online and big-box stores, we’ve been unable to find a replacement. Simple steel blades aren’t available. Trendy silicone-bonded stainless steel blades combine the worst of all worlds: won’t cut and won’t flip. Pretty nearly anything you don’t see above seems obviously unsuitable for our simple needs: too big, too small, or too melty.

    We’ll consider all recommendations and suggestions! Thanks …

  • Monthly Science: CR2032 Lithium Cell Life

    One of the Hobo dataloggers asked for a new battery during its most recent data dump. The old battery dates back to January 2015:

    Maxell CR2032 lithium cell - 22 month life
    Maxell CR2032 lithium cell – 22 month life

    That was when a batch of Energizer cells failed in quick succession: it wasn’t the datalogger’s fault. I’ve been handling the cells a bit more carefully, too, although that certainly doesn’t account for the much longer life.

    With batteries, particularly from eBay, you definitely can’t tell what you’re going to get or how long it’ll last; that’s true of many things in life.

  • Inside Another 9 V Battery

    A long time ago, I discovered some quasi-AAAA cells inside 9 V batteries:

    Inside a batteries.com 9V battery
    Inside a batteries.com 9V battery

    It occurred to me that I should dismantle a defunct Rayovac Maximum 9 V alkaline battery from the most recent batch (*) to see what it looked like:

    Rayovac Maximum 9V battery - interior
    Rayovac Maximum 9V battery – interior

    Surprise!

    A closer look at those pancake cells:

    Rayovac Maximum 9V battery - detail
    Rayovac Maximum 9V battery – detail

    They look like separate cells bonded into a stack, although there’s no easy way to probe the inter-cell contacts; the leftmost cell probably died first.

    (*) Which has apparently outlived the Rayovac Maximum brand, as they don’t appear on the Rayovac site.

  • Running Lights

    New Cadillacs have thin white LED running lights along the front edges, with angular chromed trim below:

    Cadillac running lights
    Cadillac running lights

    Their SUVs have matching vertical-stripe taillight / markers; it’s obviously a stylin’ thing. If it weren’t for the power, I’d run LED strips along the edge of the fairing & seat frame on our ‘bents.

    Probably due to having read Glory Road at an impressionable age, those lights always remind me of Heidelberg dueling scars:

    Adolf Hoffmann-Heyden -- Dueling scar
    Adolf Hoffmann-Heyden — Dueling scar

    Cannot be unseen…