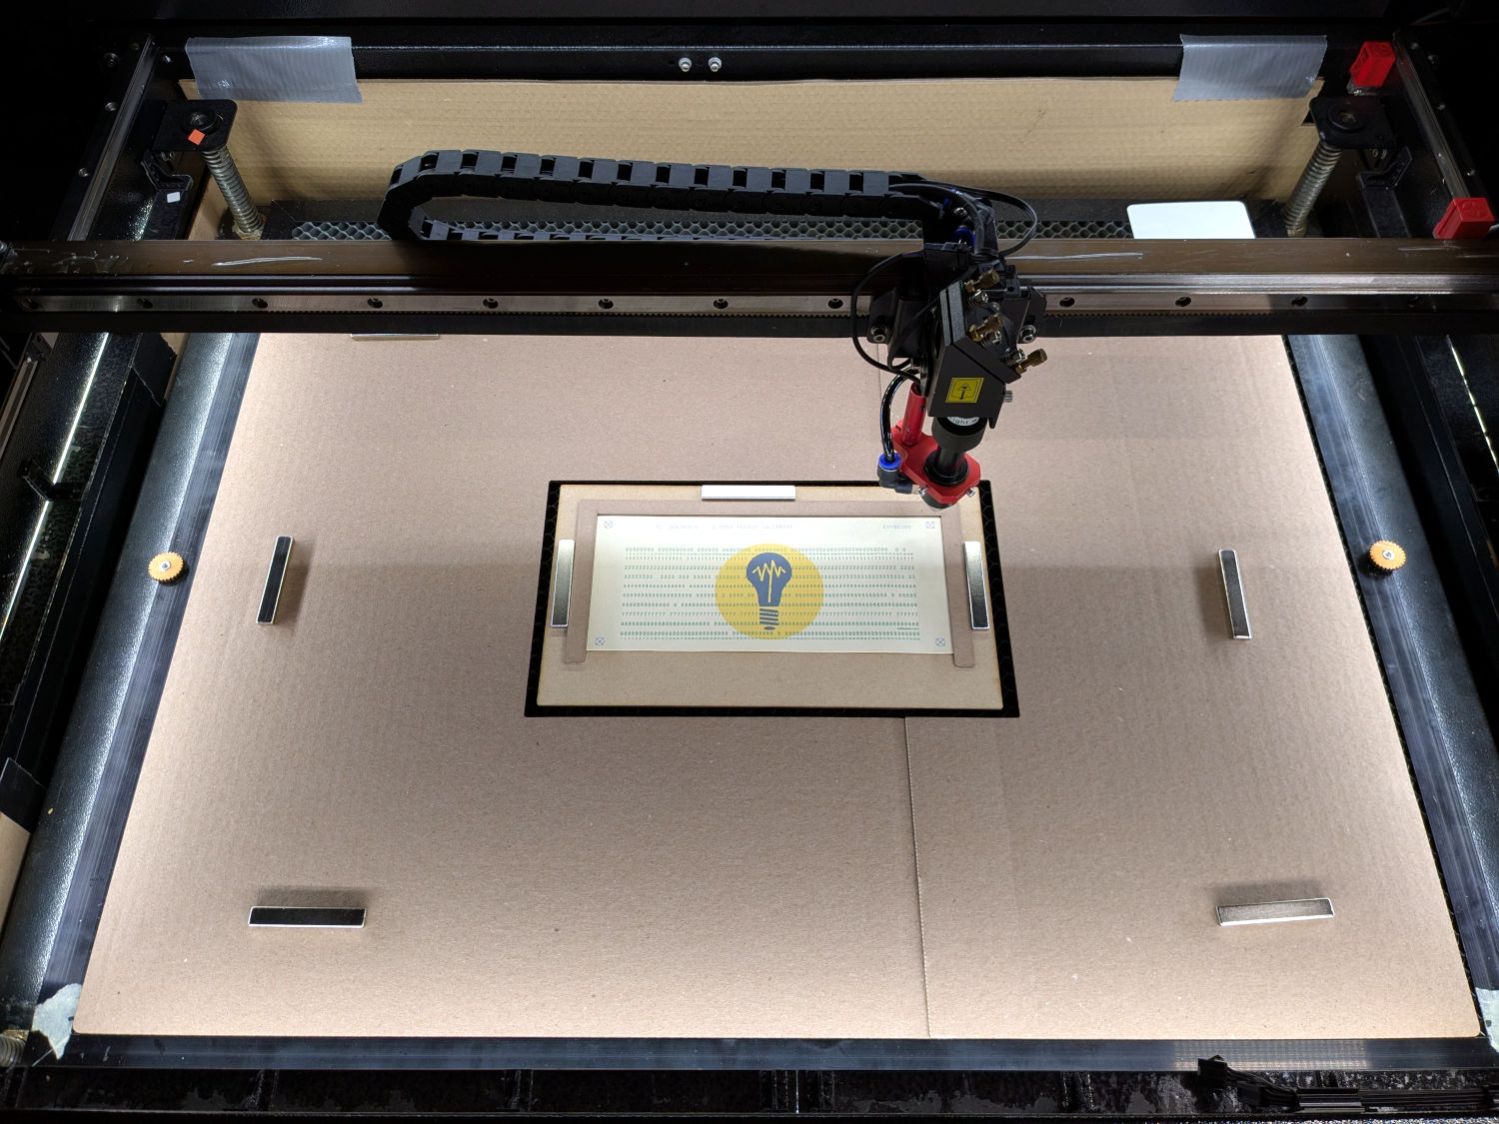
Creating a punched card with a laser requires a fixture holding the printed card-to-be flat and slightly above the honeycomb to reduce flash burns / schmutz on the underside:
A closer look while evaporating the holes:
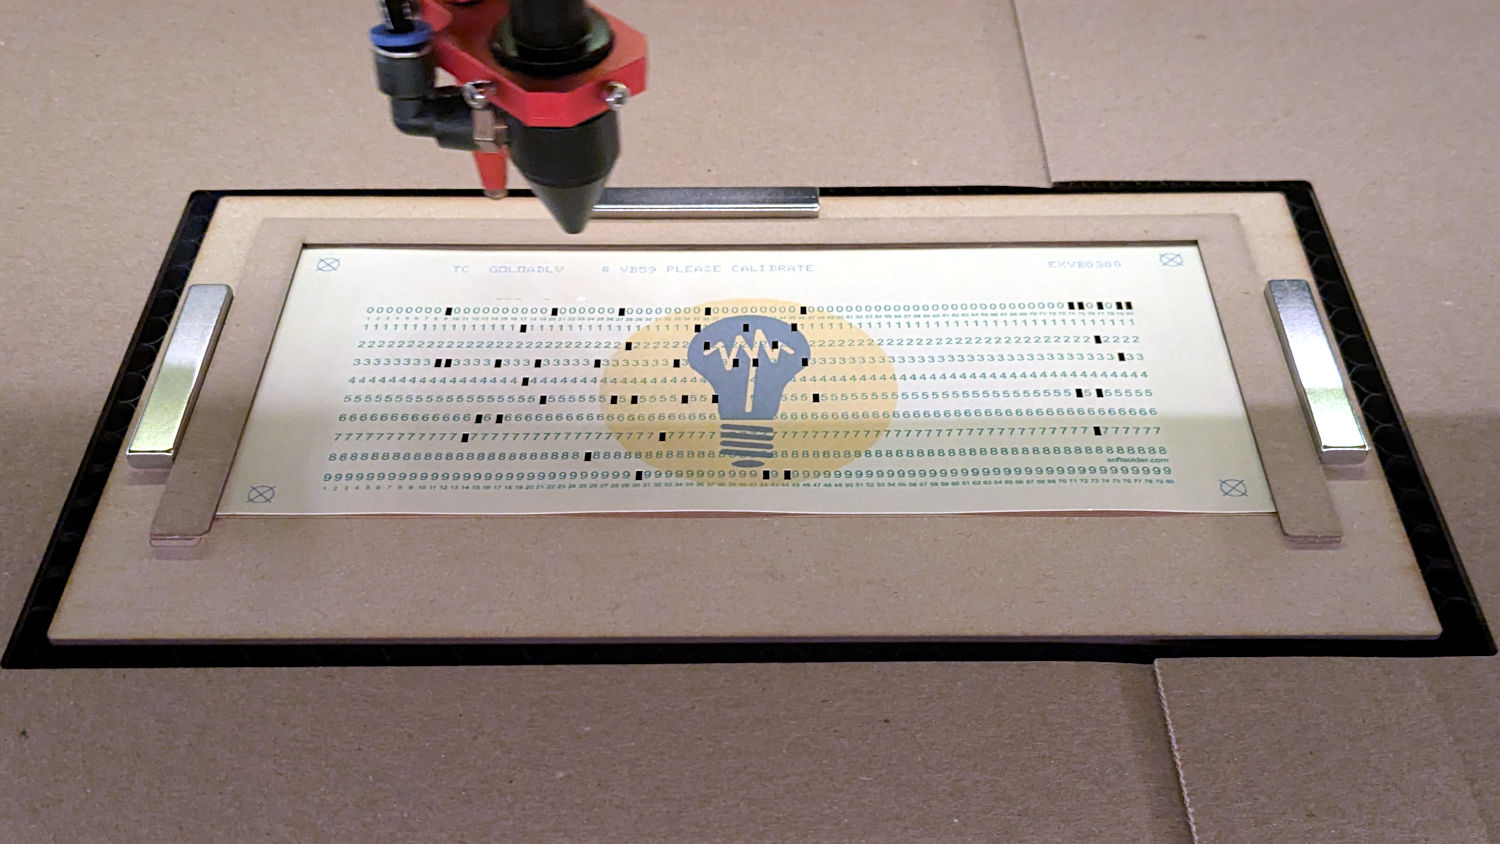
The finger-crushingly strong magnets hold the fixture firmly to the (steel!) honeycomb, while allowing some adjustment. Unlike most fixtures, this one must slide around to align the printed targets with the laser positions; for reasons to be explained later, LightBurn’s Print and Cut alignment isn’t useful.
The pieces:
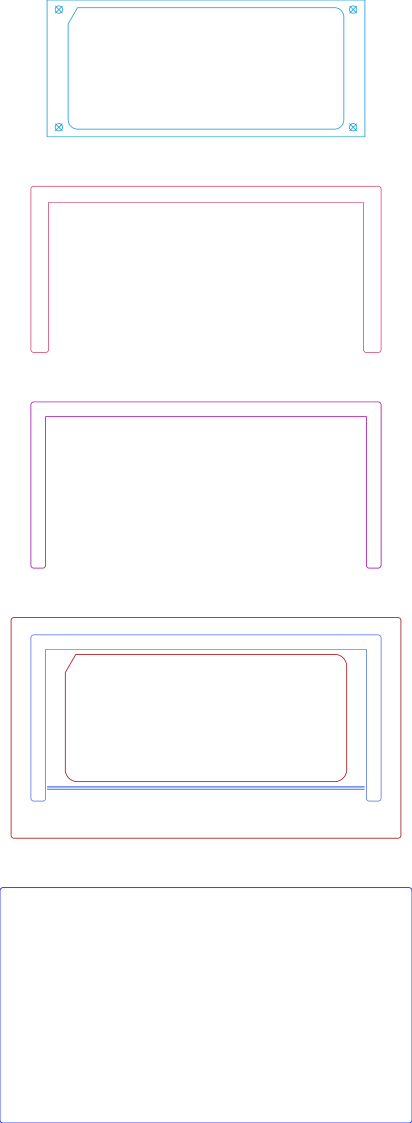
The top layout (on a LightBurn tool layer) matches the 1/3 Letter just-printed card, with targets bracketing the finished card outline. All the other pieces derive from those outlines with suitable offsets.
Glue the next three pieces together:
- Chipboard extending a millimeter over the card edges to hold it down
- Thin cardboard, about 0.6 mm thick, a millimeter beyond the card sides and flush with its top
- 3 mm MDF baseplate on the honeycomb
The card-shaped baseplate cutout lies 2 mm outside the card perimeter, for obvious reasons.
Set the laser speed / power so the blue lines on the baseplate mark the MDF for easy positioning of the cardboard spacer. The three parallel lines in front make it obvious when the card isn’t flush against the rear edge of the spacer; I’d only need one line if my paper cutter were perfectly calibrated.
The big blue rectangle on the bottom cuts a hole in a sheet of corrugated cardboard covering the platform, ensuring the air flows across the card and through the honeycomb behind the fixture; you want as little smoke hovering over the card as possible. The seam in my cardboard sheet was where they glued the box together; there’s no reason to be fussy with an air shield.
When the cutting is done, the finished card falls free:

A snippet of masking tape helps extract the card without bending it.
The LightBurn SVG layout as a GitHub Gist:

Spam comments get trashed, so don’t bother. Comment moderation may cause a delay.