Ed Nisley's Blog: Shop notes, electronics, firmware, machinery, 3D printing, laser cuttery, and curiosities. Contents: 100% human thinking, 0% AI slop.
A low-end audio power amp destined for a pair of ancient-yet-still-serviceable speakers arrived, but attempting to poke wires through the side holes of the banana jacks showed they were oriented in random directions. Back in the day, banana jacks had D-shaped shafts fitted into D-shaped panel holes, but those days are gone.
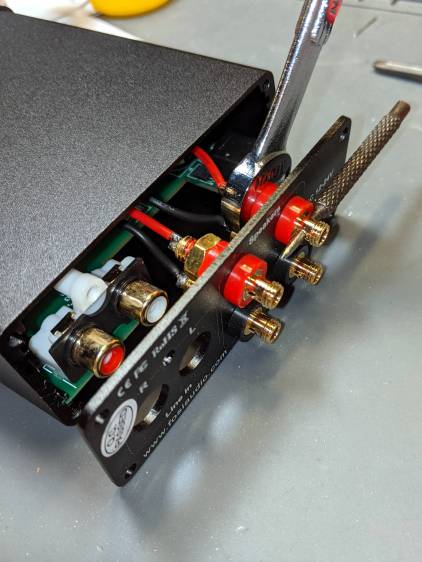
A few minutes with screwdriver, wrench, and (tiny) punch sufficed to line up the holes for E-Z poking:
Fosi audio amp – jack alignment
Despite the new convenience, I decided to solder banana plugs to the speaker wires, leading to the discovery my few remaining plugs came from the very bottom of the usability barrel:
Cheap banana plug – solder side
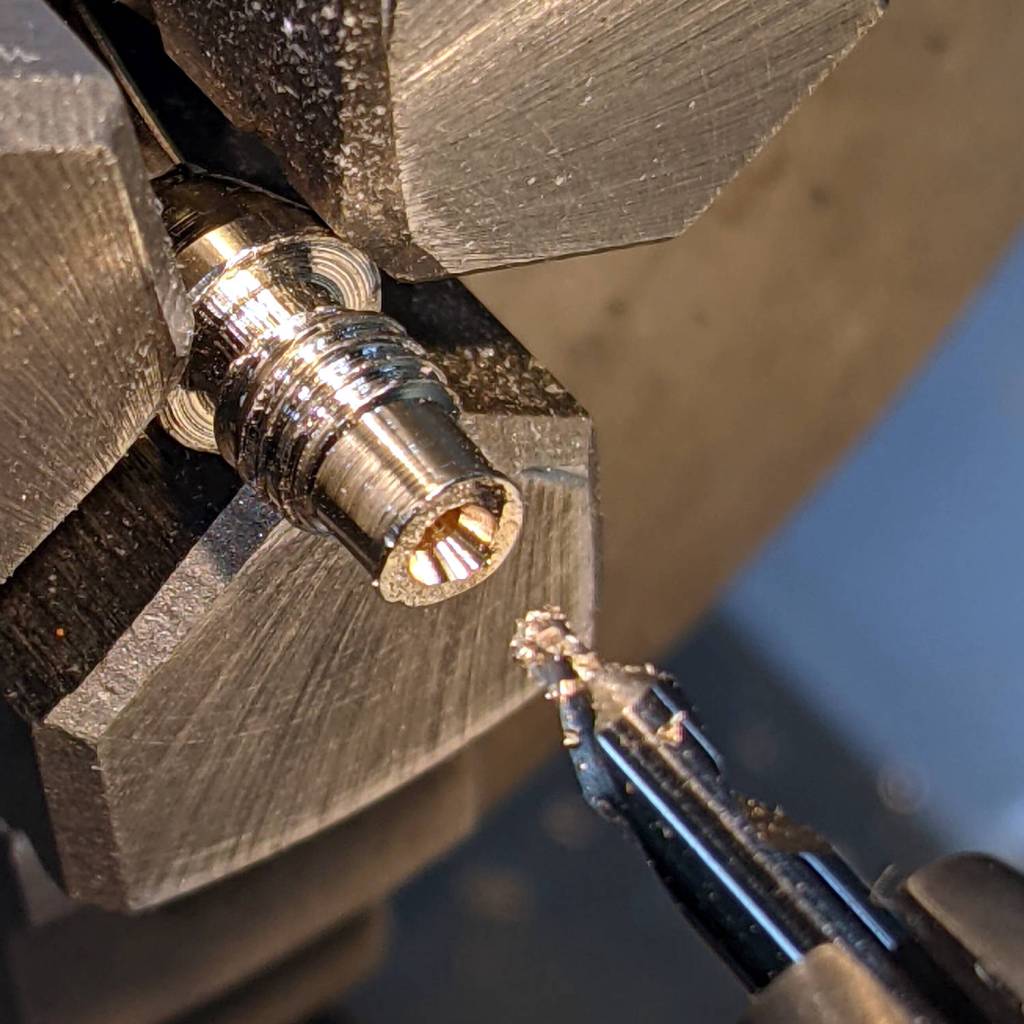
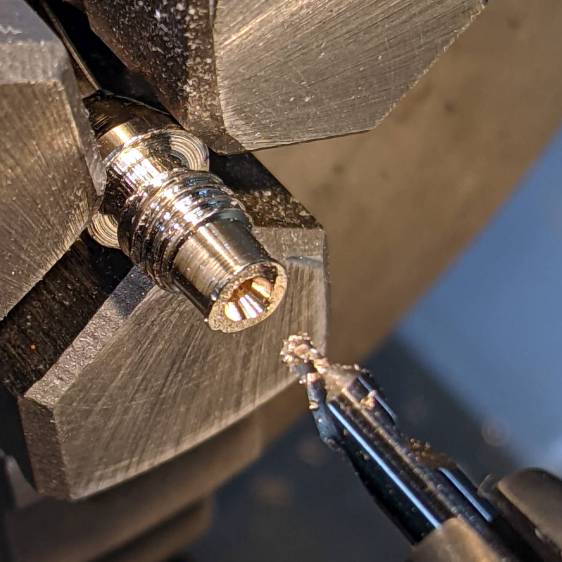
I have no idea how one might affix a wire to that blank stub, but poking a small center drill into the brass lump produces an easily solderable recess:
Cheap banana plug – center drilled
Dab with flux, tin, insert wire, add solder, repeat with all four plugs, and I’m set with a boomin’ system.
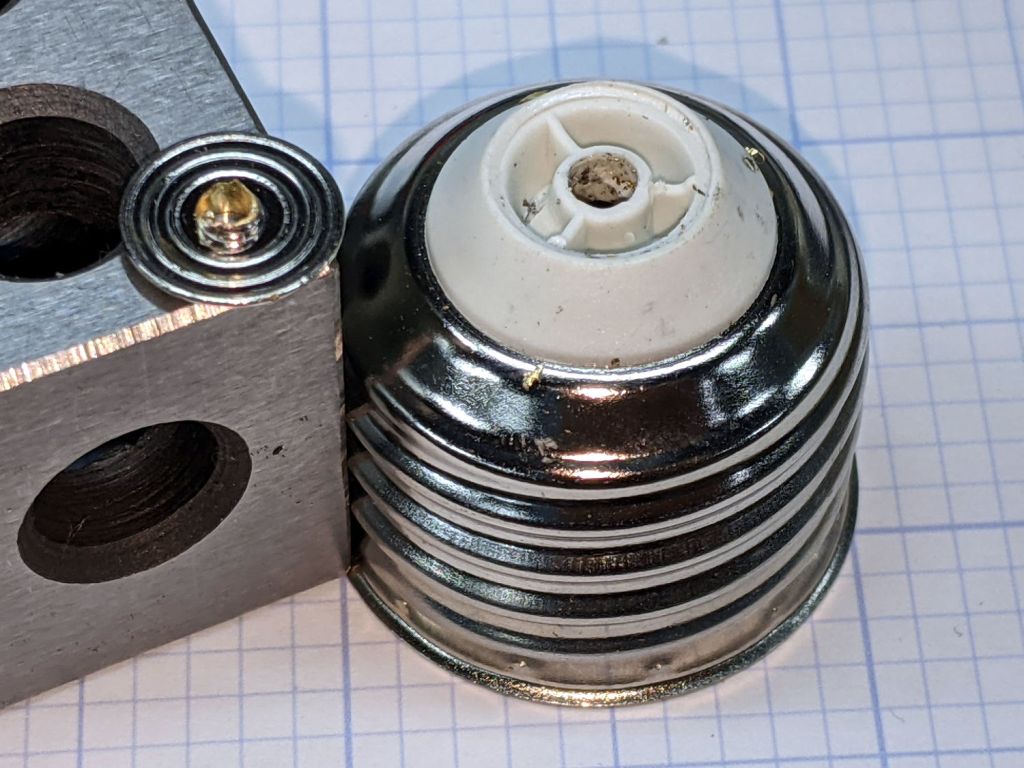
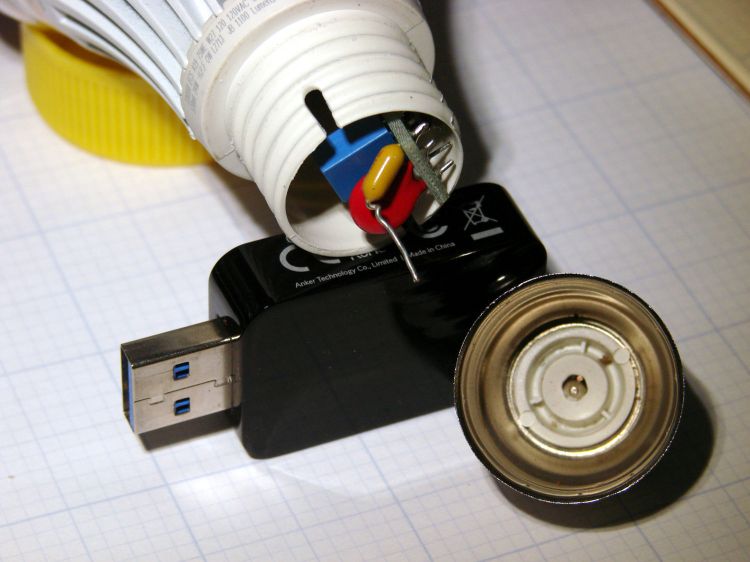
The entire metal base shell unscrewed from the plastic housing and twisted off the lead from what looks like a PTC fuse in series with the center contact; the cute little pigtail effect suggests I’ve wrecked the epoxy-to-wire seal.
It had a five year warranty which, alas, expired three years ago. This style of bulb has fallen out of favor, so I may as well get some Quality Shop Time out of it.
I don’t know how the factory machinery attached the lead to the contact button, but I’m going to go primal on it with some solder. The trick will be soldering it after assembly, so the first step is to drill through the middle of the button.
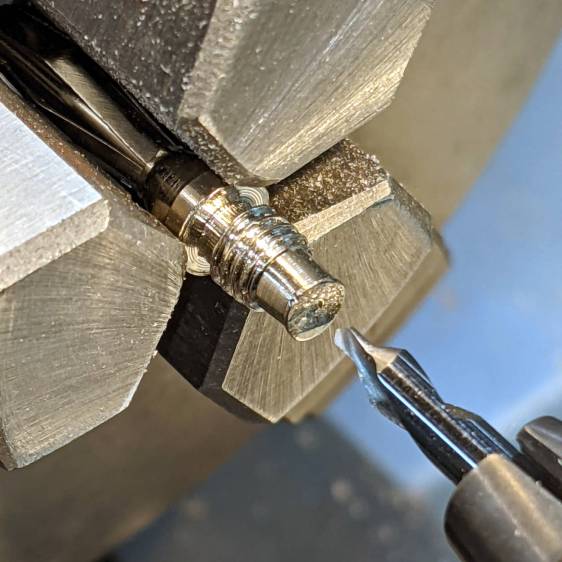
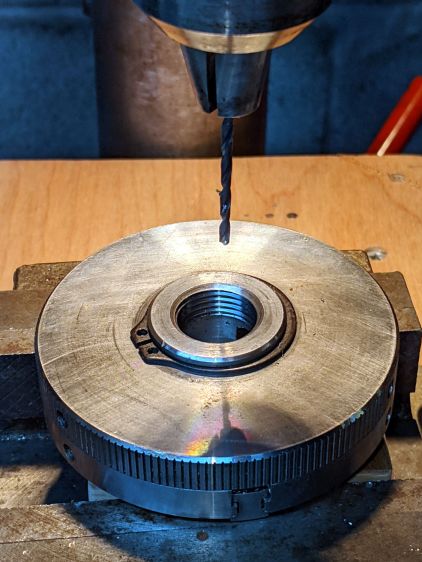
Grab it nose-down in the Sherline’s three-jaw chuck, flip it over, grab the chuck in the drill press vise, line it up, center-drill the button, then drill right through that sucker:
LED Bulb – base drilling setup
Of course, the contact came loose from the base, because I pretty much drilled right through the rivet flange holding it in place:
LED Bulb – removed center contact
Nothing a dab of epoxy can’t fix, though. I scuffed up the outside of the contact to remove the nickel (?) plating and expose the underlying brass to improve its solderability.
After the epoxy cured, align wire with hole, screw the base onto the lamp shell, and it’s ready for soldering:
LED Bulb – base ready for solder
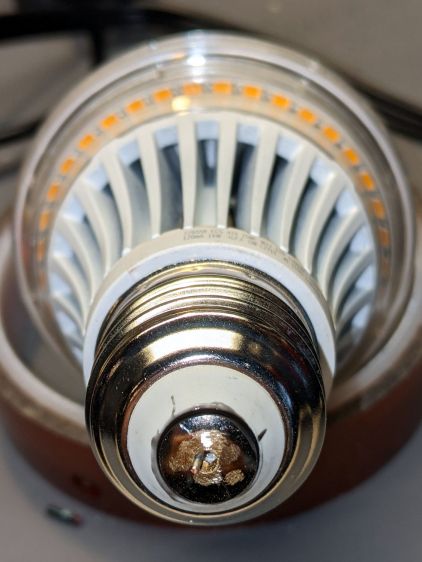
The hole is way too large for the wire, but I wasn’t about to wreck a tiny drill on what might have been a weld nugget. In any event, the bigger the blob, the better the job:
LED Bulb – soldered base
Just like light bulb bases used to look, back in the day.
With a bit of luck, it’ll sit in that socket for another seven years.
Because I live in the future and had solved this problem in the past, eight hours of print time produced a second shade:
Torchiere Lamp Shade 2 – on platform
I sliced the same STL file with PrusaSlicer to get G-Code incorporating whatever configuration changes I’ve made to the M2 over the years and include any slicing algorithm improvements; the OpenSCAD code remains unchanged.
The as-printed shade had pretty much the same crystalline aspect as the first one:
Torchiere Lamp Shade 2 – no epoxy
Smoothing a layer of white-tinted epoxy over the interior while spinning it slowly in the mini-lathe calmed it down enough for our simple needs, although the picture I tried to take didn’t show much difference.
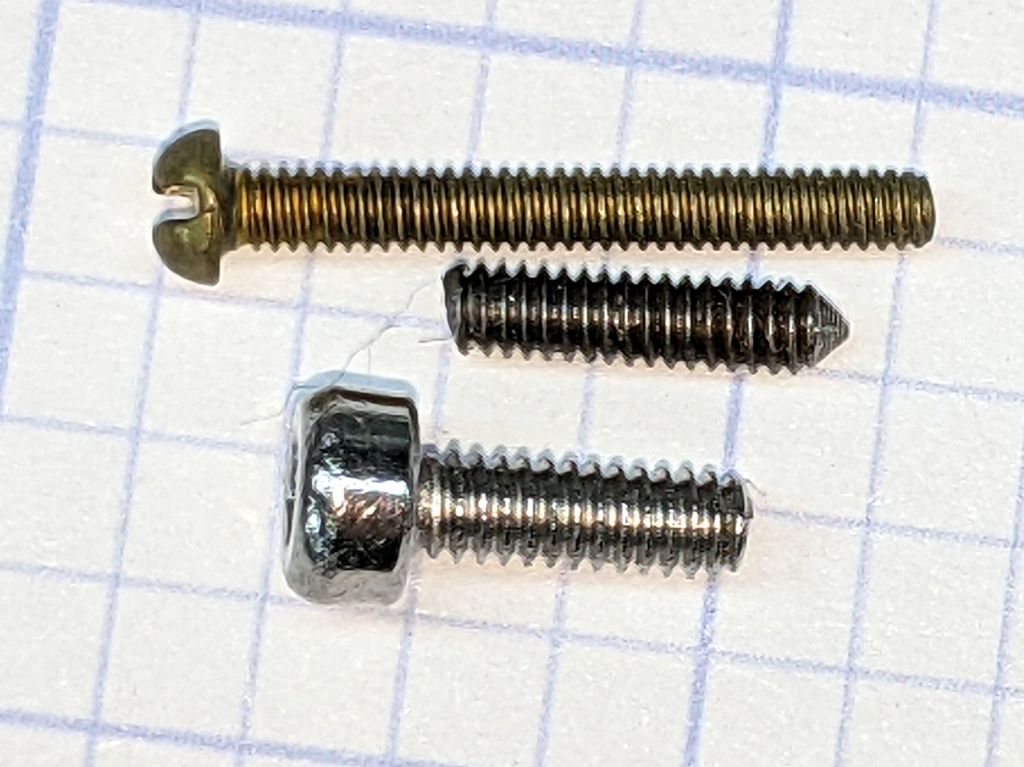
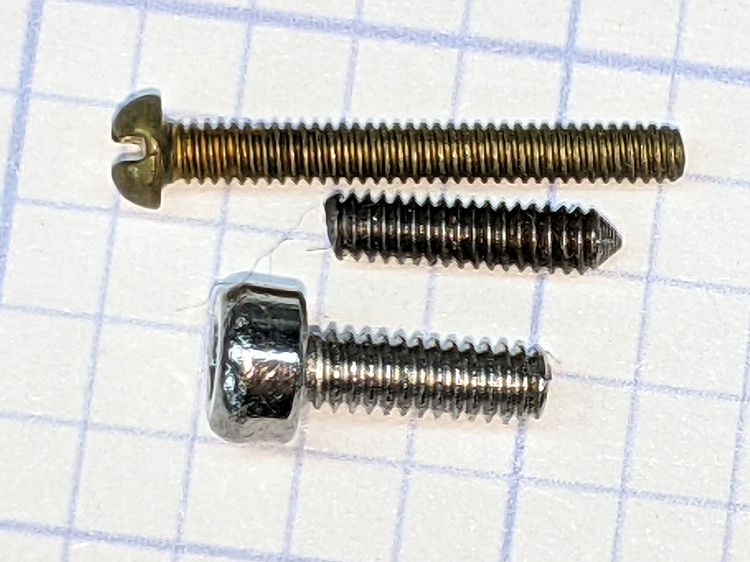
The 1-72 brass screw came heartbreakingly close to fitting and the M2 SHCS obviously won’t play. I can’t measure super-fine threads, but I can count: 16 threads on the stub occupy about the same distance as 18 threads on the 1-72 screw, so 72 × 8 / 9 = 64 tpi and it’s a 1-64 screw, not the far more standard 1-72.
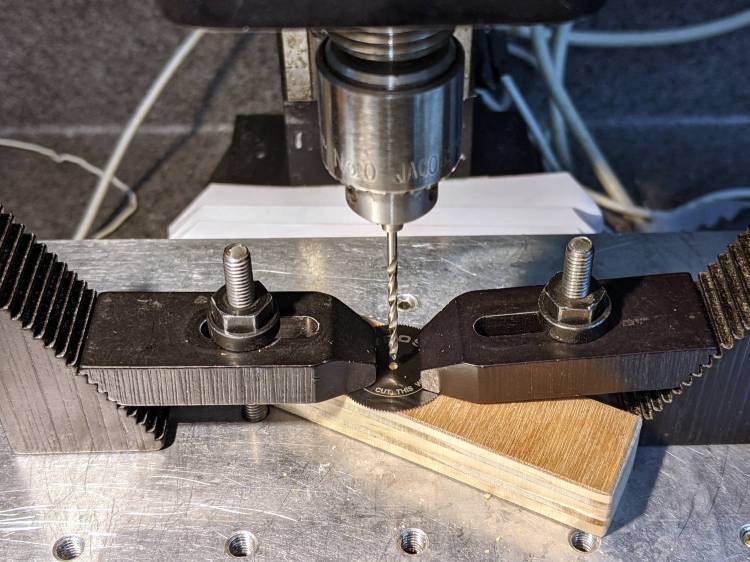
The blade hole just barely fit a #51 = 67 mil drill and measuring my assortment of mandrels produced one with the only M1.8×0.35 (OD = 71 mil) screw I’ve ever seen, so I drilled the blade with a #50 = 70 mil drill:
Gyros miniature saw blade – hole enlarging
Should the oddball screw in that mandrel break, the next step will be a #48 = 76 mil drill to fit the blade around the M2×0.4 screw for cheap and readily available mandrels.
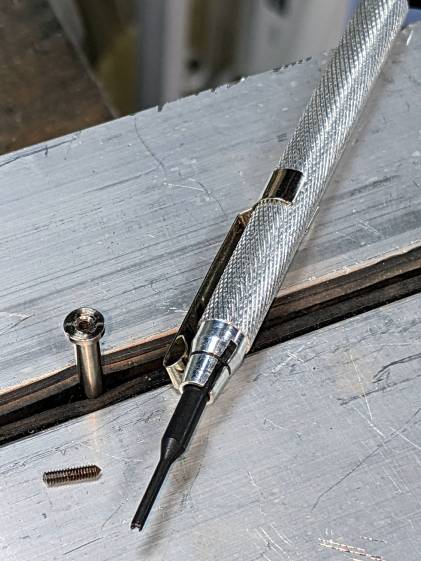
So, being left with a broken screw stub in the original Gyros mandrel, I soaked the scene in Kroil overnight, then applied a tiny screw extractor with amazingly good results:
Gyros mandrel – broken screw extraction
I did eventually find one 1-64 screw in the Big Box o’ Tiny Screws, although its infinitesimal head seems intended for gentler duty than clamping a saw blade to the end of a whirling shaft.
Hand-held Dremel mandrels have, as far as I can tell, no particular runout specs, so chucking them in a Sherline spindle collet pretty much guarantees only a few teeth on one side of the saw will do all the cutting. Which, I hope, will suffice for my simple needs.