I finally decommissioned my old Thing-O-Matic, as it’s been far surpassed by the current generation of dirt-cheap Prusa-style 3D printers, and must now figure out what to do with about 10 kg of 3 mm ABS filament. Yes, 3 mm filament from back in the Bad Old Days.
Also back in the day, our Larval Engineer made millifiori creations in glass (at school) and polymer clay, building up the final piece from murrine canes, which suggested a similar technique using filament strands:

Well, maybe it’s not exactly art …
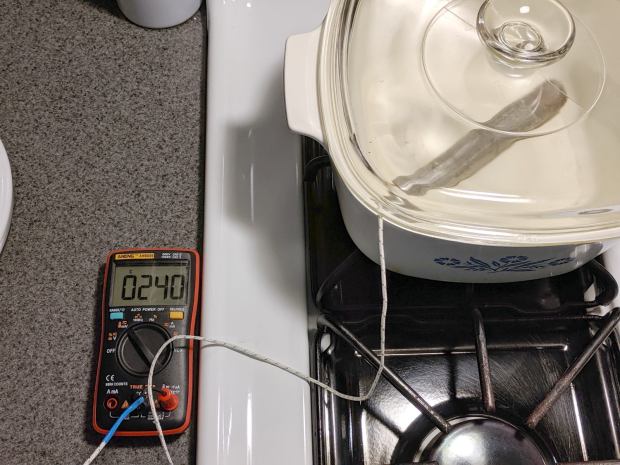
Just to see how it might work, I packed a random length of conduit with filament snippets and jammed a thermocouple into the middle:

Which went into the shop’s sacrificial Dutch oven over low heat:
For lack of anything smarter, I slowly heated it to 250 °C, well above what the Thing-O-Matic used for extrusion, let it soak for a few minutes, then let the tube cool on the counter.
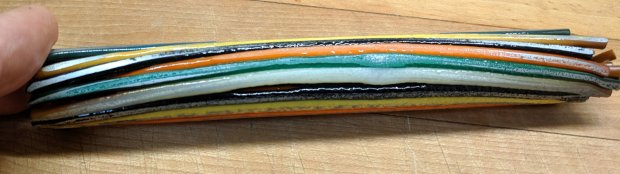
Some persuasion with a hammer and drift punch extracted the fused filament:

Obviously, the concept needs more work, but the bottom side looks promising:
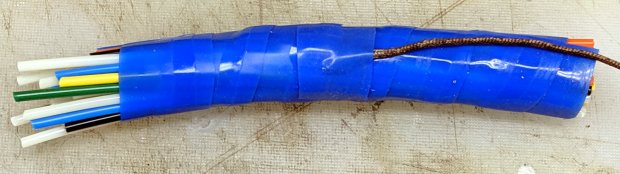
Wrapping the bundle with silicone tape should keep the filament from sticking to the tube and provide uniform compression:

I forced it into the tube and wrapped the whole affair with aluminum foil to confine the hot ABS stench:

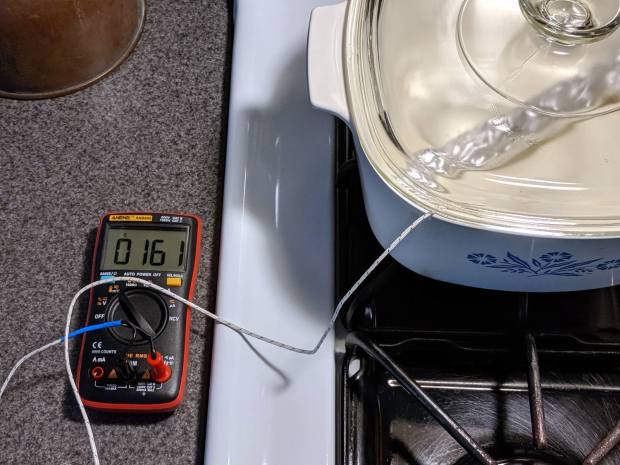
I held this one at 235 °C for a few minutes, cooled, unwrapped, and discovered the silicone wrap worked as expected:

OK, the blob on each end wasn’t expected, but at least the thermocouple came out with gentle persuasion. The compressed filament looked like it should be edible:

The molten filament oozed out of the wrap inside the tube, over there toward the right.
The filament snippets have a distinct curvature, brought on by years spent snuggled around a spool’s core, so I wondered if they could be straightened by application of somewhat less heat. Wikipedia lists the glass transition temperature for various ABS compositions as around 105 °C, so I packed the tube with more snippets and affixed the thermocouple with silicone tape:

Wrap with foil, heat to 100 °C, let cool, and they’re definitely straighter than the unheated white strand at the bottom:

Having learned my lesson with a thermocouple inside the strands, the straightened strands get a looser silicone wrap with the thermocouple secured to the outside of the bundle:
Heat to 160 °C:
Let cool and (easily!) slide the compressed bundle out of the tube:

The silicone wrap definitely mushed the strands together, as shown by the larger diameter on the uncompressed end:

Bandsawing the bundle reveals nicely fused filaments inside, along with melty ends that stuck out of the wrap:

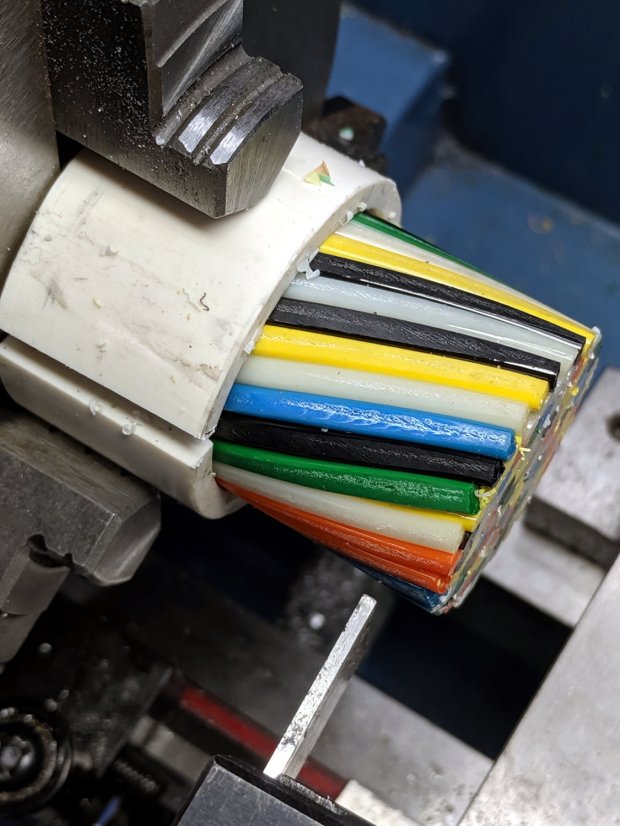
Thinking shorter lengths might pack better without straightening, I faced the ends of a thick aluminum pipe and stuffed as many snippets into it as would fit. This is the point where a real artist would arrange the filaments in a pleasing pattern, if not a picture, but I was content with a random layout:

That’s what the ends looked like after heating to 160 °C: somewhat glazed, reasonably fused, but certainly not compacted. The other end pointed upward and definitely felt the heat:

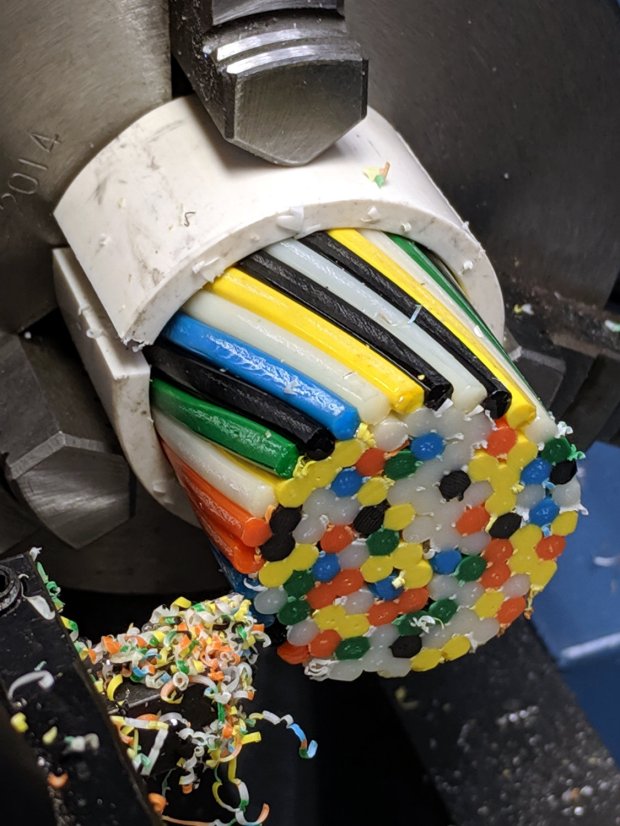
With a PCV pipe “collet” holding the cable / cane / murrina in the chuck, I faced the end:
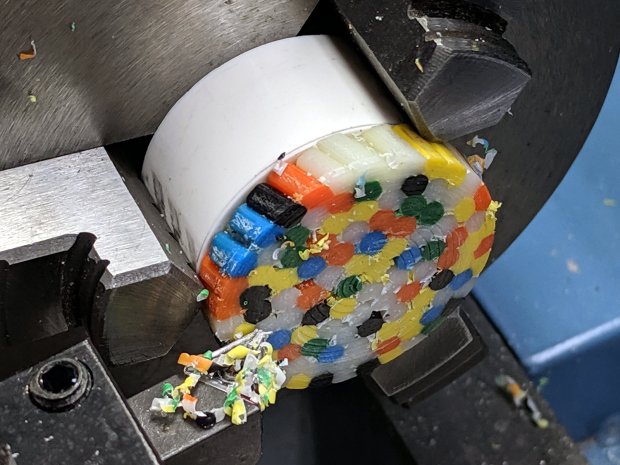
After taking this picture, I came to my senses and bandsawed the slice instead:
Parting the slice in the lathe might have worked, but it just seemed like a really really bad idea when I looked at the setup.
A PVC pipe spacer kept the slice lined up in the chuck jaws while facing the bandsawed end:
The slice and the cable:

Although the filament snippets fuse together without a silicone tape compression wrap, the gaps collect plenty of swarf during the cutting & facing:
The snippets along the outside, closest to the pipe, obviously got hotter than the ones in the middle and fused more solidly.
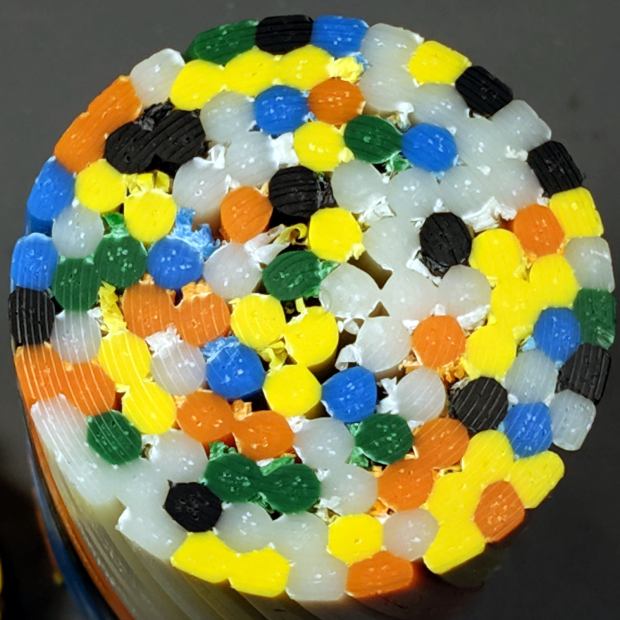
The pipe has a 35 mm ID for an area 136 times larger than a 3 mm filament. I packed about 100 snippets into the pipe, a 0.73 packing fraction, which looks to be in the right ballpark for the high end of the Circle Packing Problem. If they were straighter, maybe a few more would fit, but twisting the lot into a cable seemed to align them pretty well.
Perhaps filling the gaps with pourable epoxy before cutting the slices would help? A completely filled interior might require pulling a good vacuum on the whole thing.
A hexagonal pipe would produce slices one could tile into a larger sheet.
All in all, a useful exercise, but … it ain’t Art yet!

Comments
7 responses to “Printer Filament Millifiori”
It’s my fervent aim to have my CupCake operating again by the end of the year, so I could be in the market for 3mm ABS if the price were right. You know how to reach me!
Seems many printers use 3mm filament today still – my Lulzbot Mini 2 among others
However, make your pucks around 3 inches in dia. and add something to fill in the gaps and interesting conversation starter coasters.
Reminded me of way back and making candles by putting lots of cut of Crayons in a container and melting them all together.
While kibitzing with our Young Engineer, I ran the numbers for 3 and 4 inch pucks: something like 500 and 1300 filaments. Yowch!
Made me think of DIY pick-n-place robotics, it did …
Making art is easy. Print out a label “ART”, stick it to your trashcan a have at it :)
I’m not sure retroactive artification is allowed, but it’d certainly simplify picking a winner.
We recently saw an installation consisting of two galvanized pails stuck onto a wall frame, so apparently anything is possible.
If you can conjure up a heated cylinder press – injection molding maybe.
Surely, there’s an industrial process featuring a radially contracting cylinder. I’m equally certain it’s way too complicated for my needs.
Fortunately, all the filament found a good home and I’m out of the millifiori game. Whew!