Filling the mini-lathe’s tailstock ways with epoxy made it slide easily and lock firmly. Some upcoming projects urged me to perform The Canonical Mini-Lathe Tailstock Upgrades, as shown nearly everywhere on the Intertubes and detailed in various HSM articles.
For unknown reasons, the screw clamping the tailstock’s top and bottom castings together threads into the top casting from below:

Although it’s faintly possible you could adjust it by reaching up from below the bed, it’s easier to just drill out the threads for a clearance fit around a 5 mm SHCS:
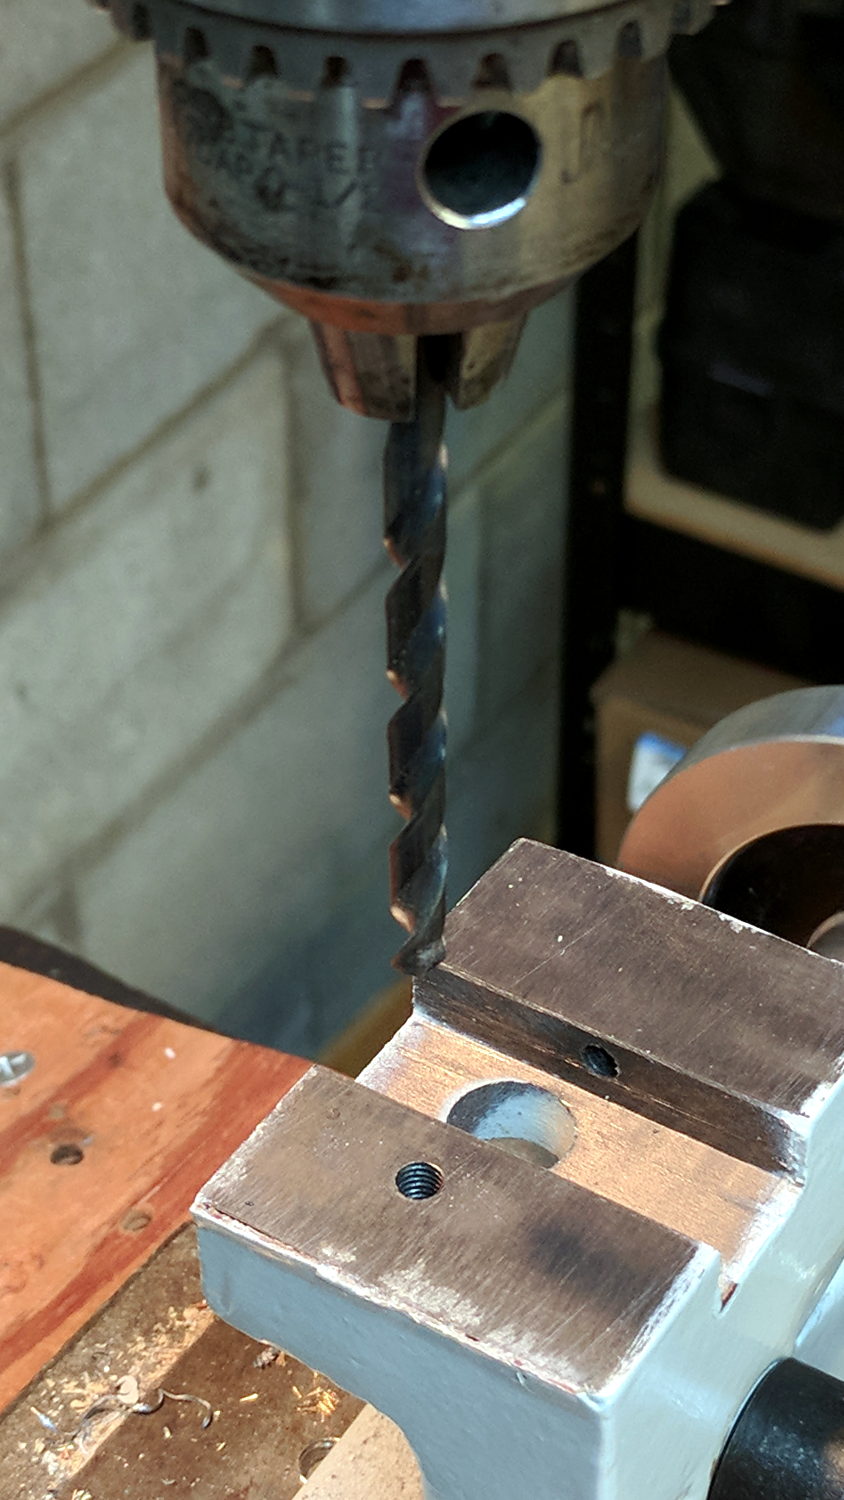
The drill went through the tailstock so easily I think the hole had been capped with body filler, which would eliminate the need for a bottoming tap.
Then build a square nut from a slice of 7/16 inch square stock:

… and be done with it:
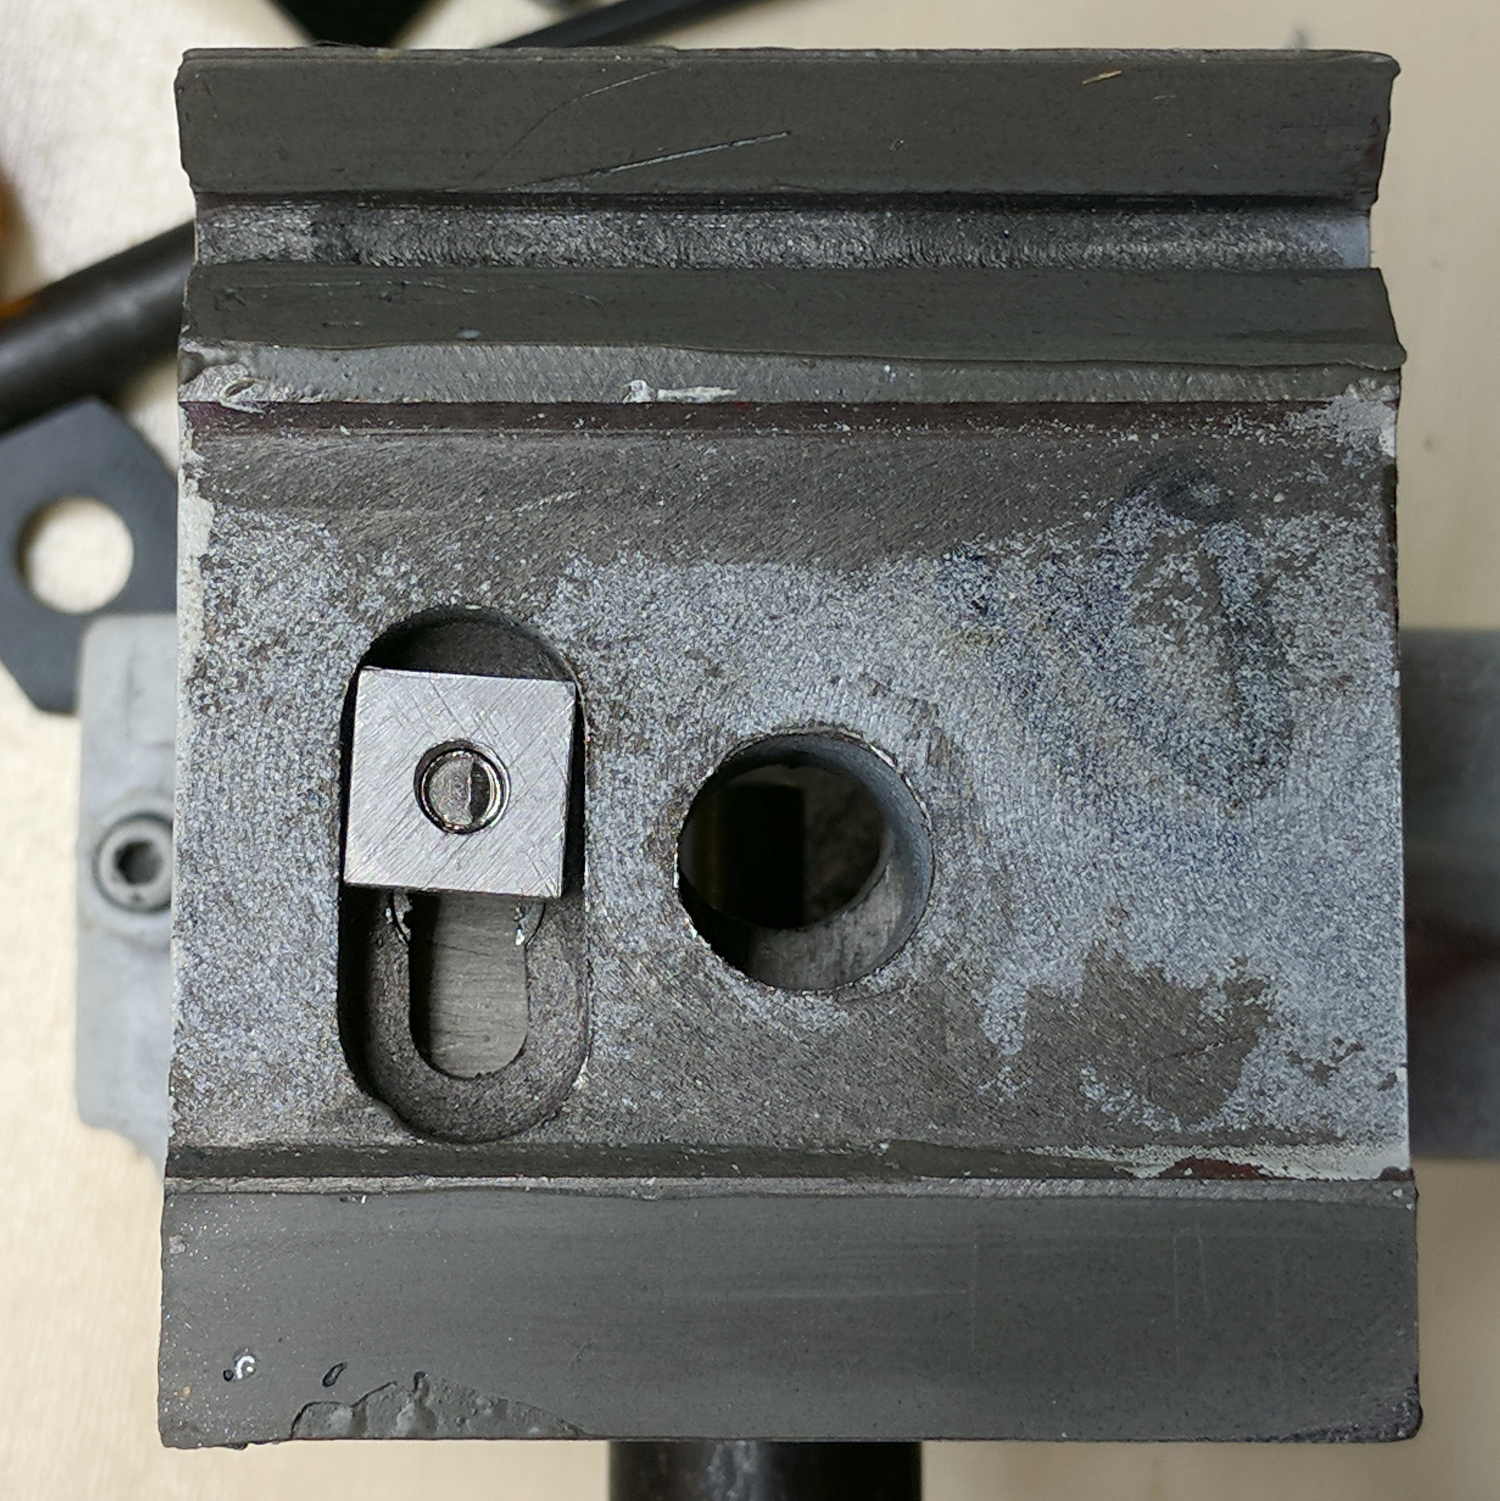
If the tailstock ever needs more adjustment range, I can knock those corners down a bit.
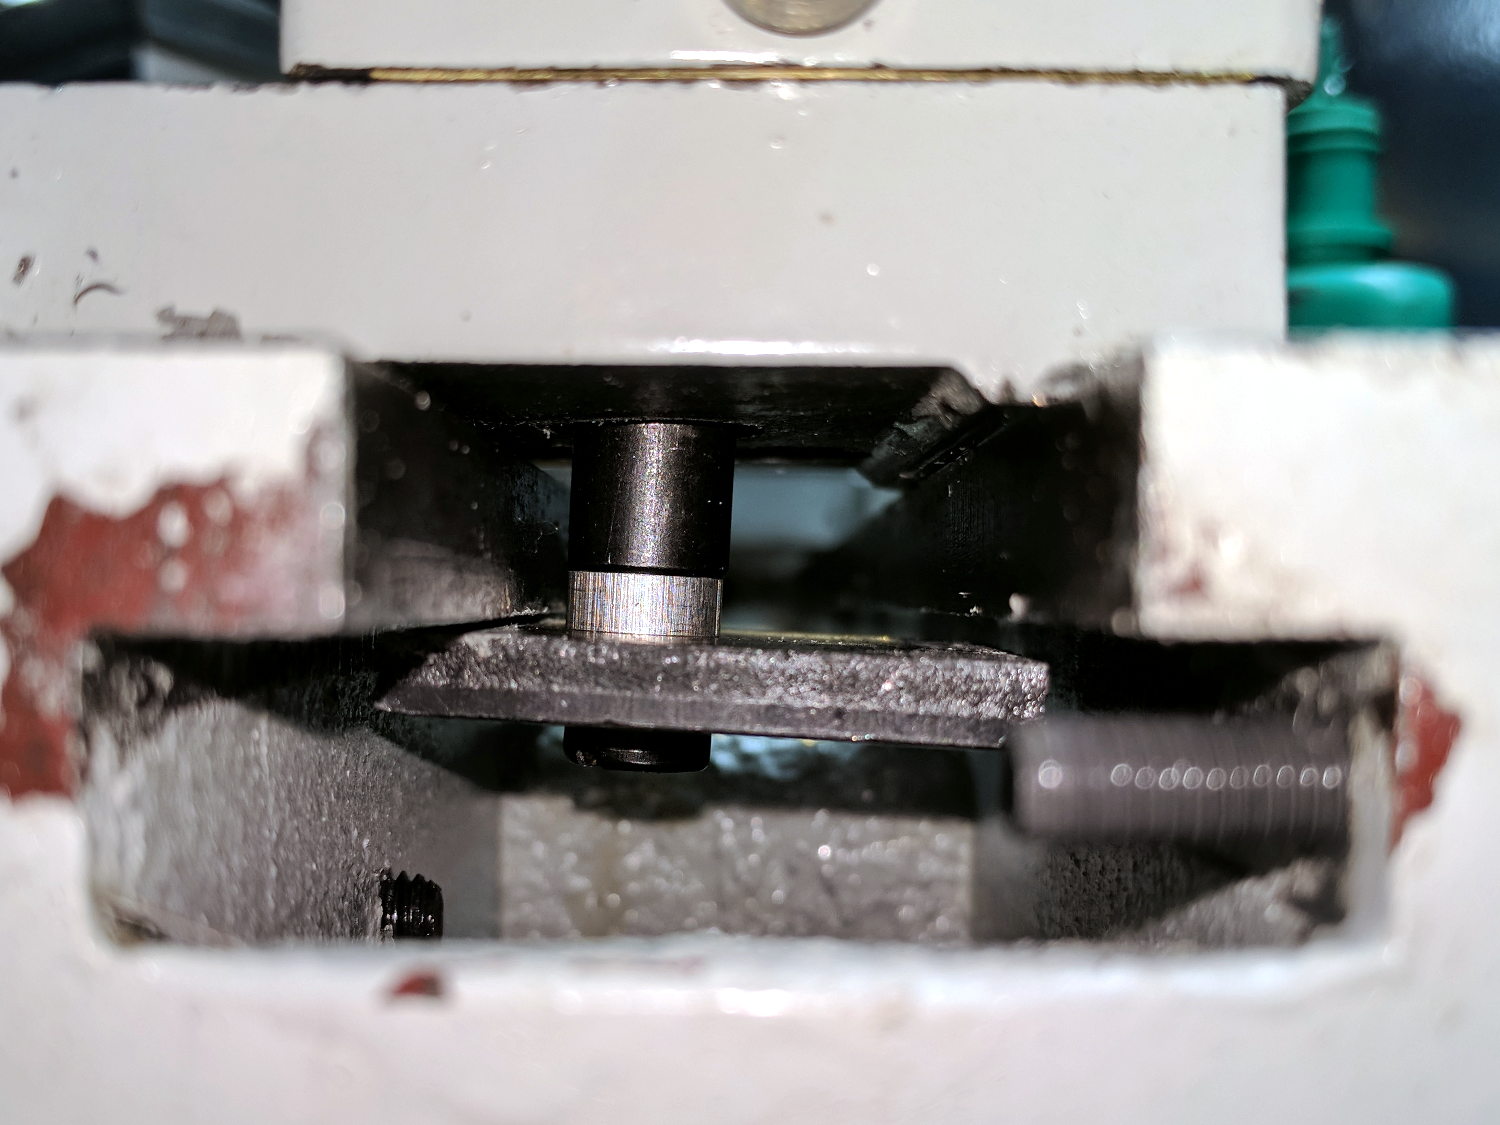
The screw clamps the castings vertically, with a second screw under the tailstock ram handwheel forcing the top and bottom not-quite dovetails together horizontally. I replaced both with 5 mm socket head cap screws:

Tightening a cup-end SHCS against the square not-a-dovetail tends to shift the upper casting; the original screw had a narrow pin end to reduce the torque. Having brass rod close at hand, this seemed easier than machining the screw:

The little tip comes from using a square-ended cutoff tool. Purists will dress the tool at a slight angle to cut off one side first. Of course, which way one dresses it depends on whether you want the remaining stub on the stock or the cut-off part. Sooo, I still have a square tool.
The tailstock has a cam lock handle clamping a square-ish plate against the bottom of the bed ways. Unfortunately, the manufacturer cut the plate with a dull shear, producing two beveled edges:

Flipping it over dramatically improved the clamping action, although I must eventually scrape the paint and grunge off the bottom of the ways. While I had it off, I turned a small aluminum bushing to replace the pair of washers:
The plate hangs lower toward the rear because the clamping bolt isn’t in the middle. The tailstock originally had a mighty spring holding it level, but the spring tended to snag against the front side of the bed, so I removed it.
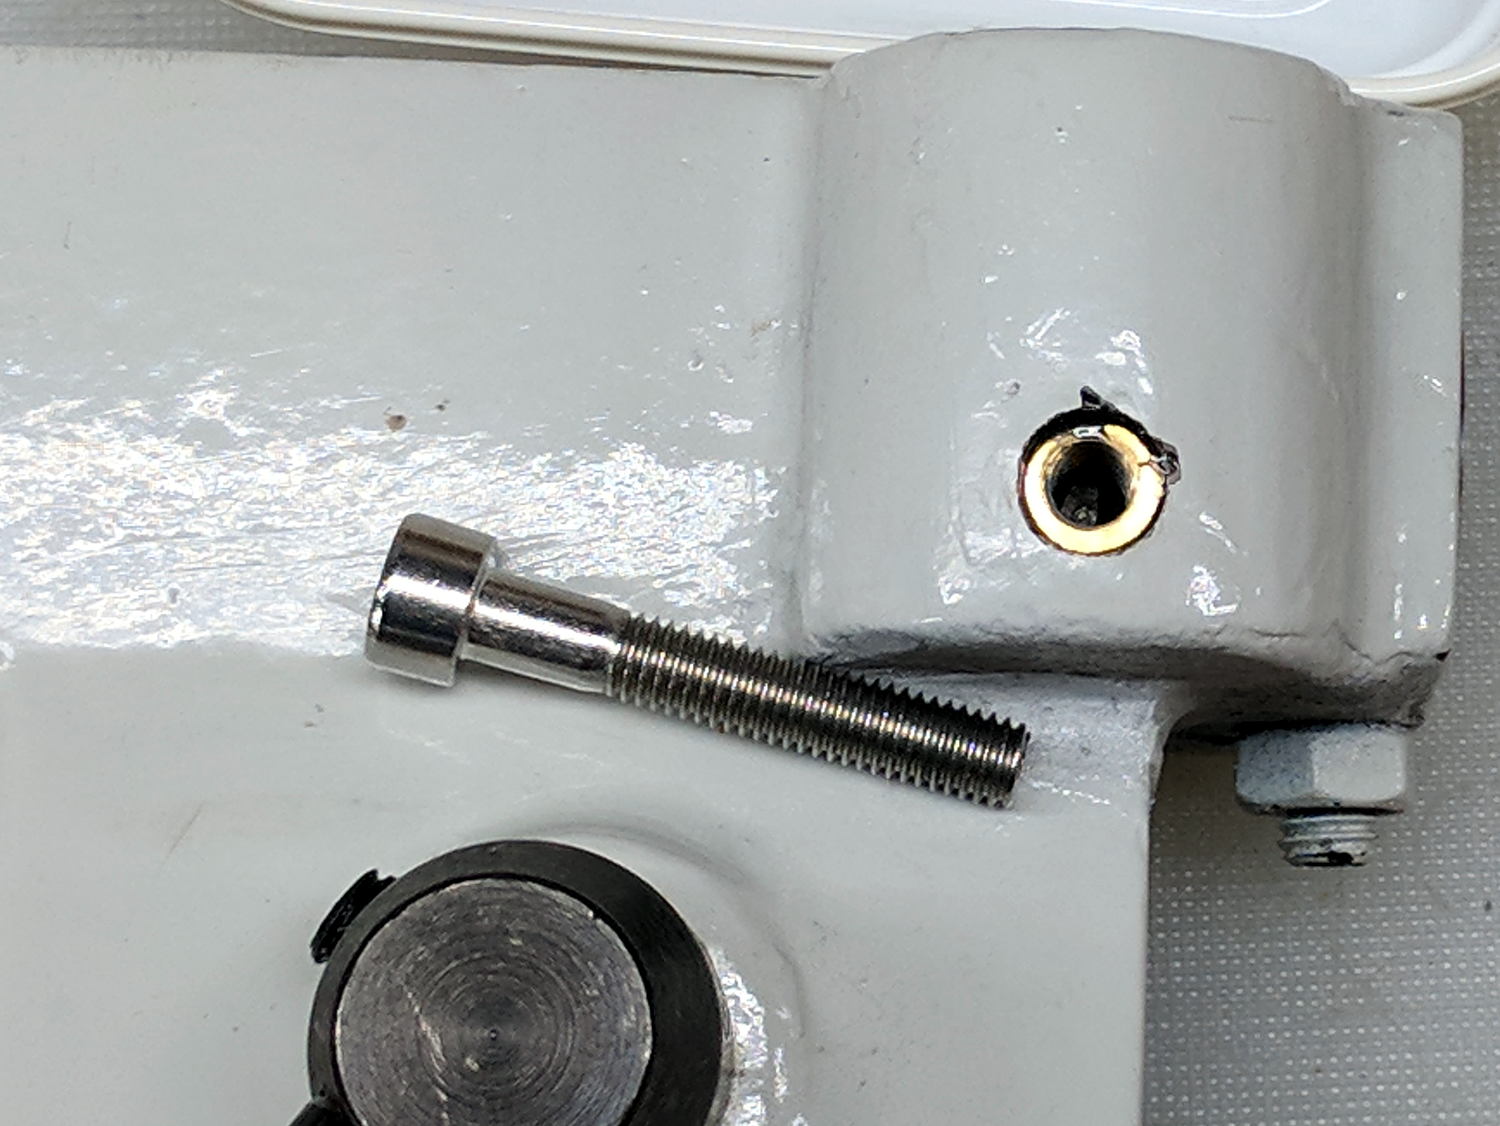
The lever handle actuating the tailstock cam lock had no stops and rotated freely counterclockwise when loosened. The tailstock casting had enough meat for a 5 mm threaded brass insert in a useful location, so I drilled a suitable hole:

The vacuum hose slurped up the cast iron dust, which is a Very Good Idea.
Butter up the insert with JB Kwik epoxy, slide into the hole, wipe off most of the excess, then pause to admire the result:
The lever stopper won’t win any design awards, even though it’s a dramatic usability improvement:

The finger-tight nut serves to lock the SHCS in place against the lever’s impact. I conjured a small bumper around the head from a rubber foot intended to fit under a random box of electronics.
Pushing the lever leftward to the stop lets the tailstock slide freely and pushing it to the right clamps the tailstock to the bed. The cam’s limited rotation keeps the plate close enough to the underside of the bed to prevent it from tipping left-to-right as the tailstock slides, so it no longer snags.
While I had the tailstock up on jackstands, this is what the ram thrust bearing looks like:
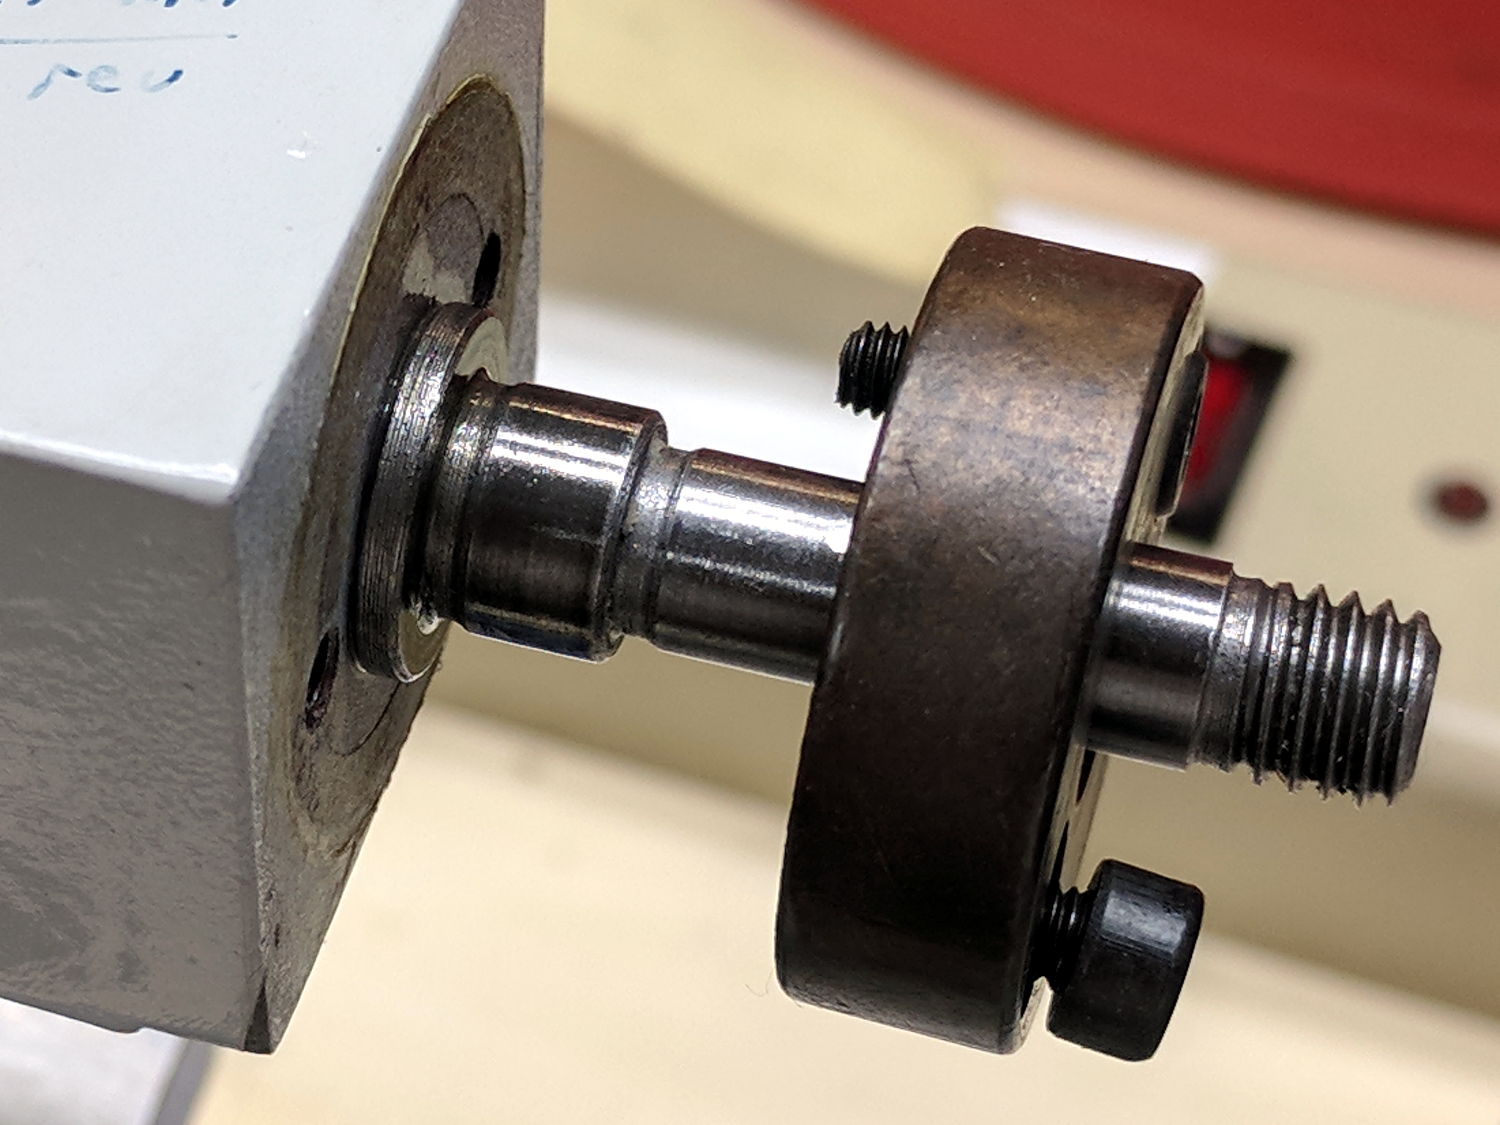
The flange over on the left bears against the steel disk on the right, with no real thrust bearing to be seen. A dab of grease improved its disposition.
Now, to realign the thing …
