The power switch on Mary’s “embroidery” Kenmore Model 158 sewing machine became exceedingly stiff, to the extent she said it was painful to push. Buying a shiny new switch seemed iffy, because a cursory search through the usual reputable electronic suppliers suggested there’s no way to specify how stiff the button might be, nor how that might feel in actual practice.
The switch harvested from the pulse-drive machine felt somewhat less stiff, so I decided to (try to) loosen it up and, if that worked, swap it for the stubborn one.
A pair of rivets hold the two halves of the switch together, obviously intended as a permanent solution. A carbide burr in the Dremel tool dealt with them easily enough:

Inside, the actuator drives a rotating brass contact:
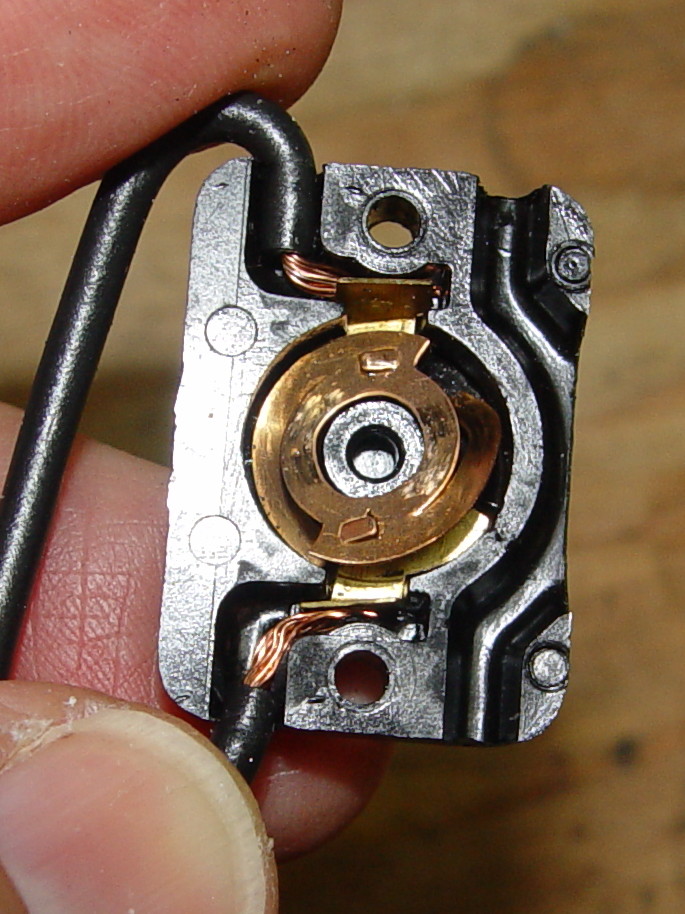
Two stationary brass contacts are spot-welded to the wires:
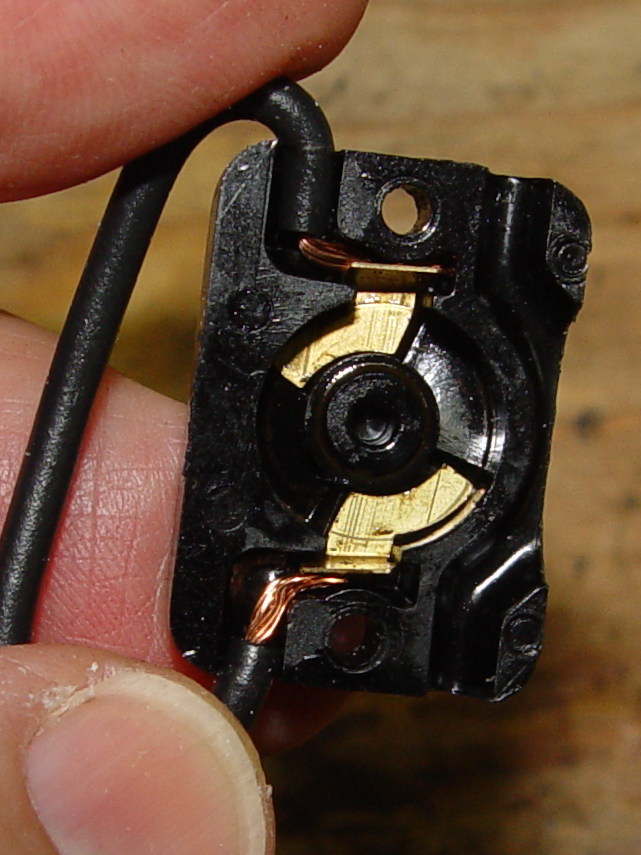
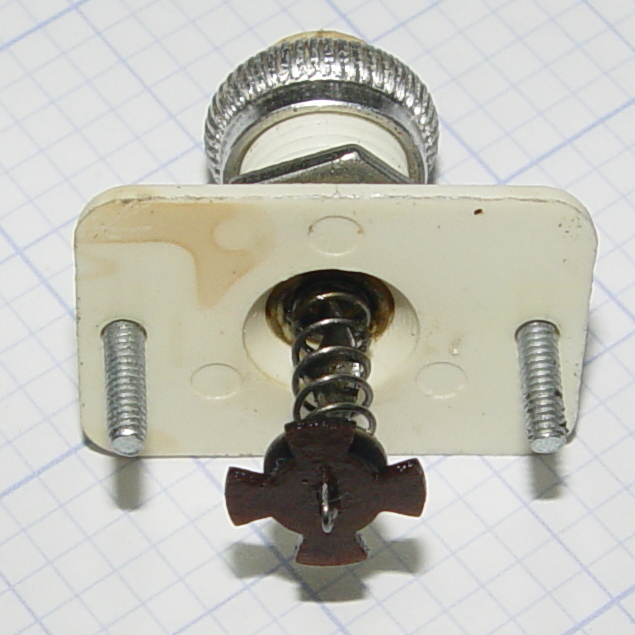
The actuator under the button consists of a helix-twisted steel rod, a rather stiff spring, and a four-vaned phenolic blade that engages those two little flaps on the rotor. The rivet holes exactly fit plain old 1-72 screws:
Not seeing anything obviously fix-able inside, I wiped the excess oil off and reassembled it in reverse order:
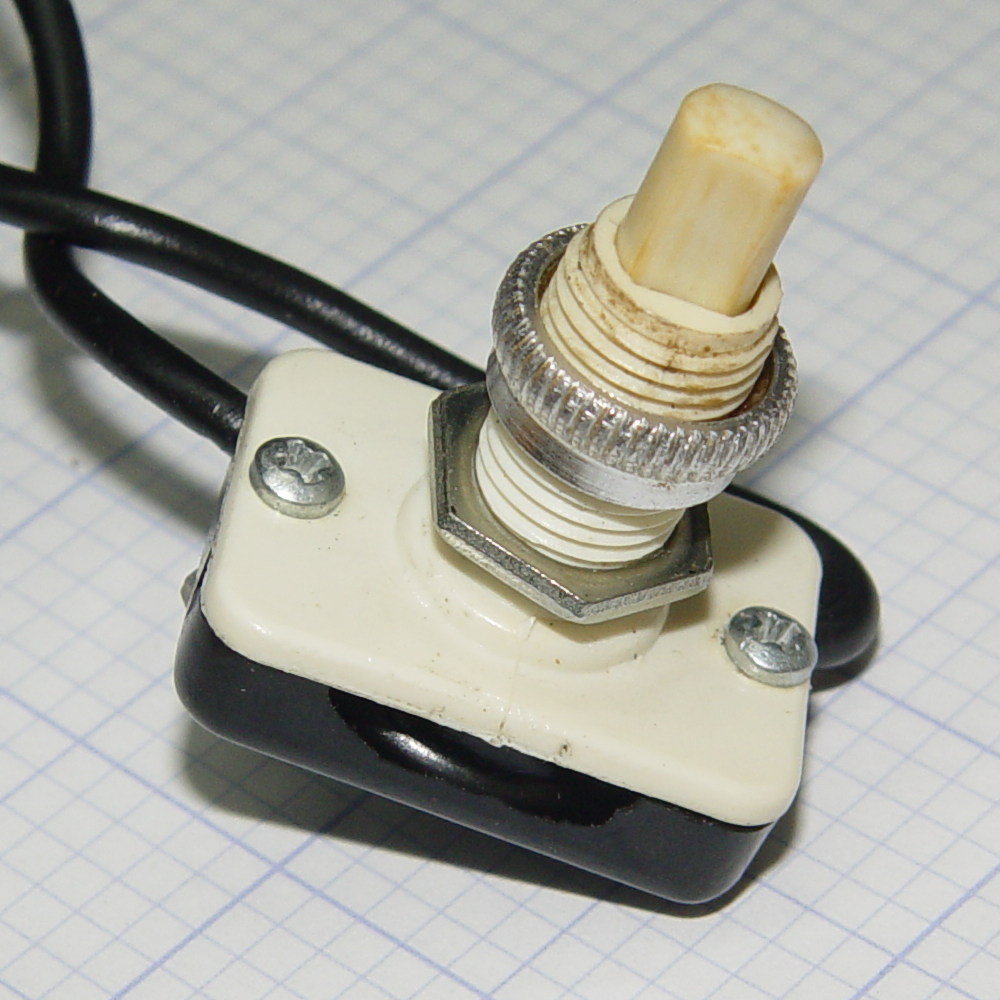
Astonishingly, that bit of attention loosened it up: the button now presses easily!
I swapped it with the too-stiff switch and declared victory…

Comments
10 responses to “Kenmore Model 158 Power Switch: Laying-on-of-hands Repair”
This is awesome! Just the kind of post I love. I have no idea how switches of this kind are made, so this was just perfect. Now I know a bit more. Woot!
(That’s what life is all about isn’t it? Amassing all kinds of knowledge?)
Well, it’s how they made switches half a century ago… [grin]
Doesn’t matter! Still fun to know. Maybe one day I coma across something like this, and then I might have an idea about what to do (if no one else knows). 😃
Julie’s 1980s Elna has been jamming due to poor quality thread (it was good, but now Greek cotton is cruddy) getting trapped in the bobbin mechanism, but now it’s jammed solidly. Something hard is in the way, possibly a piece of broken needle or a busted/out of place bit of mechanism. Julie bought a service contract with the local repair guy, so it’s his problem–doesn’t look like Elnas are intended to be repaired by the non-initiated.
I had to fix the switch on my hand-me-down bandsaw. Clogged with sawdust, but for the limited use I give it, every decade or so should do it.
Looks like I have Murphy on my back. House issues, and now the Kitchenaid mixer has some creative shapes for the bevel gear teeth. I guess 13 years is asking too much for the PTO shaft lube to last… Now I have to get the grease/gear dust out of the parts I did lube 4 years ago.
The Diamant 525 is still overkill, and the tiny ones underwhelm. Julie does 10 cups of brown rice flour at a time, but the rest she buys at the restaurant supply.
Verily, time passes quickly when you’re having fun…
You forgot cardinal rules:
1) Never make the job harder than it has to be.
2) Always spray Frog Juice on the malfunctioning part before
doing anything else. That may be enough.
Aye!
I think the previous owner squirted Sewing Machine Oil around the button shaft, because the interior ran wet with oil (plus stains on the button and under the top plate). Taking it apart may have moved some of the oil up from the bottom onto the actuator, but it definitely didn’t need more lube…
My Lifetime Supply of WD-40 has dwindled to two cans: I fear for my future.
[…] the original 15 W incandescent bulb in the endcap, so the new lights behave the same way: push the power button to turn on the machine and the LEDs pop on just like they should. I put quick-disconnect terminals […]
[…] it occurred to me that maybe, just maybe, I could refurbish / clean / repair the Kindle’s switch contacts. Shaving off the two heat-staked plastic bumps on the front and […]