The Smell of Molten Projects in the Morning

Ed Nisley's Blog: Shop notes, electronics, firmware, machinery, 3D printing, laser cuttery, and curiosities. Contents: 100% human thinking, 0% AI slop.

Tag: Sewing

Fabric arts and machines

  • White LED QC Escape

    White LED QC Escape

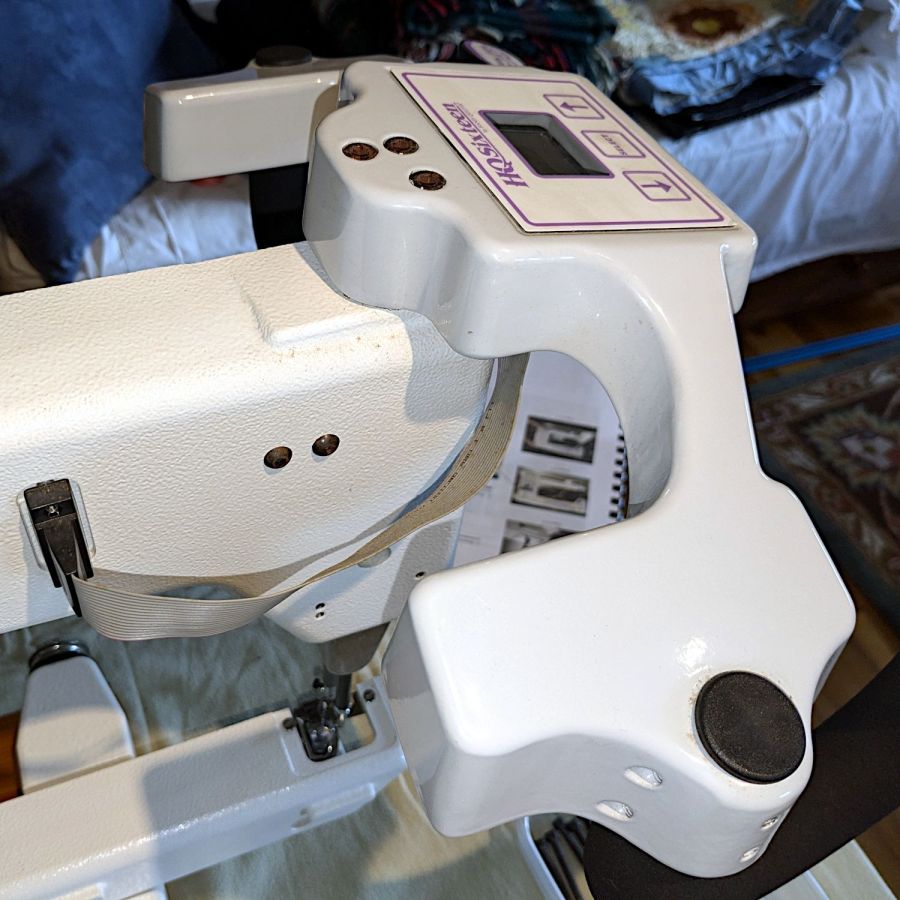
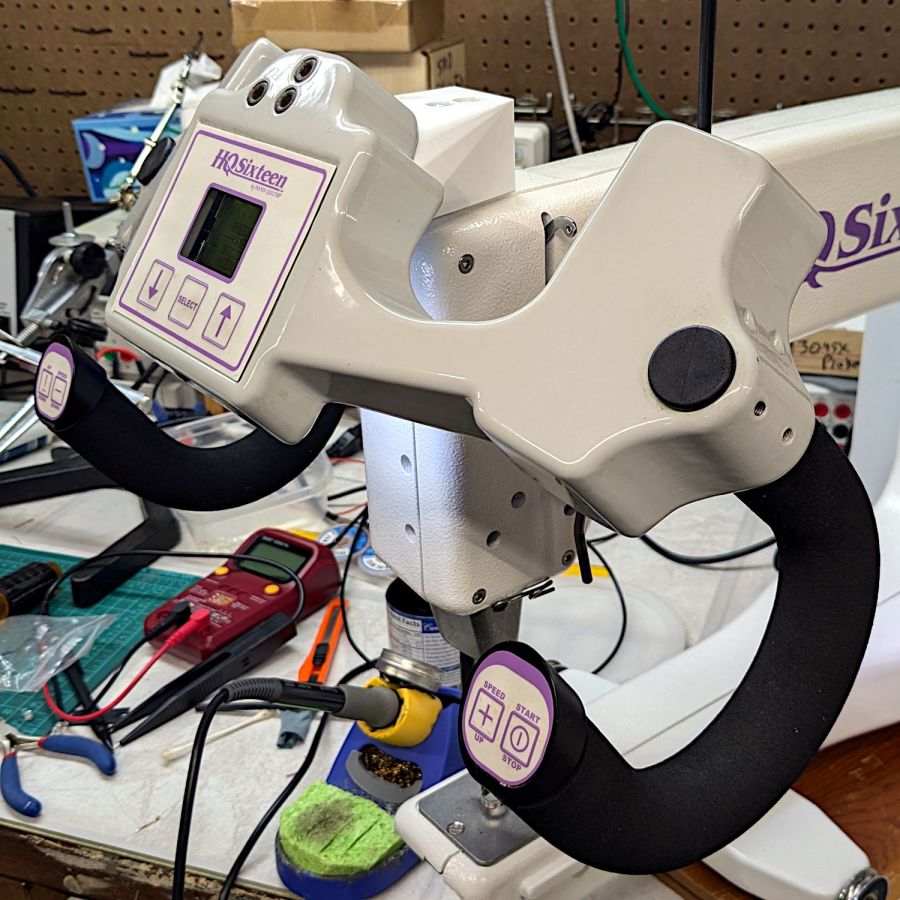
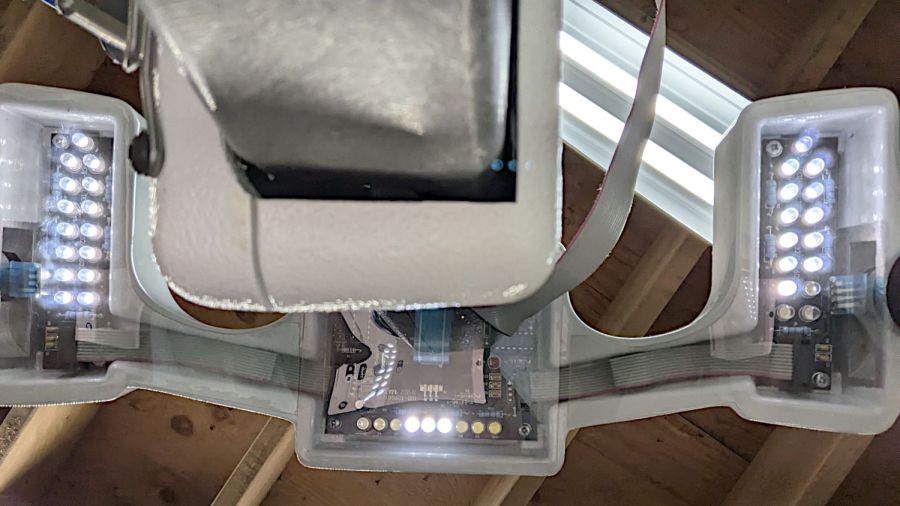
    Judging from the dates codes on the ICs inside, Mary’s HandiQuilter Sixteen long-arm machine is about two decades old and many of the white LEDs in the front handlebars have gone dark:

    HQ Sixteen - dead handlebar LEDs
    HQ Sixteen – dead handlebar LEDs

    The vertiginous view looks upward into the handlebar at the top of the machine (more on this later). The PCBs run strings of three series LEDs from a 16 VDC supply with a 390 Ω ballast resistor (oddly enough, on the ground end of the string), so one failed LED takes down all three.

    I decided to replace all the LEDs, on the principle they’re surely dimmer than they used to be and to take advantage of a decade or so of improvement in white LEDs (yes, I have old stock).

    After discovering that the HandiQuilter engineers violated the Principle of Least Surprise by orienting adjacent LED strings in opposite directions, I found one of the strings still didn’t light up.

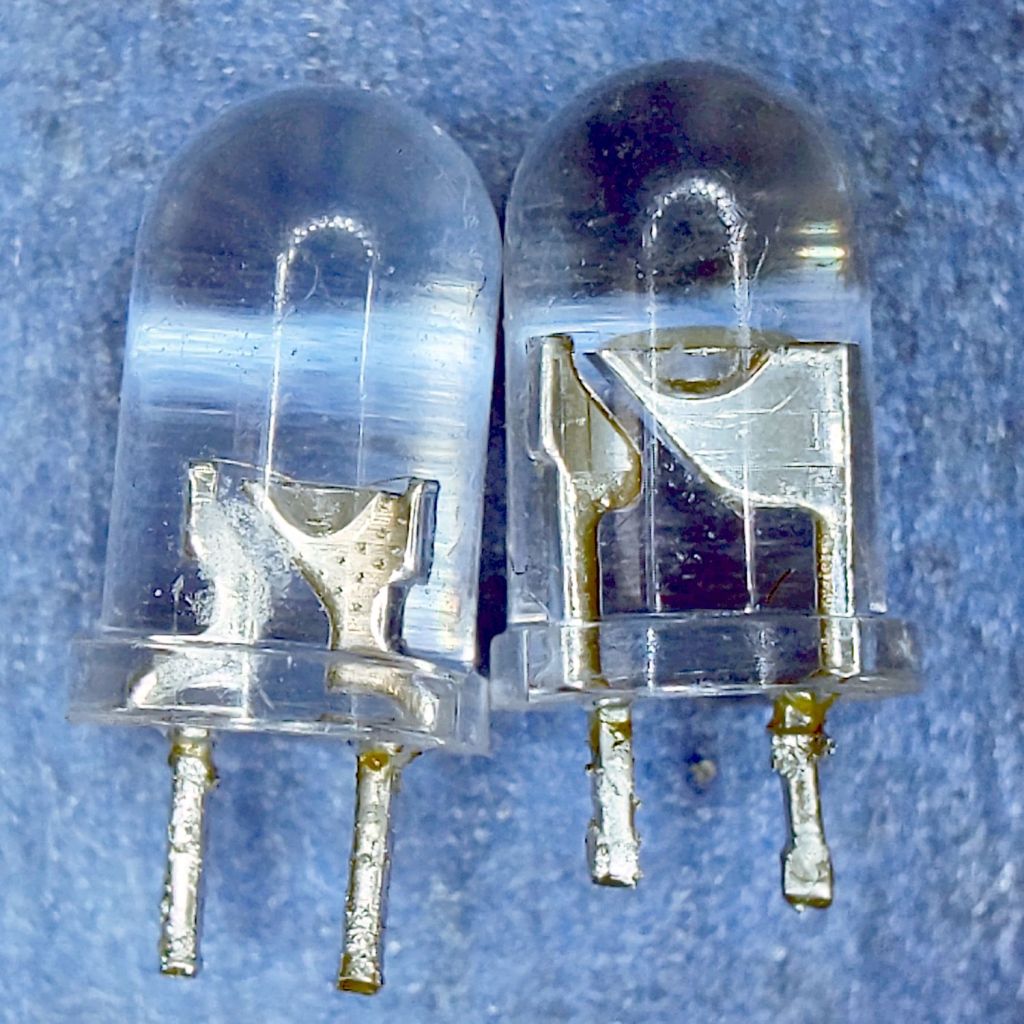
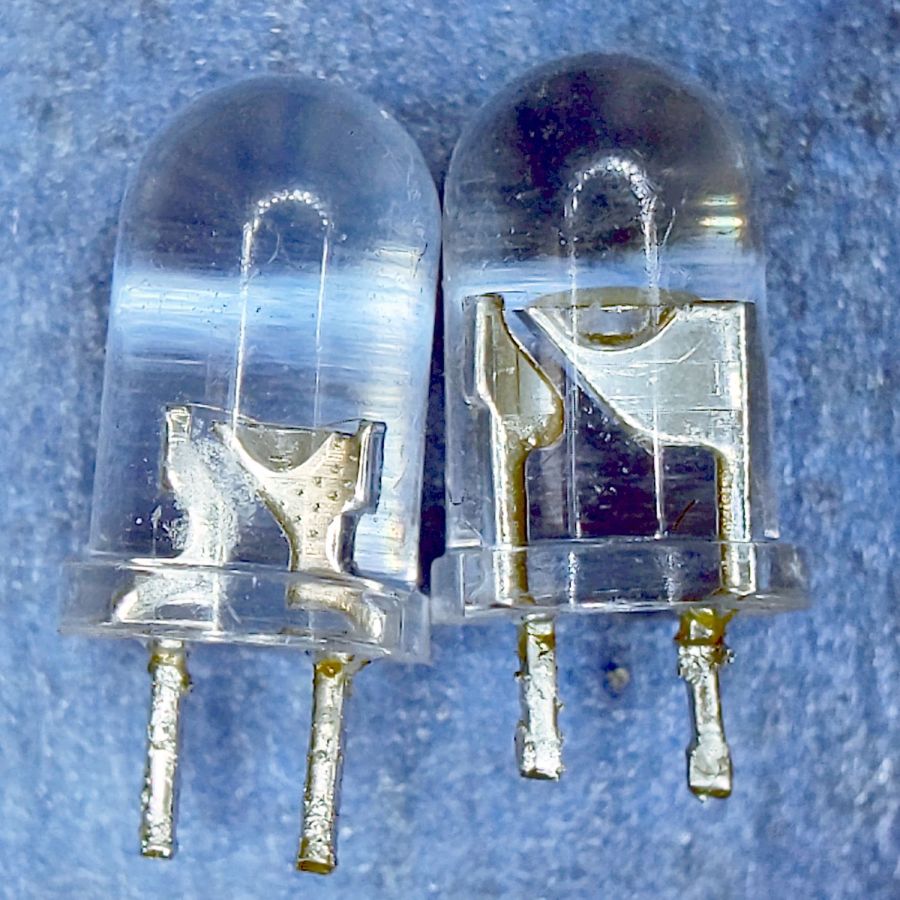
    Pop quiz: which one of these LEDs caused the problem?

    5 mm LEDs - swapped polarity
    5 mm LEDs – swapped polarity

    To the best of my knowledge, all 5 mm round LED packages mark the cathode lead with a flat edge. It’s easy to remember, as the cathode side of the schematic symbol has a bar: straight bar = straight edge.

    Inside, the LED chip’s cathode lead is bonded to the reflective cup, with the anode lead wire-bonded to the top.

    Took me a while to see what was wrong, too.

    For whatever it’s worth, the backward LED works fine.

  • Quilting Ruler Rack: Expedient Base

    Quilting Ruler Rack: Expedient Base

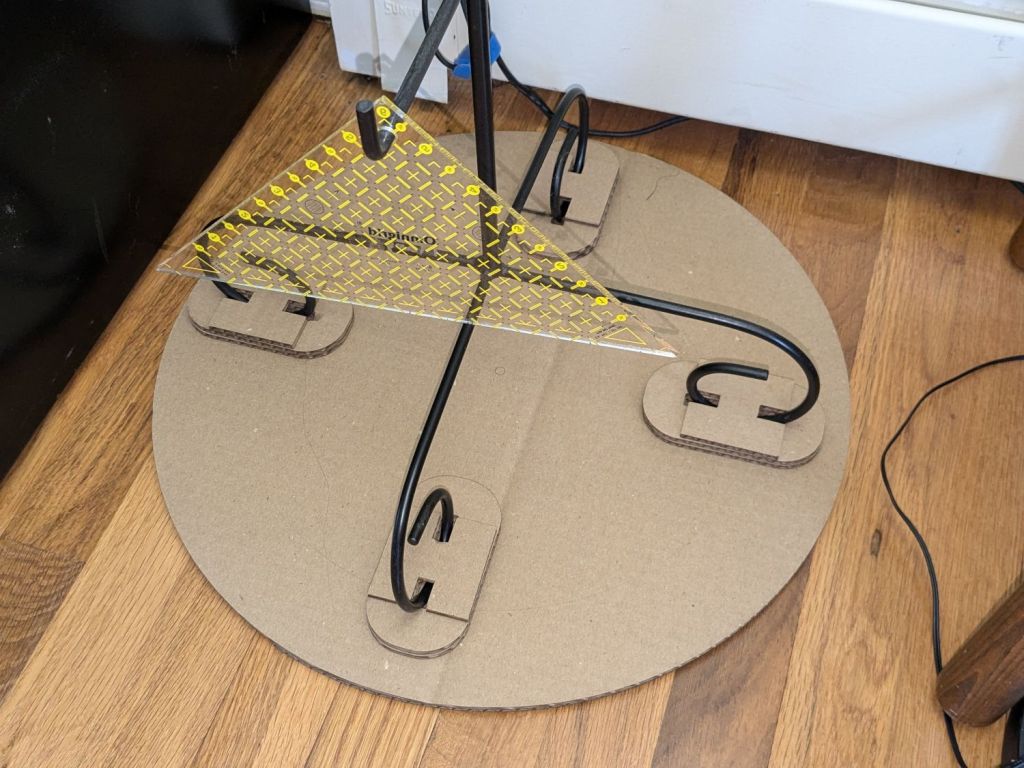
    Mary is at least the third owner of a steel rack, originally intended to hold packages of retail stuff, which now holds (much of) her collection of quilting rulers:

    Quilting Ruler Rack Base - overview
    Quilting Ruler Rack Base – overview

    Obviously, it was never intended to hold heavy acrylic sheets, but it worked surprisingly well, right up to the point where too many of the rulers collected on two adjacent columns of pegs and overbalanced the whole affair atop her while she attempted to remove a ruler.

    Subsequent accident recreation showed the rack toppled when the weight of the rulers on the two adjacent columns of hooks moved the center of mass outward, just inside the line between those feet, whereupon the slightest tug on a ruler pulled it over.

    Measurements revealed the four legs do not sit on a square contact patch, are not parallel to the radii from the center point, and are not uniformly distant from the center. Rather than committing to a finished product, I made a cardboard prototype to verify a bigger base would solve the problem and I could capture all those feet.

    You don’t have such a rack, so the exact dimensions don’t matter, but the LightBurn layout looks like this:

    Quilting Ruler Rack Base
    Quilting Ruler Rack Base

    The disk is two cross-laid sheets for stiffness, with marks burned on the top to help align the feet more-or-less around the center point.

    The oblong rings fit around the feet to capture them, so cut eight or twelve to make four stacks a bit taller than the wire diameter.

    The H shape then glues atop the rings to hold the feet in place. They’re not removable, but a razor knife will eventually solve that problem.

    I slobbered hot melt glue across the cardboard disks to hold them together, glued and aligned the rings where the feet dented the disks, stood the rack in the rings, and glued the H plates.

    About an hour elapsed from the sound of the crash to the rack once again standing quietly beside the fabric cabinets.

    We’ll run this for a while and eventually replace it with a plywood disk and screwed-in-place clamps for the feet, which will surely call for wood surface preparation / stain / seal treatment.

  • Sears Sewing Table: Caster Pads

    Sears Sewing Table: Caster Pads

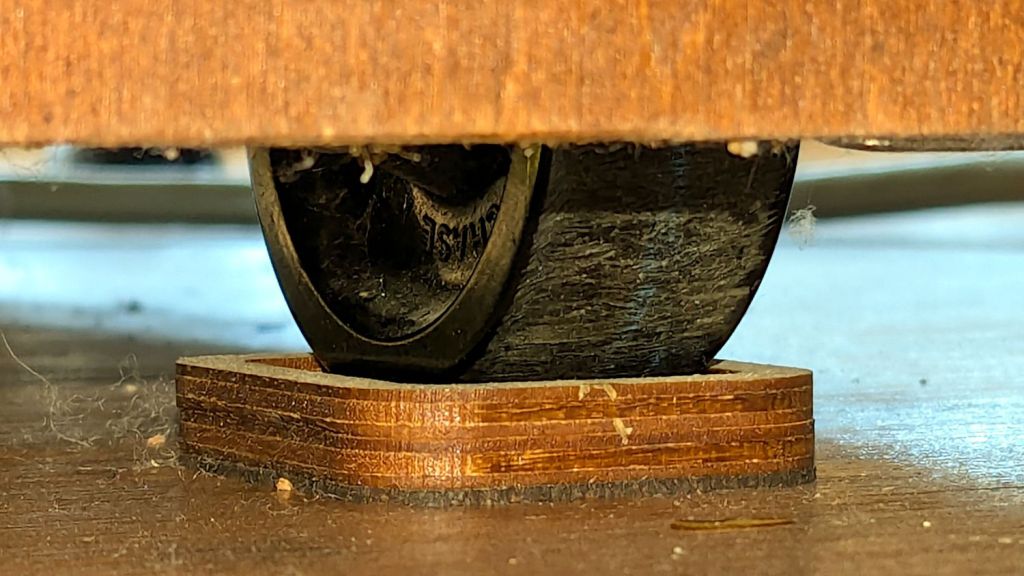
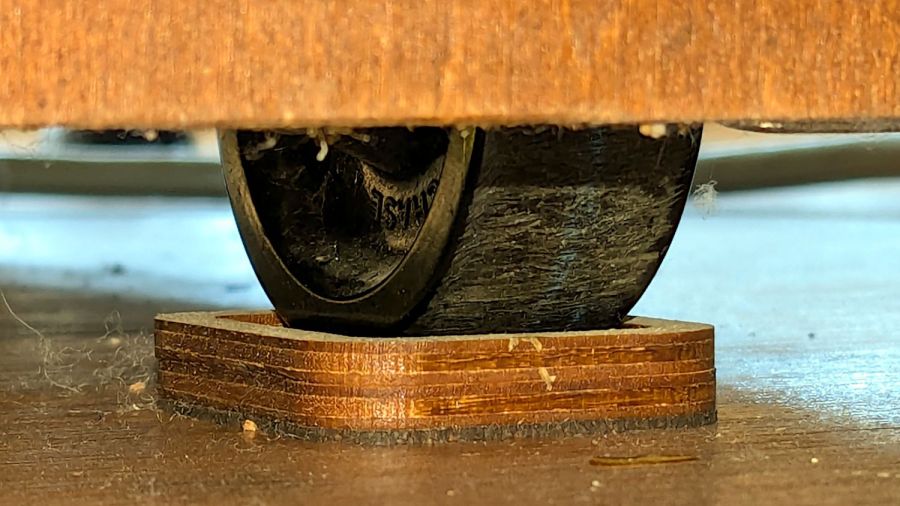
    Mary’s much-improved / -repaired Sears Sewing Table wanted to move around on the wood floor in the Sewing Room, so I captured its casters in little pads:

    Sears Sewing Table caster pad - installed
    Sears Sewing Table caster pad – installed

    A layer of 1 mm cork with PSA adhesive provides griptivity against the floor, a solid layer of 3 mm plywood spreads the wheel force over the cork, and a top ring of 3 mm plywood captures the wheel.

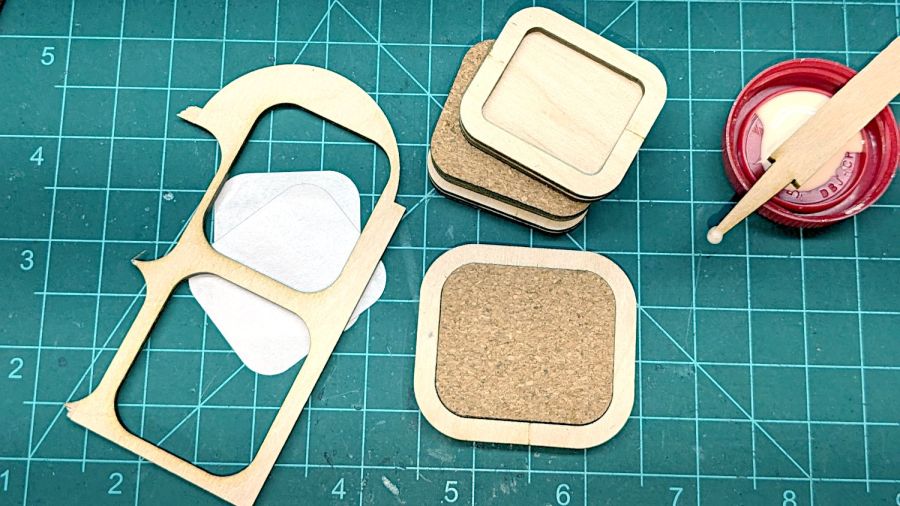
    Which looked like this during gluing:

    Sears Sewing Table caster pad - gluing fixtures
    Sears Sewing Table caster pad – gluing fixtures

    The scrap on the left served to align cork & plywood; it came from the plywood contributing the shapes. The ring around the cork is a glued-up pair of plywood rings (4 mm wide, outset from the perimeter of the pads) serving to align the two plywood layers.

    Verily: time spent making a fixture is never wasted!

    And having a laser cutter makes fixtures trivially easy, at least for simple fixtures like those.

  • Dancing With The Stars Quilt: First Wash

    Dancing With The Stars Quilt: First Wash

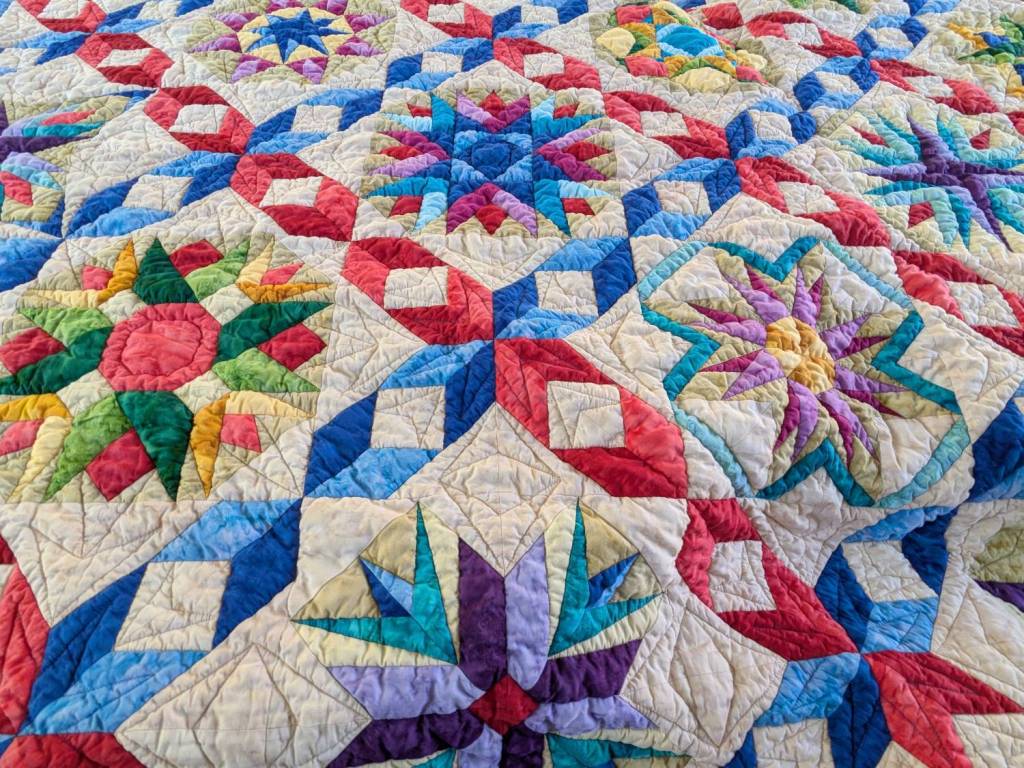
    Mary recently finished a multi-year quilt project:

    Dancine With The Stars quilt - detail
    Dancine With The Stars quilt – detail

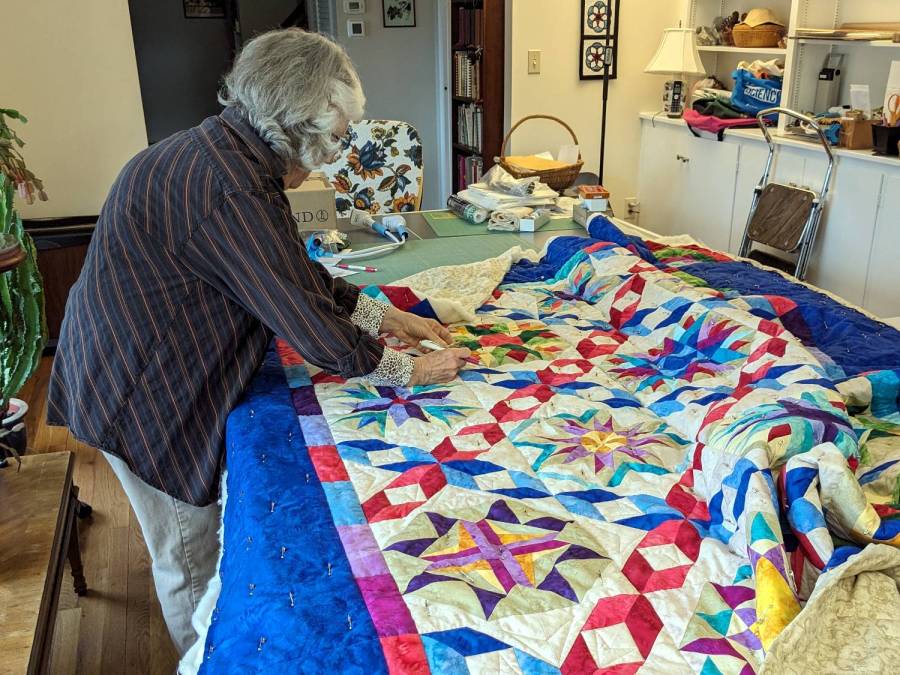
    The overall pattern is “Dancing With The Stars” and it involves more intensive detail work than I have ever deployed on anything I’ve ever done:

    Mary with quilt on ping-pong table
    Mary with quilt on ping-pong table

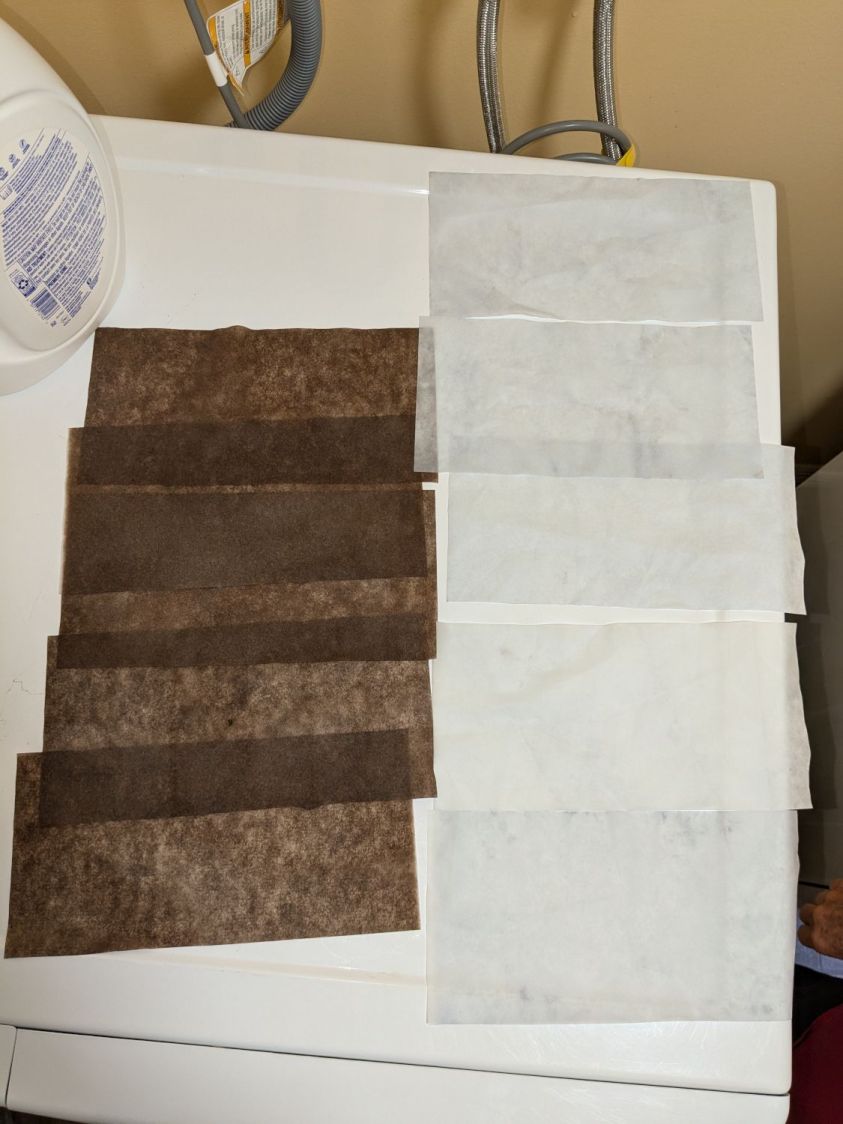
    Washing the quilt required a generous handful of Color Catchers to prevent the bold colors from bleeding into the lighter fabrics:

    Dancing With The Stars quilt - color catchers
    Dancing With The Stars quilt – color catchers

    The sheets on the left came from the wash and the ones on the right came from a separate rinse cycle. We didn’t expect the “average” color to be brown, but there it is. We were both mightily relieved when they performed as expected!

    Now, to send it away …

  • Converted OttLite Rebasing

    Converted OttLite Rebasing

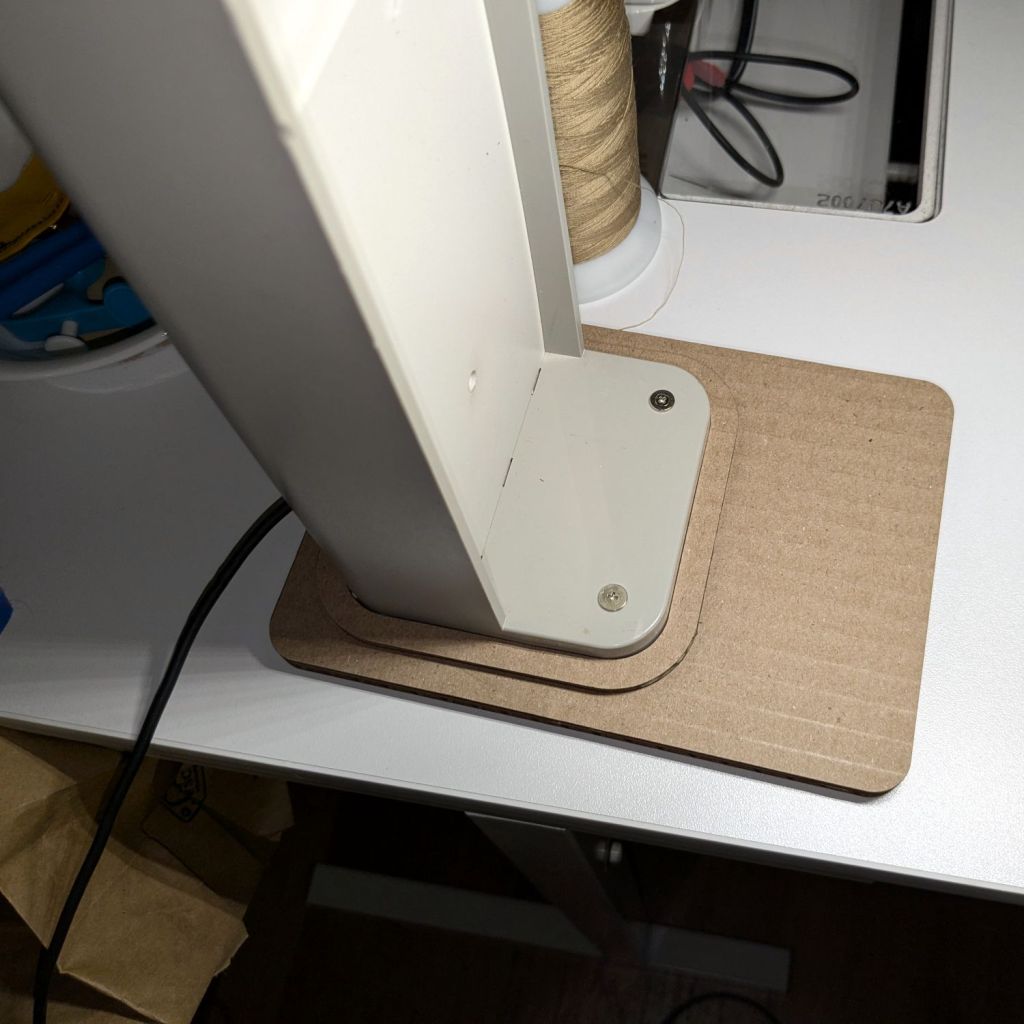
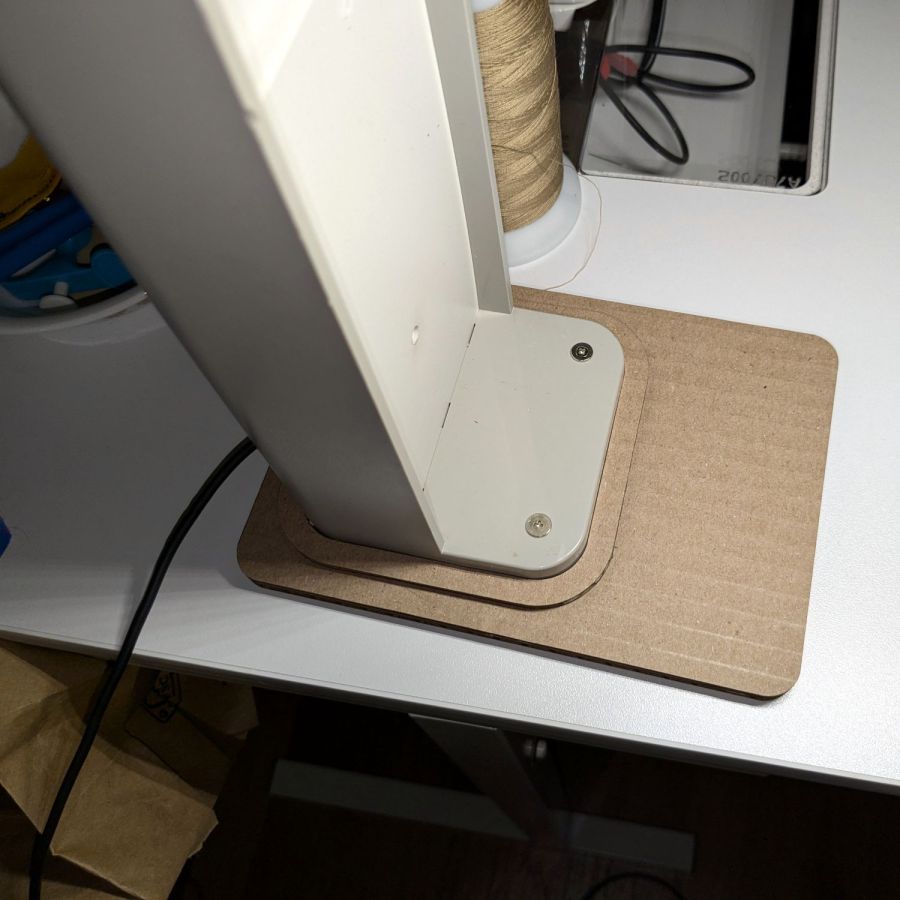
    The OttLite I converted into a NisLite fell over again and, now having a way to make the long-promised base, this happened:

    Converted Ottlite - cardboard base
    Converted Ottlite – cardboard base

    It’s not particularly elegant, what with being cardboard, but it’s a proof of concept that will determine the final size.

    The top layer is a ring around the lamp pedestal for a bit of stabilization protecting the four M3 screws holding the base to the lamp. Those screws sit on a 60 mm square, offset 1 mm to the front of the lamp:

    NisLite Baseplate - LightBurn layout
    NisLite Baseplate – LightBurn layout

    Which explains why I typically make the first few versions of anything out of cardboard.

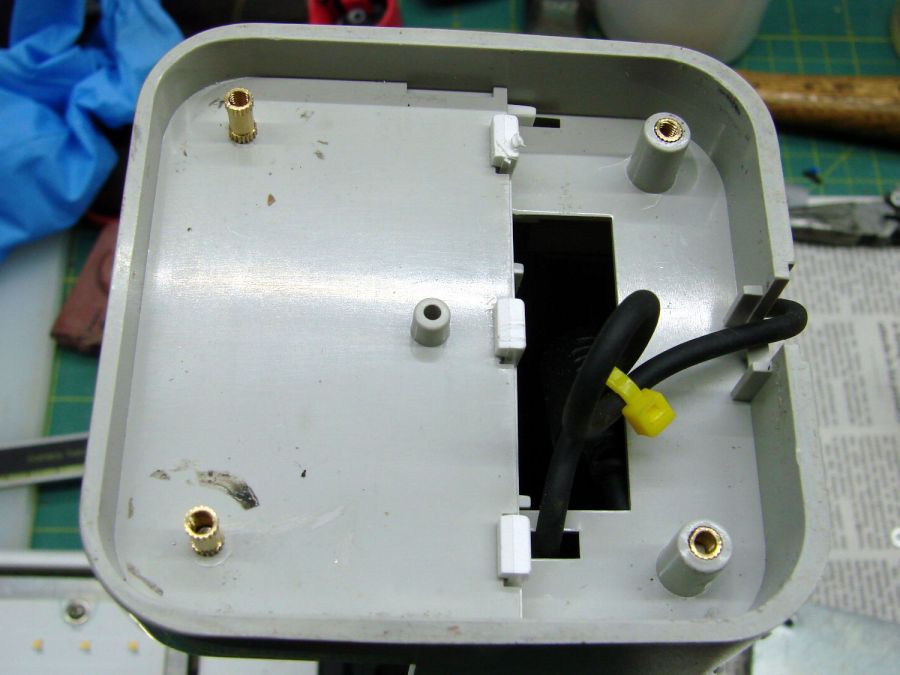
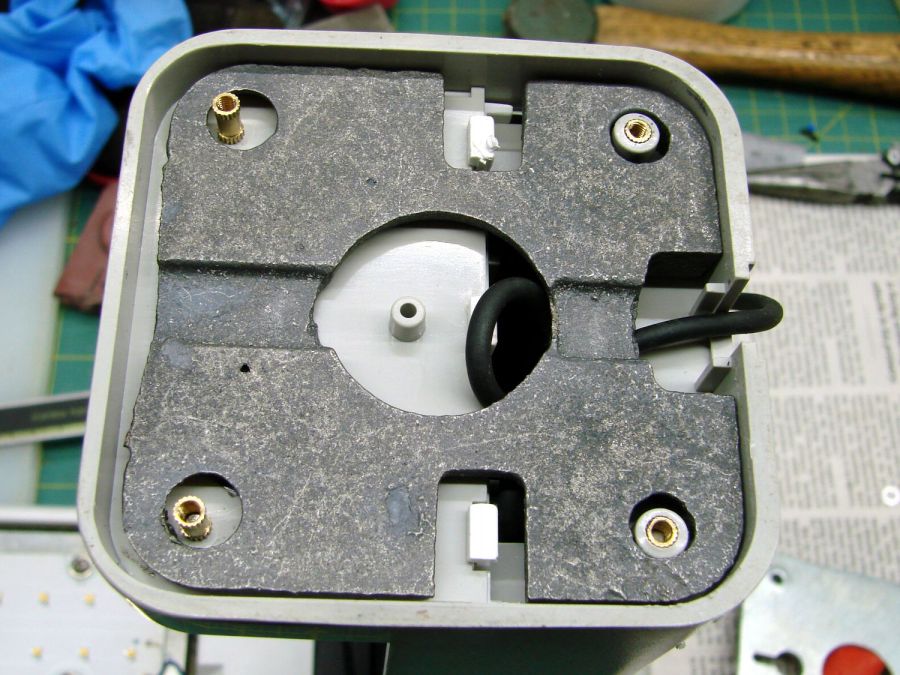
    For the record, those inserts look like this:

    Converted Ottlite - brass inserts
    Converted Ottlite – brass inserts

    A pair of very flat-head M3 screws hold the front inserts in place through holes match-drilled in the remains of the bosses I’d long ago epoxied in place. I pressed the rear inserts in place by misusing the drill press, as the lamp is much too tall for the heat setter.

    Then comes the iron base weight:

    Converted Ottlite - iron weight
    Converted Ottlite – iron weight

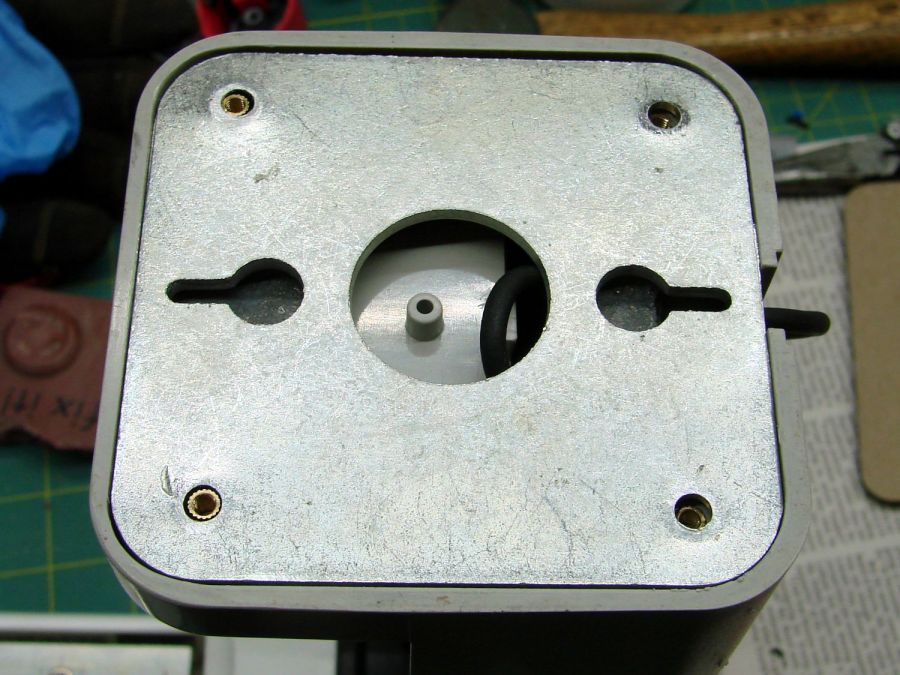
    And then the steel outer plate:

    Converted Ottlite - steel cover plate
    Converted Ottlite – steel cover plate

    The new base plate gets a ring around its perimeter for clearance under the four pan head M3 screws into the inserts.

    If the cardboard base is stable enough, we’ll do an acrylic version in cheerful primary colors.

    The LightBurn layout in SVG format as a GitHub Gist:

    Loading
    Sorry, something went wrong. Reload?
    Sorry, we cannot display this file.
    Sorry, this file is invalid so it cannot be displayed.
  • Sears Sewing Machine Table Latch Fix

    Sears Sewing Machine Table Latch Fix

    The Sears sewing table (Model 853-9635, not that you have one) wrapped around Mary’s Kenmore machine has extension surfaces on both ends:

    Sears Sewing Machine Table - overview
    Sears Sewing Machine Table – overview

    The foot panel is secured by a simple wood latch that fell off the left side:

    Sears Sewing Machine Table - stripped hole
    Sears Sewing Machine Table – stripped hole

    Having some recent experience with this sort of thing, but not wanting to work under there, I waited for a pause in the sewing, then tried to remove just the hinged piece under the top surface. It turns out the joint is glued-and-screwed, so removing the two obvious screws didn’t do anything.

    Dismounting the top surface at its other hinge and hauling the whole assembly to the Basement Shop showed this wasn’t the first time the latch had pulled its pivot screw out of the wood:

    Sears Sewing Machine Table - stripped hole detail
    Sears Sewing Machine Table – stripped hole detail

    The reason the screw pulled out of the top hole / slot is obvious when seen from the edge:

    Sears Sewing Machine Table - screw obstruction
    Sears Sewing Machine Table – screw obstruction

    That’s one of the screws holding the piano hinge in place, but AFAICT the original latch screw also went right across that hole with maybe three threads engaging the wood.

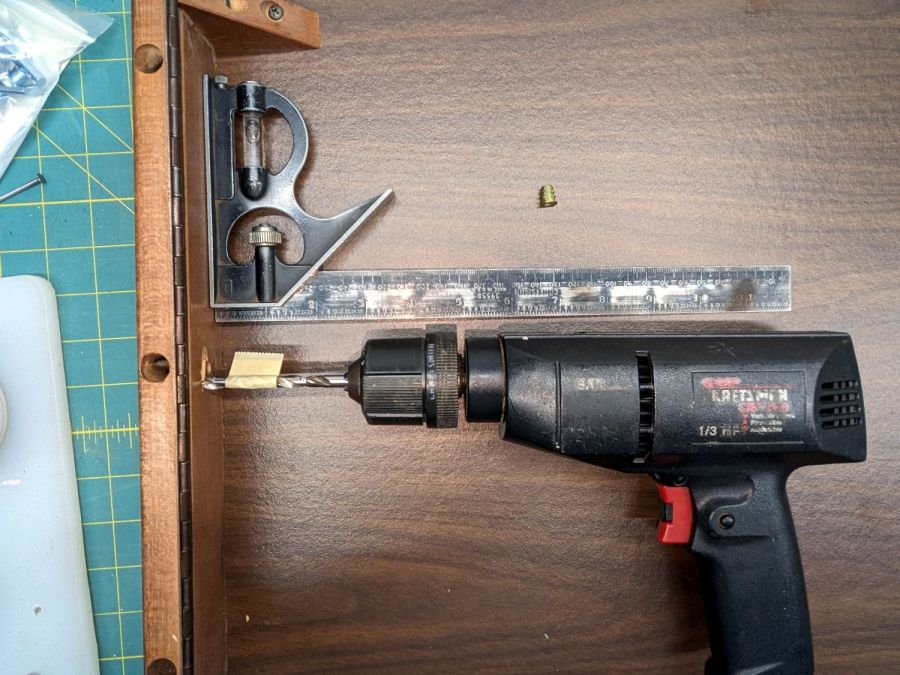
    Moving the pivot half an inch to one side won’t make any difference, so I figured I could sink a threaded insert into the wood. I’d rather use the drill press, but sometimes you gotta do what you gotta do:

    Sears Sewing Machine Table - insert drilling
    Sears Sewing Machine Table – insert drilling

    The combination square gets the drill eyeballometrically perpendicular to the end piece and the drill lies flat on the (underside) of the table surface. Seeing the bit line up with where the hole had to be was confirmation this would be successful; all I had to do was proceed slow-n-steady with the brad-point bit and stop when the tape hit the wood.

    The insert screwed in as expected, without any collisions:

    Sears Sewing Machine Table - insert installed
    Sears Sewing Machine Table – insert installed

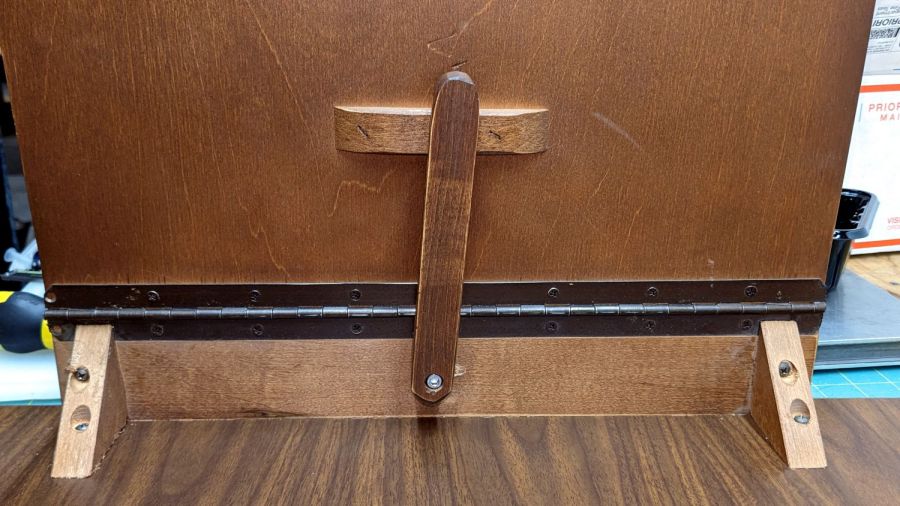
    I drilled the wood latch to clear an M5 screw on the drill press, dabbed the screw with threadlocker, and reassembled everything on the bench for curing:

    Sears Sewing Machine Table - latch installed
    Sears Sewing Machine Table – latch installed

    The extension surface on the right side of the table has an identical latch that hasn’t failed yet, but we agreed a preemptive repair is uncalled for.

    The WordPress AI image generator is delivering much less jank, even if the result has little to do with the actual post:

    Sears Sewing Table - WP AI image
    Sears Sewing Table – WP AI image

    Don’t think too much about the shadows, nor the lack of a treadle for what looks a lot like an early Singer Featherweight machine.

  • Prince Ping-Pong Table Surface Leveler

    Prince Ping-Pong Table Surface Leveler

    Mary redesignated the Prince Tournament 6800 ping-pong table that Came With The House™ as her quilting layout table, so it now fills much of the Sewing Room (f.k.a. the Living Room):

    Mary with quilt on ping-pong table
    Mary with quilt on ping-pong table

    For reasons lost in the table’s history, the two halves of the top surface weren’t quite flush on one side, by a matter of a few millimeters. This bothered me far more than it did her, so the delay until I finally fixed it wasn’t critical:

    Prince ping-pong table leveler
    Prince ping-pong table leveler

    That’s 3 mm plywood + 1.5 mm Trocraft Eco pushing the surface upward just enough to almost make the joint (visible near the bottom of the picture) flush within +2 -1 mm across the table width, making it obvious that neither piece is exactly planar.

    The shape has mixed metric and inch dimensions, for no reason I know:

    Prince ping-pong table leveler
    Prince ping-pong table leveler

    If you ever need such a thing, remember to use screws about 4 mm longer than the ones you took out.

    The LightBurn layout as an SVG image:

    Loading
    Sorry, something went wrong. Reload?
    Sorry, we cannot display this file.
    Sorry, this file is invalid so it cannot be displayed.