Ed Nisley's Blog: Shop notes, electronics, firmware, machinery, 3D printing, laser cuttery, and curiosities. Contents: 100% human thinking, 0% AI slop.
Went to roll the bike out of the garage and the rear tire was dead flat. You don’t even need to look at the tire, you just instantly know something’s wrong: the bike feels funny with a flat tire.
The picture shows the problem: a pinhole in the tube. Nothing penetrated the tire, nothing went wrong with the tire liner (you can see this was a few mm from the edge, so it’s not an abrasion flat), there are no problems anywhere. Just a tiny hole in the tube.
As nearly as I can tell, the tube simply failed at that point, without any external aggravation.
Popped in another tube and it’s all good, but … I guess it’s time to buy some new tubes: the new one came from a box dated May 90.
Finding a flat in the garage is much much better than finding a flat on the road.
So Mary was going to apply the long-disused Sears Craftsman electric hedge trimmer to the decorative grasses she’d planted on either side of the (equally disused) front entry, but when I deployed the thing it didn’t run. A quick walk through the debugging tree: GFI green, extension cord OK, so it must be the trimmer.
Off to the Basement Laboratory Repair Wing…
Two tricks to getting it apart, after removing all the obvious screws:
The handle comes out of the sockets after great persuasion
Remove two of the three hex-head-with-lockwasher screws on the bottom and the case pops apart. The third screw holds the motor plate into that half of the case.
The switch is, of course, not intended to be repairable, but that’s something of a motivator around here. It uses those awful poke-and-pray spring clamps, which you could, in principle, release with a small screwdriver, but I cut the wires on the motor side of the switch, leaving plenty of room to graft connectors onto them.
Next time, I’ll be able to release the wires more easily.
Congealed grease on switch contacts
A rivet holds the switch together, but attacking it with a drill removed enough of the head that I could whack the rest of the body out with a drift punch. A 2-56 machine screw fits neatly into the hole and there’s enough clearance on both sides for the screw head and a nut; hack the screw to length with a Dremel abrasive cutoff wheel.
Notice that the switch trigger button visible from outside the case acts on a push rod that slides the movable contacts (in the top part in the picture) back-and-forth atop the copper contacts (with the wires). A pair of springs loads the movable contacts against the copper strips.
The problem turned out to be, as expected, congealed grease inside the switch. The black gunk on the right halves of the copper contacts was essentially solid; you can see that it formed a nice insulating layer. I cleaned that out, polished up the moving contacts, reassembled it, and … the switch still didn’t work.
At least I discovered that with an ohmmeter, before reassembling the entire trimmer!
Switch contact slider
The movable switch contacts have a small ramp, just about in the middle, that rides up on the black hump between the copper strips when the trigger button is released. That mechanically breaks the connection, but also allowed the grease to congeal in the air gap. The grease also formed a lump that prevented the movable contacts from pressing firmly against the copper strips, despite the springs.
I gnawed out that crud with a small screwdriver, dabbed on more contact oxidation prevention grease, buttoned it up again, and now the switch works perfectly again.
New switch wires
I spliced in somewhat longer lengths of hookup wire with butt-splice connectors I’ve had for years and it’s all good.
The post with the screw hole just below the wires matches another in the opposite half of the case; the post actually fits inside the ring you see here, so it doesn’t crunch the wire. However, the wire must be pushed in far enough to avoid interfering with the switch action rod.
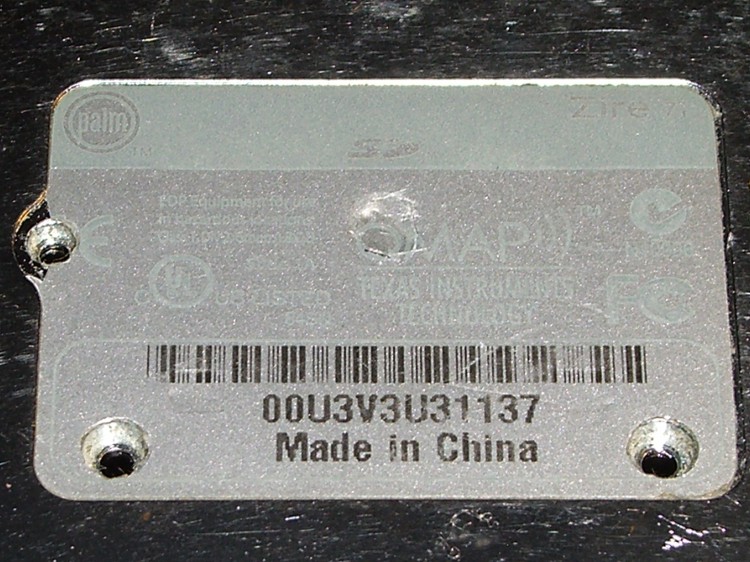
I tote around an ancient Palm Zire 71, which suffices for my simple calendar & to-do lists. This is my second, as the first failed when the flexible cable connecting the guts to the charging / USB connector crapped out; turns out that the slide-to-open feature that reveals the crappy camera also stresses the flexy cable to the breaking point. Now I don’t do that any more.
The battery (well, it’s actually a single Li-Ion cell, but let’s not be pedantic) finally stopped taking a charge, so I did a full backup, tore the thing apart, and popped in a new battery. This being my second Zire 71, things went smoothly…
I got a stack of surplus Palm batteries some years ago, but they’re readily available from the usual suspects for prices ranging from $5 to $50. We’ll see how well mine survived their time in isolation.
The connectors don’t match, which means you just chop off them in mid-wire, then solder the old connector onto the new battery. A few dabs of Liquid Electrical Tape and it’s all good.
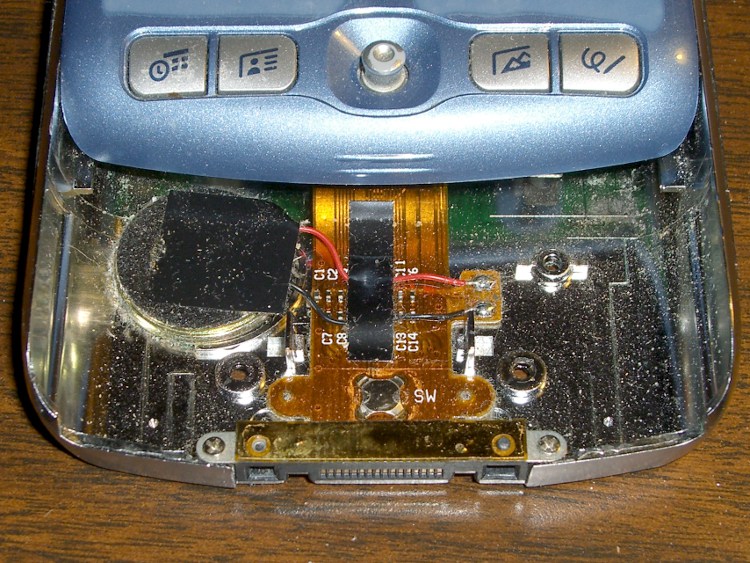
Some teardown instructions are there, with fairly small pix.
General reminders:
Stick the teeny little screws on a strip of tape
Watch out for the tiny plastic switch fin on the side
Torx T06 screws on either side of the camera
The silver shield around the shutter button snaps under the sides with more force than you expect
There’s a metal strip over the connector that can be taped back in place after the plastic posts snap off
Gently pry the flexy cable up off the base, using the tabs on either side
The speaker seems to be held in with snot
The battery shield is not soldered in place!
The battery adhesive comes off with a sloooowww pull
Screws under label
Components around shutter button
Back side
Although it may not be obvious, I replaced the crappy plastic window over the camera with a watch crystal. Much better picture quality, although much worse than my pocket camera.
Backup and restore with various pilot-link utilities:
The latch closing my tea ball consists of a nice stainless steel dingus held on by a grotty rivet of unknown provenance that I’ve repeatedly staked over the years. It finally came undone this morning, so I had a few minutes of Quality Shop Time right after breakfast.
My tiny-screw box (left over from the long-gone Leichtung Workshops) has some stainless 0-80 screws that I found somewhere, but only brass nuts. Ah, well, we used to use brass water fixtures and lead pipe, so an 0-80 nut in hot water isn’t going to kill me.
The ball rim has a recess for the rivet head, but the screw head was slightly larger. I braced the rim of the ball across the vise jaws and give the recess a few shots with a fat punch to enlarge it.
Stainless screw and brass nut
Then…
A dot of Loctite on the threads
Assemble everything
Take it apart to put the latch on the correct side of the rim
Reassemble
Attempt to close
Gently bend the rim to flatten it out
Close
Attempt to latch
Brace closed rim on vise opening with screw head up
A few shots with a drift punch to settle recess around screw head
Success!
It seems I ain’t worth a damn in the morning without a hot cuppa. The rituals must be preserved.
I tossed the ball in the dishwasher and opted for a tea bag today…
Just for curiosity’s sake, I applied a slitting saw to the oldest defunct generic NP-FS11 battery pack, cutting carefully along the bonded joint between the two parts.
No coolant, 1000 rpm, 200 mm/min, the saw is 22 mm diameter. Much slower than you’d use if you were in production, but I’m not.
First cut all the way around at 0.5 mm inside the case, then another pass at 1.0 mm. The second cut went ting as it passed the tabs at the base of the cells, so I knew the halves were released.
Inside we find a pair of 14430 Li-Ion cells, wired in parallel, with a little protection circuit board just jam-packed with teeny parts. One may reasonably assume the circuit controls over-charge and over-discharge, as well as current limiting.
Pack opened
So a reasonable (or, perhaps, amusing) thing to do would be to buy raw cells from a nominally reputable supplier, do a heart transplant, and see if that improves the situation.
Protection Circuit – Outboard
Photos of the protection PCB, showing the cell connections. Positive end of the cells is toward the PCB. I think there’s enough clearance in the camera’s battery compartment to allow a wrap of tape around the case in lieu of re-bonding the plastic together.
Straight up: this is about a stainless steel socket head cap screw I installed eight years ago, not the original Easy Racers screw, so this is not their problem.
I rode out for milk-and-eggs at the corner store, a flat one-mile ride, and stopped at the traffic signal. Light goes green, line of cars accelerates, so do I… and there’s a snap and the left side of the seat sags backwards. I am not a powerhouse rider and it’s March, so I’m not doing leg presses while getting up to cruising speed.
I continued the mission by sitting slightly to the right on the seat and pedaling gingerly, then diagnosed the problem in the corner store’s parking lot. If I’d been further away, I’d have done the repair right there, but I figured it’d hold together until I got home. It did.
The problem turned out to be a broken screw holding the left-side seat strut to the threaded eyelet on the rear dropout. The top picture shows the way I have it set up: seat strut clamp outboard, rack strut inboard, with a socket head cap screw extending all the way through, and secured with a pair of stainless nuts that went missing along with the broken screw end.
Screw fracture closeup
Here’s the fracture across the end of the screw, which shows no evidence of foul play. As nearly as I can tell, the whole thing snapped off in one event, with none of the crud that would indicate a progressive crack. Compared with that wheel stud, this is in pristine condition.
So it’s time to replace the right-side screw, as well, which means a trip to the Bike Repair Wing of the Basement Laboratory. While I had the bike up in the repair stand, I decided to reshape the head on the right-side screw for better chain clearance.
As nearly as I can tell, the usual practice puts both the seat strut and the rack strut outboard of the threaded eyelet on the dropout, but that seems wrong to me. The seat strut puts a tremendous amount of stress on the screw, so you really want that lever arm as short as possible: put the clamp against the eyelet. While the rack isn’t as heavily loaded, cantilevering it outboard of the clamp just doesn’t look right.
But putting the rack strut inboard of the eyelet means the screw head sticks out rather more than I’d like. Very rarely, the chain will snick against the head and even more rarely it jams between the head and the freewheel. Nothing much happens (it’s a freewheel, after all), but I think reducing the head thickness ought to help.
Reshaped socket head cap screw
So I chucked the screw in the lathe, shortened the socket by about half, and put a taper on the head. If I had a stock of round-head cap screws, one of those would be even better.
The shortened socket makes it a bit tricky to get enough bite with the hex key, but this isn’t something that requires much attention after it’s installed… and I get to do all that in the shop.
Dabs of Loctite in the eyelet and nuts, for sure!
By a truly rare coincidence, a standard 1-1/2 inch cap screw is exactly the right length.
Right-side mount
Here’s a view of the installed right-side screw, looking rearward along the upper rear triangle tube. Seat strut to the outside, rack strut to the inside, and reshaped head above the cluster.
Took the bike out for a 16 mile spin today and it’s all good.
A note for the weight weenies in the crowd: a rack on the back of the seat adds a redundant support structure. Without that, a failed seat strut can be a real showstopper. Even if you don’t use your bike as a pack mule, maybe you should add a rack.
After 30-some-odd years, the X10 controller we’ve been using to turn off all the lights at bedtime finally stopped working. For the last few months it had been occasionally jamming ON, even when nobody pushed any keys, and the only way to reset it was pulling the plug.
The big silver can on the white cable is an ultrasonic mic, so perhaps the circuitry around that was getting cranky: the ultrasonic cleaner in the bathroom (which we use for eyeglasses) would reliably jam it. I think the controller was responding to the third harmonic of the 40-ish kHz cleaner power, delivered through the power line.
As you’d expect, all the electrolytic caps were shot; ESR for the big one was “open”, the smaller ones around 5 Ω. The capacitance values were entirely within spec, of course. I replaced all three.
X10 Controller keyboard
While I had the hood up, I cleaned the switch contacts, even though that probably had nothing to do with the problem. Back in the day, they used actual metal deformable domes, stuck under an adhesive layer that did a fine job of keeping the crud and dust out.
Put everything back together, fired it up, and it misbehaved the same way. I’d say we got our money’s worth out of it, though.
A replacement is on the order of $15 from the usual eBay suppliers, so it’s not the end of the world.
The new one probably doesn’t have the ultrasonic receiver, so it shouldn’t respond to the ultrasonic cleaner with the same enthusiasm.