Ed Nisley's Blog: Shop notes, electronics, firmware, machinery, 3D printing, laser cuttery, and curiosities. Contents: 100% human thinking, 0% AI slop.
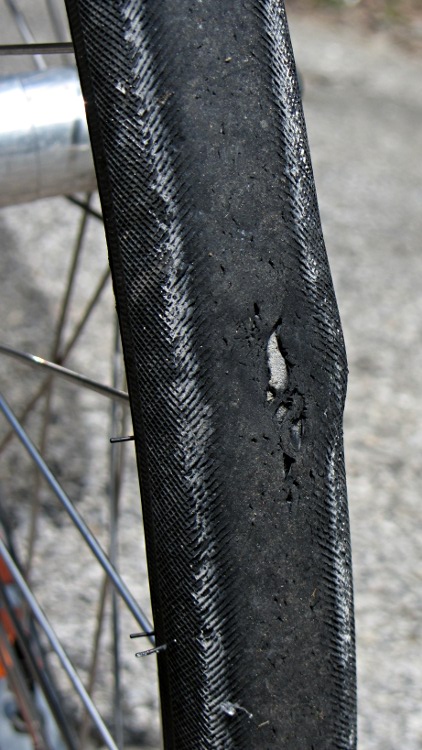
Found this aneurysm on the front tire just before a grocery ride, so I stuffed a spare tire and tube into a pannier before rolling away. As expected, it didn’t blow out, but …
I think this started with a gash in the Kevlar belt that didn’t quite penetrate the cords holding the tire together. As you’ve seen, our tires collect a remarkable number of cuts due to broken glass.
The cords inside the tire seemed fine, although the weave was somewhat distorted. The inner rubber layer wasn’t punctured, despite what it looks like here.
The tube also looked fine, despite riding on a tire liner for at least a year. The tube abrasion failures in the rear tire must be due to something other than just the combination of tube and liner; perhaps the tube flexes just enough to erode at the discontinuities.
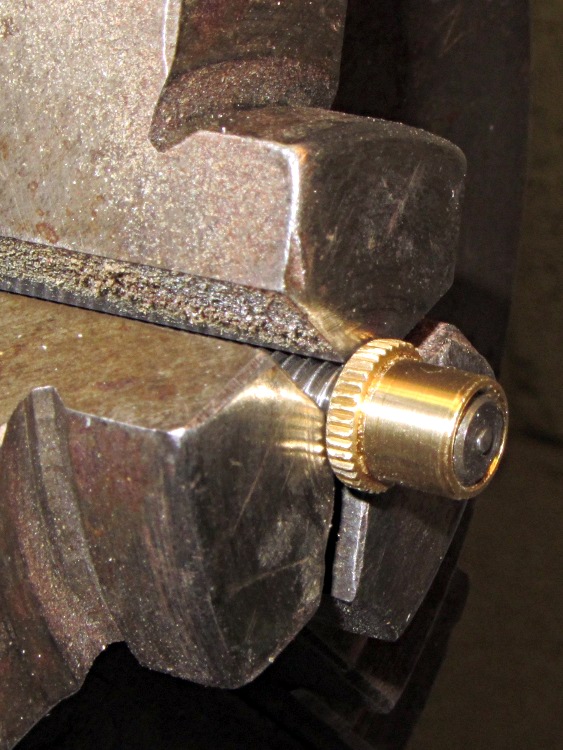
The new Y axis anti-backlash nuts for the Sherline mill have a countersink on the end that fits into the saddle. The nut on the left is as-delivered (I bought two) and the nut on the right is after cleanup:
Sherline Y axis anti-backlash nuts – original vs cleared
The thread was munged enough to jam the leadscrew; it started fine from the knurled end, but wouldn’t emerge from the countersink. This being a left-hand thread, I couldn’t just run a tap through the nut, so clearing the thread required:
Some tedious handwork to clear enough of a path until …
I could force the nut over the old leadscrew, which re-formed the thread enough that …
More tedious handwork could remove the debris and bent brass
After that, the OD of both nuts was slightly oversized: 0.316 inch, which didn’t fit in the 5/16 inch (0.3125) bore. So I mounted the nut on the old leadscrew, took advantage of the fact that a left-hand thread gets tighter with cutting force from the lathe bit[Edit: wrong! See comments], and turned it down just a hair:
Turning down anti-backlash nut OD
Purists will quibble that I should have used the four-jaw chuck. Turns out the three-jaw has under 1 mil of runout, which is as good as one could possibly want in light of the bearings.
The X axis nuts were fine, so I suspect a recent production run had a bit of a tooling problem.
[Update: The mail brings replacement nuts that look just fine. Must have been one of those glitches. No hard feelings!]
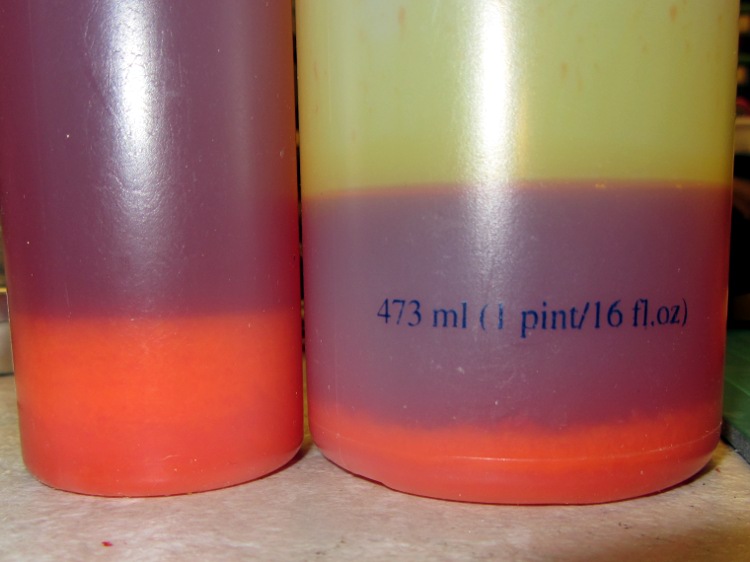
Something has gone badly wrong with the yellow bulk ink that I’m using in the Canon S630. Over the winter a precipitate formed in the bottles:
Sediment in ink bottles
And in the ink tanks:
Sediment in ink tank
But now that the Basement Laboratory has warmed up, not only does the precipitate remain, but some of it is growing:
Growth in ink tank
The picture doesn’t do it justice; it looks like pond scum in there. Only the yellow ink behaves like that, so it’s likely some contaminant in that batch. Because I buy ink in pint bottles, it’s a long time since that batch arrived and there’s no point in kvetching to the vendor. IIRC, I actually got this bottle from a friend who scrapped out his S630; he’d been refilling cartridges from the same source, too.
I ordered four sets of five tanks (CMYKK) from the usual eBay vendor for 20 bucks and will toss the old tanks & ink when those arrive.
There’s a set of four bulk ink bottles from a long-dead HP2000C printer on the shelf, but I suspect the ink chemistry differs by enough to ruin the Canon’s printhead… which is discontinued, so when the head dies, the printer dies, too.
A hinge started squeaking, which required nothing more than a long pin punch, a soft hammer, and a dab of oil.
The unplated steel hinges in our house date back to the middle of the last century and all of them have a convenient hole in the bottom for a pin punch: much fancier than the raw edge of the folded frame and the butt end of the hinge pin. You drive the hinge pin upward with a few taps, lube it, and tap it back in again with a soft hammer (perhaps against a folded rag), and you’re done.
On the other side of door, however, lies one of our follies. For reasons that made perfect sense at the time, the hallway has five different shades of white paint:
Flat walls
Eggshell ceiling
Gloss trim
Semigloss front door
Epoxy hinges
The hallway has three branches, two openings, and ten doors. The white really sets off the hardwood floors and doors, while brightening what would otherwise be a rather dim area, but never, ever again will we make that mistake.
On the other paw, the hinges came out well. I took them off all those doors and jambs, cleaned the steel, gave ’em two rattle coats of white epoxy, and reinstalled. Much nicer than contemporary “shiny brass” plating or raw steel.
The Y axis on my Sherline CNC mill has developed about 8 mils of backlash, a bit more than seems reasonable. Some poking around shows that the anti-backlash nut is loose while in the middle of the leadscrew and snug while at either end, which suggests the leadscrew thread is also worn. That’s no surprise, as I didn’t figure out that having a bellows over the leadscrew was a Good Thing until, let us say, considerably later than I should.
If I must replace the leadscrew, I may as well take the whole XY assembly apart, clean everything, and replace the consumables. So I ordered a sack o’ parts from Sherline; they’re all cheap and readily available. The overall index has the exploded diagrams and the parts list for my mill boiled down to:
54161 Y axis leadscrew (9 inch)
50140 Y axis anti-backlash nut
50200 Y axis nut
50171 X axis leadscrew
50130 X axis anti-backlash nut
40890 X axis nut
50150 anti-backlash lock
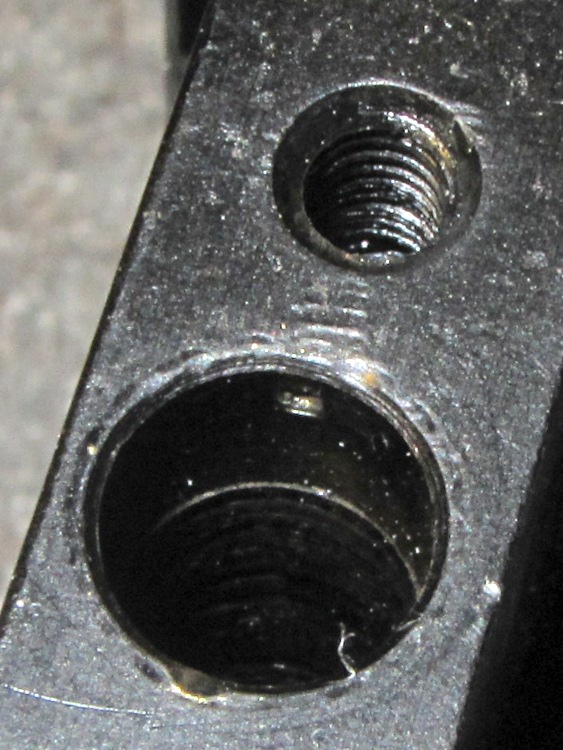
The only gotcha: nowhere (that I can find, anyway) is it written how to get the leadscrew nuts out of the stage. It turns out that the holes through the stage aren’t uniform: the X narrower on the right and the Y on the front, so you must drive the X axis nut out to the left and the Y axis nut out to the rear. The counterbore is visible just behind the anti-backlash nut if you know what to look for, so you’re driving the axis nut away from the backlash nut.
On the X axis:
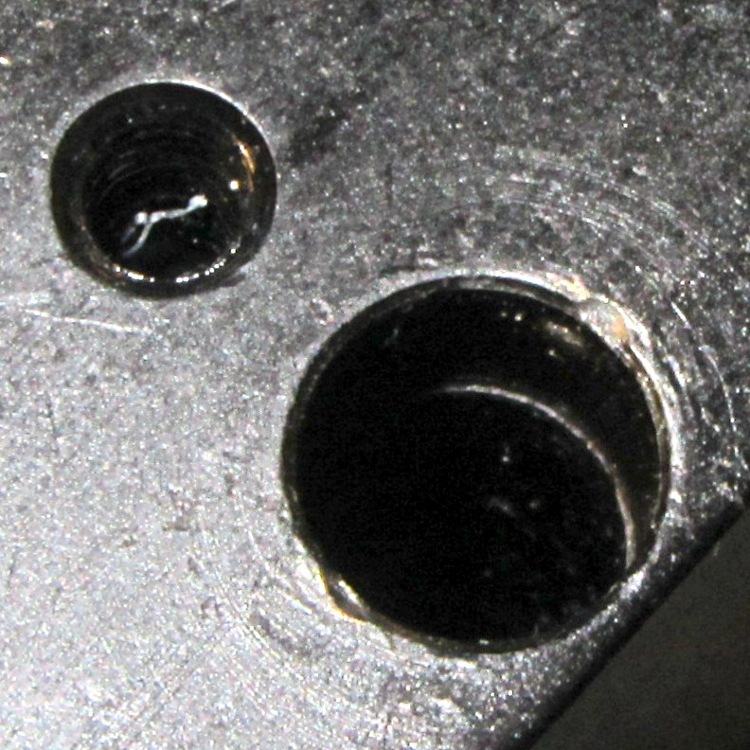
X axis leadscrew hole counterbore
On the Y axis:
Y axis leadscrew hole counterbore
Trust me on this: you cannot drive a 5/16 inch nut through a 19/64 inch counterbore. If you have a 19/64 inch transfer punch, that’s a dandy way to get the nuts out.
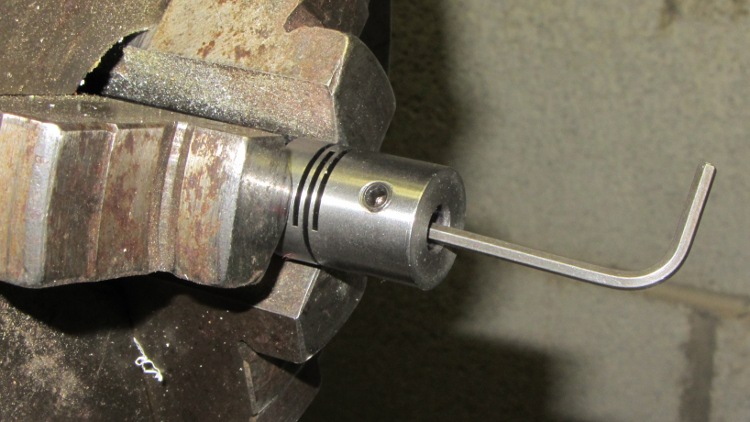
The easiest way to loosen the socket head cap screw holding the flex coupling to the leadscrew is to grab the coupling in a lathe chuck (with the leadscrew protruding into the headstock) and then apply the hex key:
Loosening leadscrew bolt
They used red (high-strength) Loctite on all the leadscrew bolts, as well as on the tapered joint between the leadscrew and the flex coupling, and on the bearing preload nut… so I will, too.
Back when I got a Philips Sonicare (on the recommendation of my dental hygenist, after a particularly nasty bout of plaque removal), the battery gave nearly two weeks of service between charges. As shown in that graph, the runtime gradually faded away to two days, at which point I decided it was time to tear the thing apart and see about replacing the batteries.
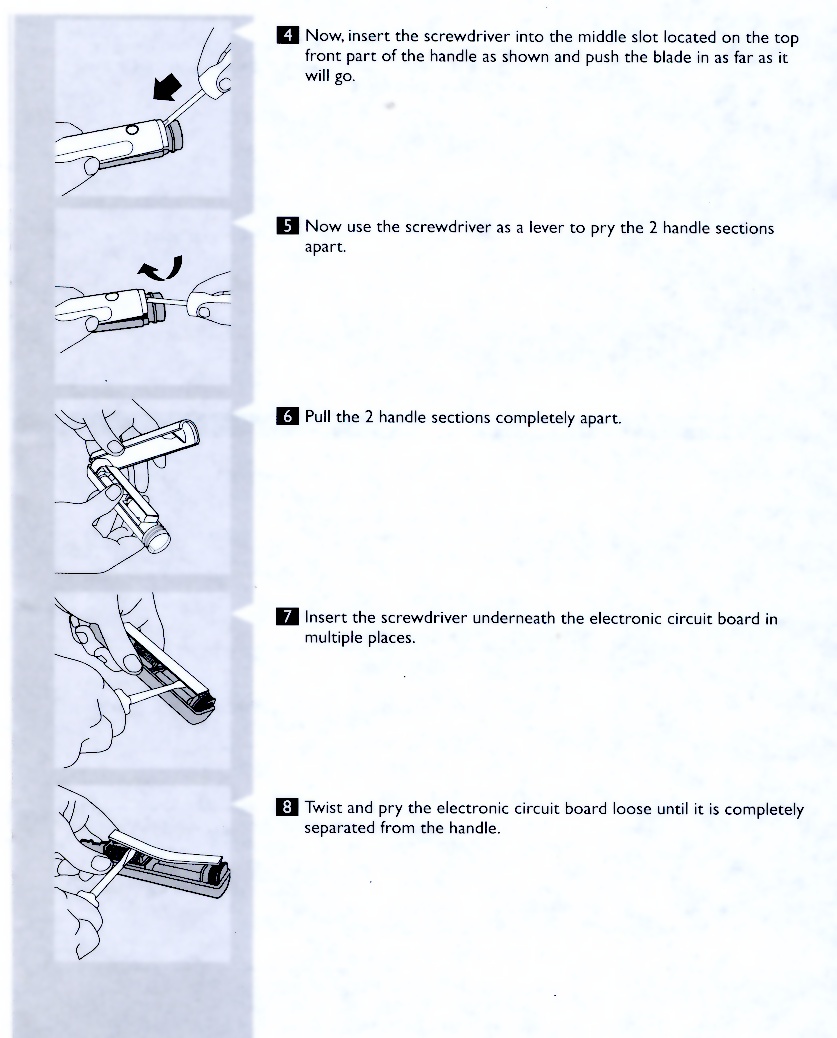
The instruction manual tells how to dismantle the case and extract the NiCd battery for recycling:
Please note that this process is NOT reversible.
Well, there’s a challenge if I ever read one, but Wouldn’t It Be Nice If you could take something apart, unplug its defunct battery, install a new one, and button it up again? Then you wouldn’t be forced to buy a new $70 toothbrush, which probably explains everything… and I suppose the replacement battery would cost $40, even if it were a pair of AA cells.
For reference, the instructions (clicky for more dots):
As predicted, suasion applied through a small screwdriver popped the top end of the case apart, but the remainder required concerted prying and muttering. The case halves mate with a tongue-and-groove joint that’s either sonic welded or adhesive bonded to form a watertight seal all the way around, to the extent that they suggested cleaning the thing in a dishwasher.
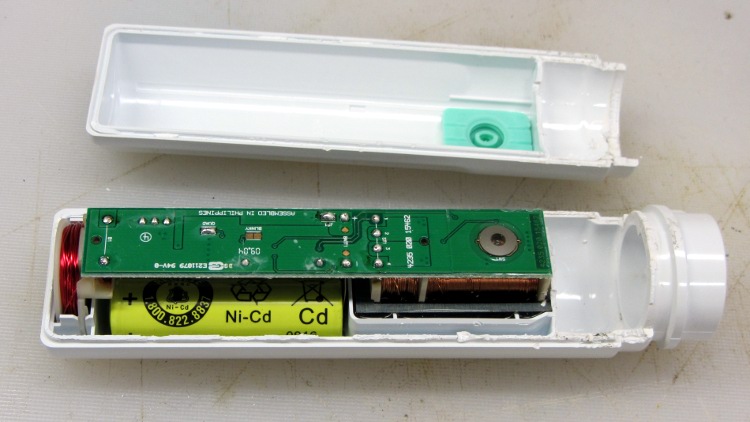
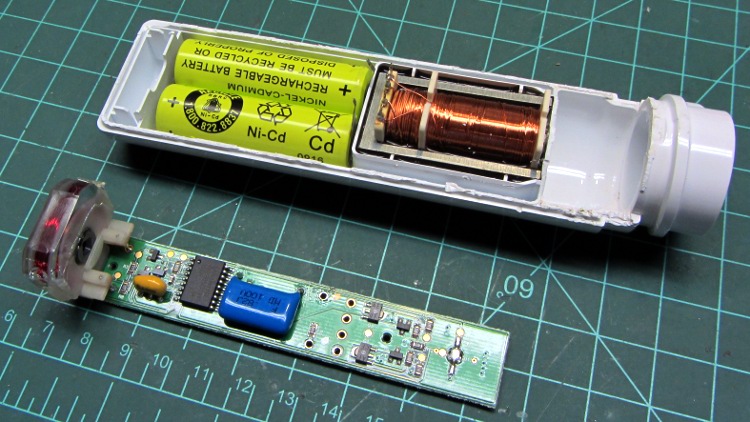
Eventually, though, it came apart:
Sonicare – case opened
The “motor” (actually, a solenoid that couples to the magnet on the brush stem) is firmly potted in place (on the right), as are the NiCd cells and the charging power pickup coil at the base on the left. The potting compound seems to be a clear epoxy, rather than a compliant rubber, and it doesn’t bond to the case at all. It is, however, a perfect fit and doesn’t pop loose without a struggle; their instructions will definitely break the PCB.
Seen from the other direction, six connections join the PCB to those immovable objects. The four pins (on the far left) go to the solenoid and the pair (just to their right) to the battery:
Sonicare PCB solder points
A few dabs of desoldering wick suffice to free the pins and release the PCB. Mercifully, the potting compound surrounding the charging coil slid out easily, as they (inexplicably) omitted a mechanical lock molded into the case:
Sonicare – PCB removed
Removing the NiCd cells required considerable prying, as described in the instructions, that en passant damaged their cases. I think if you weren’t paying attention, you could easily rupture a cell case with the screwdriver and spatter the area with potassium hydroxide, perhaps shorting the cell in the process and producing rather more excitement than most folks expect.
A closeup of one cell; the other bears similar damage:
Sonicare – damaged NiCd cells
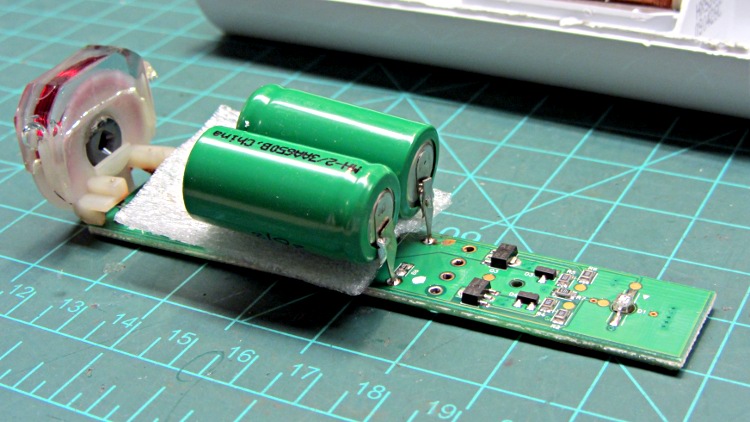
I snipped off the cell tabs and applied them to the new NiMH cells. A bit of closed-cell foam between the cells and the PCB cushions the assembly:
Sonicare – new NiMH cells on PCB
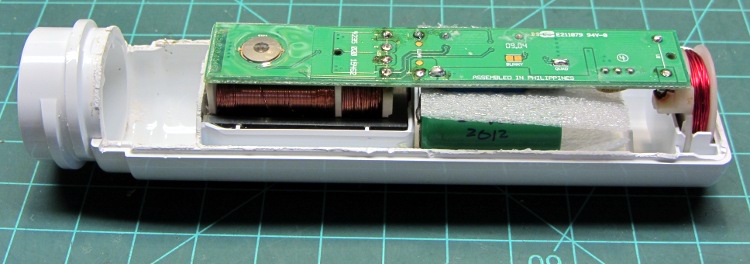
Stacking more foam snippets under the cells filled the space left by the potting compound, then soldering the solenoid pins held everything together:
Sonicare – new NiMH in place
A wrap of clear adhesive (rather than the obligatory Kapton) makes for a tidy joint that probably won’t last very long, but it looks much the way it did before the operation. The case is no longer waterproof and won’t withstand the dishwasher. In fact, I must now store it with the brush end downward to keep the last few drops out of the handle.
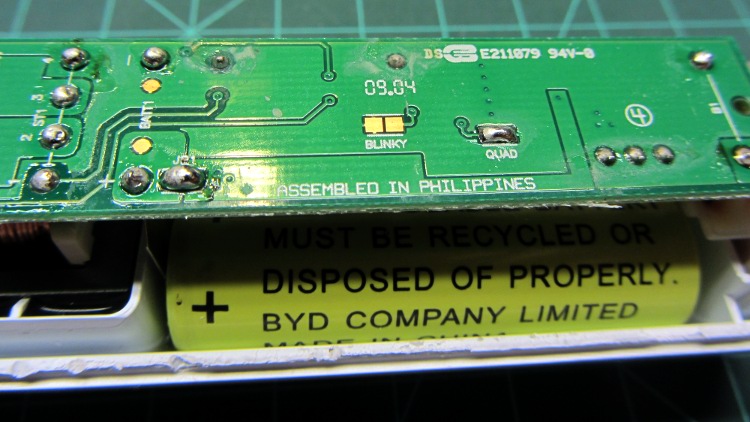
There’s an interesting solder jumper on the PCB that I didn’t bridge, but the next time it’s opened up I’ll apply a dab:
Sonicare – BLINKY jumper
The alert reader will notice that I’ve replaced 2000 mA·h AA NiCd cells with 600 mA·h 2/3 AANiMH cells, without changing the charger. The power transfer through the inductive coupling drives a trickle charger at about one hour of recharge per brushing, so there’s not much danger of overcharging the cells.
Now, to discover what runtime fresh cells deliver. This calls for another slip of geek scratch paper in the bathroom.
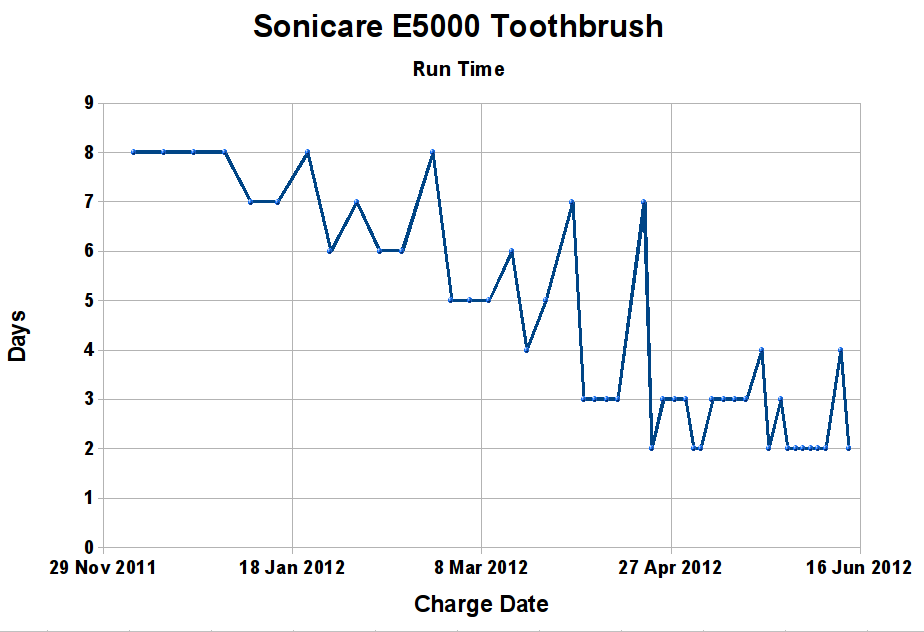
Being that type of guy, I noted each date when my Sonicare toothbrush needs recharging, at least after the battery had declined to about a week between charges, specifically so I could produce this graph:
Sonicare Runtime
The peaks include trips where I didn’t use the toothbrush and I’ve certainly blundered a few dates, but you can eyeball a trendline: those cells are kaput!
In round numbers, I bought the thing in early 2010, so the cells lasted maybe 2-½ years. I routinely run the toothbrush until the blinky light indicates that it needs charging, then fill it up overnight, to avoid having the cells fail like the ones in the beard trimmer.
Somehow the notion of discarding the whole toothbrush seems wrong, even though the instruction manual describes how to remove the battery for recycling before you junk the carcass. Talk about planned obsolescence!