Ed Nisley's Blog: Shop notes, electronics, firmware, machinery, 3D printing, laser cuttery, and curiosities. Contents: 100% human thinking, 0% AI slop.
Having an aversion to getting slapped in the face by Blackthorn branches overhanging the Dutchess Rail Trail, I generally give up waiting for anybody else to do the job:
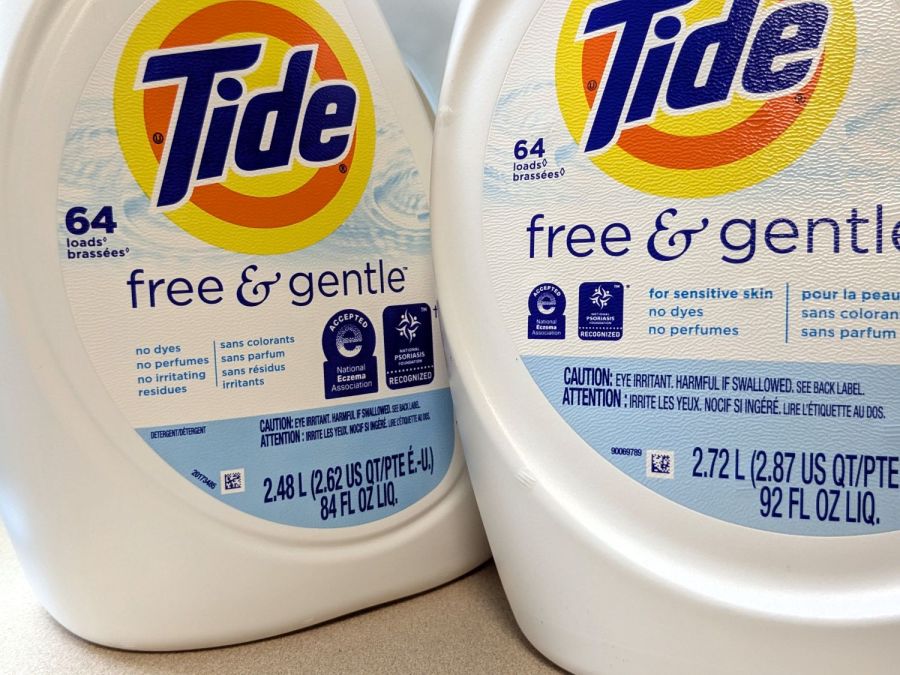
The most recent Tide HE Laundry Detergent bottles seemed smaller than the one we were about to empty and, indeed, they were:
Tide HE shrinkflation – bottle labels
Call it 9% smaller, based on the volume in liters. I suspect the price was also 9% higher, but that would require more digging in the file cabinet than seems justified.
Note that both bottles claim “64 loads”, each with an asterisk (well, a lozenge ◊ symbol) explained on the label:
Tide HE shrinkflation – new load bars
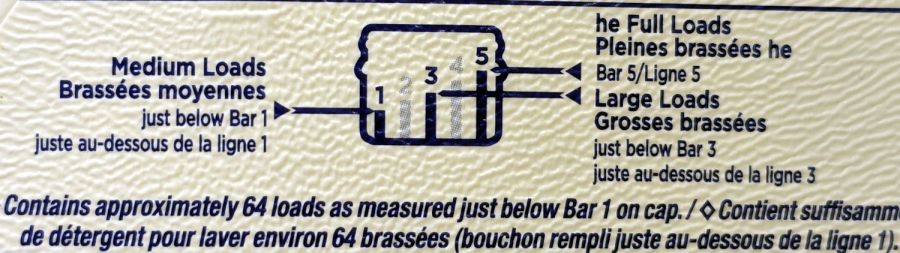
That’s the new chart. The old chart was more explanatory:
Tide HE shrinkflation – old load bars
Note the “just below Bar 1 on cap” weasel wording. The term “meniscus” enters the chat, although laundry detergent doesn’t have much in the way of surface tension.
One might reasonably assume the bars on the new cap have gotten shorter, so that the volume of detergent used for each load would be smaller.
One would be wrong:
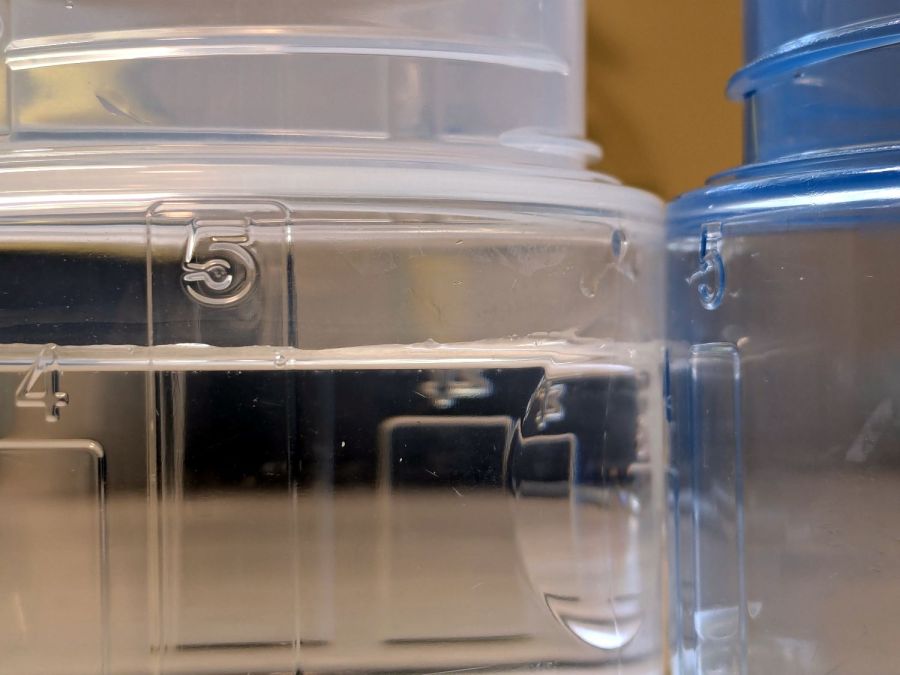
Tide HE shrinkflation – cap capacity marks
The blue cap on the right is one we’ve been using for the last few years, because I put black tape at the level of the first bar to match our “Medium” loads. I cannot imagine how much dirt would require filling the cap to Bar 5.
The clear cap on the left is the new cap. I filled the blue tap to the top of Bar 5 with water and poured it into the clear cap, where it comes about 3/4 of the way to the top of the new Bar 5. Evidently, the amount of detergent required to get grubby clothes clean has increased by 33%.
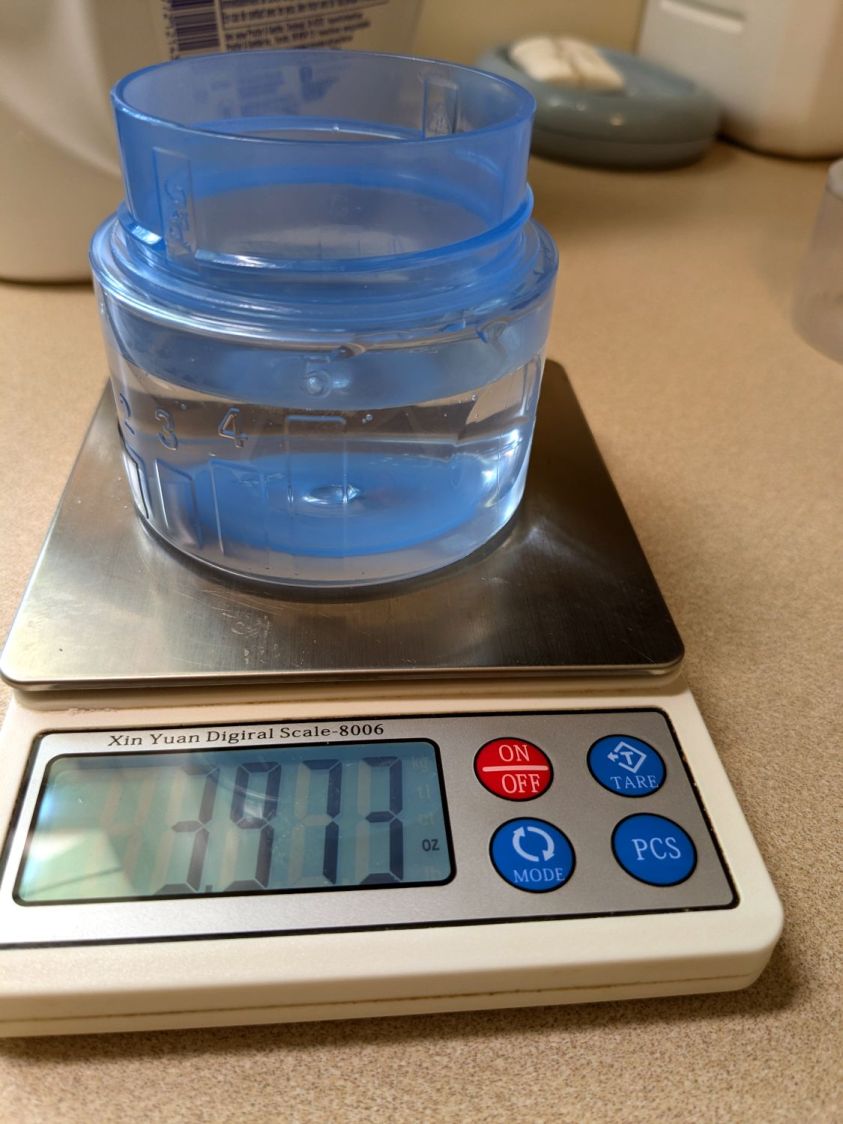
The old cap holds just shy of 4 fluid ounces to the top of Bar 5:
Tide HE shrinkflation – old cap bar 5 capacity
The new cap holds 5.5 fluid ounces to the top of its Bar 5:
Tide HE shrinkflation – new cap bar 5 capacity
If you have really crusty clothing, you’re now using 36% more detergent per load.
The obvious arithmetic shows the old bottle holds 23 “Bar 5” loads and the new bottle holds 15.
To the limit of my measuring ability, both caps hold 1.3 fluid ounces to the top their respective Bar 1 levels. I cannot vouch for the “just below” level, but I suspect more accurate measurements would show the new caps have slightly lower volume at that level, juuust enough to make the “64 loads” weasel wording come out right.
These switches carry absolutely no regulatory approval markings, although they do claim to carry 10 A at 250 V, which I take with another load of salt.
At least here in the US-of-A, a 240 VAC outlet has two “hot” wires carrying 120 VAC 180° out of phase, which means both conductors must be switched. Despite the voltage rating, only the L path goes through the clicky switch, with the N path along a strap just below the switch toggle. Using it on a 240 VAC circuit will kill you stone cold dead should you assume whatever it controls is turned off.
I secured the Line and Neutral conductors with crimp connectors, rather than just wrapping the 20 AWG wires around the screw terminals, because the case halves join without perimeter nesting: a bare millimeter of air in the gap between the halves separates the terminals from my fingers. A layer of good electrical tape on each side improved that situation, but not by much.
The complete lack of strain relief clamping on the cords prompted me to route the wires around the screw bosses. After a function check, squirts of hot melt glue anchored the two cords somewhat better.
Aaaaand I secured that loose strap on the right with an (identical to the others!) screw from the Tray o’ Random Screws. The other switches had both screws installed, so this one must have been a QC escape.
They suffice for the purpose, but … caveat emptor!
Our medical practice has been Borged by Optum, which is, through a number of corporate cutout layers, owned by UnitedHealth Group, so (despite claims to the contrary) our doctors effectively work for a health insurance company. No, they may not be paid by UHG, but following the money in reverse shows the flow of influence.
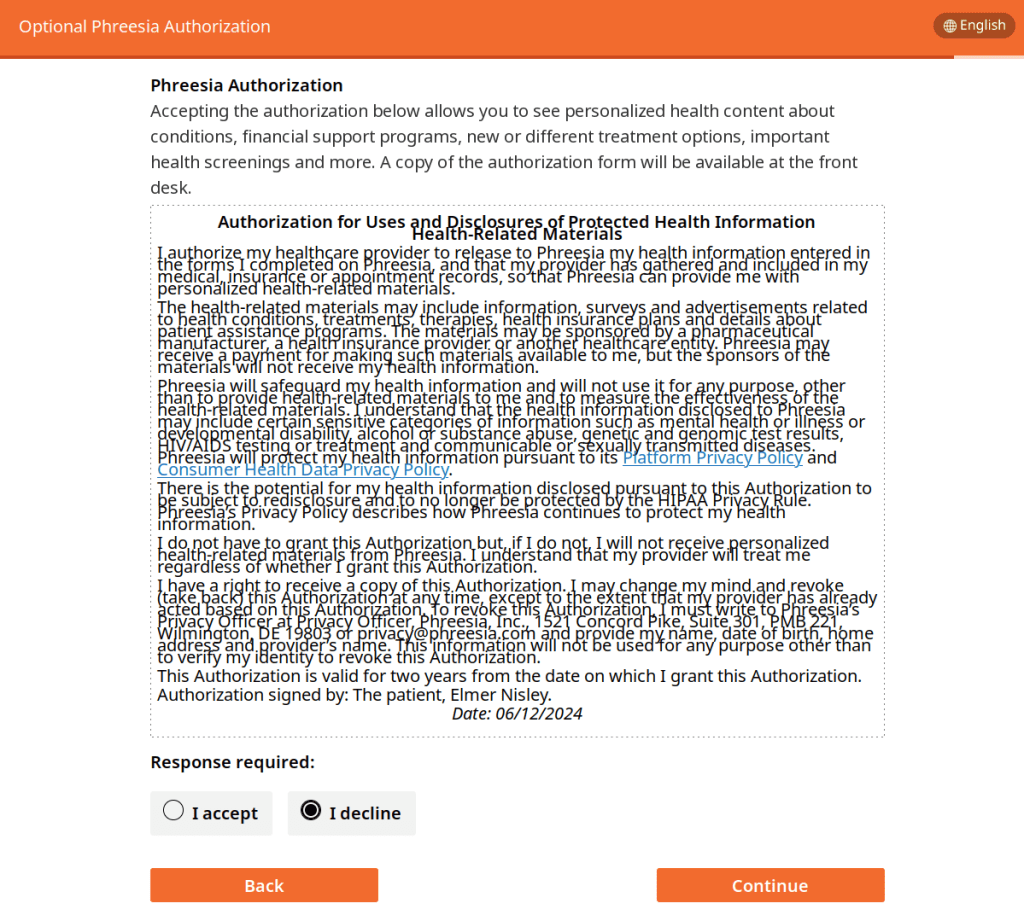
Apparently this has slightly affected the original practice’s reliance on Phreesia for pre-visit sign-in information collection although, as before, Phreesia still really wants to scatter your precious personal bits to the far corners of the InterWebs:
Phreesia optional authorization – 2024 version
The wall o’ text is a bit shorter then the earlier version and cannot be scrolled or printed. It still admits:
There is the potential for my health information … to be subject to redisclosure and to no longer be protected by the HIPAA Privacy Rule.
Yes, I understand that’s the whole point of getting me to agree to release my private bits to Phreesia, so they can make money by selling it to the highest bidder(s).
What’s new is the previous page in the sequence, of which I do not have a screenshot, presumably coming from Optum, emphasizing in bold type that I do not have to authorize Phreesia’s data collection.
I infer this means two things:
Optum / UHG has had their awareness raised about this nonsense
Phreesia contractually requires that dark-pattern page
Yes, I understand that I have no privacy and should get over it, but somehow this sort of behavior rankles …
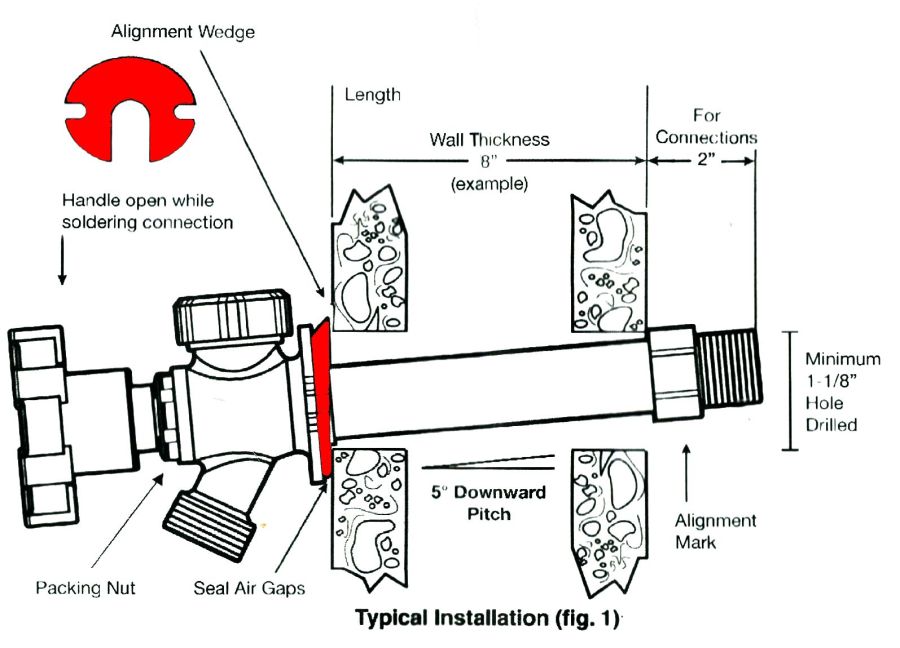
A pair of frost-free sillcock faucets arrived to replace the house’s leaky and un-repairable hose bibs. The faucet must be mounted at a 5° angle to let the water drain out when it’s closed:
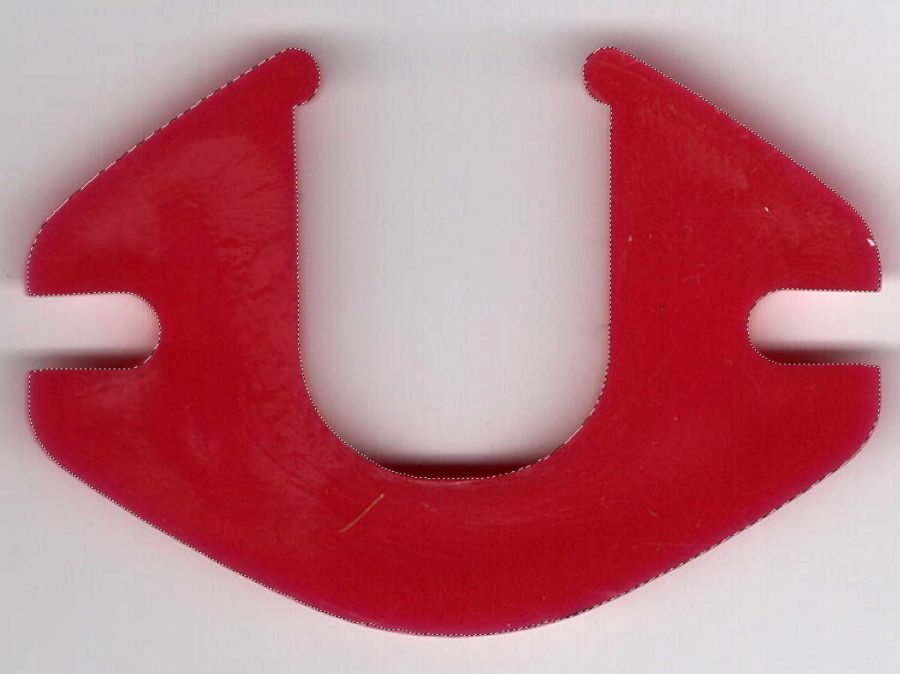
Sillcock faucet alignment wedge – GIMP color selection
After a little manual cleanup in Quick Mask mode, apply a 1 mm inset to ensure it snaps around the pipe, convert the selection to a path, export it as an SVG image, and import it into OpenSCAD to cut the angle:
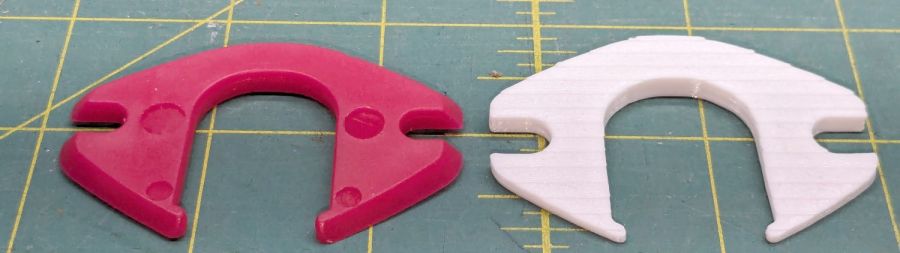
And comes off the printer looking just about like you’d expect:
Sillcock faucet alignment wedge – OEM vs printed
The far side of both wedges are 5 mm tall, but you can see the difference four more degrees makes in the front.
It’s even more obvious from the edge:
Sillcock faucet alignment wedge – on pipe
The wood siding where these will fit is perfectly vertical, so getting the wedge angle right isn’t really optional.
I must drill the existing hole in the sill plate out to 1-1/8 inch to clear the pipe fittings, plus the wood around the screws holding the current bibs to the wall will surely need some buttressing, but all that’s in the nature of fine tuning.
FWIW, this was the first 3D print after the move and I’m happy to say the M2 had no any need of adjustments.
The WordPress AI image generator apparently ignored the post text and produced a stylin’ picture of an arched bathroom faucet over a rimless sink, which I shall leave to your imagination.