Ed Nisley's Blog: Shop notes, electronics, firmware, machinery, 3D printing, laser cuttery, and curiosities. Contents: 100% human thinking, 0% AI slop.
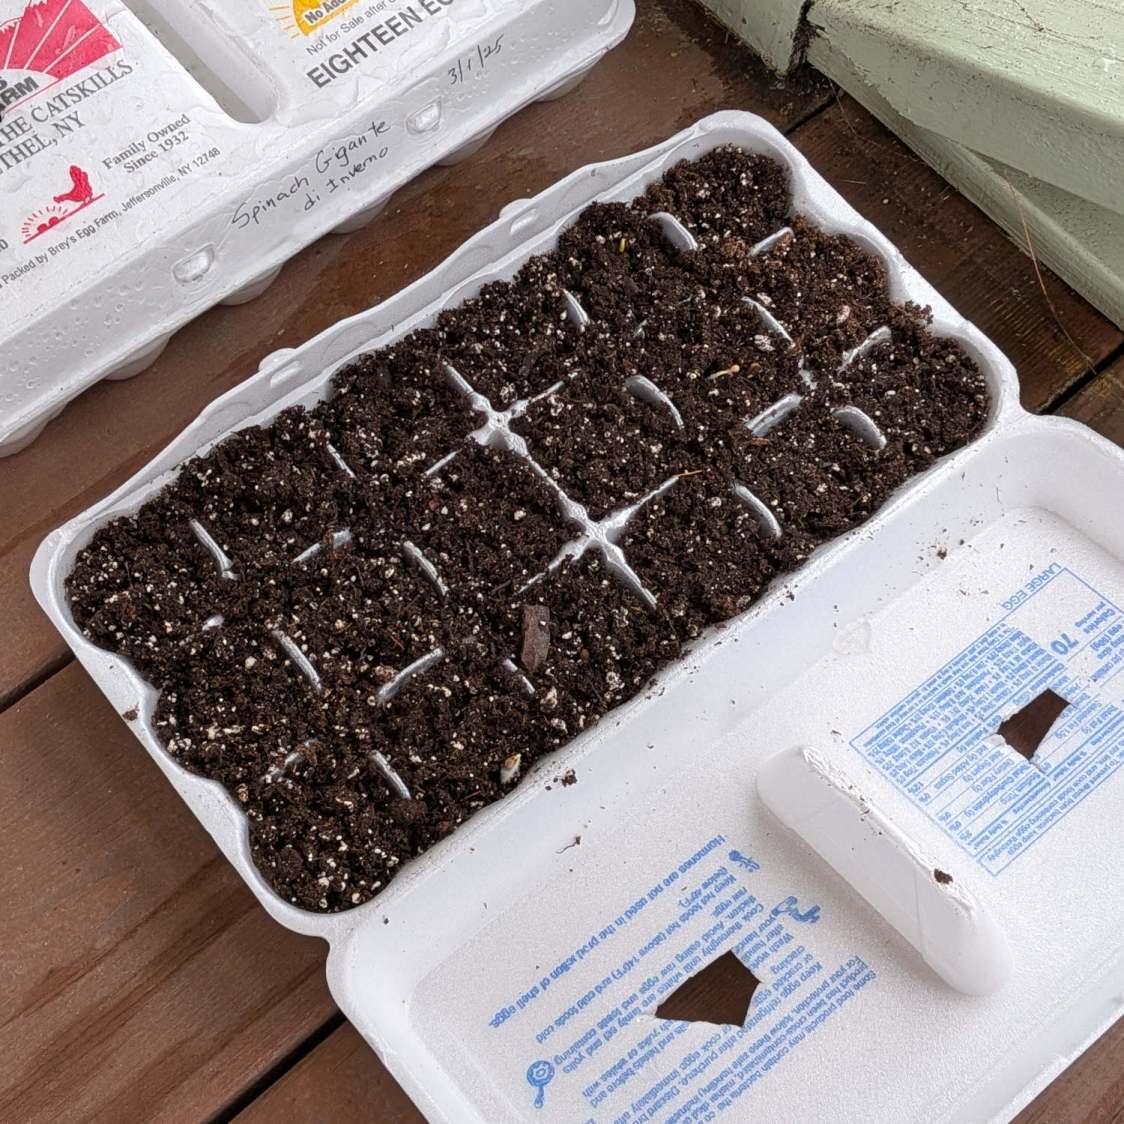
Mary has been using Styrofoam egg cartons to sprout seeds for this year’s garden veggies:
Egg carton sprouter – hand cut
I looked at those artisanal holes and offered to make sprouters with precisely calibrated laser-cut holes.
After the laughter died down, this happened:
Egg carton sprouter – lid detail
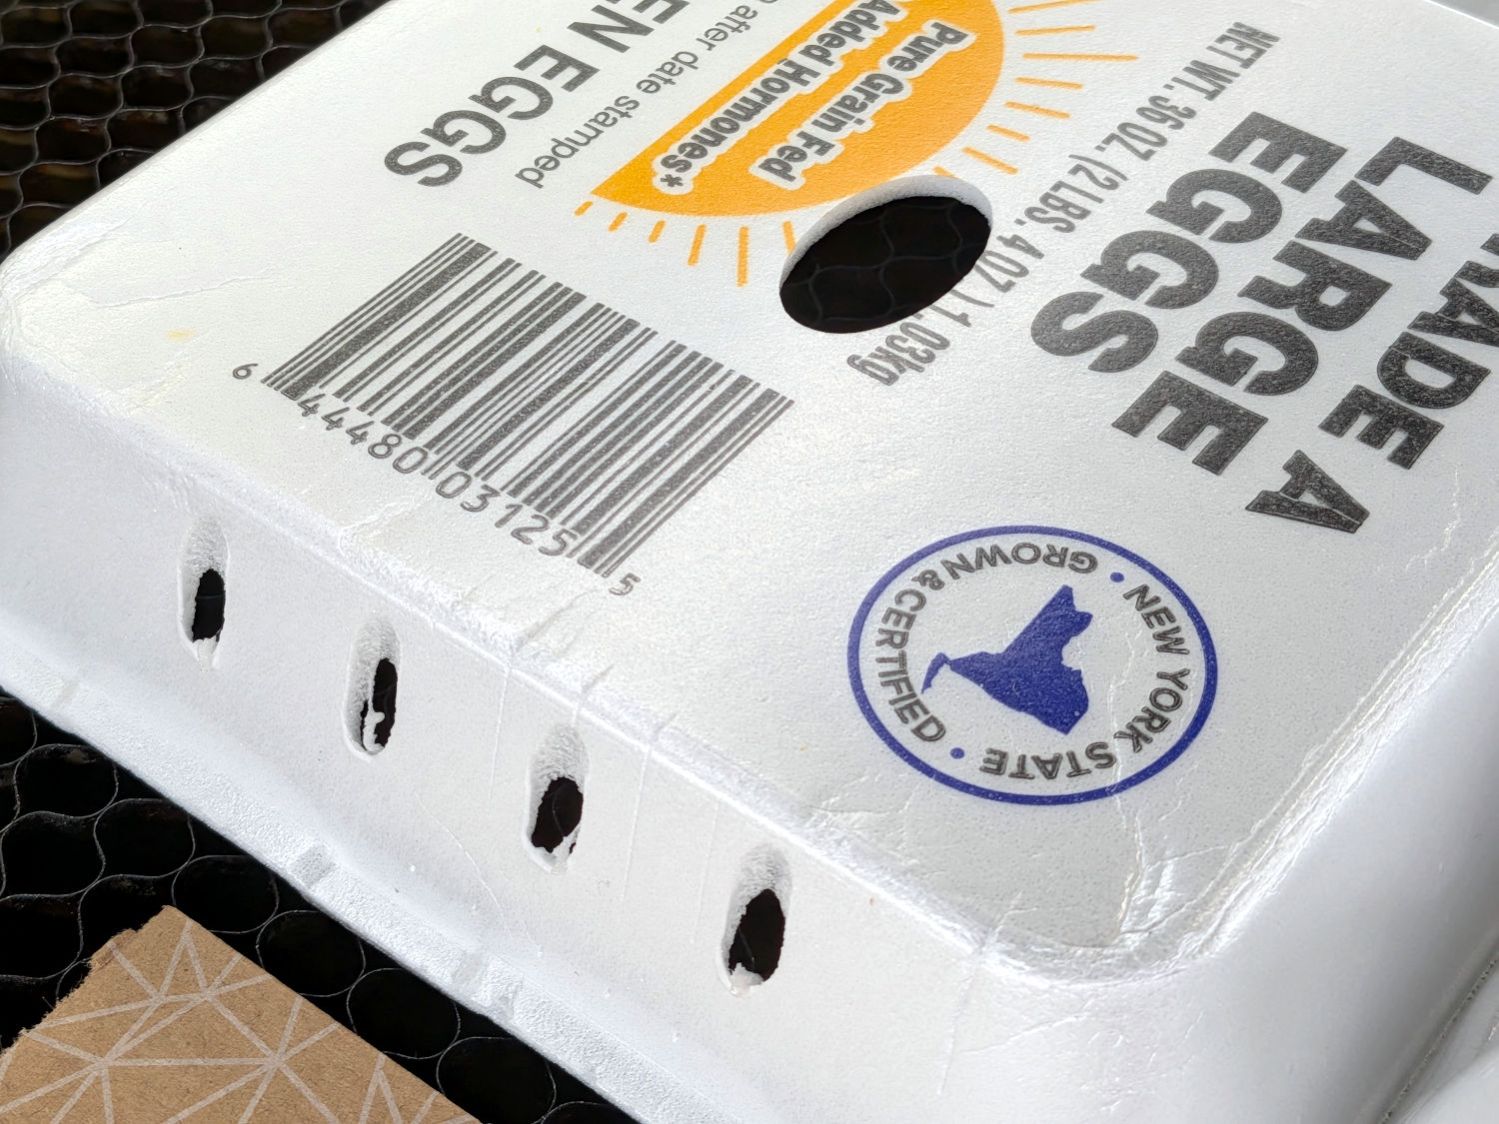
Each egg compartment has a drainage hole in the bottom:
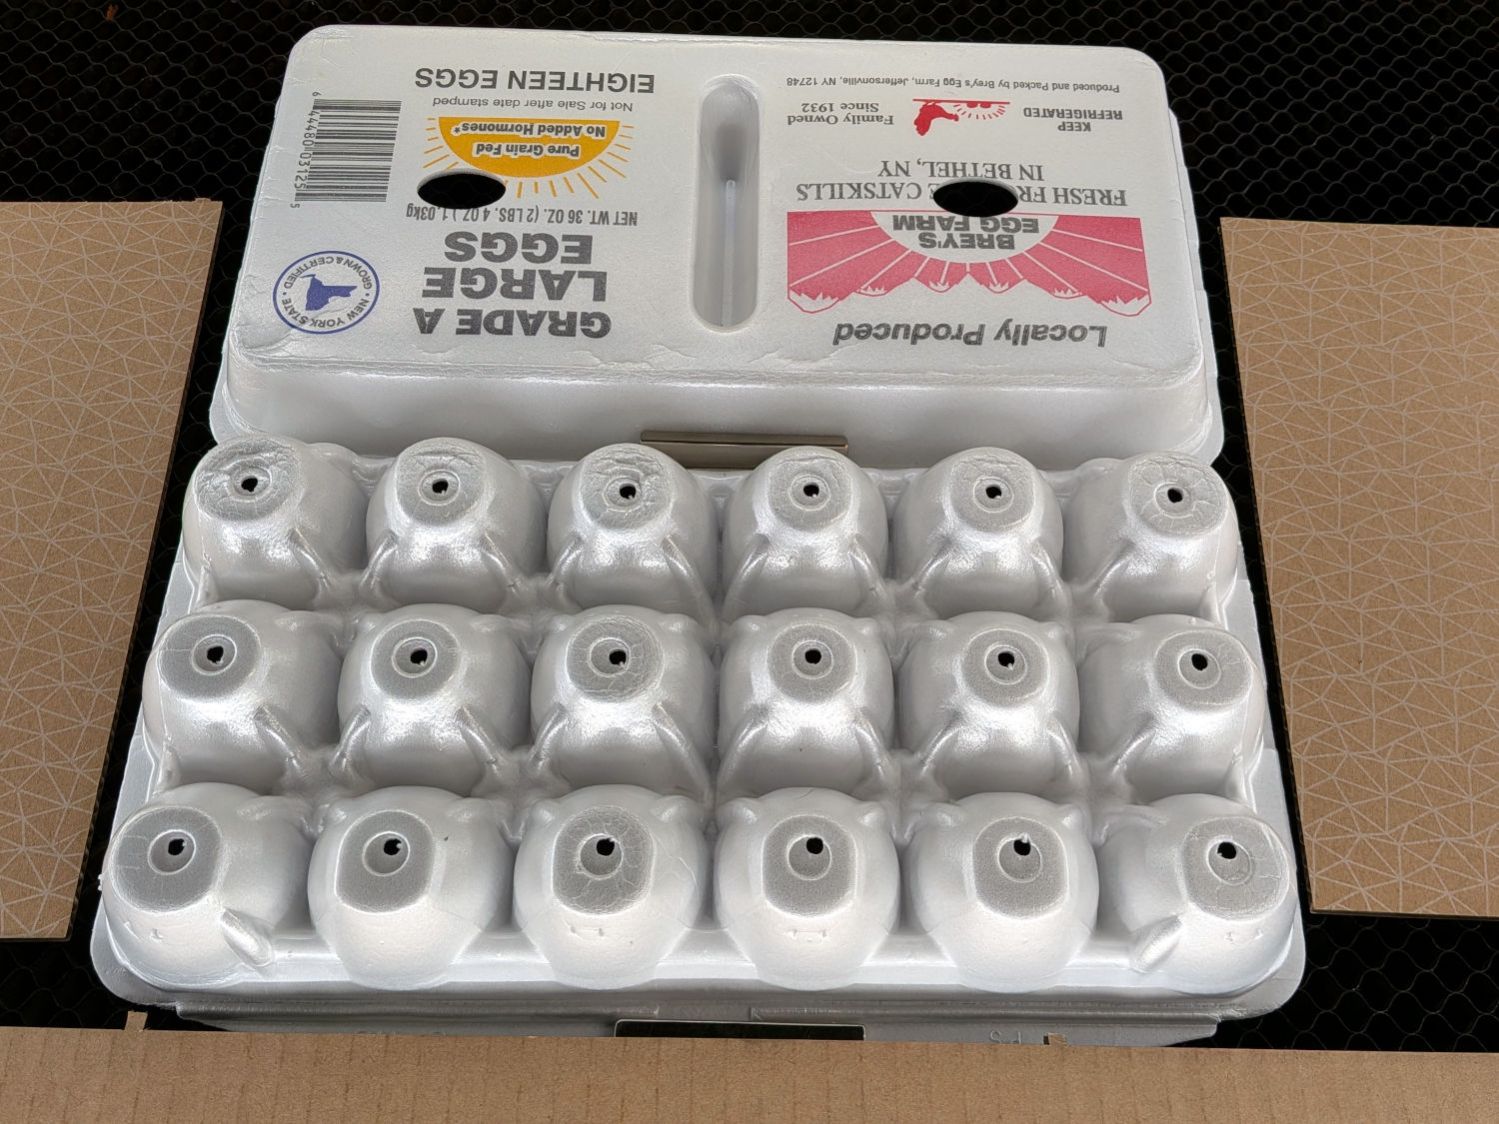
Egg carton sprouter – on platform
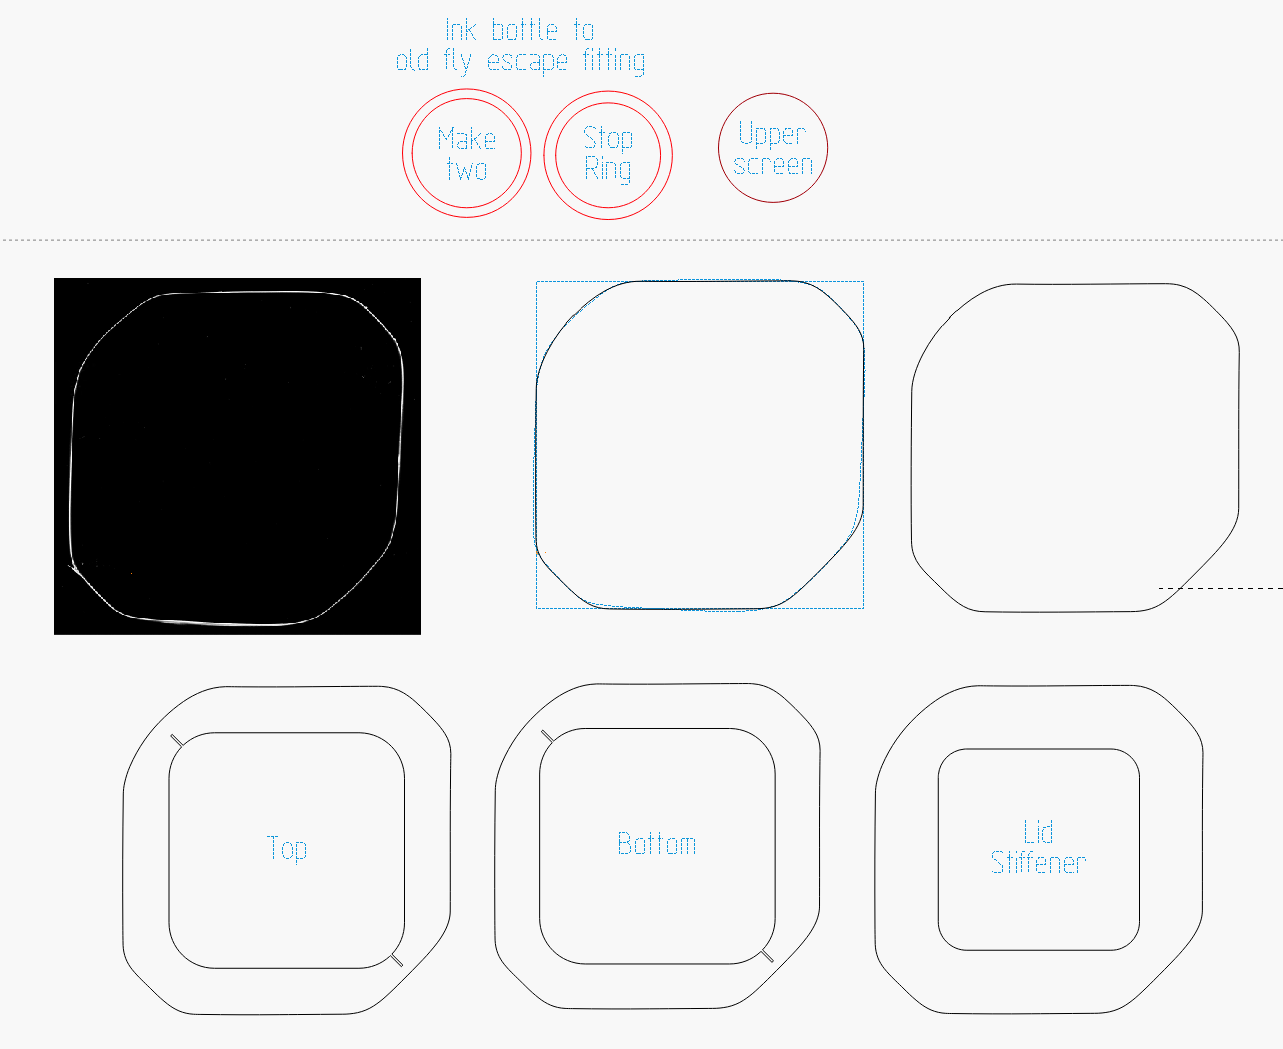
The LightBurn layout has four shapes in three virtual arrays:
Drain holes: 3 mm circle, 6×3 array
Top vents: 25×15 mm oval, 2×1 array
Side vents: concentric 3×4 & 2×3 mm ovals, 2×4 array
Which looks like this:
Egg Carton Sprouter – LightBurn layout
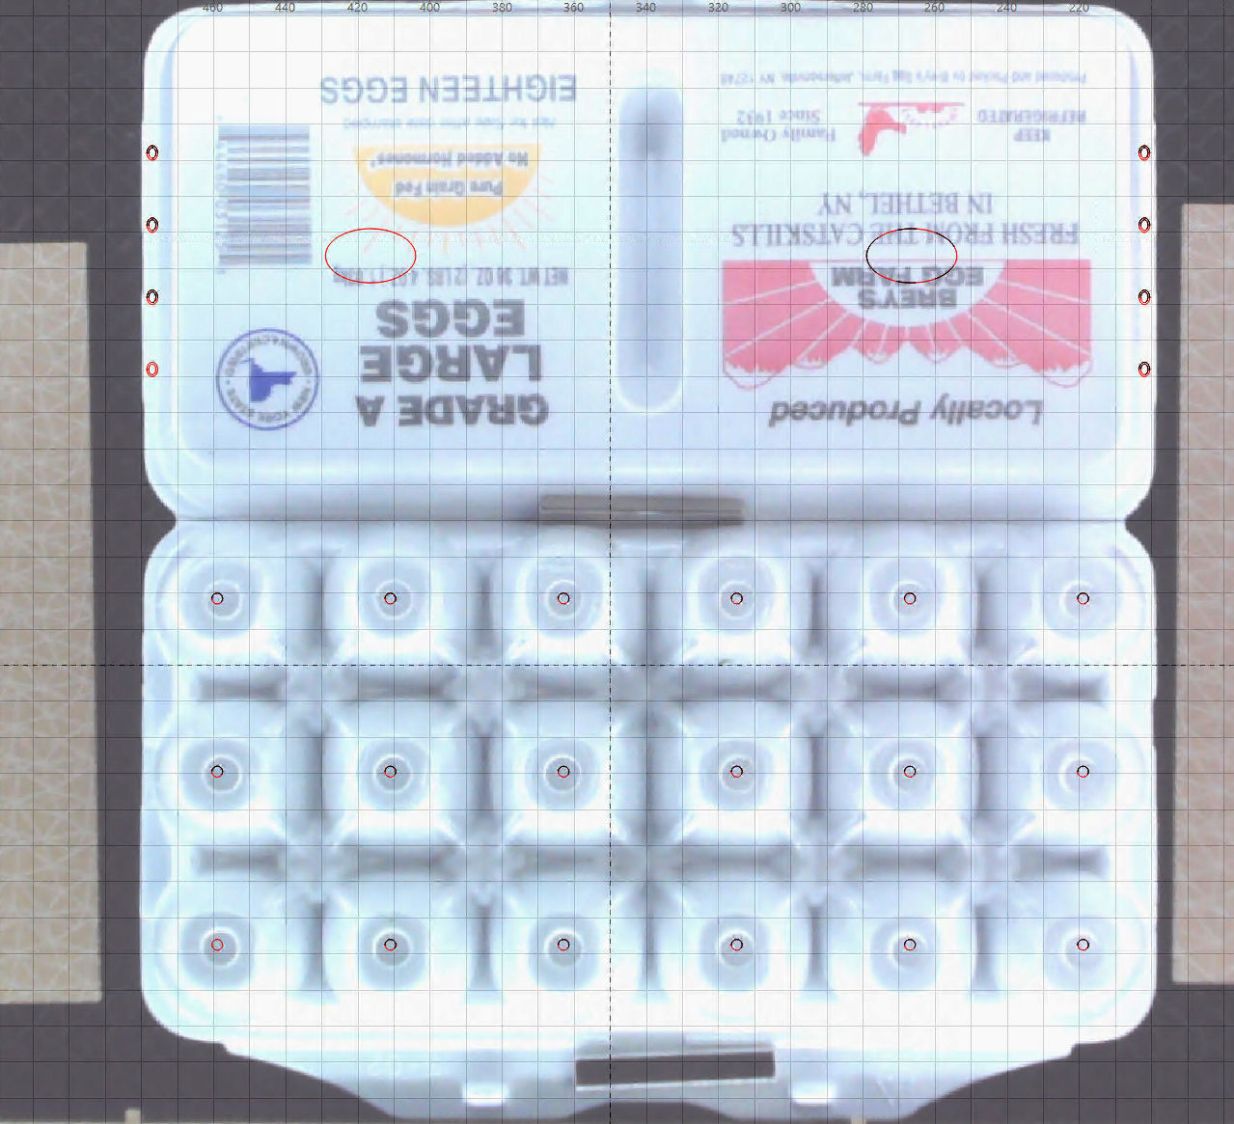
Because this isn’t a high-precision operation, I align the patterns to the carton using the camera:
Egg Carton Sprouter – LightBurn camera alignment
The two halves of the unfolded carton aren’t the same height, which means the top and bottom patterns have different focus levels and must be cut in two operations.
The SiLite tray is well-weathered, but remains structurally sound: still ready for service in the D-Hall breakfast line on the morning after the Apocalypse.
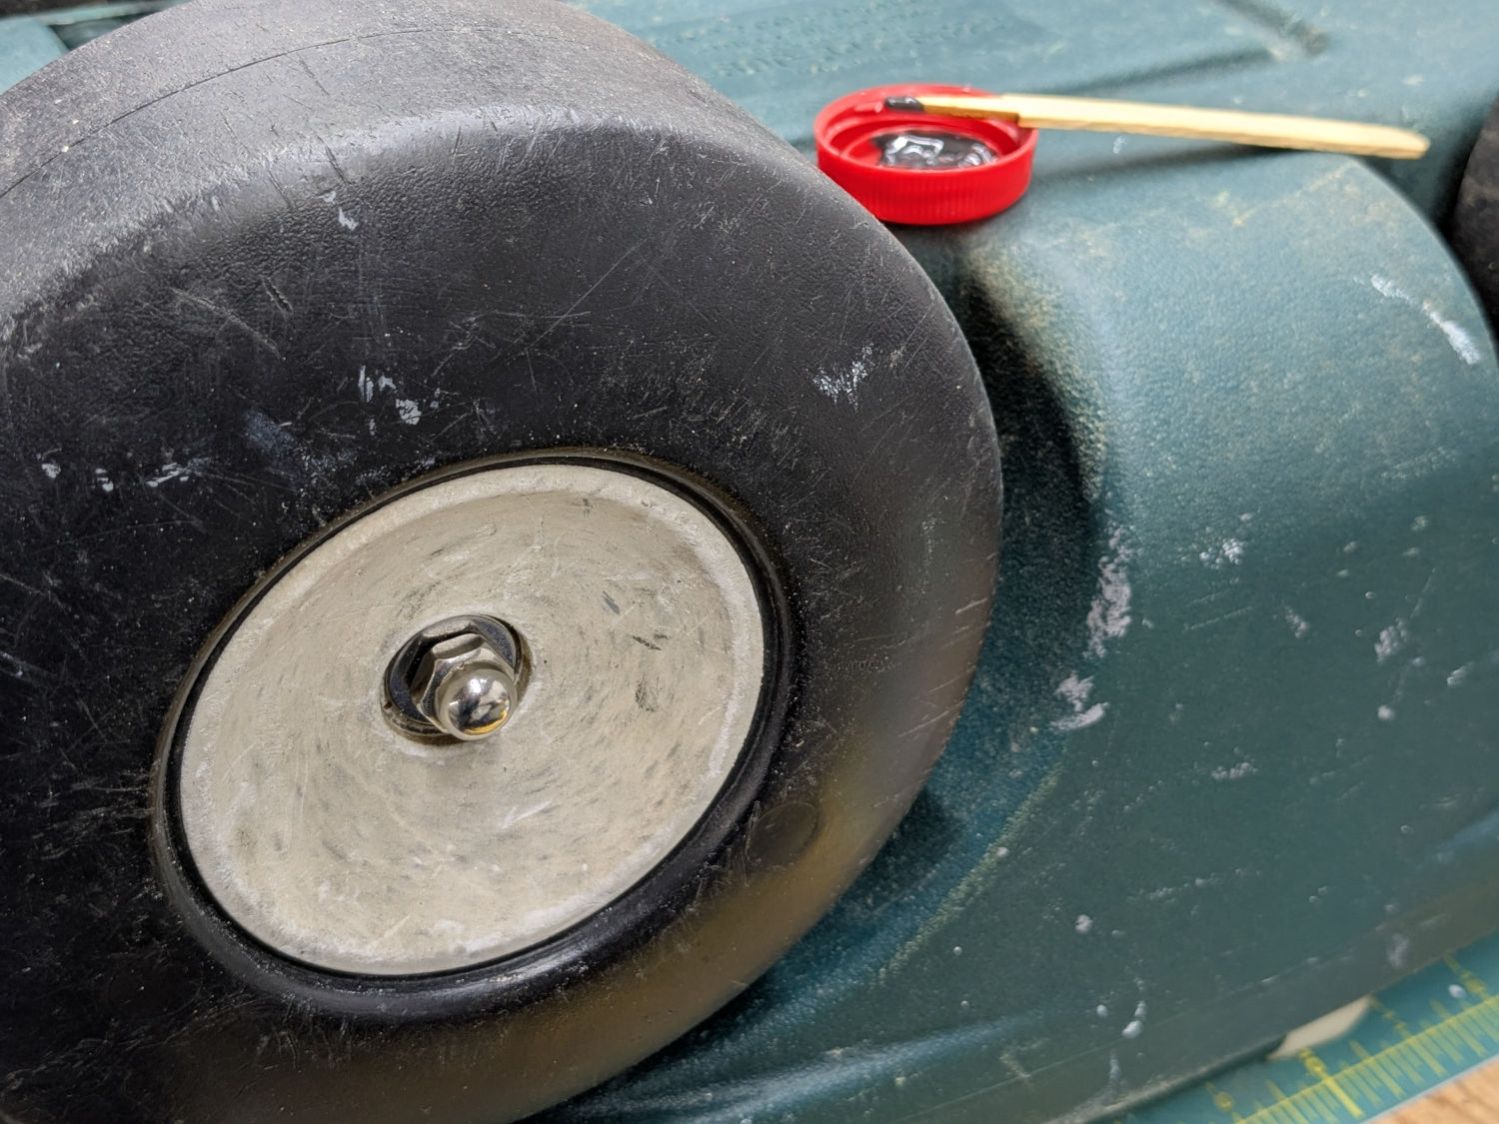
The cart in Mary’s Vassar Farm plot returned in need of repair:
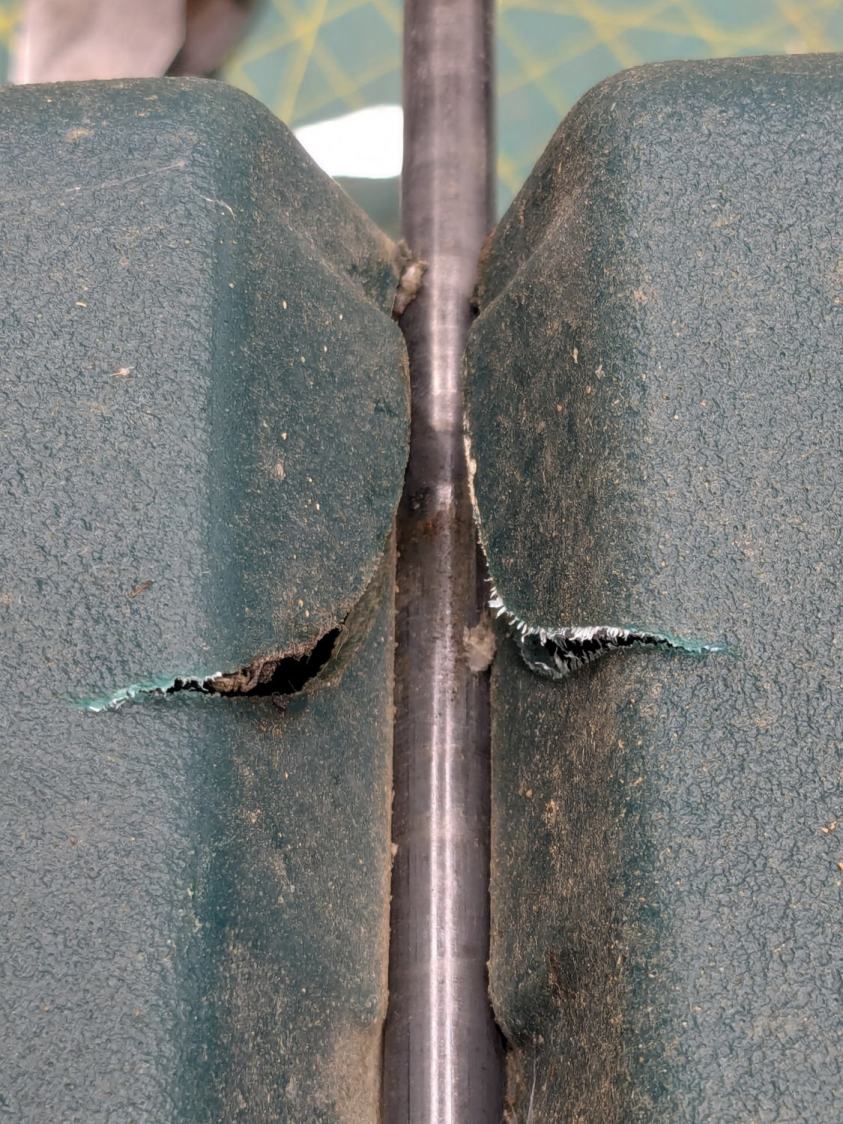
Garden Seat – fractured body
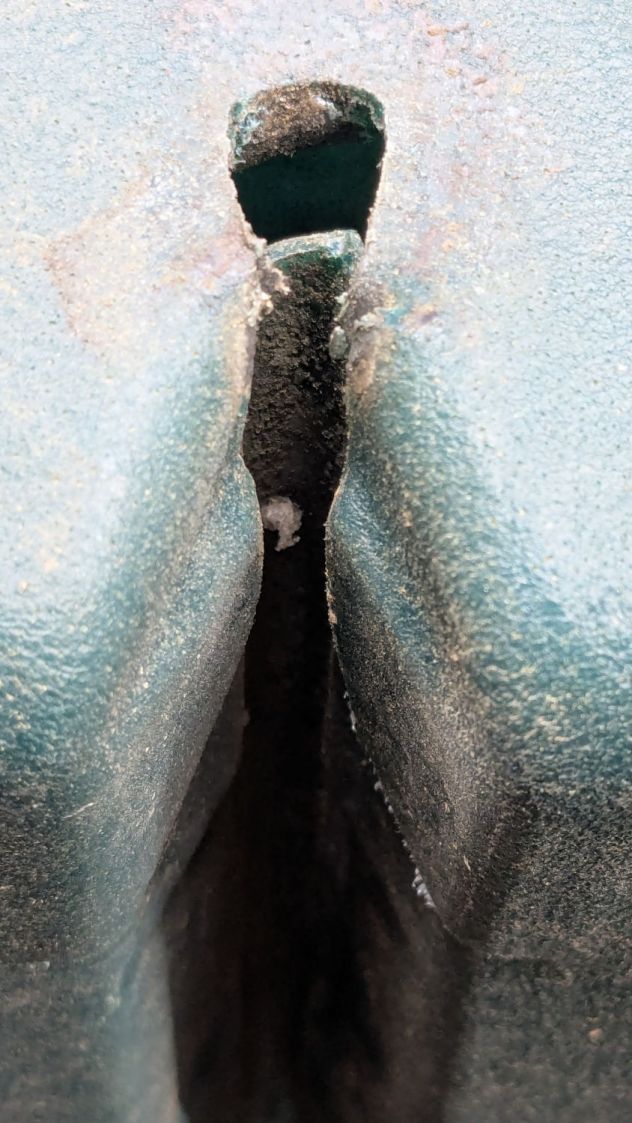
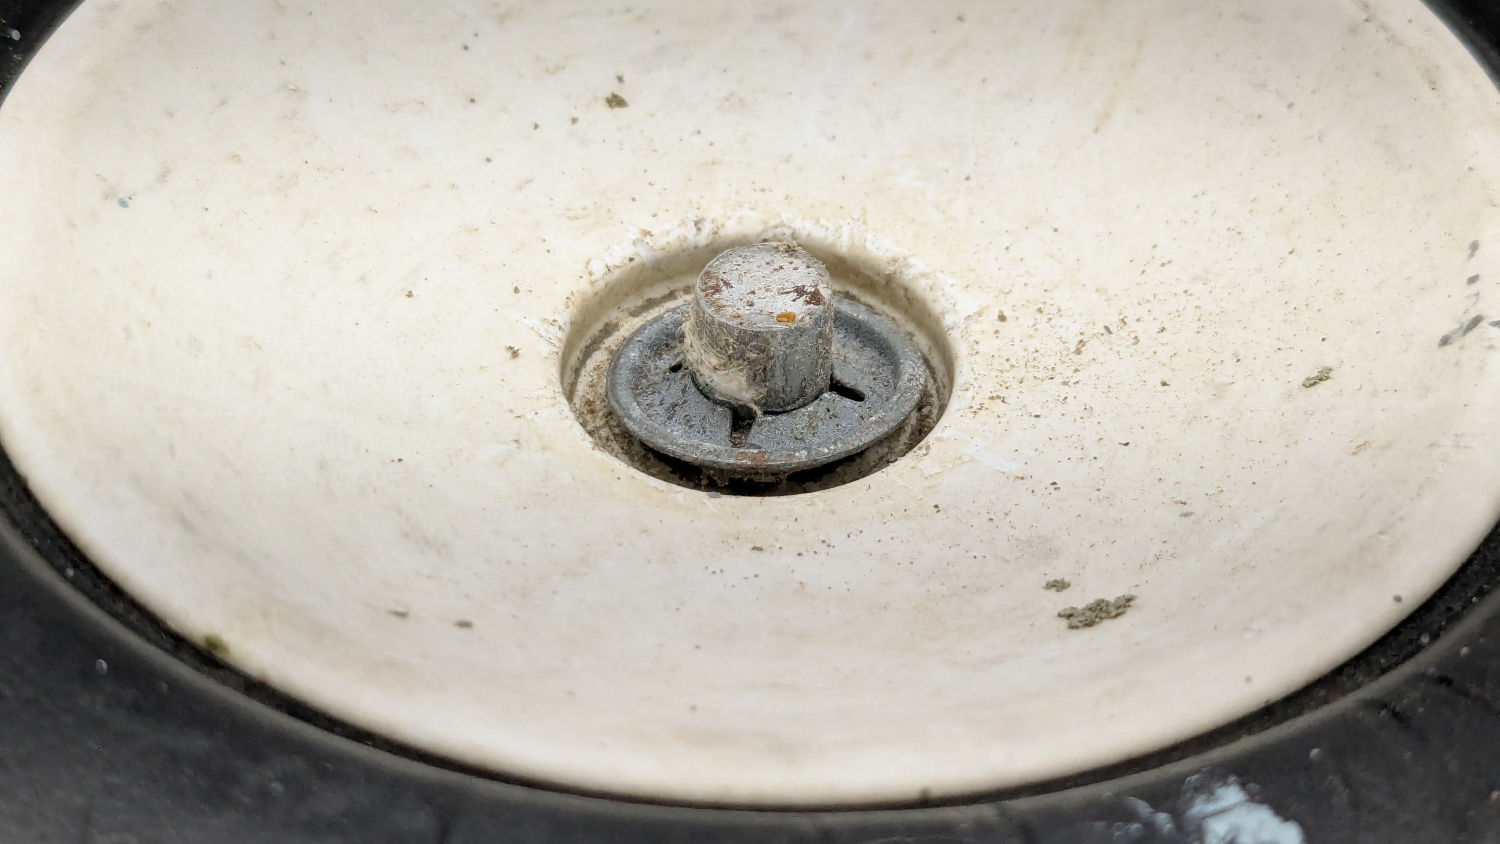
Those fractures near the end of the axle let the axle erode the side wall:
Garden Seat – eroded body
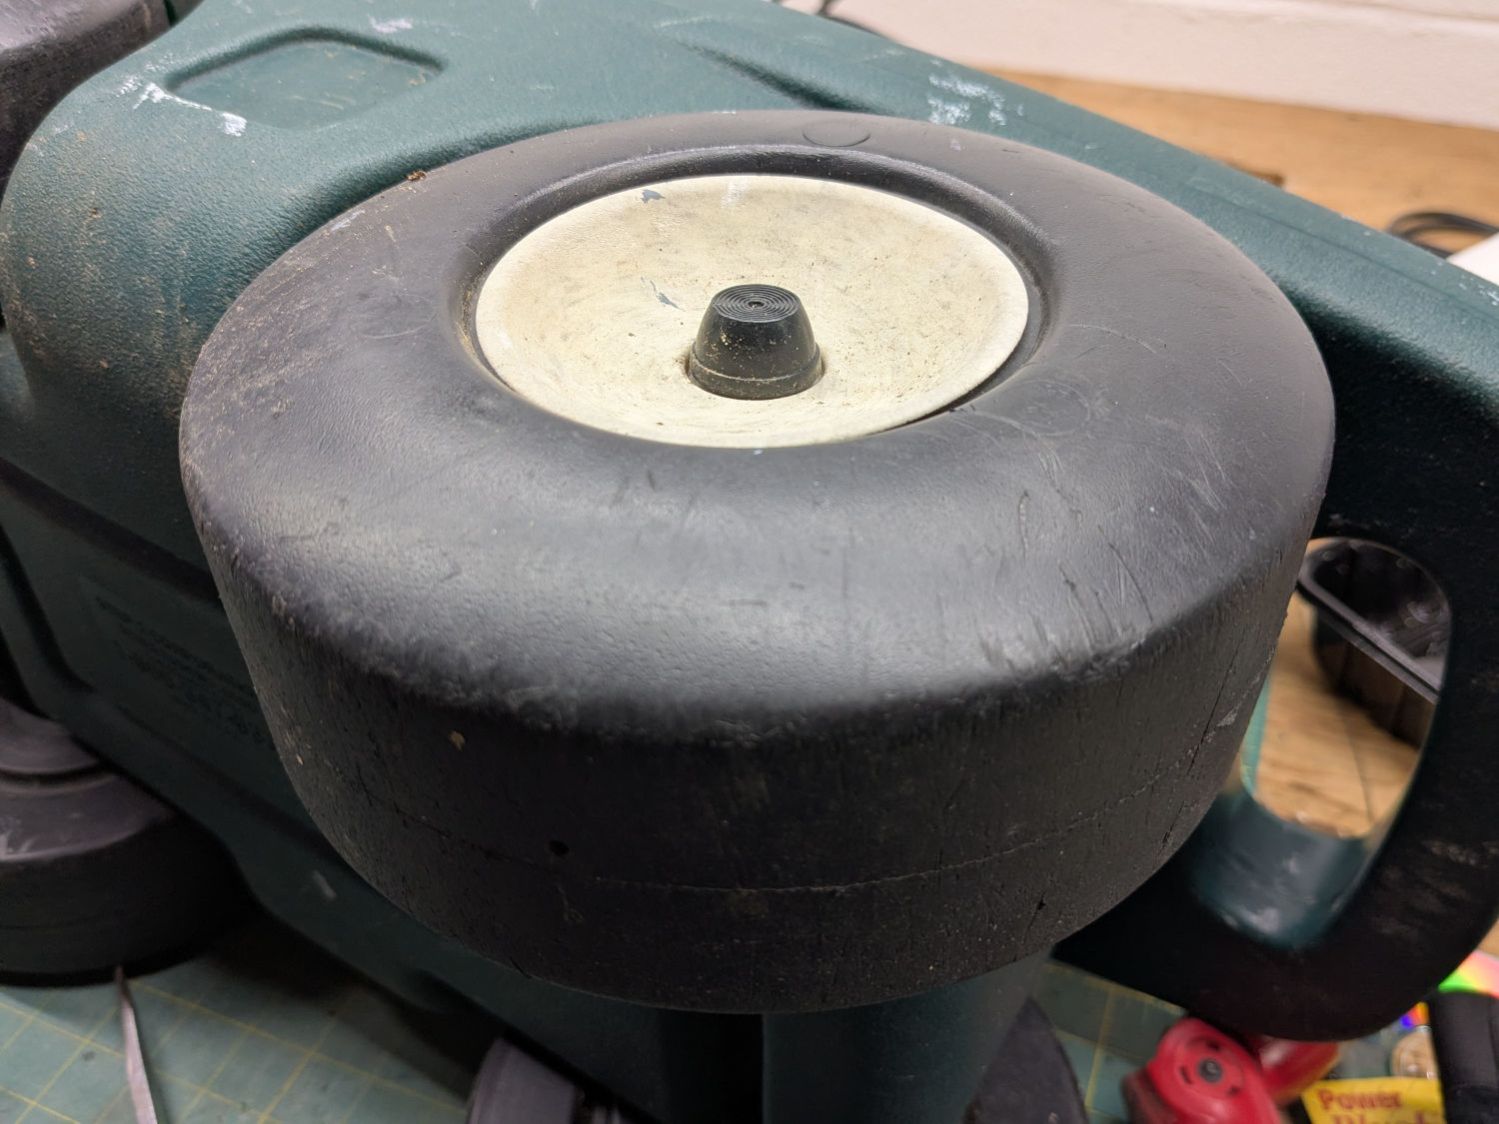
This will obviously require some sort of reinforcement on the body holding the axle, but the first challenge involved getting the wheels off the axle:
Garden Seat – axle cover
Some brute force revealed the hub covers snapped over an install-only locking fastener:
Garden Seat – axle retaining clip
More brute force cut those fasteners (a.k.a. star-lock washers) to get the wheels off the axles.
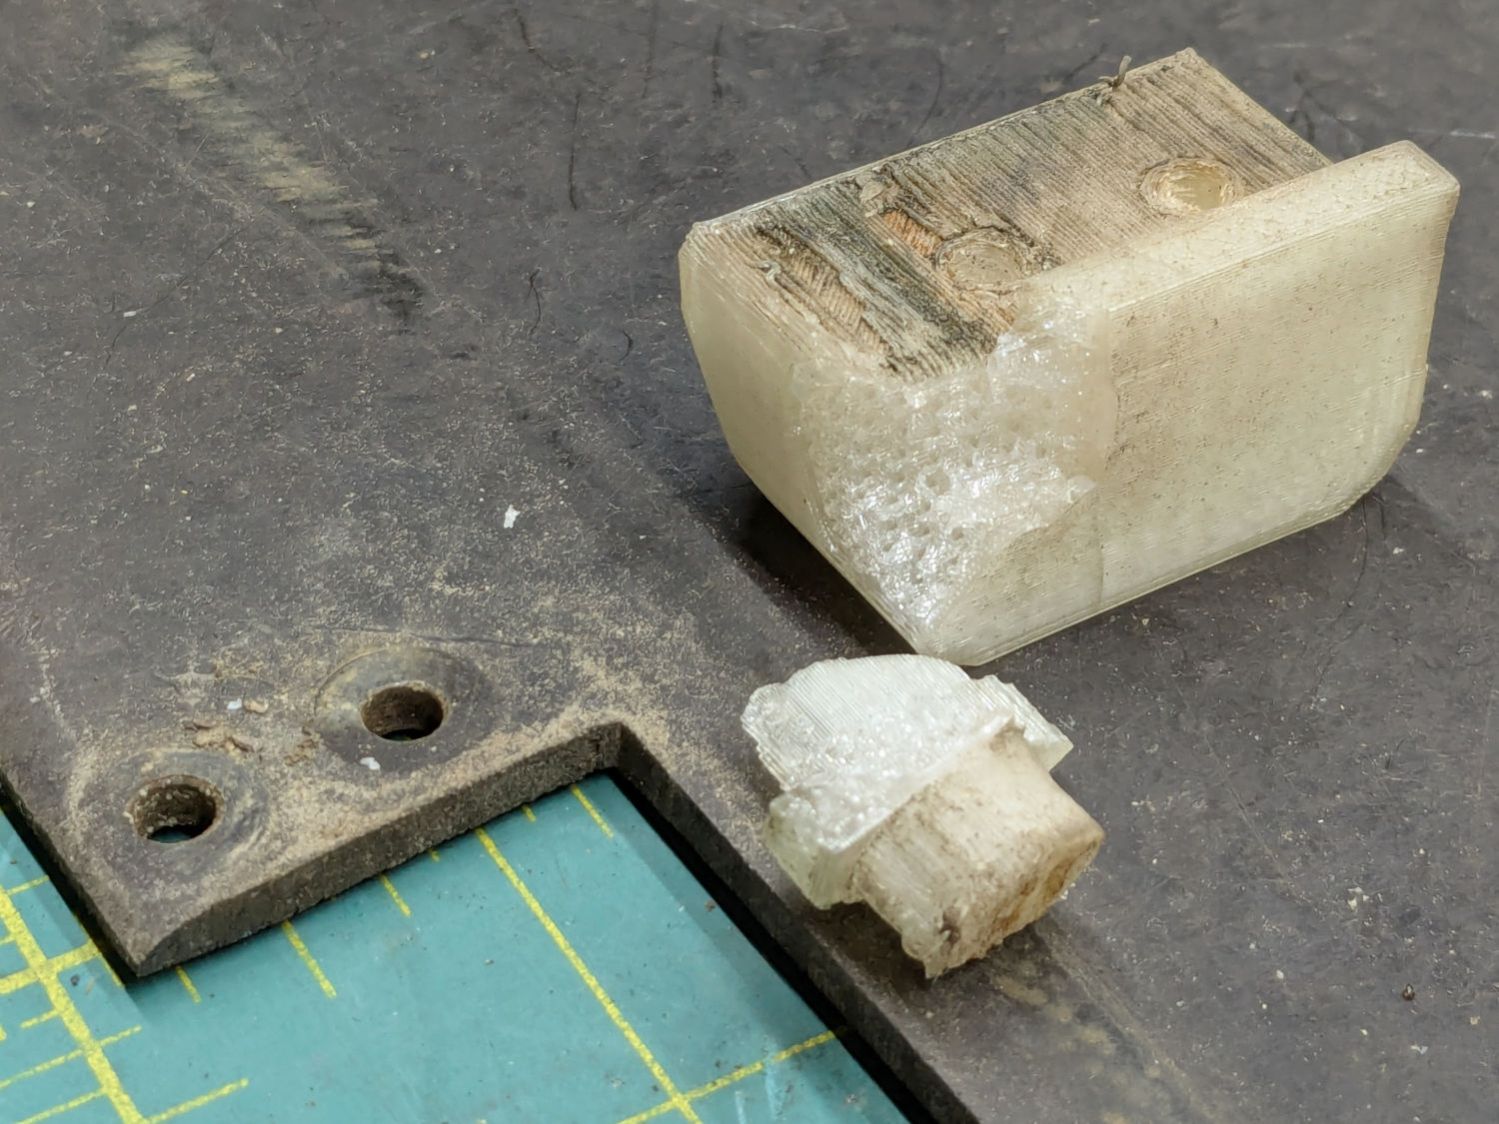
While contemplating the situation, a box of 606 bearings (as used in the PolyDryer auto-rewind spindles) failed to scamper out of the way and produced a victim fitting perfectly on the 8 mm axle:
Garden Seat – bearing idea
I regard such happenstance as a message from the Universe showing I’m on the right track. The alert reader will note the axle should not rotate, but does sport scars showing it’s done some turning in the recent past, so the bearing may not be a completely Bad Idea™.
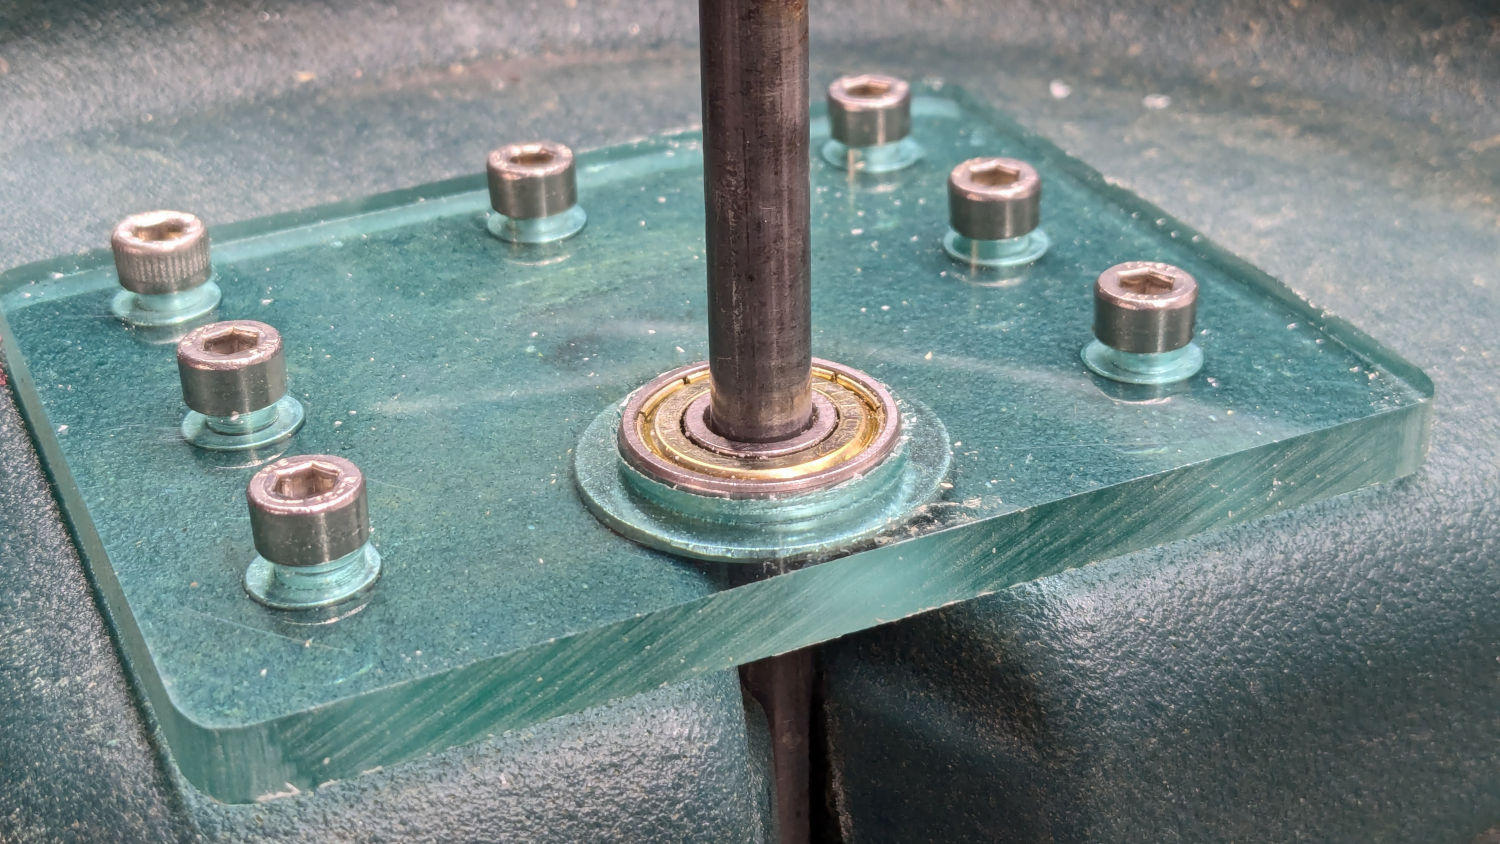
Finding a Lexan snippet exactly as thick as the bearing suggested bolting a plate across the side of the body to support the bearing, like this:
Garden Seat – reinforcing plate installed
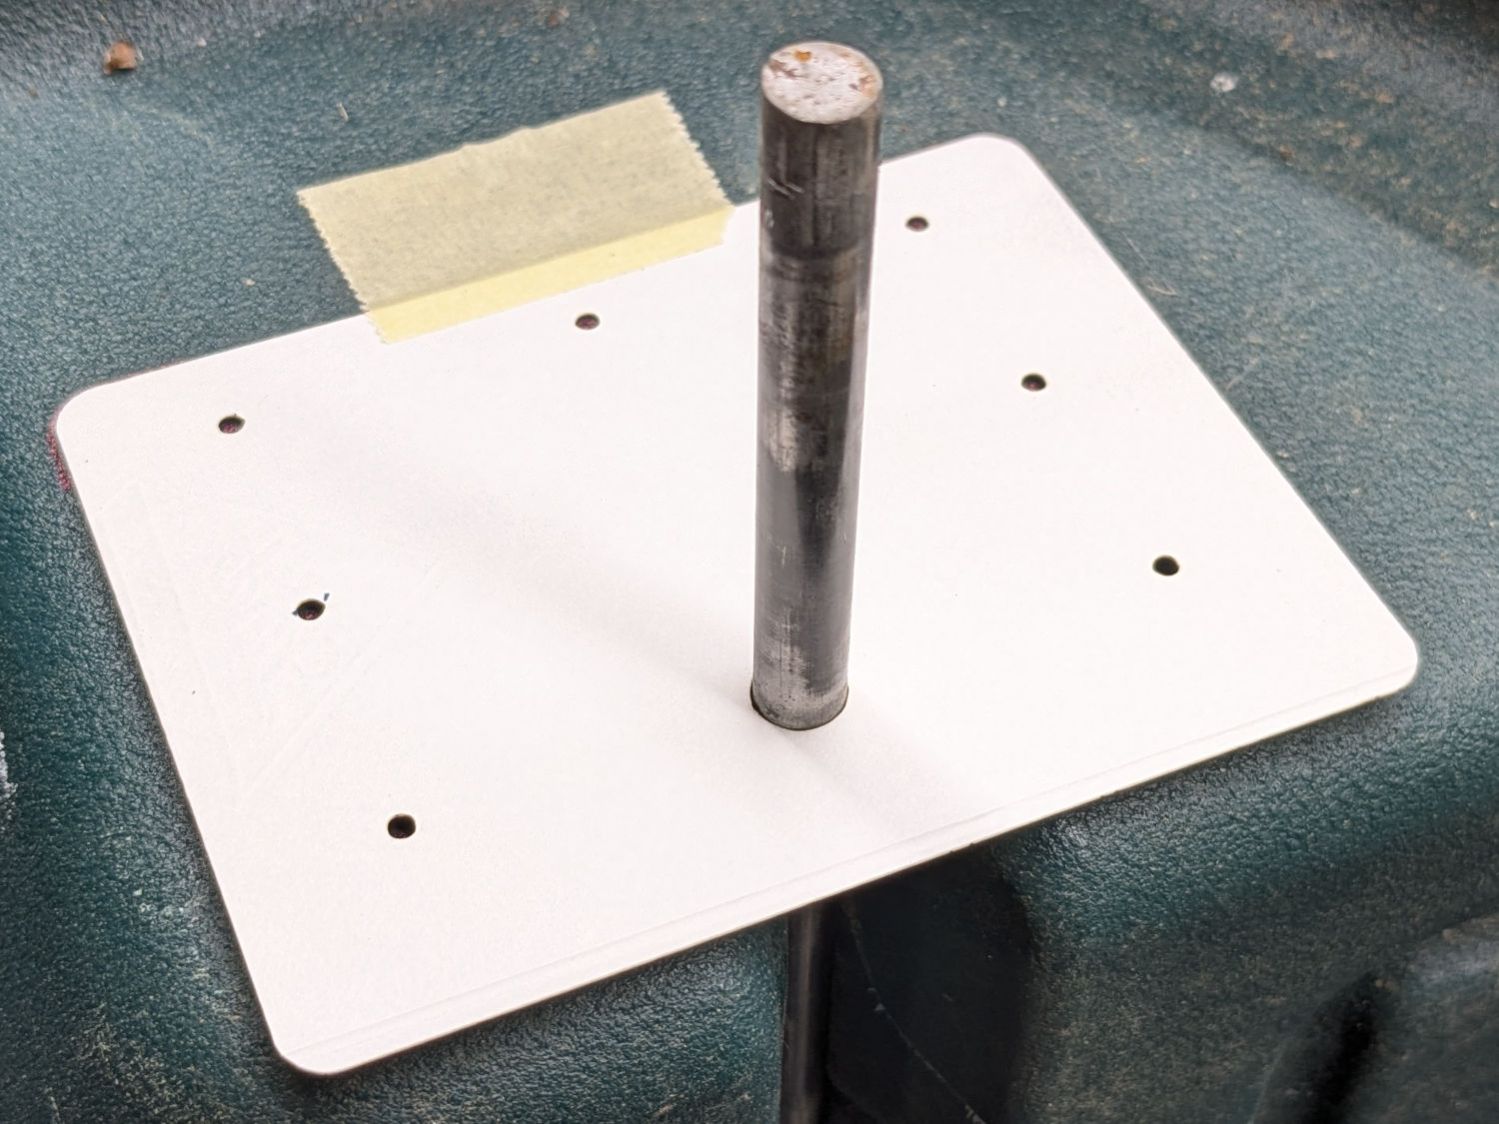
Some layout work in LightBurn produced a template to mark the body for hand-drilling the holes:
Garden Seat – drill marking template
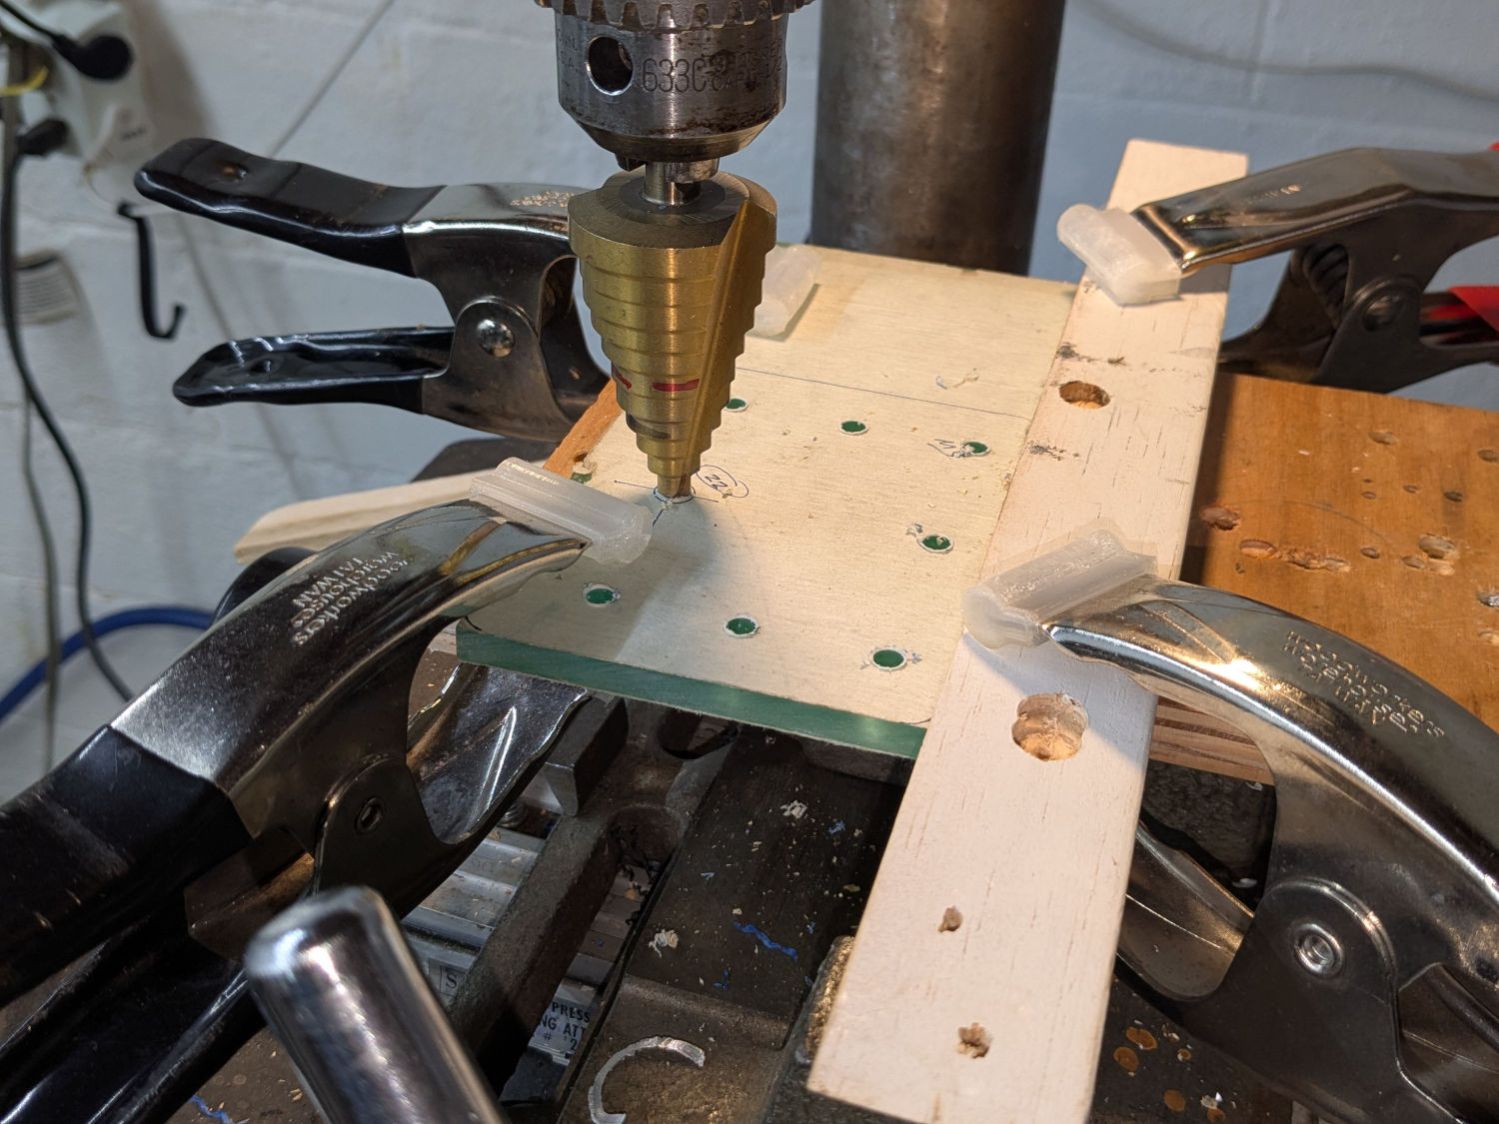
In retrospect, that was a mistake. I should have:
Laser-cut an MDF sheet to make a drill jig
Drilled one hole and inserted a screw
Drilled the rest of the holes in exactly the right places
Instead, three of the holes in that nice Lexan sheet ended up slightly egg-shaped to adjust for mis-drilled holes in the body.
I squeezed 5 mm rivnuts into whatever fiber-reinforced plastic they used for the body, which worked better than I expected. They’re intended for sheet metal, so I set the tool for 5 mm compression and they seem secure. I hope using plenty of screws across a large plate will diffuse the stress on each screw.
In this situation, I regard JB KwikWeld epoxy as “removable with some effort”, as opposed to the destruction required with those star-lock washers. High-strength Locktite might also be suitable, but I do not anticipate ever having to remove these again for any reason and do not want the nuts to fall off in the garden.
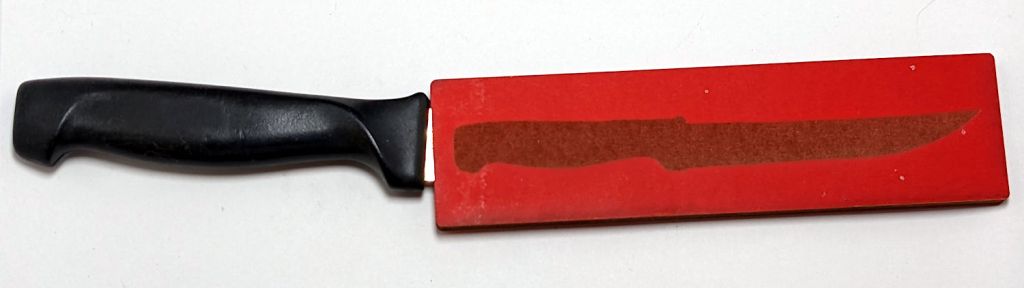
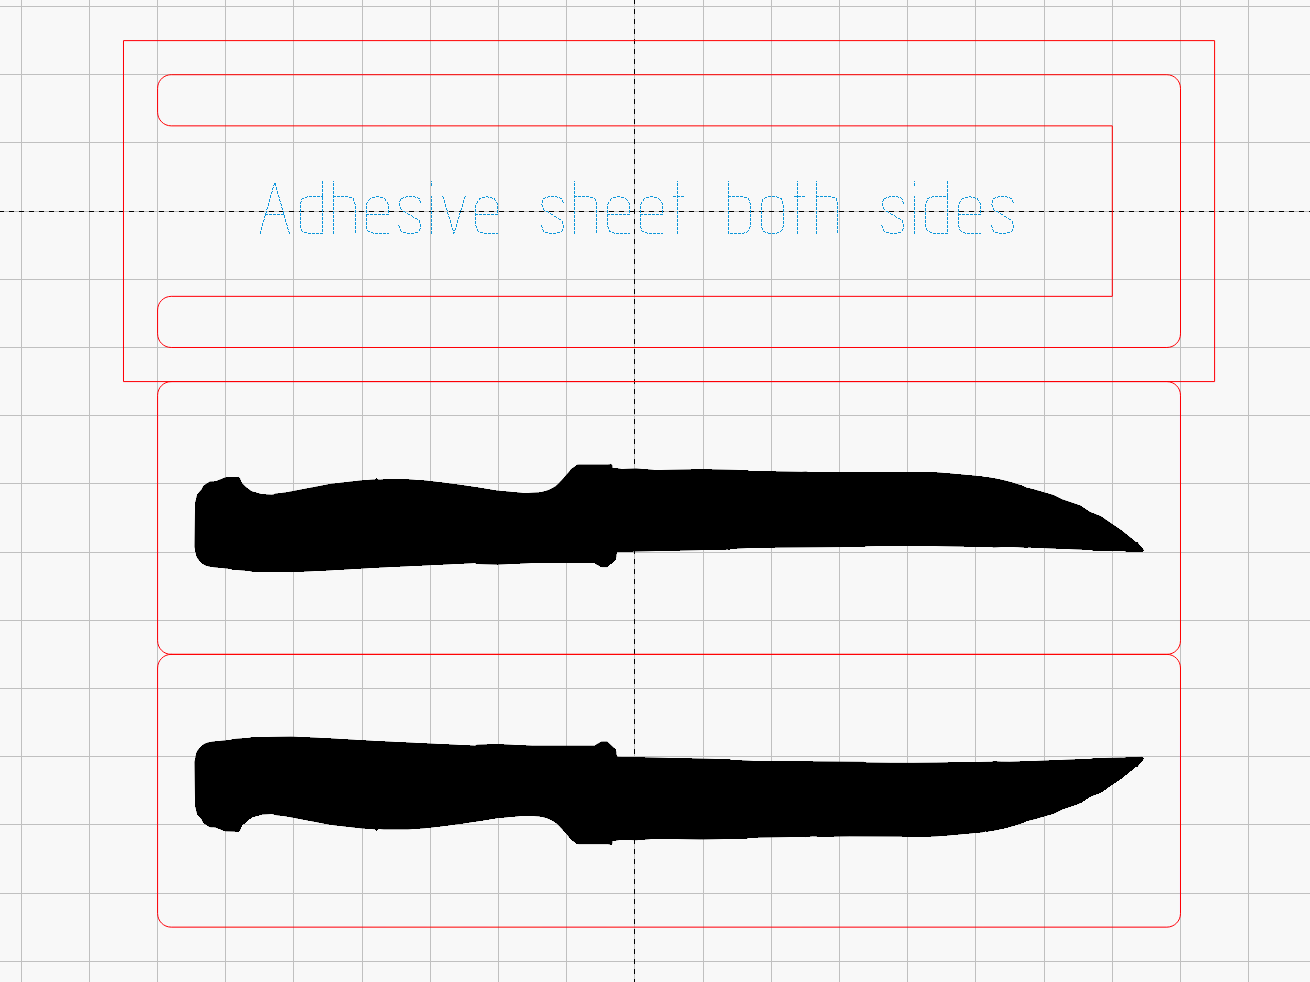
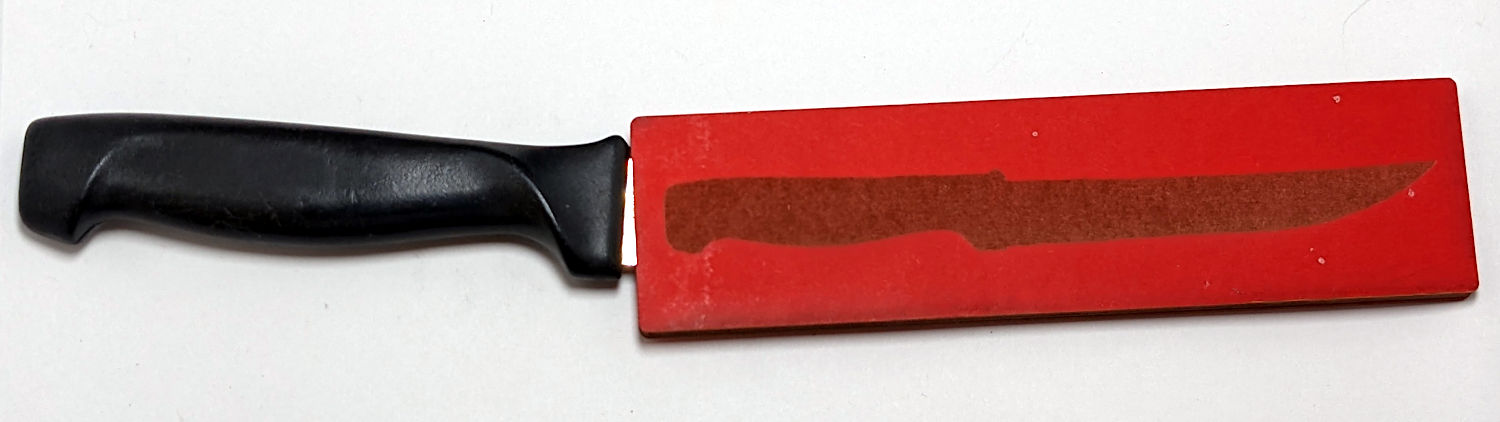
The knife’s silhouette came from a few minutes with GIMP, because cleaning up the edges on a graphics tablet is easier than fiddling with precise spline curves. Export the selection as an SVG, import into LightBurn, set to Fill, and Fire The Laser:
Garden knife sheath
The upper block in the LightBurn layout is an oversized rectangle so I could cut that out first, stick craft adhesive on both sides, trim the edges, drop it back into the hole, then cut the middle part of the sheath.
It’s made of recycled through-dyed chipboard and it won’t last forever, but that’s not a problem because these things tend to wander off before they disintegrate.
I must do a few more for the other garden bucket, but those should be straightforward.
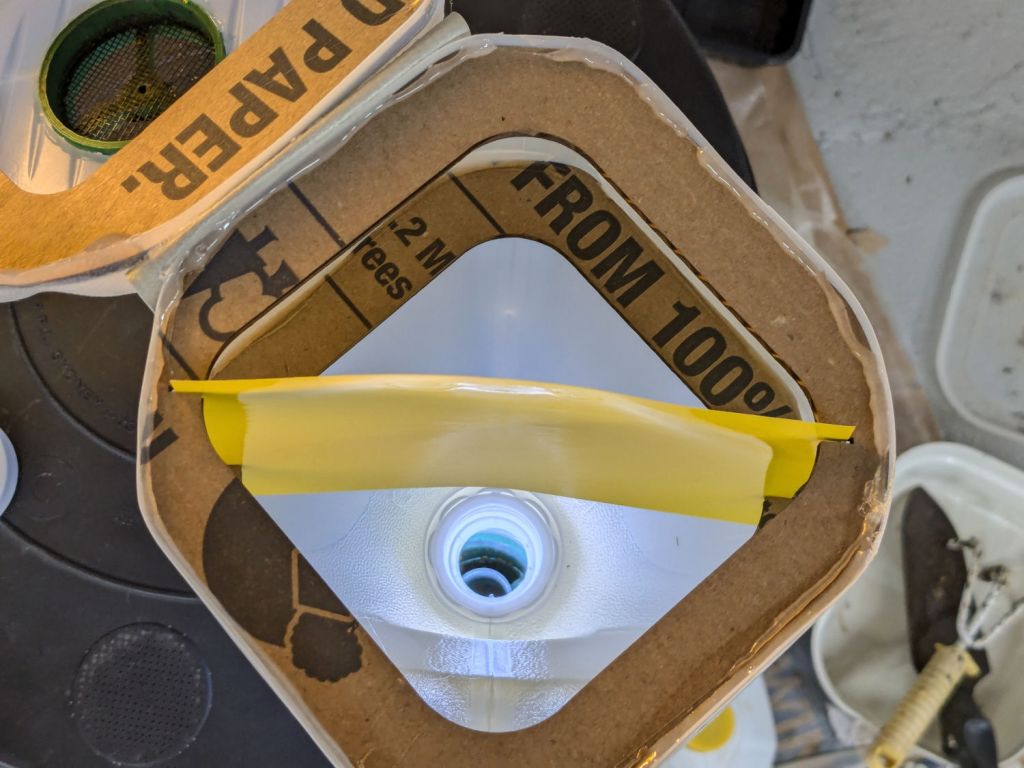
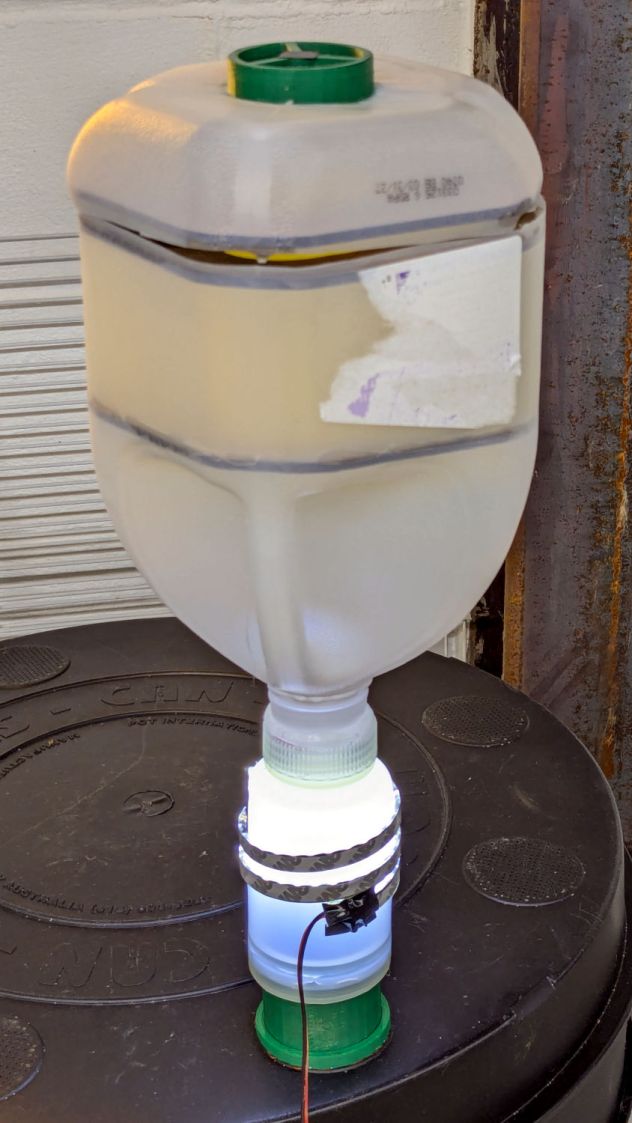
Despite freezing the kitchen scraps going into the worm bin since the previous fruit fly infestation, a zillion flies are now in residence. Lacking the peppermint-stick tube of yesteryear, I conjured another fly trap from common household items:
Worm Bin Fly Trap – overview
The gap around the top got a strip of tape after I took the picture.
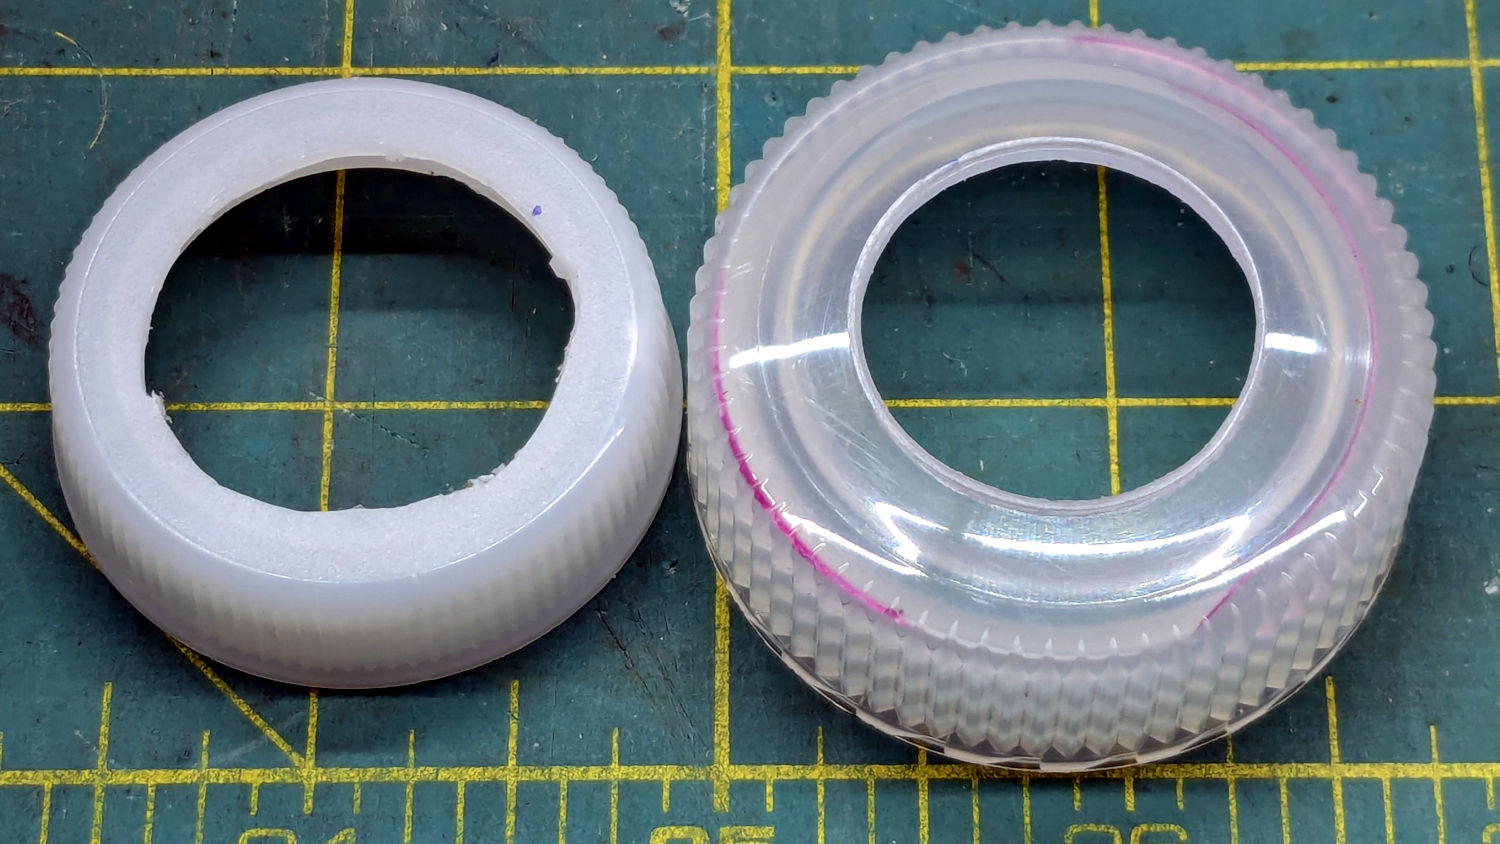
I was all set to 3D print a threaded adapter to join the two bottles when I realized they already had lids. A few minutes of lathe work added a passageway:
Worm Bin Fly Trap – Bottle caps
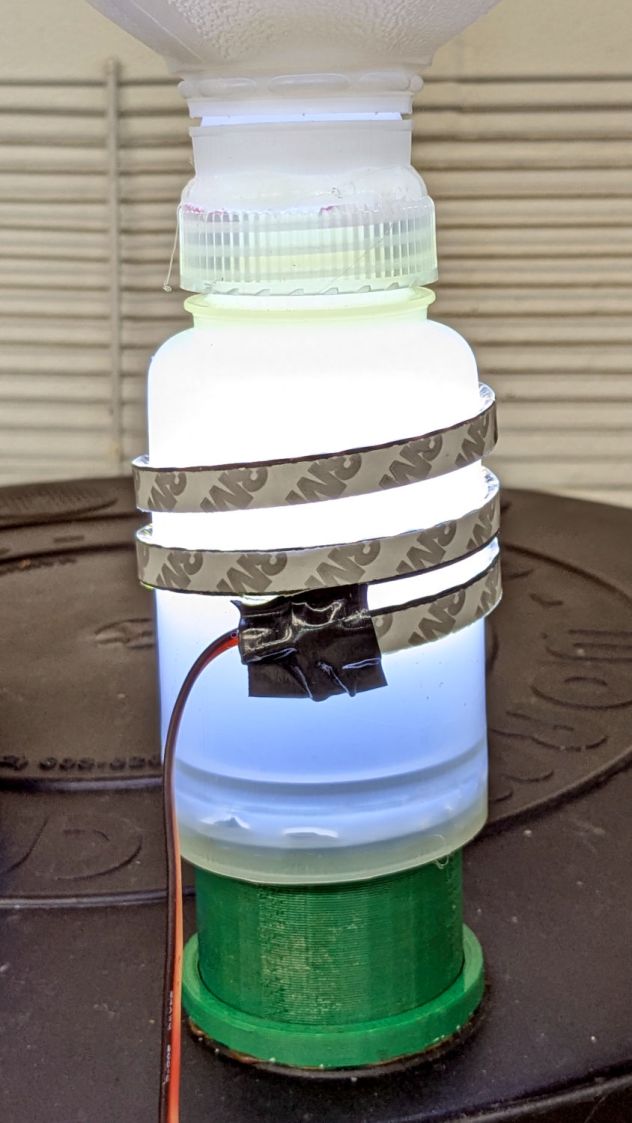
They’re held together by a generous ring of hot melt glue:
Worm Bin Fly Trap – lighting detail
The LED strip provides enough light to simultaneously attract the flies and repel the worms.
The laser cuttery looks like this:
Worm Bin Fly Trap – LightBurn parts
The white shape in the black block is a scan of the cut-open jug, with the other shapes in that row being rectangularized versions. The two tiny notches in the Top and Bottom shapes hold the sticky paper.
The two rings at the top adapt the LED-wrapped bottle to the existing fitting on the worm bin from the previous episode. They’re visible as shadows near the bottom of the bottle.
The circle is a laser-cut hole in the gallon jug bottom for the screened plug made for the pepermint-stick tube; the less said about that operation the better.
So far, so good, although previous experience suggests the flies will be breeding ahead of their (considerable) losses for the next few weeks.
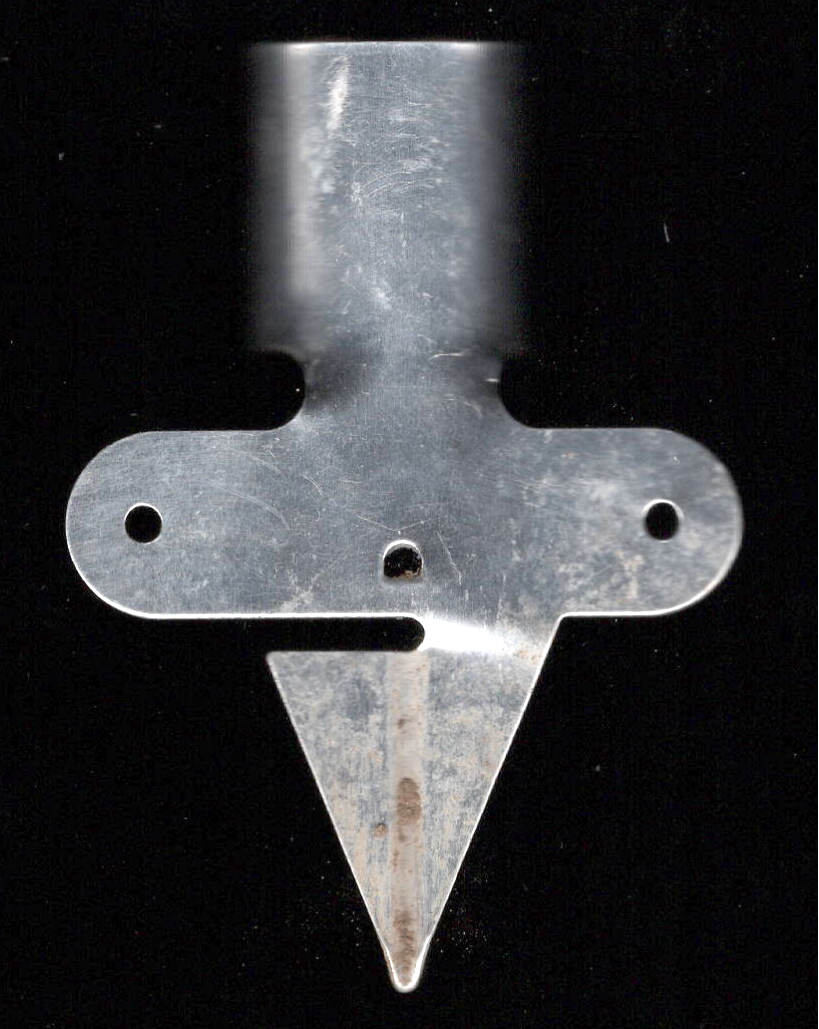
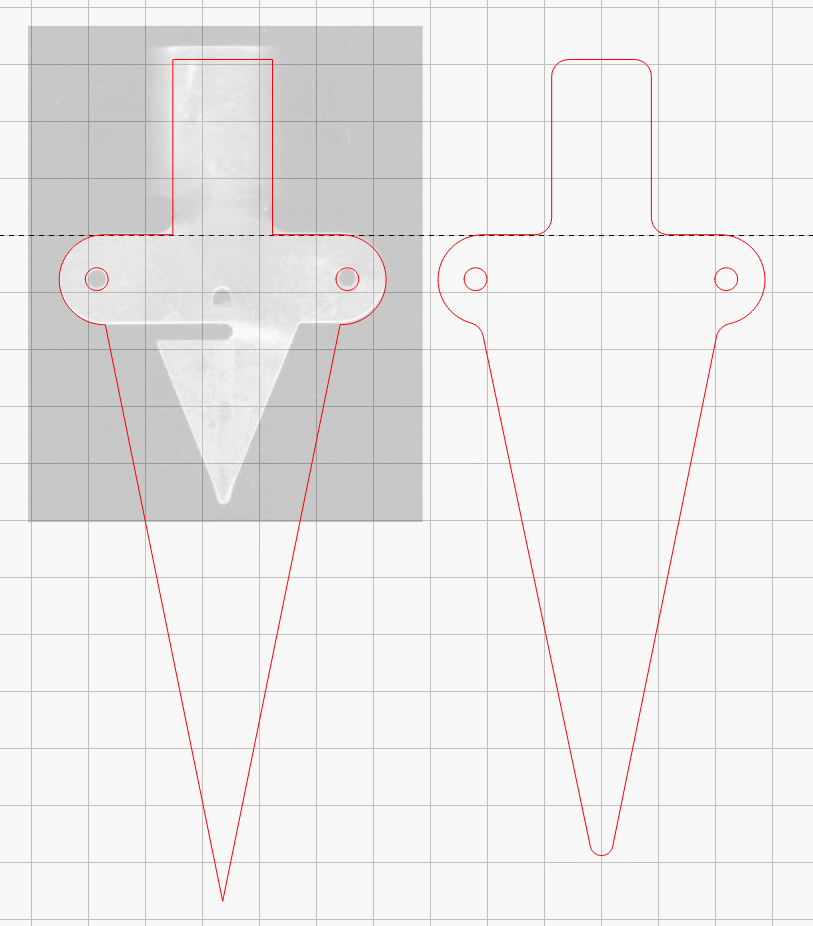
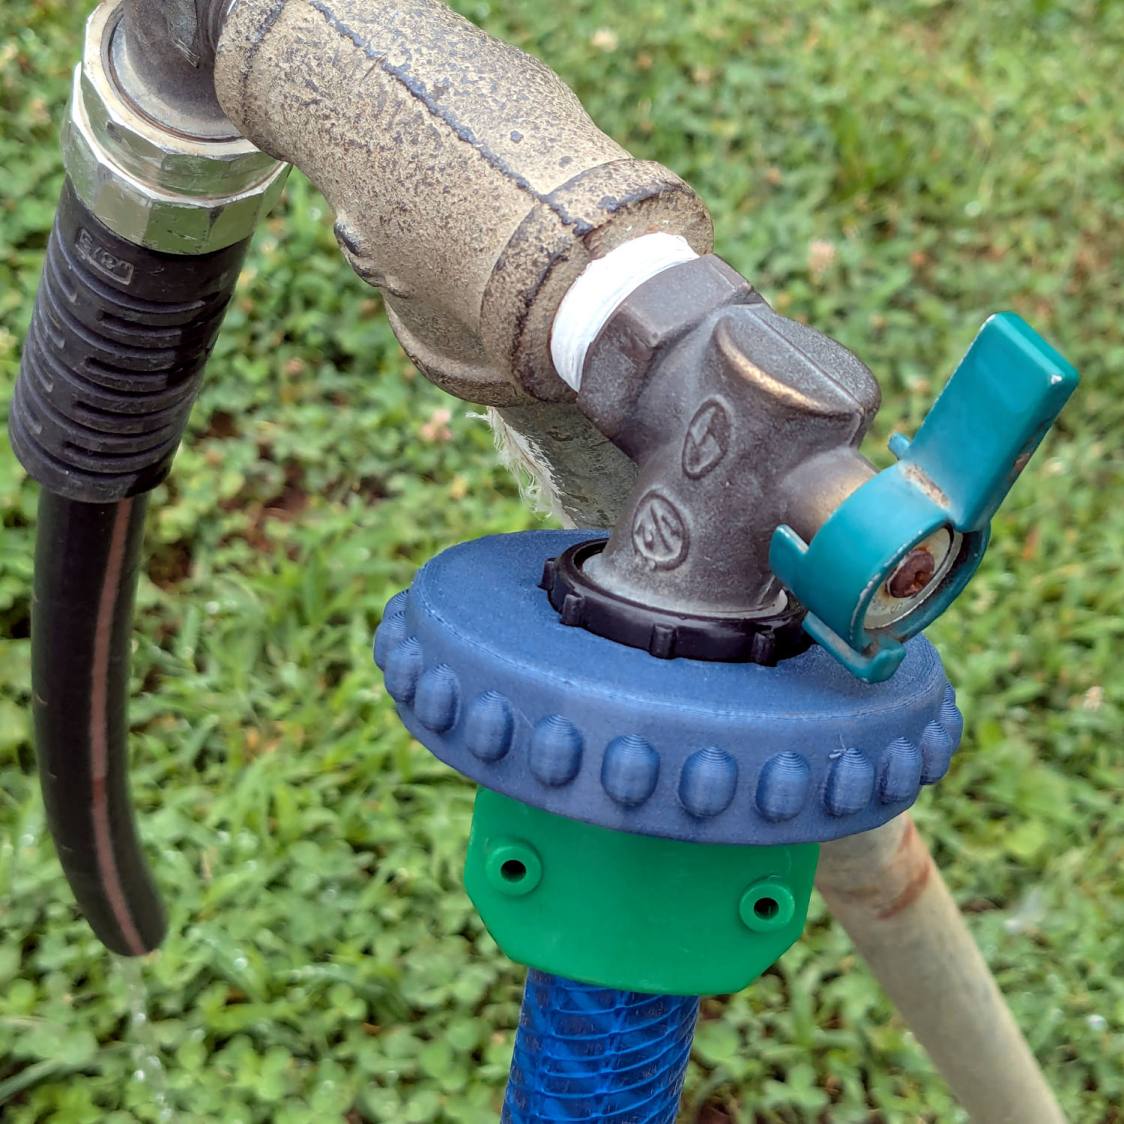
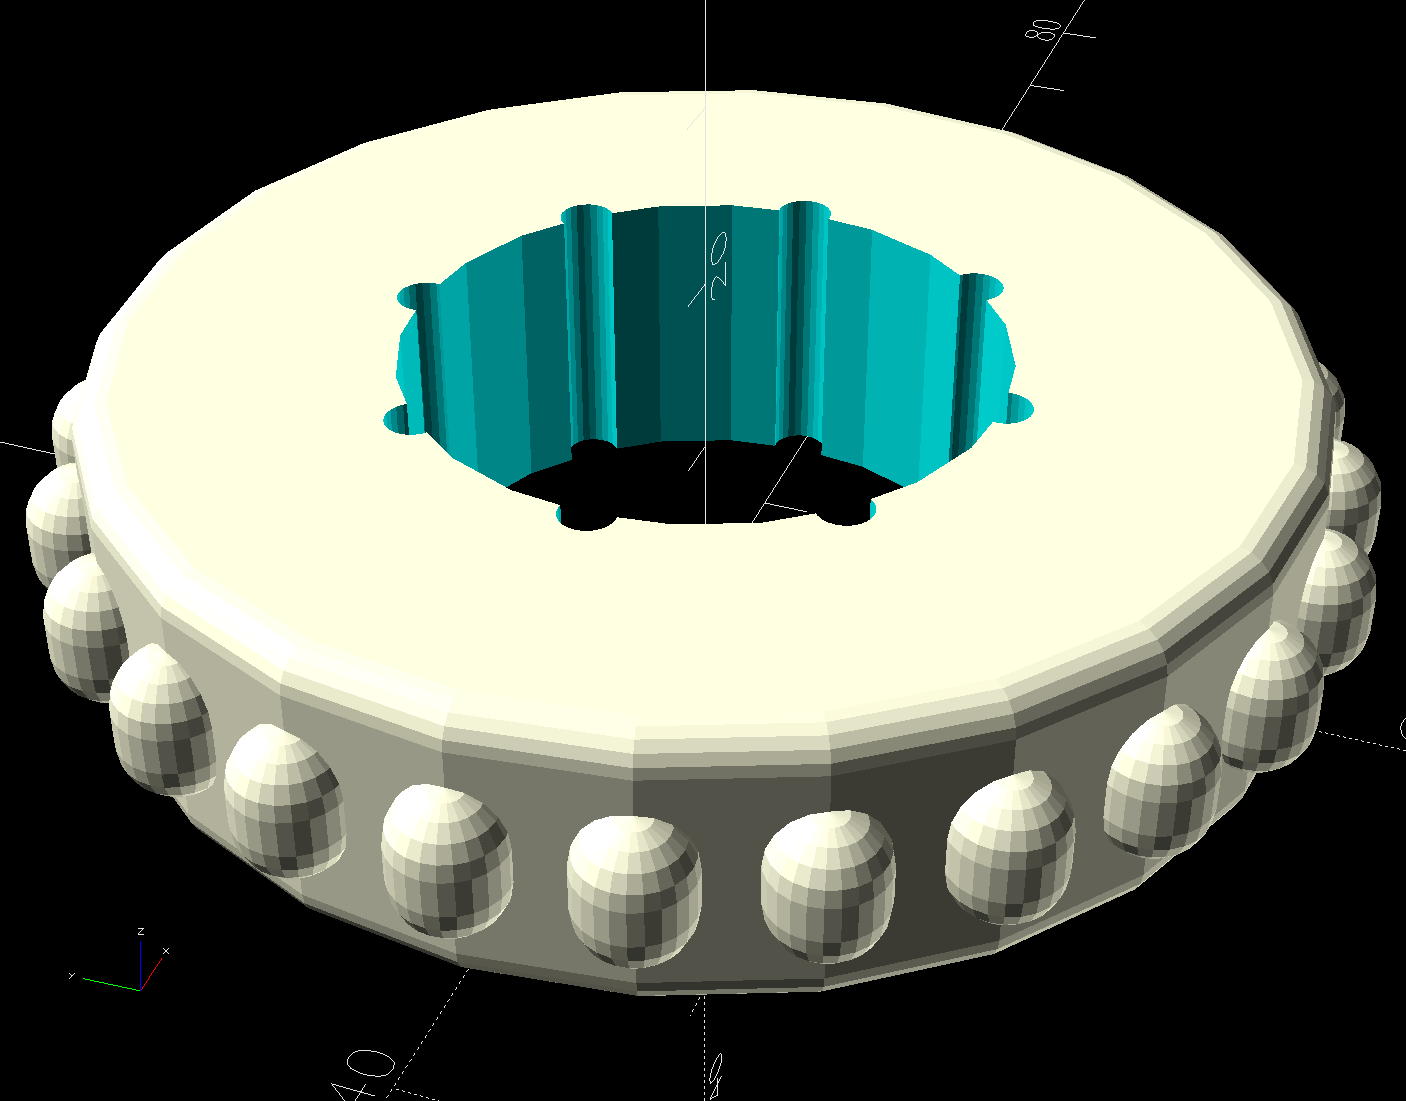
One of Mary’s gardening buddies gave her a Taylor rain gauge he picked up at a closeout sale, but the exceedingly thin aluminum holder obviously wasn’t up to the task:
Taylor Rain Gauge – OEM metal stake
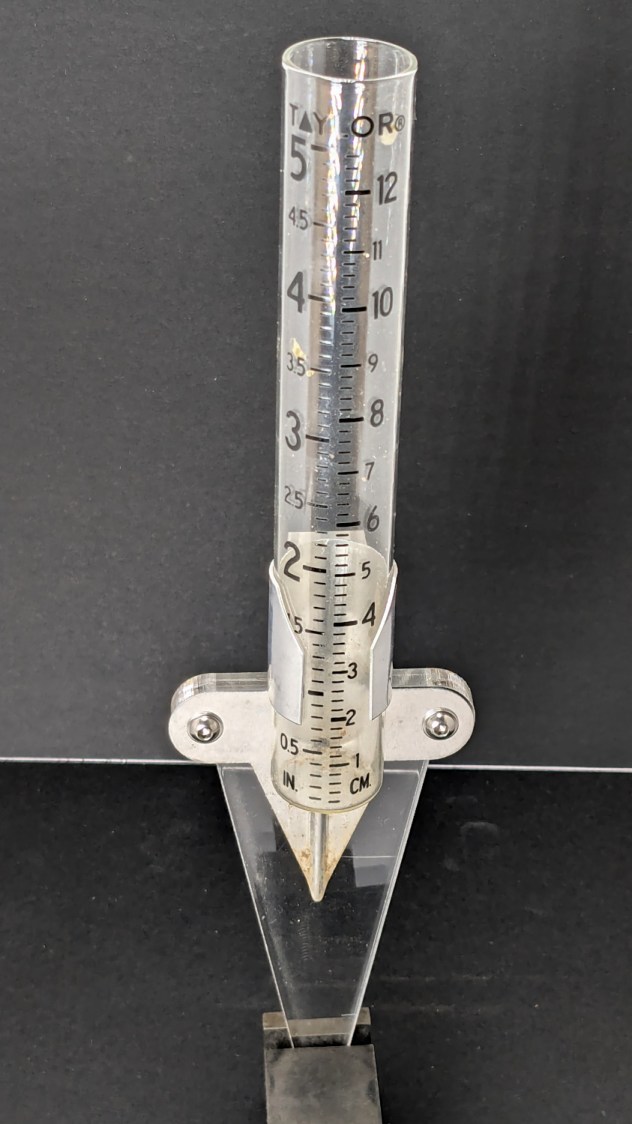
I briefly considered 3D printing a better bracket, but came to my senses:
Taylor Rain Gauge holder – front
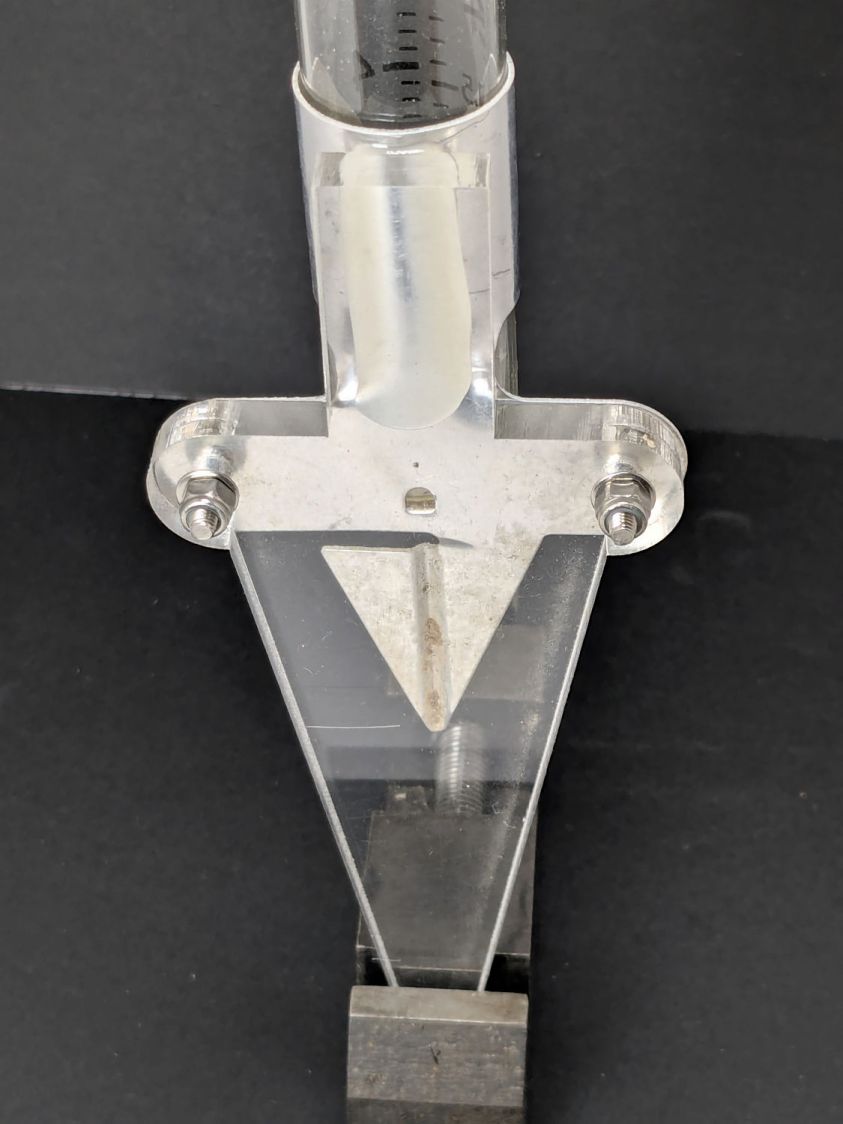
A generous fillet of tan JB PlasticBonder holds the thin aluminum clamp ring to the top of the dagger spike:
Taylor Rain Gauge holder – rear
The spike is 6.3 mm acrylic and should survive for a while despite the stress-raiser corners. The next iteration will have radiused corners and could last longer:
Taylor Rain Gauge Holder – LightBurn layout
The holes will fit 4 mm screws, although the OEM holder isn’t good for more than 3 mm.
Got it done the day after the old hose split, glued it on the hose with E6000+, installed it the next morning, whereupon the weather delivered three inches of rain. It’ll get screwed onto the faucet in a few days …
This file contains hidden or bidirectional Unicode text that may be interpreted or compiled differently than what appears below. To review, open the file in an editor that reveals hidden Unicode characters.
Learn more about bidirectional Unicode characters


