As part of the power train autopsy, Matt pointed me at the specs for the AmpFlow E30-400 motor they built into the chassis. The Performance Chart (mooched from AmpFlow to forestall link rot) provides useful information:
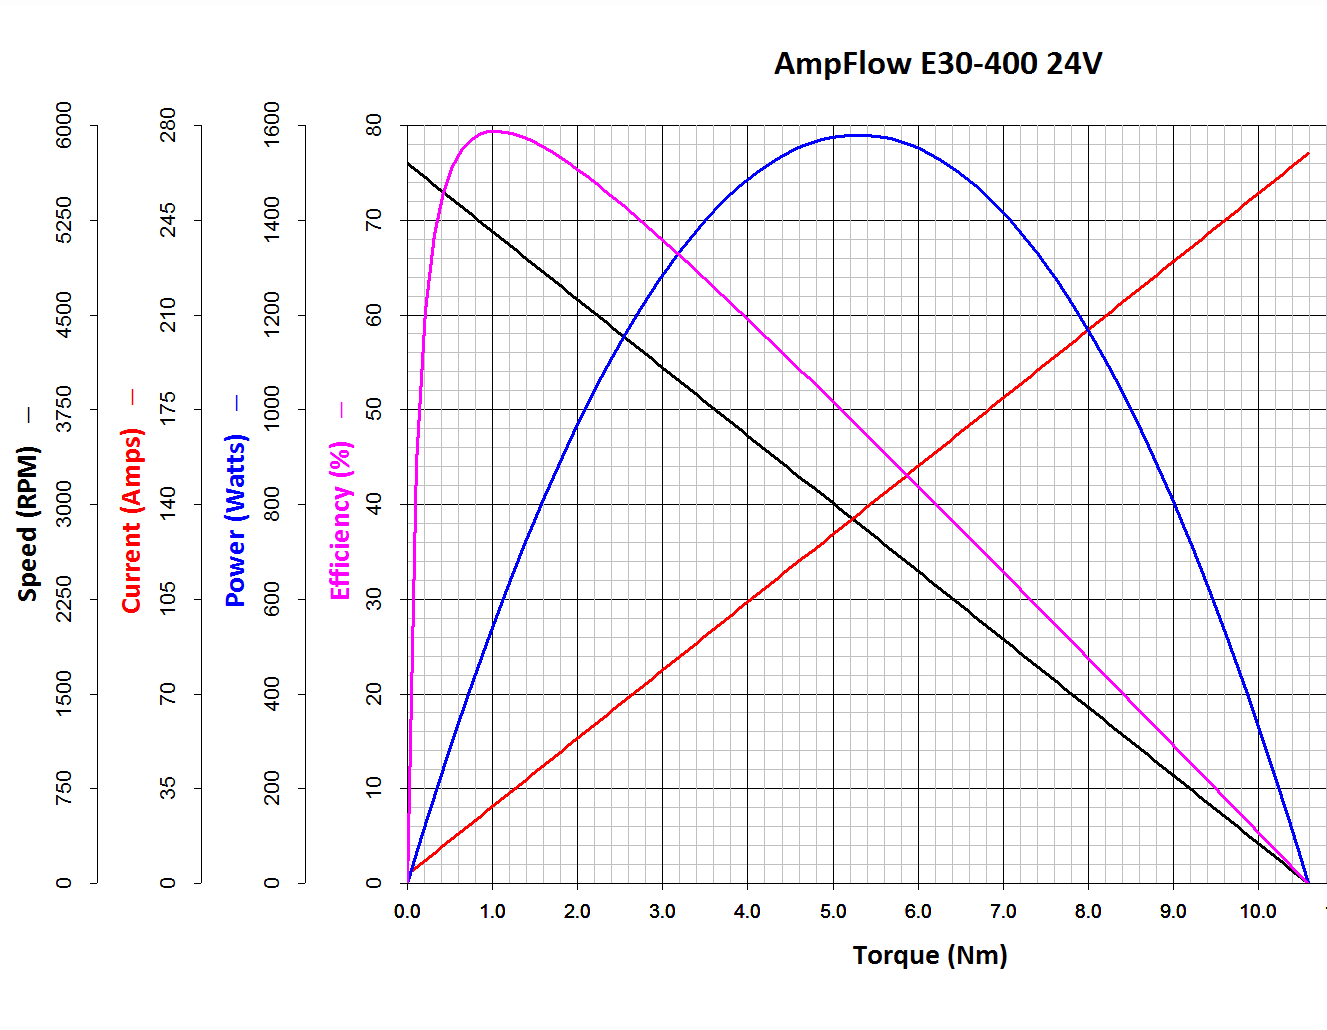
The Power Wheels Racer rules limit the motor to 1440 W, a tidy 60 A at 24 V. Let’s call it 70 A, which lines up neatly with the second major division up from the bottom: the orange current line hits 70 A with torque = 2.6 N·m.
Draw a vertical line at that point and read off all the other parameters from the scales on the left.
The motor will produce 2.6 N·m at just shy of 4500 RPM; call it 4400 RPM.
The SqWr Racer has 9:40 chain-drive gearing, so the rear wheels turn at:
990 RPM = 4400 RPM x (9/40)
With 13 inch diameter wheels, the racer moves at:
38 mph = 990 RPM x (π x 13 inch) x (60 min/hr) x (1 mile / 63.36x103 inch)
Which is scary fast if you ask me. A higher ratio may be in order.
At that speed the motor delivers:
1.6 HP = 1180 W = 2.6 N·m x 4400 RPM x 2π rad/rev / (60 s/min)
… to the shaft and, minus mechanical losses, to the tires.
If the racer doesn’t require that much power to roll at breakneck speed, it’ll go even faster, until the motor’s (falling) power output matches the (rising) mechanical load at some higher speed with correspondingly lower current.
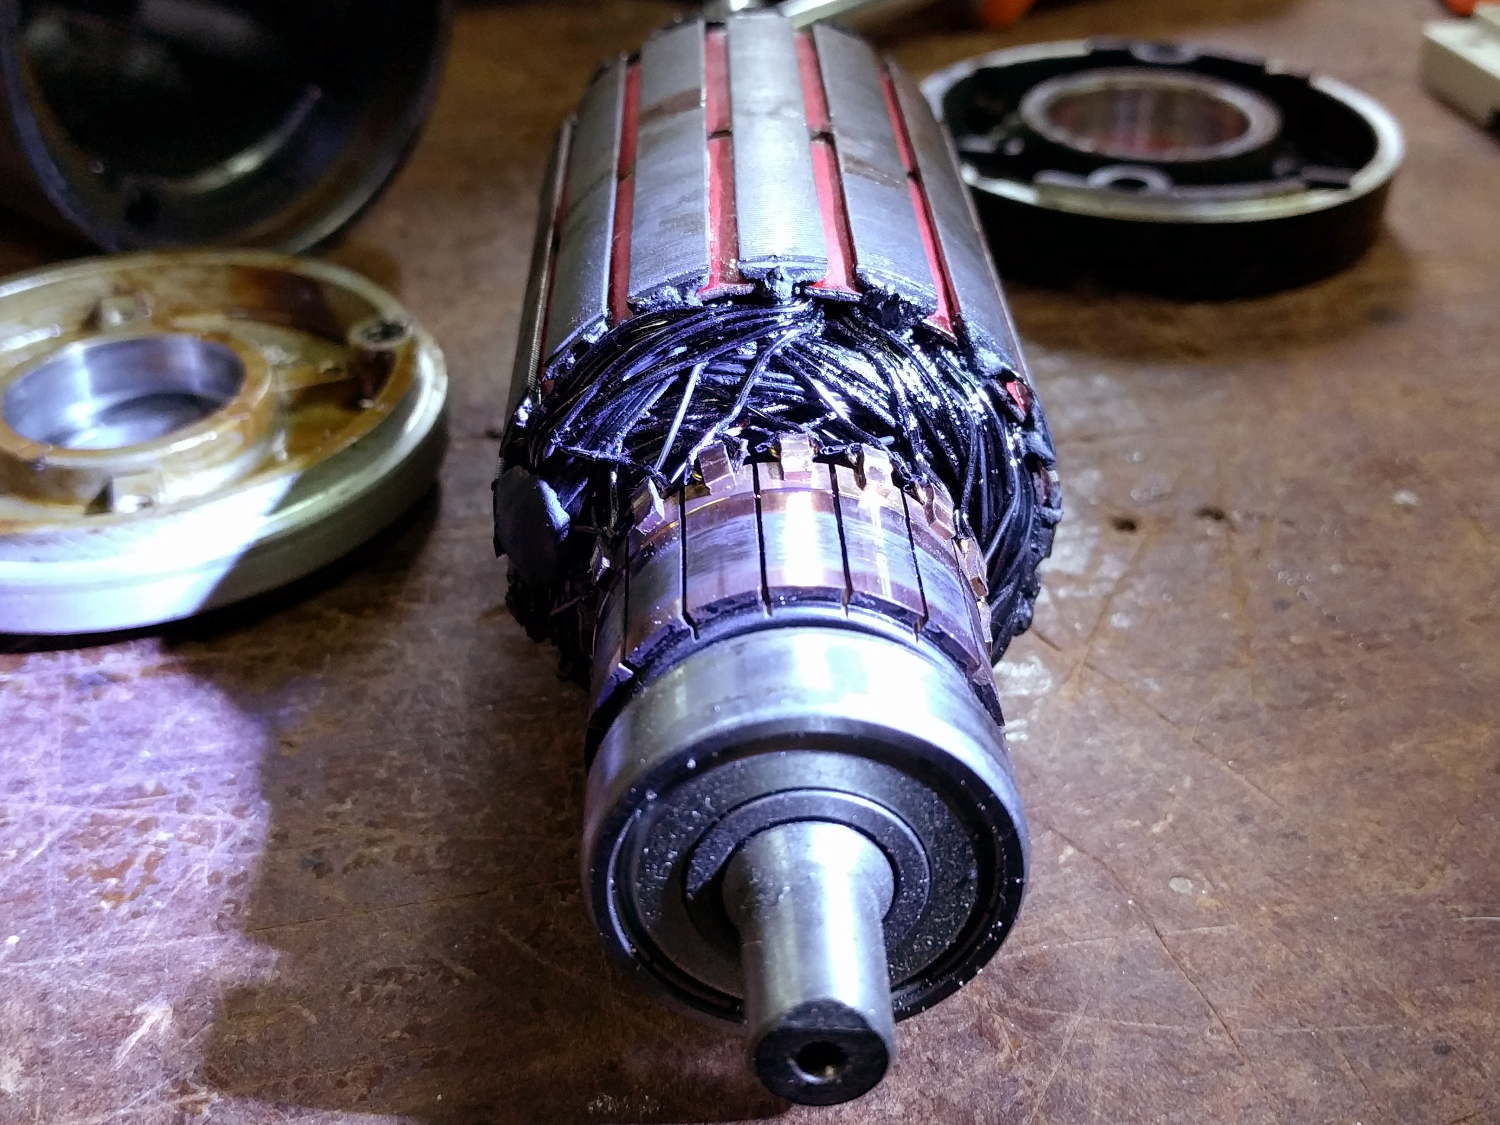
With a current of 70 A and a winding resistance of 0.089 Ω (let’s say 0.10 Ω), the motor dissipates 490 W. That’s probably too much for long-term running, even with a 70% (= 1150 / (1150 + 490)) efficiency.
The mandated Littelfuse 60 A fuse has a bit under 1 mΩ of cold resistance and will dissipate 3.6 W at 60 A. The specs say it will blow within 6 minutes at rated current.
The resistance of the wiring / connectors / switches / whatever should be on that same order. Figuring the racer needs 2 m of stranded copper wire, that calls for 2 AWG or larger (0.5 mΩ/m). Right now, the racer uses 8 AWG (2 mΩ/m) and might have 4 mΩ total resistance, although I think it has less than 2 m of wire. Empirically, the motor conductors get really hot at 40 A for about ten seconds, but that’s with a severely defunct motor.
If the conductors + connectors between the battery and the motor introduce, say, 10 mΩ of resistance, they’ll dissipate 36 W at 60 A. That scales linearly with resistance, so a high-resistance connection will incinerate itself.
Using a PWM controller to reduce the speed will reduce the available horsepower, so the racer will accelerate slowly. With the torque limited to 2.6 N·m, the horsepower will vary linearly with the PWM duty cycle: nearly zero for small PWM, up to 1.5 HP for large PWM at 60 A, then upward as the RPM increases with decreasing load. Yeah, you get more torque when you need it least.
I could make a case for a three-speed transmission in addition to higher gear ratio, although that seems overly complex.
A less beefy motor will be in order and The Mighty Thor suggests a torque converter as a low-budget transmission. Sounds good to me; I should learn more about electric traction motors…