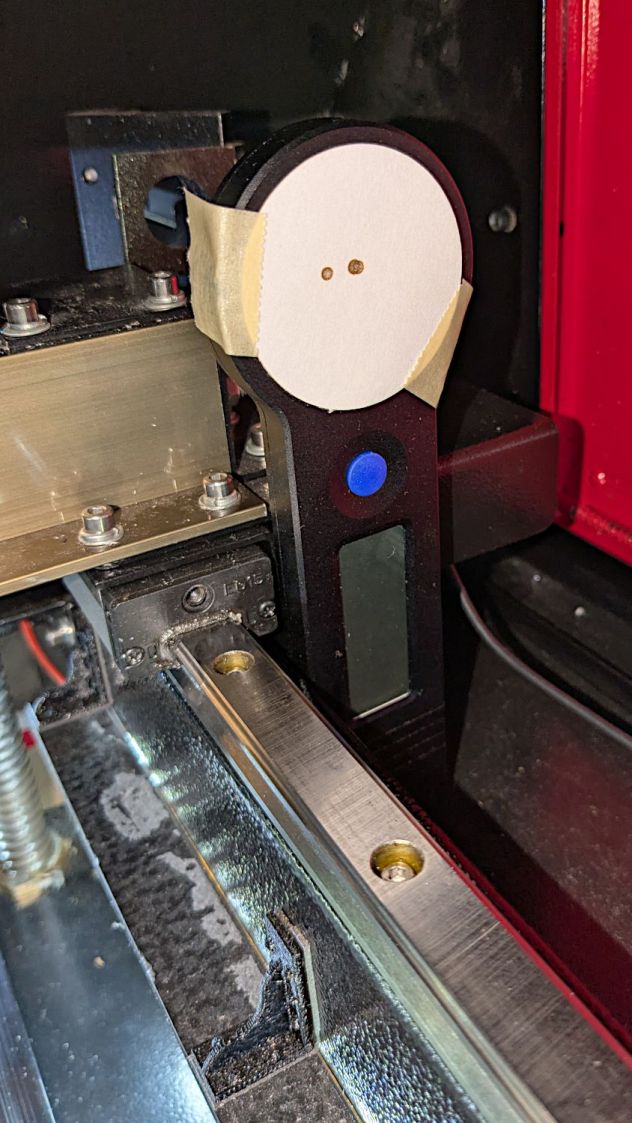
Continuing the experiments on Y axis wobbling produced this shaky engraving:

The rectangle is 30×10 mm, with lines spaced 0.25 mm apart to simplify estimating distances (although I also have a measuring magnifier) and run at 100 mm/s to simplify converting distance to time. The lines alternate in direction, beginning with a left-to-right line at the bottom (which is bar-straight from the initial positioning move). The wobbles occur at the start of each line.
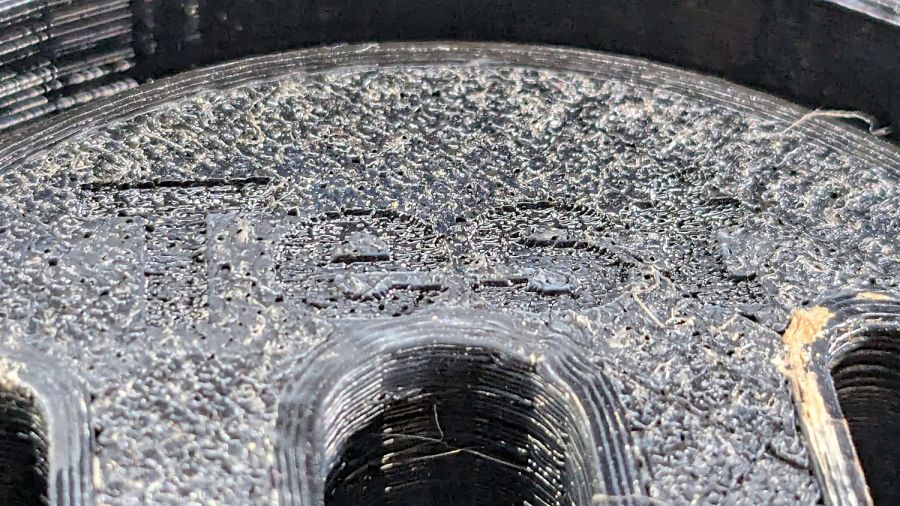
A closer look with blown contrast:
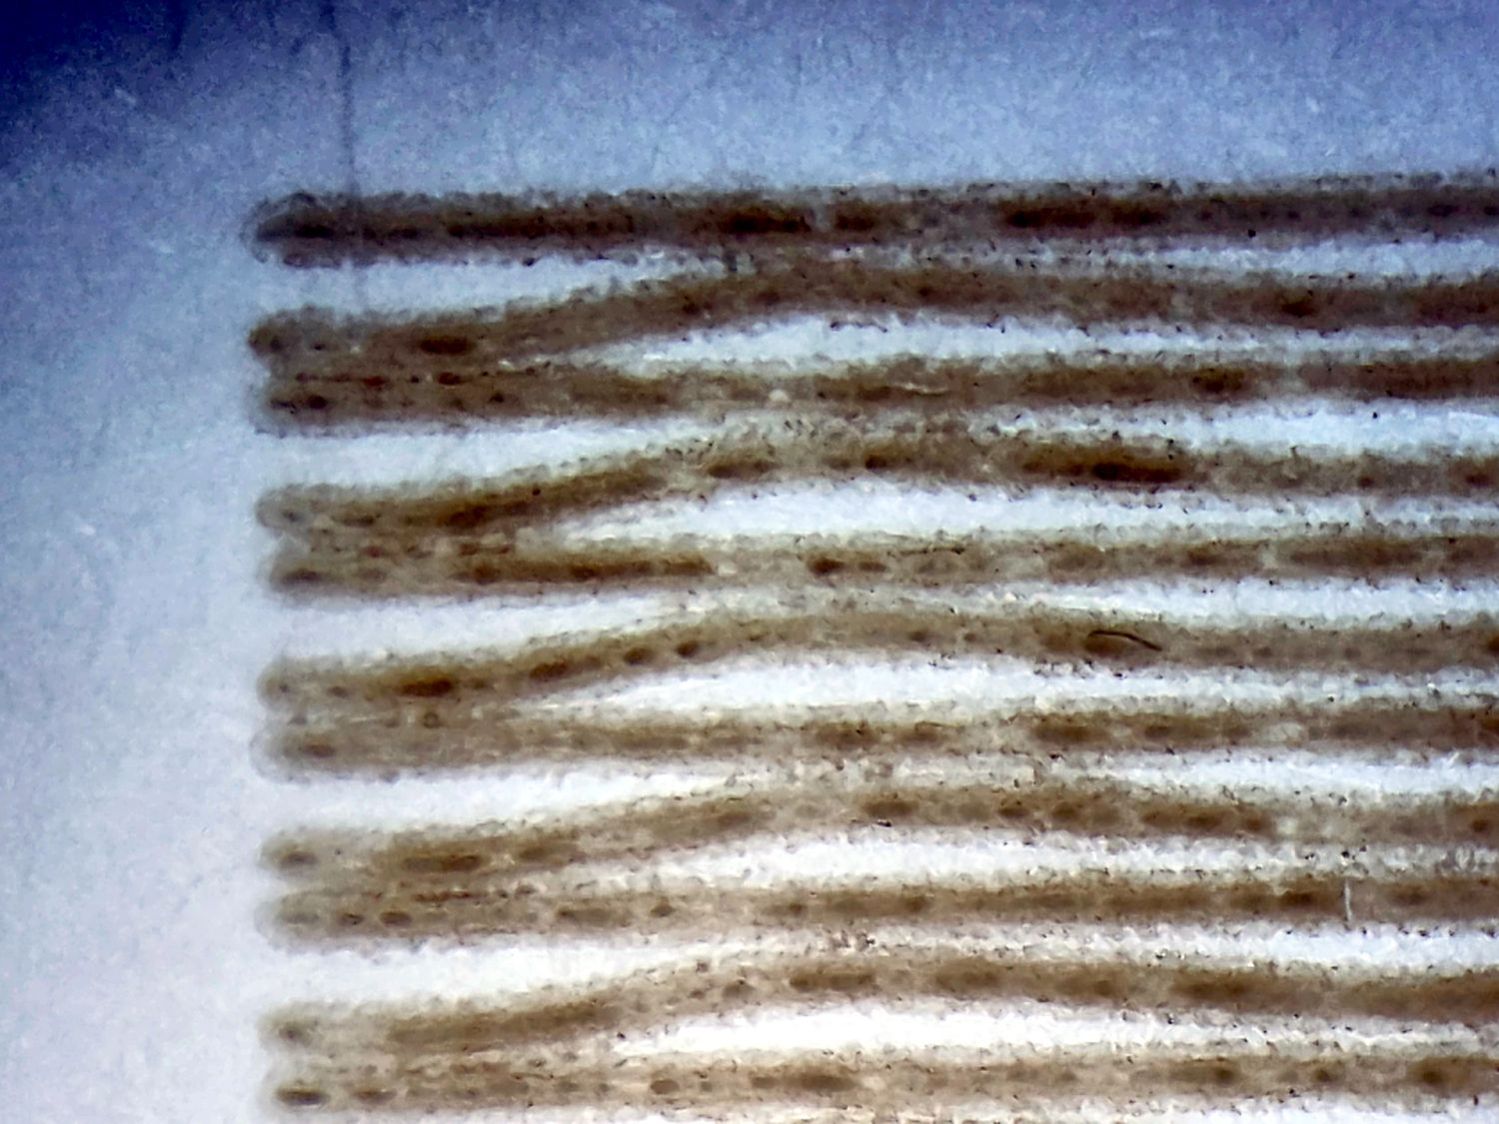
The maximum error in the Y axis direction looks like 0.12 mm and damps out after 3 cycles. Each cycle covers 2.8 mm = 28 ms = 35 Hz.
The LightBurn Preview shows a 1.5 mm overscan distance and extrapolating the wobbulations leftward suggests the gantry starts the scan line with an overshoot due to the Y axis motion. The cycle-to-cycle damping is about 50%, so the initial overshoot (invisible in the overscan region) might be 0.25 mm, agreeing reasonably well with the 0.2 mm seen while cutting small squares.
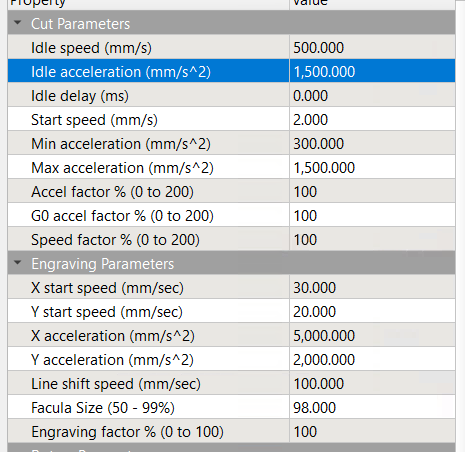
The results above come from these settings:
- Layer speed: 100 mm/s
- Line interval: 0.25 mm
- Y acceleration: 2000 mm/s²
- Y start speed: 20 mm/s
I then made single-variable changes to the Engraving Parameters settings:
Line shift speed
- 500 mm/s
- 10 mm/s
Y Acceleration
- 200 mm/s²
Y start speed
- 30 mm/s
Today I Learned: The Y Start Speed (in mm/s) for engraving is capped by the Y Axis Jumpoff Speed (in mm/s², so perhaps the maximum change in speed), which is, in turn, capped at 80 mm/s.
Each of the variations produced a result visually indistinguishable from the image you see above: the error magnitude and oscillation frequency were identical.
One possible reason: None of those settings have any effect, because LightBurn doesn’t do whatever the Ruida controller defines as Engraving. However, changing both the Y start speed and the Jumpoff speed should have made at least a little change to the results and did not.
Another possible reason: Each 0.25 mm Y axis change requires 20.8 motor steps (either 20 or 21 at 12 µm/step), so the fancy tweaks lack space to take effect, the motor thumps 20-ish steps, and the gantry shakes the same way every time.
The closer you look, the worse it gets …