Ed Nisley's Blog: Shop notes, electronics, firmware, machinery, 3D printing, laser cuttery, and curiosities. Contents: 100% human thinking, 0% AI slop.
An entry from The New Garden Encylopedia, copyright 1936 through 1946, gives recommendations for using arsenical poisons in your garden:
Arsenical poisons
My father always said anybody who talks fondly of The Good Old Days wasn’t alive back then. He was and thought things had definitely improved since then.
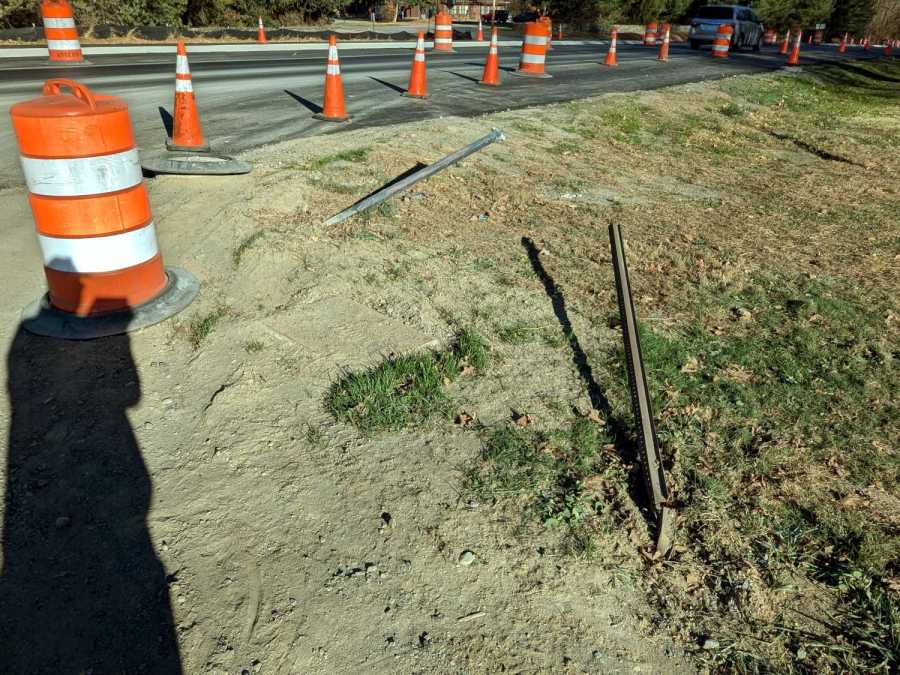
Having watched a tour bus jounce over the poor suffering street lamp base, I can easily understand how something similarly large killed the street signs:
Street Lamp Base – Overview
The black ring in the upper left formerly positioned a barrel over the lamp base:
Street Lamp Base – barrel ring
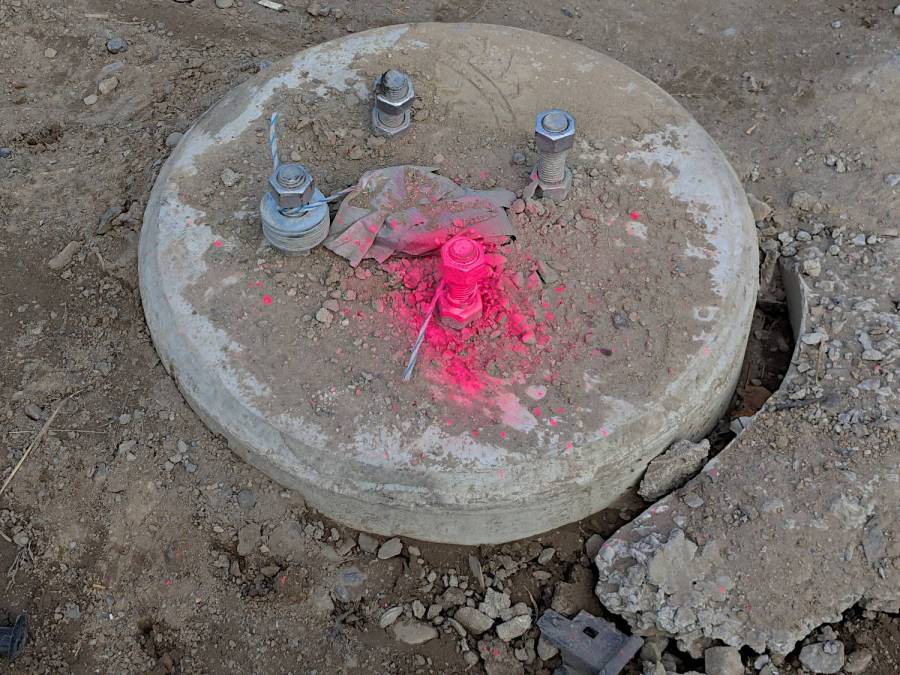
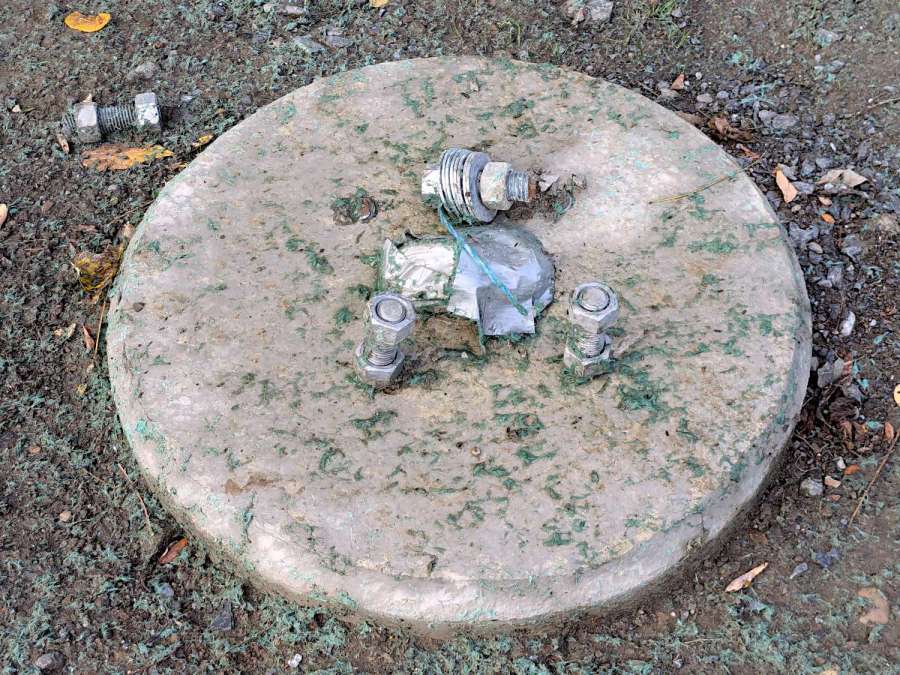
Something heavy shaved down those bolts:
Street Lamp Base – detail
The blue-and-white pull cord seems at risk of vanishing.
They’re now laying asphalt and the project continues apace.
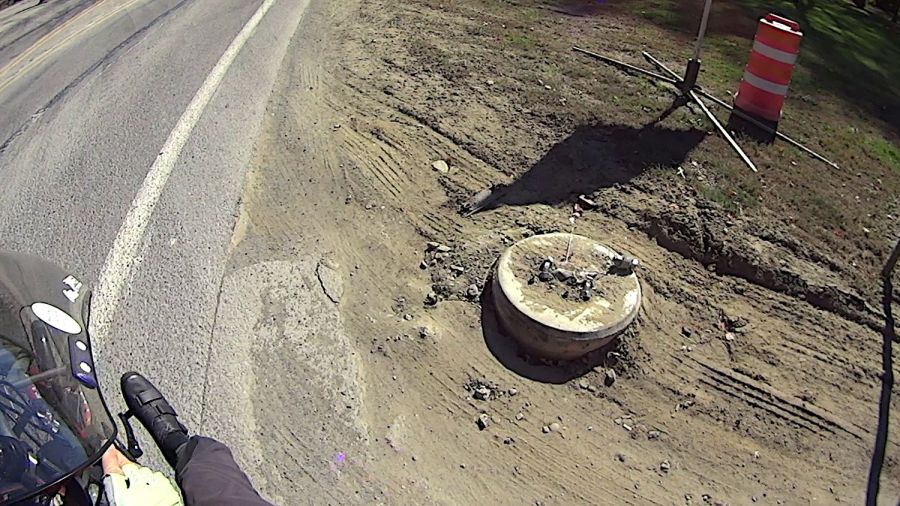
NYS DOT installed rows of street lamp foundations along both sides of Rt 376 as part of the intersection reconstruction that will eventually put a fourth traffic circle along Raymond Avenue. Until the intersection of Rombout House Lane with Rt 376 vanishes, this lamp base at the corner sits well within the turning radius of the heavy trucks entering & exiting the contractor’s material dump & equipment marshalling yard:
Street Lamp Base – A
The fluorescent paint appeared after something heavy ran over the base and bent two of the bolts that should secure the lamp post.
A few days and a few more passes killed those bolts dead:
Street Lamp Base – A – more destruction
The barrier barrel in the background sat atop the base for a few days, but obviously didn’t affect the outcome.
A few hundred feet south, a heavy metallic mass sheared off another pair of bolts and bent the survivors:
Street Lamp Base – B
Someone eventually moved the sheared bolt atop the base, so perhaps the damage has been noted where that note will have some effect.
The “bolts” are the threaded end of long rods embedded in the three or four feet of pre-cast concrete forming the lamp base. The concave concrete mass to the right in the first picture is residue from the poured concrete in the hole anchoring the base to the ground.
A four foot deep trench along the row of lamps holds electrical conduit between them for the wiring that will eventually surface through the conduit covered by the duct tape. The white-and-blue cord hauls the pull tape from one base to the next to pull the conductors through the conduit.
Replacing those cast-in-place bases won’t be a trivial (pronounced “inexpensive”) operation and I suspect a powerful motivation to just un-bend the wounded bolts and pretend they’re not severely weakened. I doubt a base with just two bolts will pass final inspection, but maybe the inspector won’t look inside the lamp pole covers.
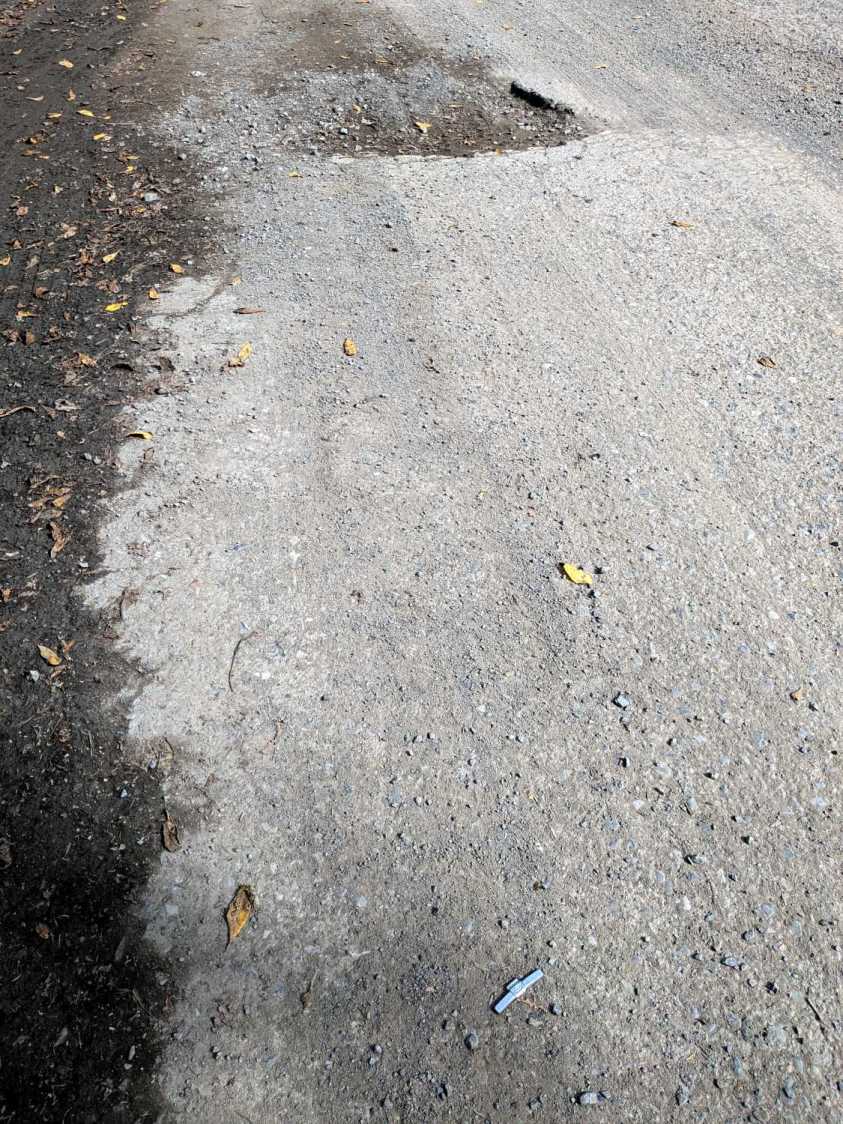
Spotted while walking on Rombout House Lane out of the Vassar Preserve:
Pothole vs wheel weight
Looks like somebody hit that pothole at a pretty good clip and knocked a wheel weight loose.
Rombout House Lane is a tiny L-shaped road serving as a Preserve entrance and exit not at the intersection of Rt 376 / Raymond / Hooker, but it’s slated for oblivion when NYS DOT finishes constructing the roundabout / rotary. With plenty of heavy equipment now crushing it, a walking pace is as fast as anyone should drive (or bicycle!) there.
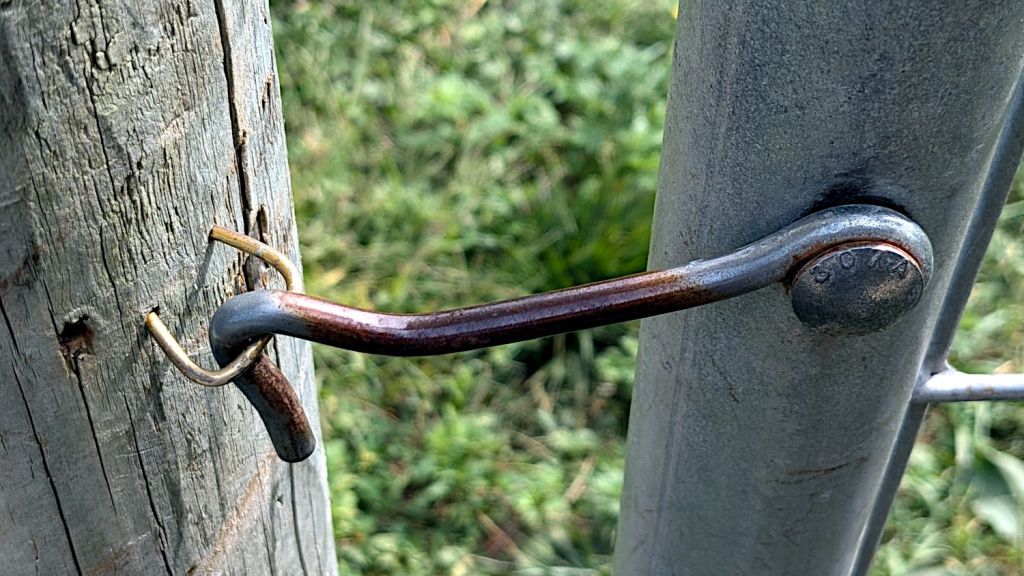
For reasons not relevant here, I ended up making a field-expedient repair to a garden gate latch:
Improvised gate latch staple – installed
The hole in the post just to the left of the obviously improvised staple shows where the Original Staple had vanished, never to be seen again. It looks like the gate has shifted an inch or so to the right (or the post to the left), which would explain why the staple gradually worked loose.
The improvised staple is a length of coat hanger wire bent into a square U, with the ends snipped off at an acute angle:
Improvised gate latch staple – cut wire
Those points do look scary, don’t they?
Then I gently tapped it into place, driving maybe ¾ inch of wire in the wood, flattening the loop a little more than I wanted, but not enough to make me try again.
Not our gate, not Mary’s garden, but deer pose a threat to all veggies within, without regard to ownership.
I have *a lot* of coat hanger wire for repairs like this …
One of my Old Guy medicines has an elaborate desiccant container:
Pill desiccant container
Being that type of Old Guy, I weighed the container when I emptied the bottle, then left it sit in the kitchen cabinet with the scale for a week as the weight slowly increased.
It started at 2.38 g and stabilized at 2.56 g, so it absorbed 0.18 g of water from the air after it got my attention.
Peeling the label revealed an obvious joint:
Pill desiccant – contents
Looks like HO-scale coal in there!
The desiccant weighs all of 1.20 g, so it absorbed something more than 10% of its weight. That’s less than I found with silica gel, but I don’t know the starting weight or how much moisture it already absorbed.
A newly opened pill bottle disgorged a container weighing 2.42 g. The initial weight obviously depends on many variables, none of which would be tightly controlled.