Ed Nisley's Blog: Shop notes, electronics, firmware, machinery, 3D printing, laser cuttery, and curiosities. Contents: 100% human thinking, 0% AI slop.
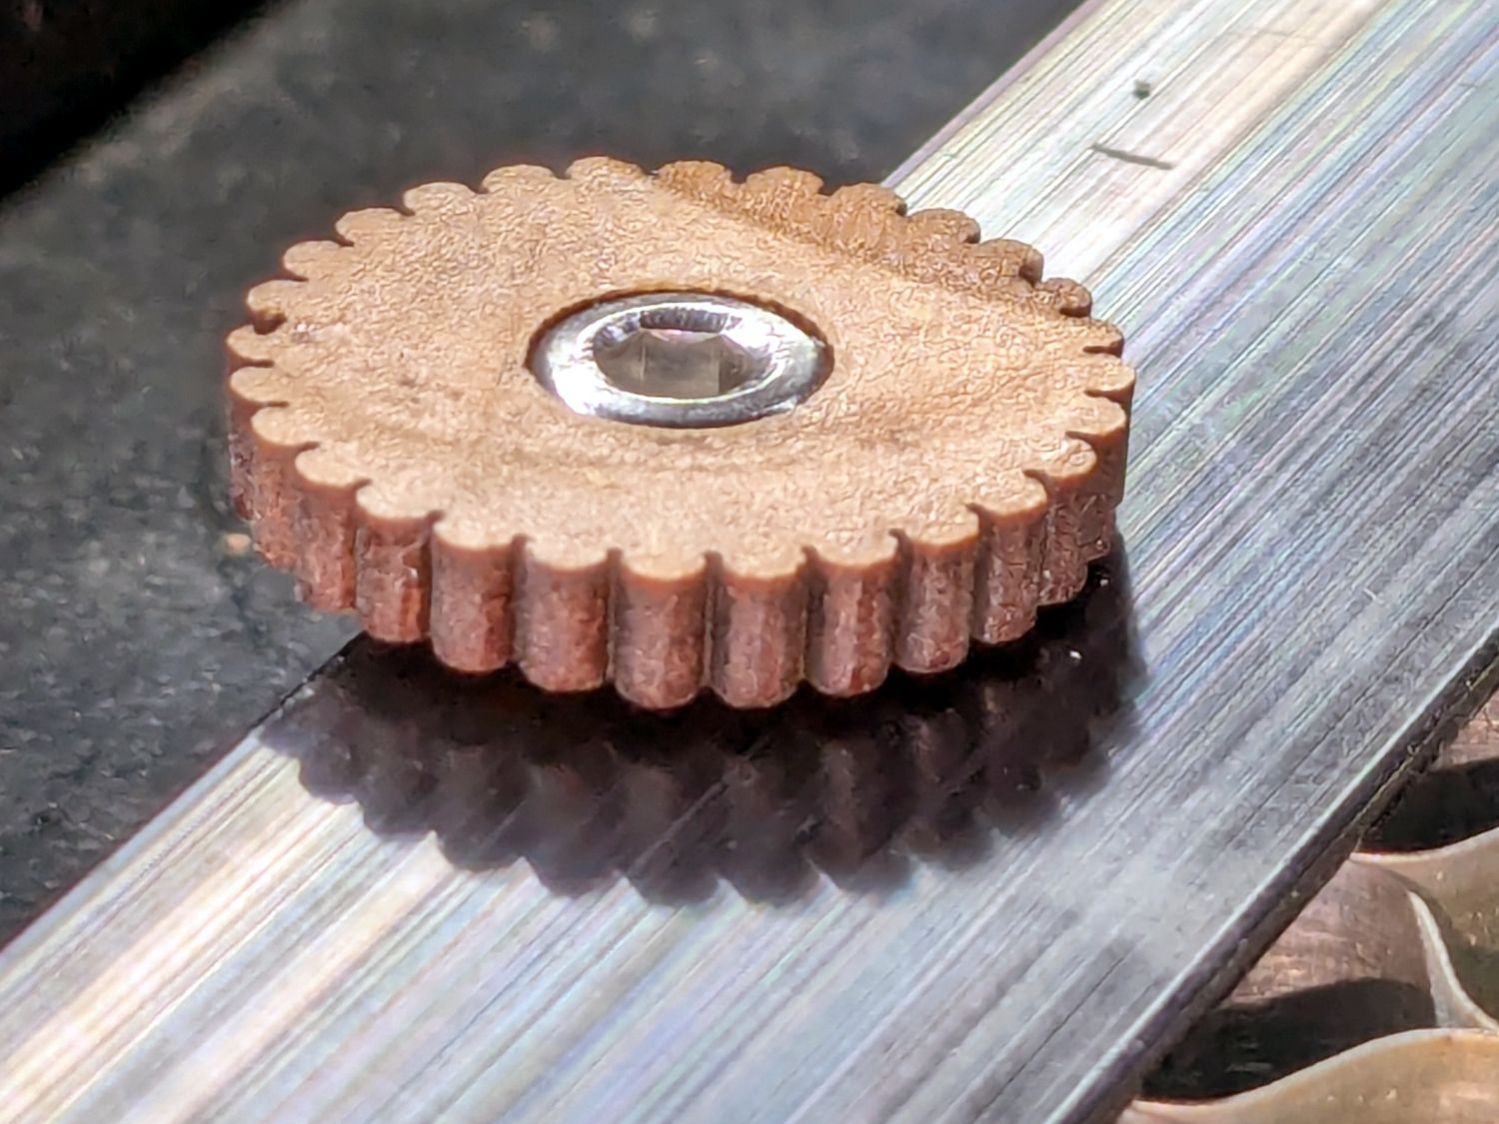
The honeycomb platform in my OMTech laser cutter was secured by a pair of M4 screws passing through the surrounding frame into a pair of nuts requiring considerable contortion to install. As a result, I tended to use the screws as locating pins by just dropping them into the holes, which didn’t prevent me from jostling the honeycomb out of position on a few occasions.
With everything torn down as part of the move, I drilled out the holes in the frame and installed a pair of M4 rivnuts:
OMTech laser – Honeycomb screw rivnut
The scar around the hole in the honeycomb came from the factory; I have no idea what they were doing to cause that much wear.
Anyhow, installing the screws now requires zero contortionism and they locate the honeycomb much more securely.
I should conjure knobs for the top of the screws to eliminate the need for a hex key, although that’s definitely low on the task priority list.
The previous Basement Laboratory generally stayed above 60 °F = 15 °C, so I set the LightObject water chiller’s low-temperature alarm accordingly.
Having reached the point where I can set up the laser in its new home, I connected the chiller tubes, filled the reservoir with distilled water (and a squirt of algaecide), connected the alarm wiring, turned it on, and had the cool water trigger an alarm:
LightObject Laser chiller – low temp alarm
Which was relayed to the controller:
KT332N Diagnostic display – water protect active
Silencing the chiller’s alarm clears the error indicator in the controller, so it’s possible to Fire The Laser with too-cold water if necessary.
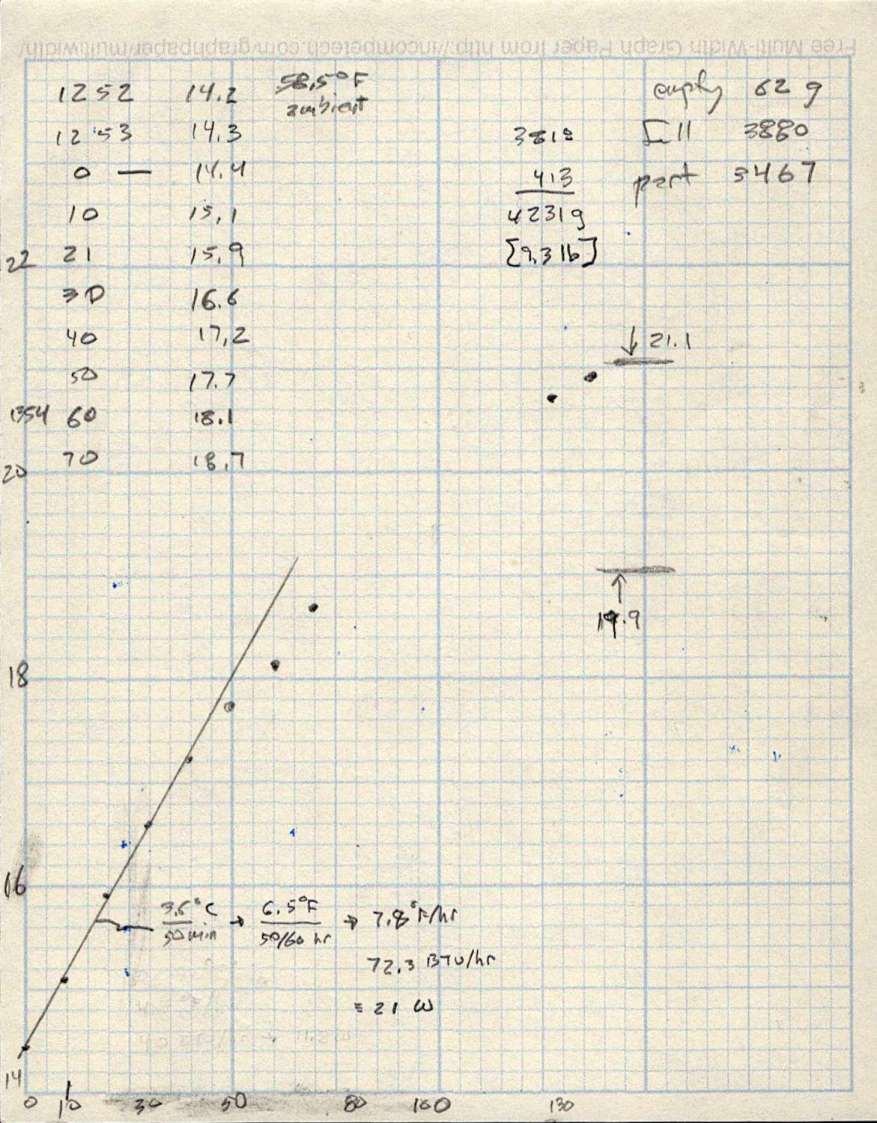
As with the previous icemaker chiller, plotting the water temperature as a function of time shows the pump adds some energy as it moves the water around the loop:
LightObject Q600 chiller – water heating
The gap in the data shows where I had a few other things to do, but the exponential rise is obvious. The chiller compressor starts at just over 21 °C and stops at just under 20 °C, so the exponential curve had gone about as far as it could go.
The numbers in the upper right of the plot give the weight of:
An empty water bottle
A full gallon bottle
The partially empty bottle used to top off the reservoir
How much water went into the chiller reservoir
The figures in the bottom mash the initial slope of that curve together with the weight of the water to find the 21 W required to heat the water at that rate, with a bank shot off British Thermal Units because why not.
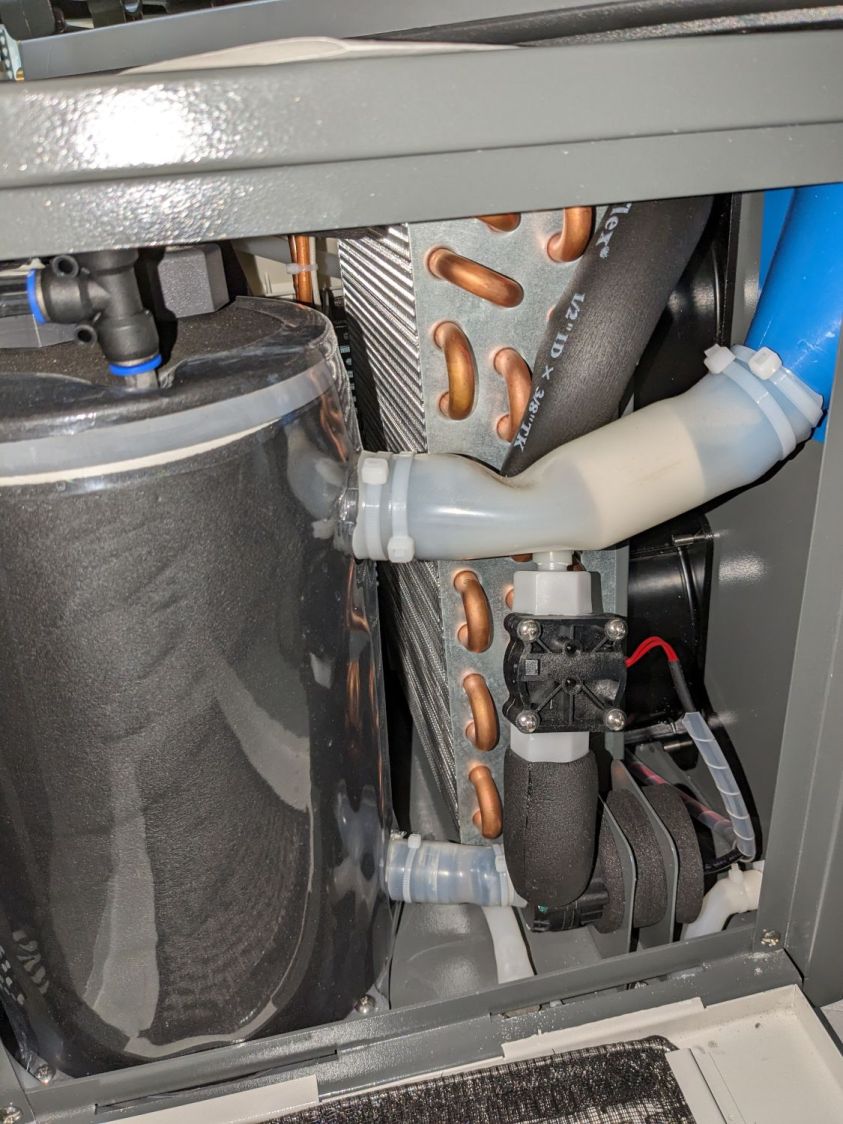
A Kill-a-Watt meter shows the Q600 chiller draws 36 W with the pump running, which includes the controller and a column of blue LEDs behind the water level tube.
The pump (in the lower right) isn’t exactly water-cooled, but it’s not losing a lot of heat through that foam wrapper and maybe most of the heat really does come from the motor:
LightObject Laser chiller – right side internal view
The basement temperature will rise as Spring becomes Summer, so the chiller will start working right away, and it’ll definitely get more exercise when the laser starts cutting again.
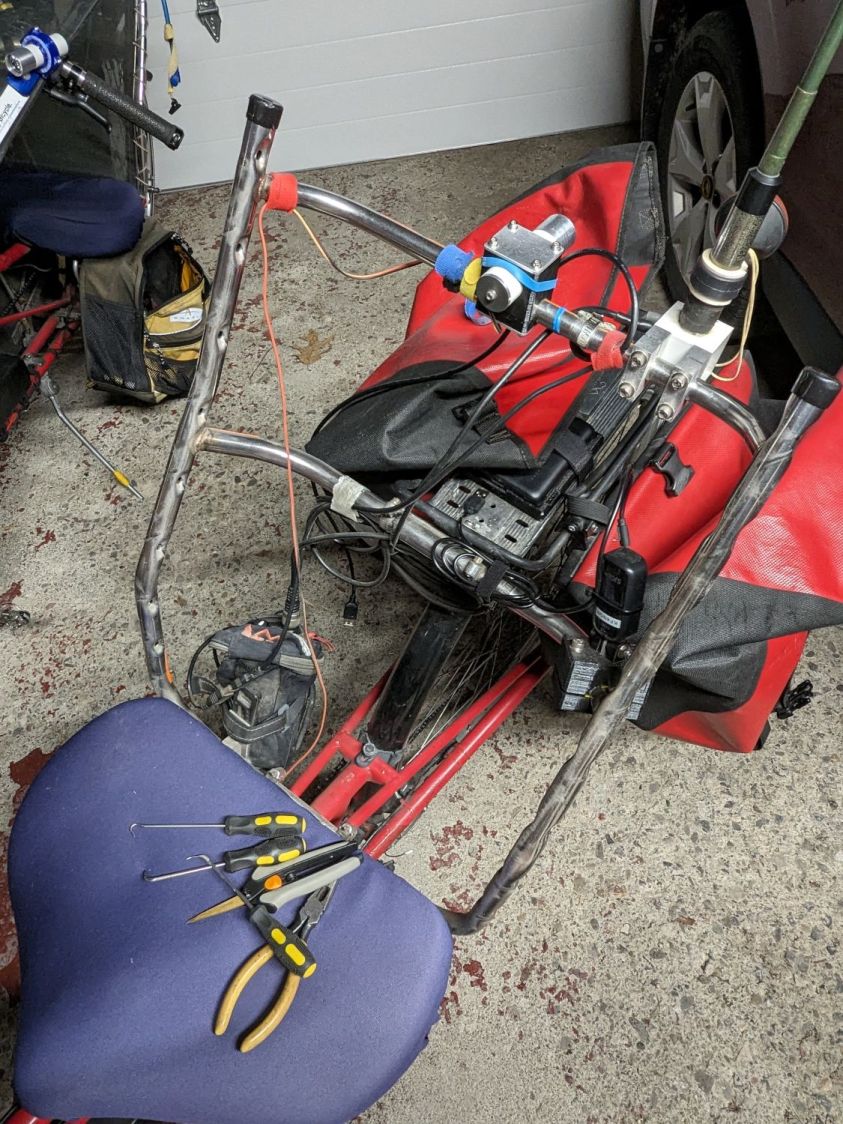
The cord path isn’t at all obvious, even given the smudges on the seat struts:
Tour Easy – seat mesh removed
Pictures of the original cord as installed at the Easy Racers “factory” served as guidance:
Tour Easy – seat cord – front viewTour Easy – seat cord – side viewTour Easy – seat cord – rear viewTour Easy – seat cord – bottom detail
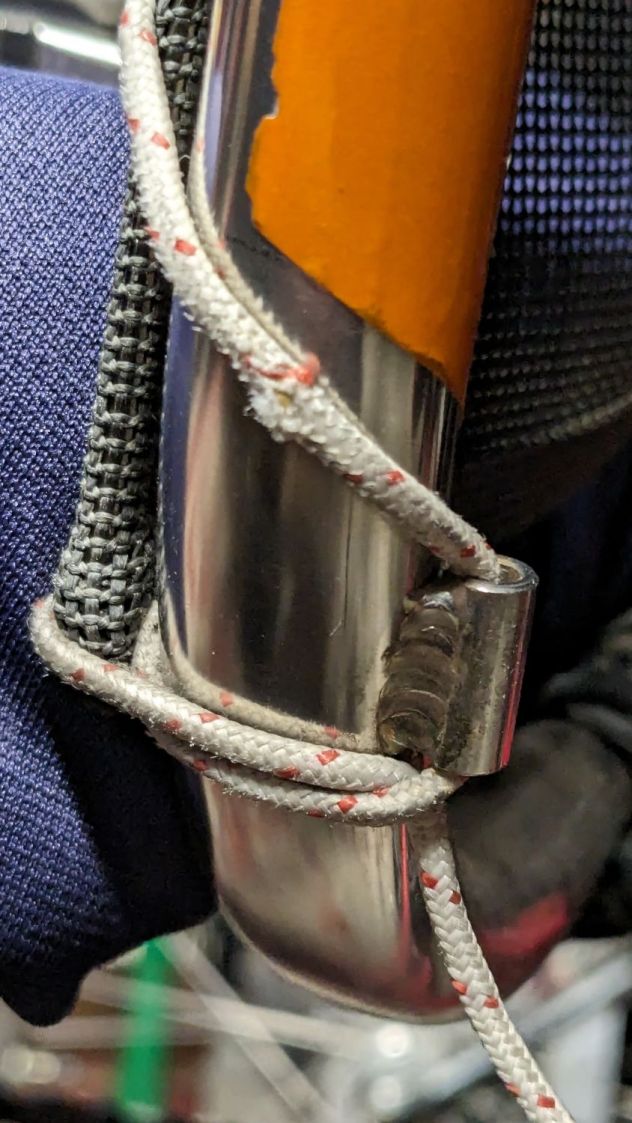
The knots joining the cord at the top, taken juuust before I pulled the right knot apart:
Tour Easy – seat cord – knots
Those are in addition to my Tour Easy a few feet away, but you can never have enough pictures.
A 3.5 meter cord will be plenty long enough and marking the midpoint simplifies equalizing the two sides. The cord crosses the seat frame at the bottom from the lower guides, although I’m reasonably sure it wouldn’t matter if you ran separate lengths up the two sides with a knot in the lower guide.
The new cord claims to be 1000 pound test (200 pound working), but the vital dimension is its 2.6 mm diameter to match the OEM cord. It does not claim to be UV stabilized, which may turn out to be a problem over the course of a few years.
Our new-to-us house included a heavy-duty basement dehumidifier with a blower motor calling for a few drops of SAE 20 oil twice a year. Some searching turned up a specialized flavor of 3-In-One Oil for motors.
It arrived with free inclusions:
3-in-One Motor Oil – top inclusion
Backlighting makes them more obvious:
3-in-One Motor Oil – top inclusion – backlit
There’s also a free-floating jellyfish slightly denser than the oil:
3-in-One Motor Oil – bottom inclusion – backlit
As is now the typical case with Amazon purchases, the only choices are to return / exchange the item, as the seller cannot be contacted directly. I tried sending 3-In-One a question through their website, en passant discovering they’ve been Borged by The WD-40 Company, only to be rejected by the site’s Captcha without ever seeing the test images.
AFAICT, it’s oil and the motor will just have to get used to it.
One doorbell ding came from a guy who sheepishly admitted he had just collided with our mailbox, which sits on the outside of a gentle curve and sticks out, IMO, a bit too far into the street.
This not being my first time in this rodeo, I allowed as how if he’d replace whatever broke, I’d do the fixing and it’d be all good. As it turned out, the only broken part was the foamed-plastic post, which split neatly along its length around the crosspiece hole. After looking things over, I said I’d just epoxy it together and call it done.
That afternoon, I mixed up a generous cup of the casting epoxy I’d been using for coasters and suchlike. It is now well past its best-used-by date and somewhat cloudy, but I figured it would suffice for the purpose; nobody will notice cloudy epoxy on a mailbox post.
I have Too. Many. Clamps. and know how to use them:
Mailbox post repair
He departed, quite literally in tears, over my not raking him through the coals. I figured anybody who’d stop and admit to property damage needed encouragement, not chastisement, and replacing the headlight on his pickup would be more than enough punishment.
An old antique drop-leaf table serves as a plant stand and time reference:
Drop leaf table – in use
While adjusting the clock for Daylight Saving Time, one of the folding leaves … folded, dumping the clock on the floor.
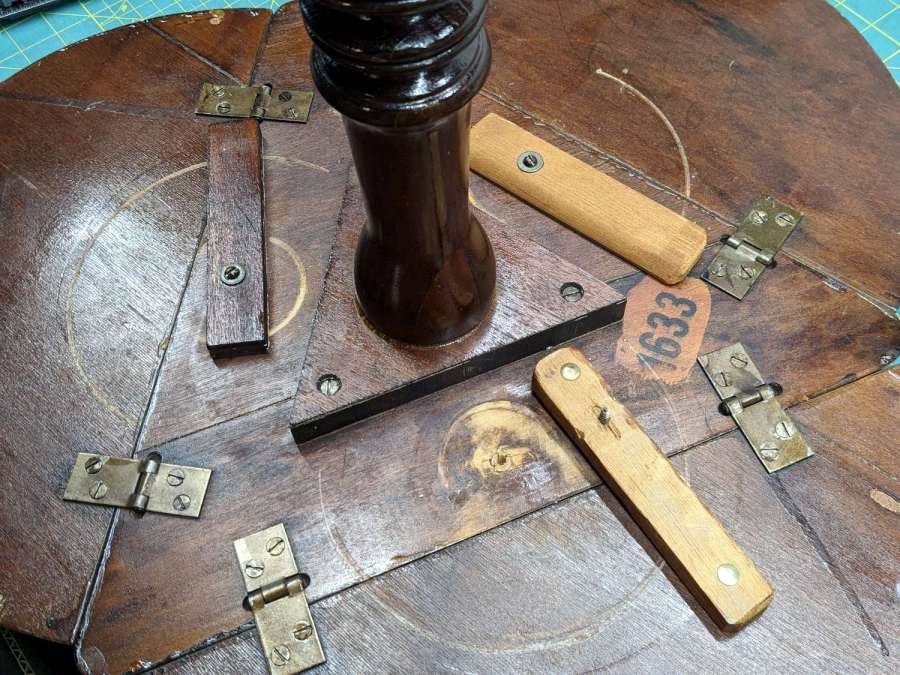
It turns out the latches holding the leaves in place have been repaired / replaced many times since the table left the factory:
Drop leaf table – random latches
I’m certain the latch in the upper right came from my father’s hands.
Although it’s an antique, it’s not a priceless antique, so I had no compunction about drilling out the wood screw holes, installing metric threaded inserts, and converting all the screws to M4 button heads:
Drop leaf table – wood insert
That’s a brad-point bit intended to produce clean-sided flat-bottom holes (modulo a triangular pit from the tip) exactly right for screwing an insert all the way down. The table top just barely fit on the drill press, so I could set the depth stop to make the answer come out right every time.
A dot of low-strength threadlocker keeps the screws from turning, although the table has pretty much reached a steady state these days.
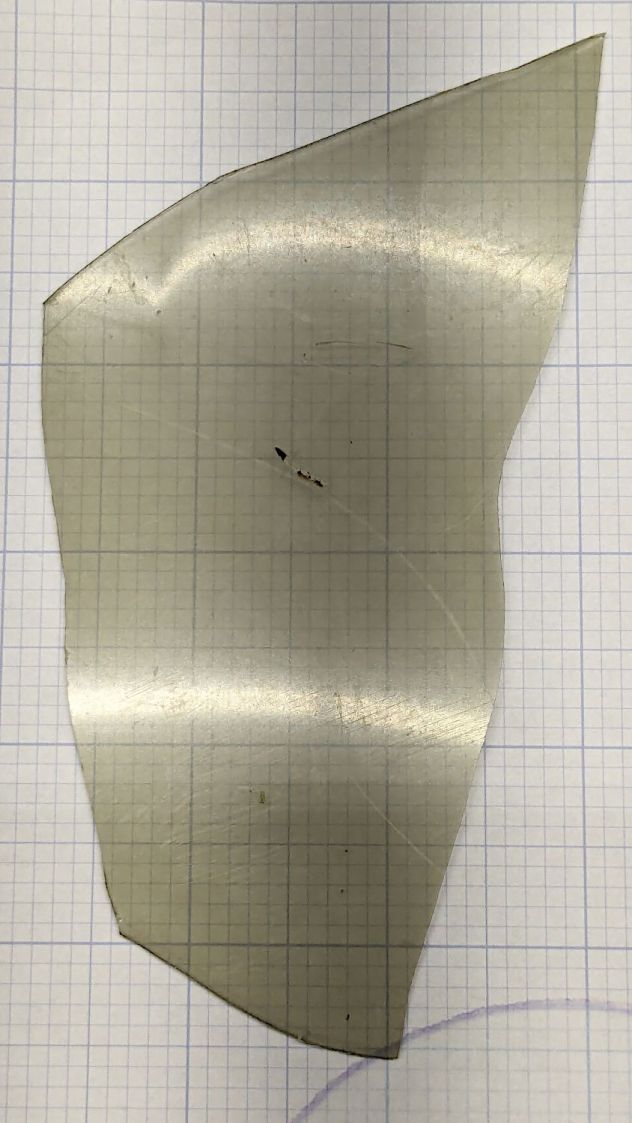
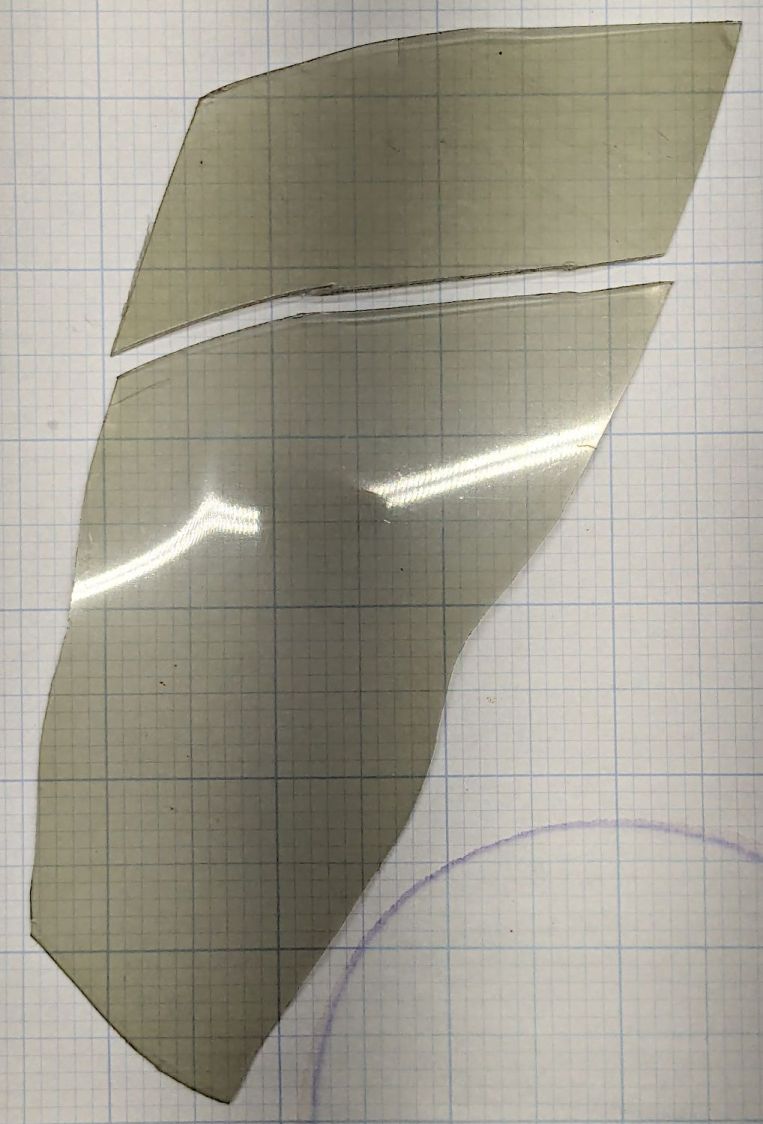
A fairing fragment provided an excuse to practice plastic polishing:
Fairing polish – start
That’s from a EZR-SZ Zzipper fairing ridden about 2000 miles a year since 2001, so it’s spent far too much time in the sun and definitely not gotten all the finicky care it deserves. It’s tinted 60 mil polycarbonate, vacuum-molded into the bubble shape required to fit on a Tour Easy recumbent.
Fairing Flashlight Mount – Mary approaching
On the other paw, Karl Abbe (the guy behind Zzipper) says the typical fairing survives maybe half a decade, so it doesn’t owe us anything.
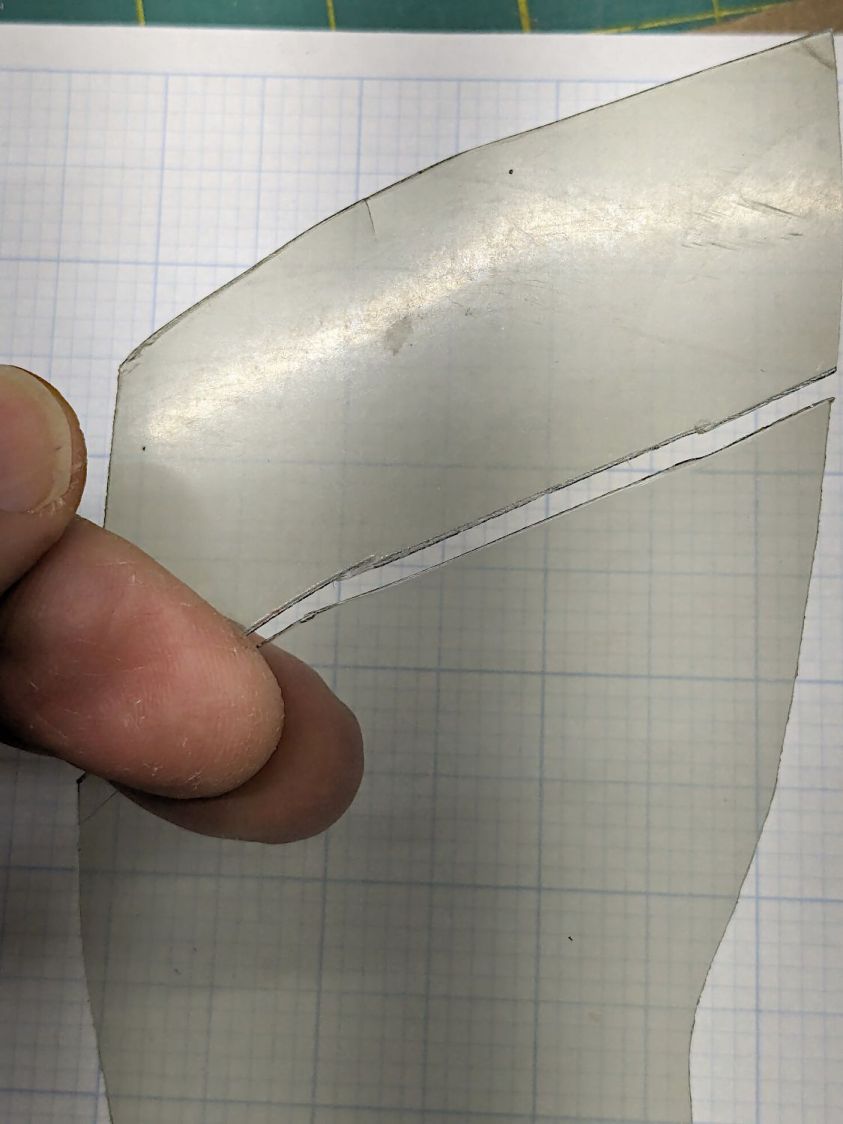
I applied all three bottles of Novus Plastic Polish in descending numeric order, using snippets of Official Polish Mates (which could be a Krakow escort service) with a vigorous circular motion, ending up with a reasonable result:
Fairing polish – transmission
I cut the smaller chunk from the fairing for comparison. It’s been washed to dislodge loose crud, but is otherwise as-ridden.
The fairing has deeper scratches than Novus can buff out, but removing the surface scuffs and haze definitely improves the clarity:
Fairing polish – clarity
The view from father away:
Fairing polish – clarity
Eks describes this sort of thing as a “Used Car Finish” = high polish over deep scratches:
Fairing polish – surface finish
All in all, a nice result from very little effort.