Ed Nisley's Blog: Shop notes, electronics, firmware, machinery, 3D printing, laser cuttery, and curiosities. Contents: 100% human thinking, 0% AI slop.
For the first time ever, Digikey sent me a full-line catalog.
Digikey catalog
It’s 2778 pages long, three inches thick, and weight 2 kg.
Some time ago I made the mistake of replacing our large rusted-out mailbox with a much smaller one: the catalog presented a solid wall of paper when I opened the door.
Here’s a closeup…
Digikey catalog vs Arduino Duemilanovae
Now, I’d love to have you believe I’m such a high-rollin’ kind of engineer that Digikey spares no expense on my behalf, but the only explanation for this embarassing situation I can come up with is that their customer service system blew a gasket in my general direction…
What makes it even more ironic is that they’d recently sent me a survey asking how I’d like to get their catalog. I’d emphatically replied that I did not need a paper catalog or a USB stick with the PDFs. Just let me do the on-line searching and occasionally refer to the appropriate PDF pages and I’ll be fine.
The damned thing is basically useless; I hate to just toss it in the recycling, but I can’t think of any reason to keep it around.
I just removed my mailing address from their list, presumably leaving my account info intact; we’ll see if that sticks.
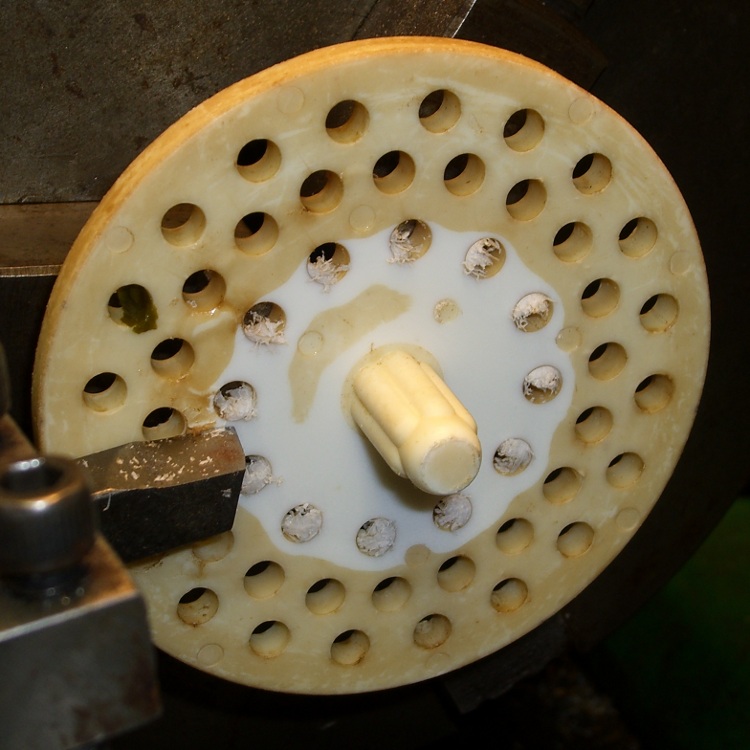
We have a (formerly) white plastic strainer in the kitchen sink that has acquired a brown biofilm layer. Bleach is moderately effective, but the surface is just ooky.
Green tea is suspected, but the evidence is not, at least according to me, conclusive. More research is in order.
Took the evidence to the Basement Laboratory’s Machine Shop WIng and skim-cut both faces, cleaned up the rim, drilled out the holes, countersunk the holes to get rid of the chaff, and it’s all good. The surface is probably too rough, but we’ll see what happens.
I figure I can do that maybe twice more before I must make a new one; looks like a perfect match for CNC, doesn’t it?
I use a blender to mix up the pancake batter every few days. Over the last week or so, the rotary switch Pulse position wasn’t returning to Off all by itself. After having replaced the impeller bearings, I couldn’t just ditch the mumble thing without at least trying to fix it…
A search for replacement parts reveals that Farberware kitchen appliances are disposable crap: they’re so cheap nobody stocks repair parts. IIRC, this blender was maybe ten or twenty bucks after rebate, which gets you through the shipping charge for the repair part. I would love to believe that paying more for kitchen appliances actually bought better quality.
Switch wire connections
As you’d expect, the four silicone rubber feet pop off to reveal machine screws that hold the plastic base to the metal body. This picture shows the wire connections to the switch:
L = brown
1 = orange
2 = no connection
3 = red
I couldn’t pull the switch knob off the shaft, so I dismantled enough of the motor mount to ease it to one side, apply a right-angle screwdriver to the switch body screws, and loosen the switch. That gave me enough room to jam a screwdriver between the switch and the mounting bracket to pry the knob off. It’s a plastic-on-plastic friction fit.
After the fact, it turns out that two screws behind the knob secure the mounting bracket to the bezel. Remove those screws, the bracket comes off, and it’s trivially easy to remove the switch screws.
The wires attach through those horrible spring-loaded push-and-pray connections: jam the wires in, pull back, and it’s supposed to be a gas-tight joint forever. I don’t believe a word of it. Remove the wires by poking a small screwdriver into the opening and forcing the brass tab away from the wire. Yuch!
Opening switch with slitting saw
The switch body parts are, of course, bonded firmly together: no user serviceable parts inside. I deployed a slitting saw on the Sherline mill, grabbed the switch in the vise, and sliced 2.5 mm deep along the line between the two body parts.
The switch is some sort of engineering plastic, so I ran the saw at about 2000 rpm, cut at 100 mm/min, and dribbled water on the blade to keep it cool. You can see the grayish-brown residue under the switch.
The thing came apart easily enough after that…
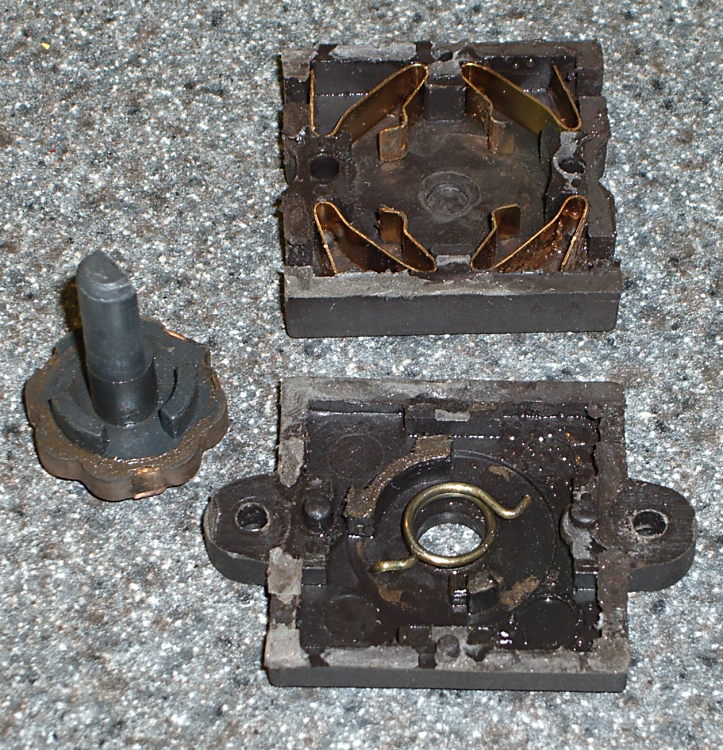
Switch Guts
These pics show the switch components. Note how the spring fits in the body and the four cunningly folded brass strips that simultaneously attach the wires, make the switch contacts, and spring-load the rotary detents.
I took the liberty of bending the strips to restore the clamping force on the wires; poking the tabs with a screwdriver tends to bend them a bit.
So it goes.
There wasn’t anything obviously wrong inside, but after a bit of puzzling, I discovered the problem residing in the coil spring that returns the switch to Off…
Cracked spring
The spring wire is 1 mm diameter. A bit of rummaging in Small Spring Box Number Two disgorged a bag of spring-clip thingies with the proper wire size and just about the right coil diameter, too.
The right way to make a spring is to start with straight music wire, anneal it, make a mandrel, bend up a spring, then heat-treat the spring to make it just the right hardness and toughness for the job.
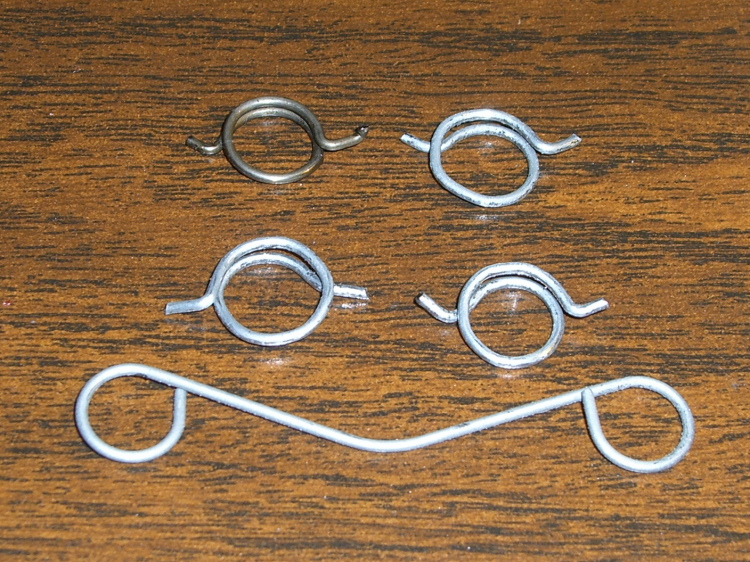
Spring iterations
I deployed my wire-bending pliers, made a few trial runs (well, OK, they weren’t trial runs when I started…), and got close enough by the third attempt (lower right).
Yup, cold-bending spring steel. It is to shudder, huh?
I bent the wire just off straight and worked my way around the coil about 0.5 mm per bend to produce a rather lumpy coil spring. This is definitely the wrong way to go, because the wire’s much too hard for that treatment: it wants to stay straight and doesn’t like those right-angle bends to form the end tabs. I think this will work well enough for long enough, though.
The spring’s chirality turns out to be important; the coil wants to tighten around the shaft when the knob’s in the Pulse position. The spring-clip thing has two ends; only one produces the correct result, which is perfectly obvious in retrospect.
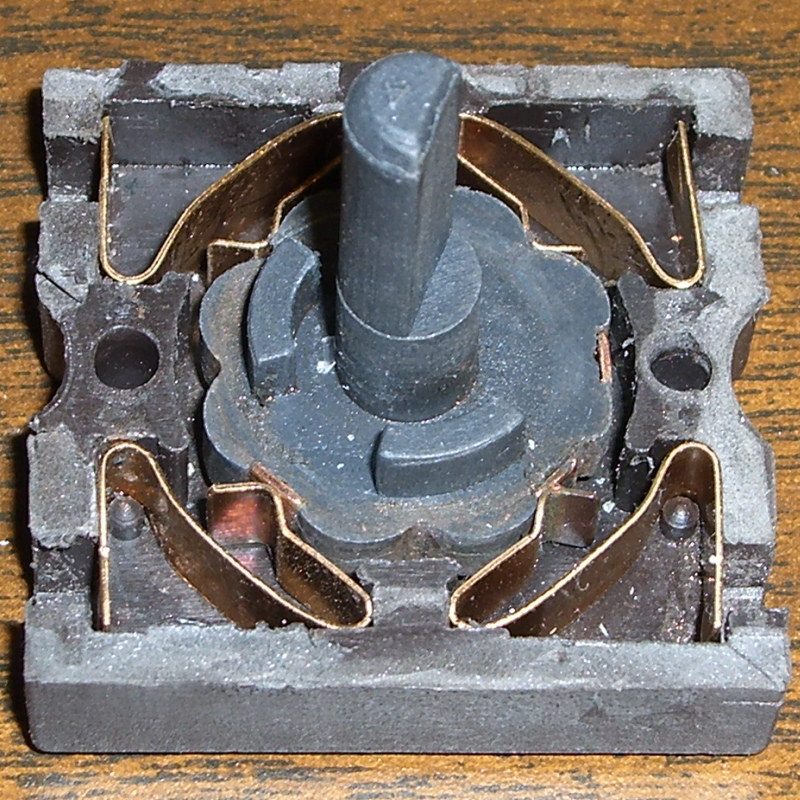
Spring on switch rotor
The spring fits on the rotor like this, but with a whole lot more preload tension than you’d expect. The end result was a somewhat smaller coil diameter than I started with; I shrank the coil, re-bent a new tab on one end, chopped off about 4 mm of wire, and it was all good.
I also backed off the ramp on the notches that engage the brass contacts in the Pulse position so the switch wasn’t so prone to hang up. That was what motivated me to fix the thing: one morning I manged to leave the switch in Pulse because it didn’t quite snap back to Off, took the lid off the bowl, and the blender started up again. Fortunately, the batter is too thick to jump out of the bowl, but it was a near thing.
Here are the four switch positions and their contacts, in order from Pulse (most counterclockwise) to Speed 2 (most clockwise). You could, I suppose, conjure up a replacement switch if you puzzled out the connections; all the rotor tabs are connected together.
Switch contacts – PulseSwitch contacts – Off
Notice that, although switch contact 2 is unused, it is connected when the switch is in the Off position.
The back of the switch body takes pressure on the switch knob, as well as engaging the end of the rotor to hold it in the middle of the body. I wasn’t comfortable just gluing the body together again, because I suspect none of my adhesives will actually bond to the plastic.
So I chopped off a length of aluminum U-channel, poked two holes it in, shortened a pair of salvaged screws, and made a clamp for the switch body’s back. The body has three locating pins, so the two parts aren’t shifting with respect to each other, and the clamp holds the back firmly in position.
Repaired switch with back clamp
Reassembly is in reverse order, paying a bit of attention to securing the wires in those crappy push-and-pray contacts and keeping everything away from the cooling fan as the bottom snaps into place.
Done!
The economics of this sort of repair make absolutely no sense at all, but I hate throwing stuff away just because some cheap part failed. In this case, I’d be happy to replace the switch… let me know where you can find one with the requisite contacts and spring arrangement!
My mother’s pantry disgorged a can of Hershey’s Cocoa dating back to the mid-90s (if I’m interpreting the 94P date code correctly). Their Favorite Hot Cocoa recipe is straightforward:
SINGLE SERVING: Combine 1 heaping teaspoon HERSHEY’S Cocoa, 2 heaping teaspoons sugar, and dash salt in mug, add 2 teaspoons milk and stir until smooth. Heat 1 cup milk: fill mug. Stir and serve.
Browsing in the grocery store revealed that the current recipe has considerably more stiffness: two tablespoons of both cocoa and sugar.
One tablespoon = 3 teaspoons. How they interpret “heaping” I don’t know, but it’s under a factor of two. Maybe cups are bigger these days, but surely not by a factor of four or five.
Zowie!
The Official Recipe from the Hershey’s website lists 2-3 teaspoons of cocoa and 2 tablespoons of sugar. I love this suggestion:
VARIATIONS
Rich and Adult: Increase cocoa to 2 tablespoons …
I just replaced an Energizer lithium cell that I installed on 19 March 2008. The logger runs full-time, taking data points every few minutes.
That’s nigh onto two years of life!
I must conclude the battery life problems mentioned there (admittedly, in a different logger) were due to craptastic Renata cells, rather than the Hobo logger itself.
Mary popped a CD into the boom box, poked the Go button, and the display read “No Disc”… which was odd, as the larger player in the living room had gotten halfway through it with no trouble.
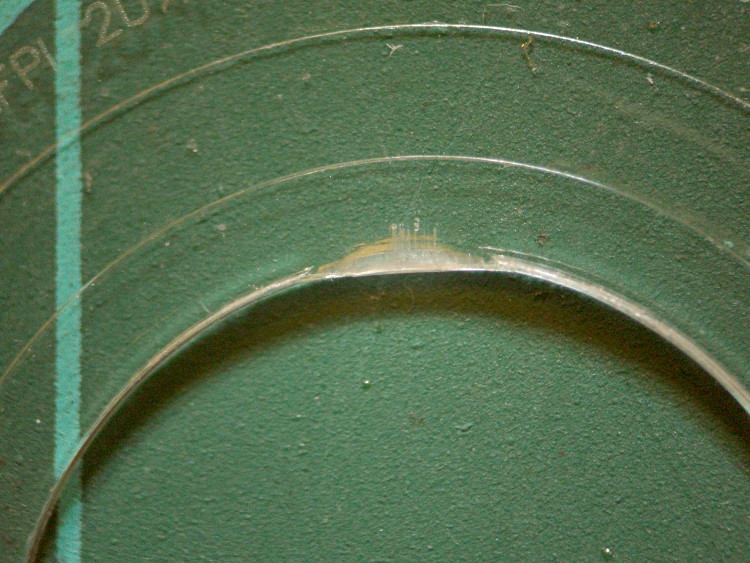
A bit of diagnostic winnowing revealed a ding on one side of the CD’s hole, as though it had been mashed by a heavy object. These CDs (it’s 13 of 16 in an audio book) aren’t new, but they’ve been reasonably well treated by all parties. It looks like it might have been crunched in a player, which you’d think would be impossible.
The disc seemed to seat firmly on the player’s hub, so I suspect the ding put the CD far enough off-center to defeat the player’s track acquisition and following algorithm.
A long time ago I wrote exactly that firmware for a prototype video disk player: find a one-micron track with a one-micron beam while the track wobbulates a few hundred microns as the disk spins at 3600 rpm. After that, mapping the track eccentricity and following it around the disk was a simple matter of software…
In this case, a bit of razor-knife surgery removed the plastic intruding into the hole and set everything to rights.
That’s in addition to the ten dollars folding cash money enclosed with the survey as, I suppose, a motivation to not chuck the whole thing in the trash.
The survey told us that our household had been “scientifically selected” to ensure a valid sampling of the TV viewing population, so it was very important to return the survey. I was astonished that they’d pay thirty bucks for a survey, but that’s probably a good indication of their desperation.
OK, sez I, I’ll play along; every man has his price.
It took ’em until Question 4 to get to the heart of the matter: how many television sets does our family own? Surprisingly, the first choice was “None” and, because that best describes our situation, that’s what I picked. Most of the other questions didn’t have a “Hell, no!” response, but I picked the smallest numbers, hours, and viewers they allowed.
While there is, in fact, a TV in our house, it’s parked on a basement shelf with its cord wrapped around it and hasn’t been turned on in years. Sort of like the “iron phone” I keep in a box nearby; it comes out when I must verify that the phone company’s problem is upstream of the jack on the side of the house.
And, besides, it’s an analog TV and we all know what that means: ain’t none of those signals on the air these days. Yes, we have a cable connection, but the only thing crossing the jack is Internet data and, IIRC, the Cablevision diagnostic channel.
We have a lot of time for interesting & productive projects. They didn’t ask about that sort of thing, though.
Our results were, most likely, something of a disappointment.
[Update: OK, three times is enemy action. I will delete further comments asking to be signed up for the survey. ‘Nuff said.]