Ed Nisley's Blog: Shop notes, electronics, firmware, machinery, 3D printing, laser cuttery, and curiosities. Contents: 100% human thinking, 0% AI slop.
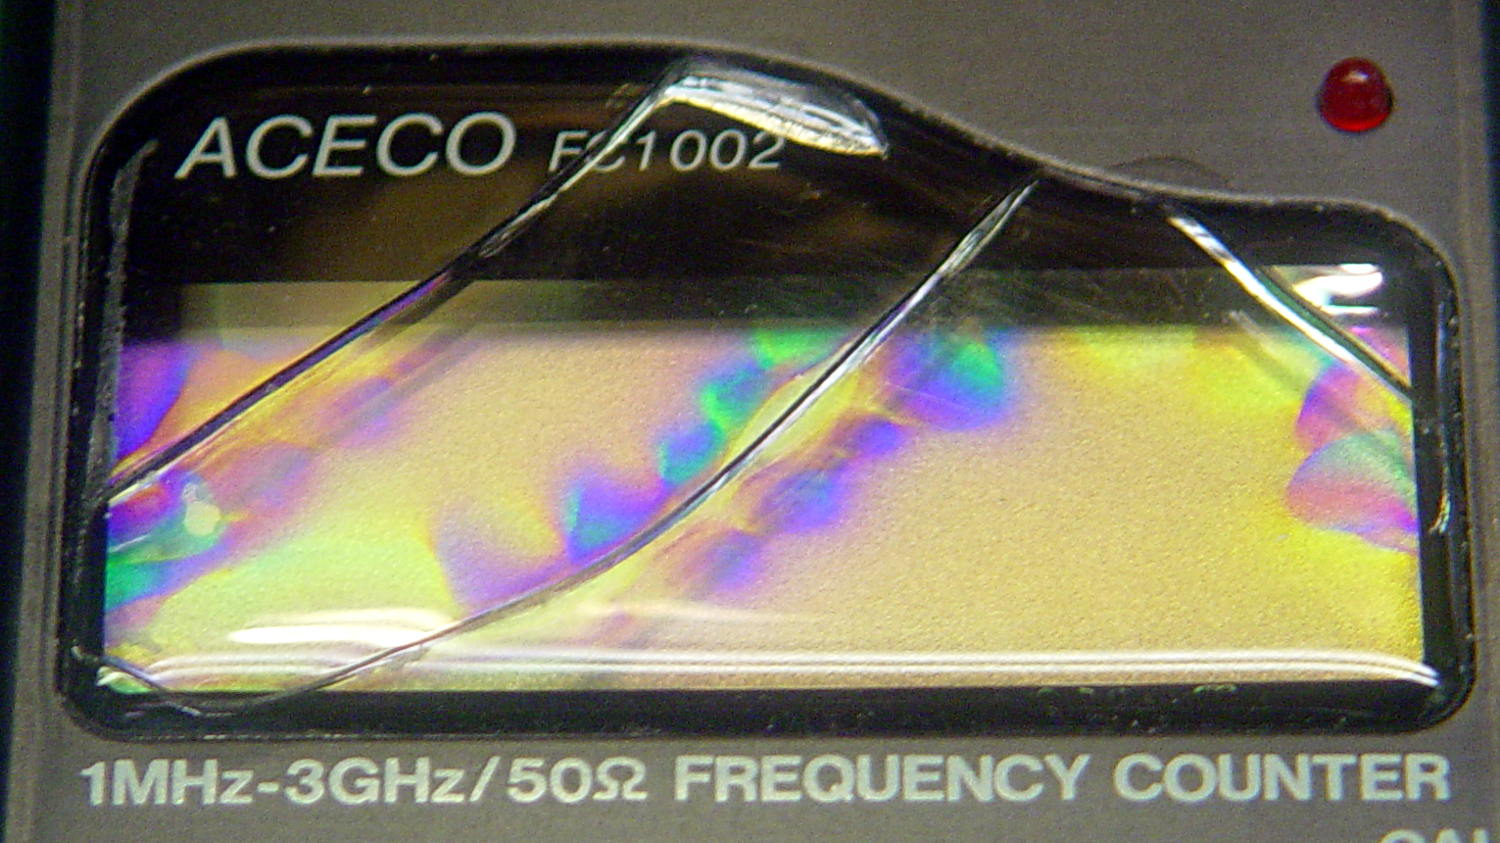
FC1002 Frequency Counter – faceplate – circular polarizer
A sheet of linear polarizing film held in front of the lens:
FC1002 Frequency Counter – faceplate – linear polarizer
For reference, none of the other instrument faceplates on the bench show anything other than uniform gray, with one exception that points directly to the plastic injection point.
I’d say this plate cracked due to unrelieved internal stresses and not anything I did or didn’t do.
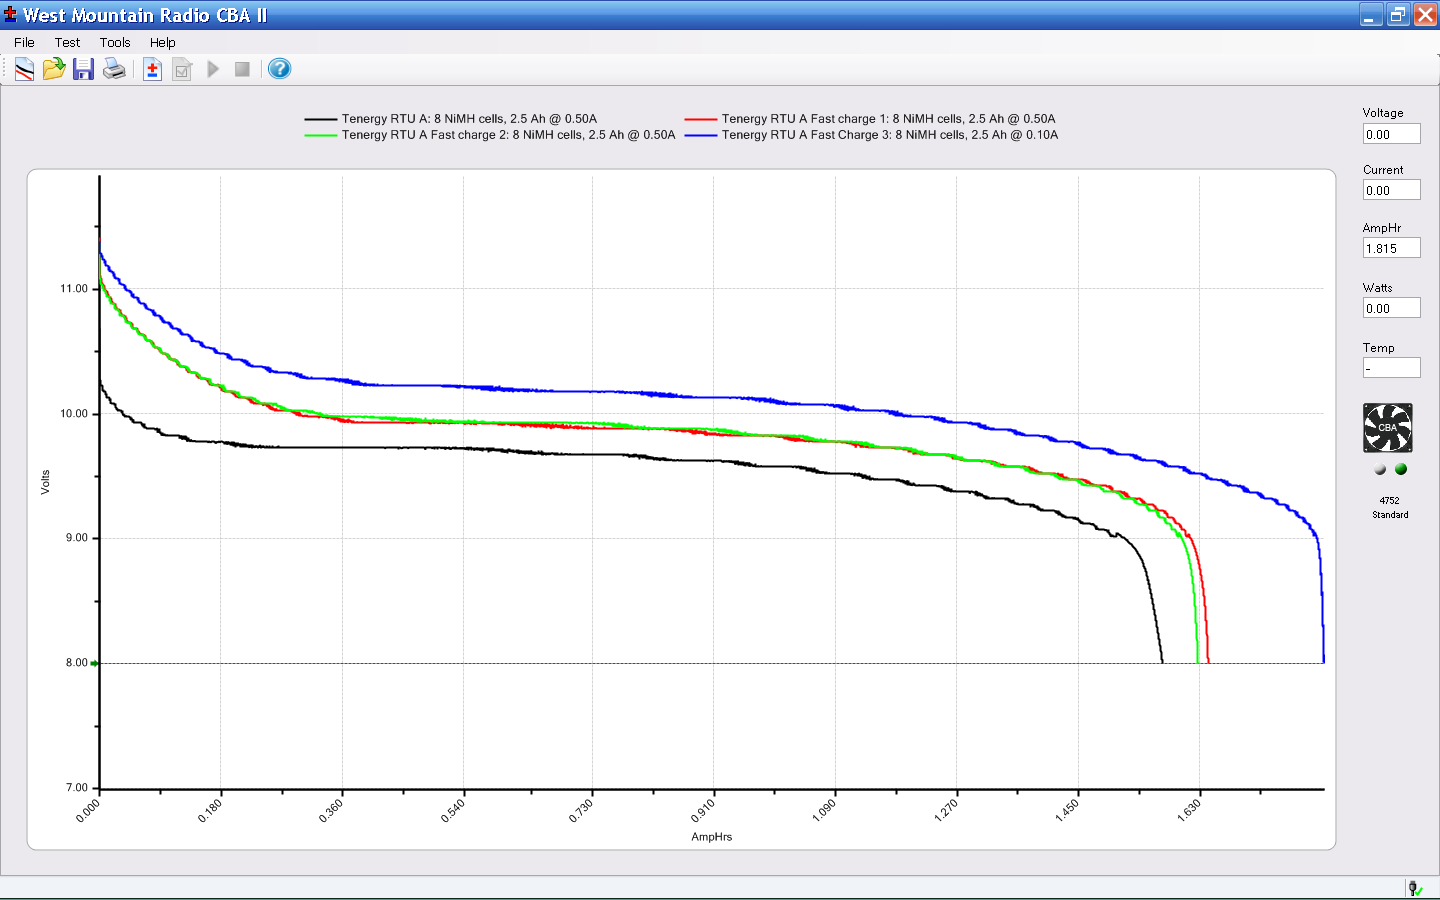
The main reason for taking the FC1002 frequency counter apart was to replace the failed quad-AA NiCd battery pack. Rather than buy new cells with tabs, I recycled some low-discharge “ready to use” NiMH cells from the heap. Back in 2009, they looked like this:
Tenergy RTU Pack A Tests – Aug 2009
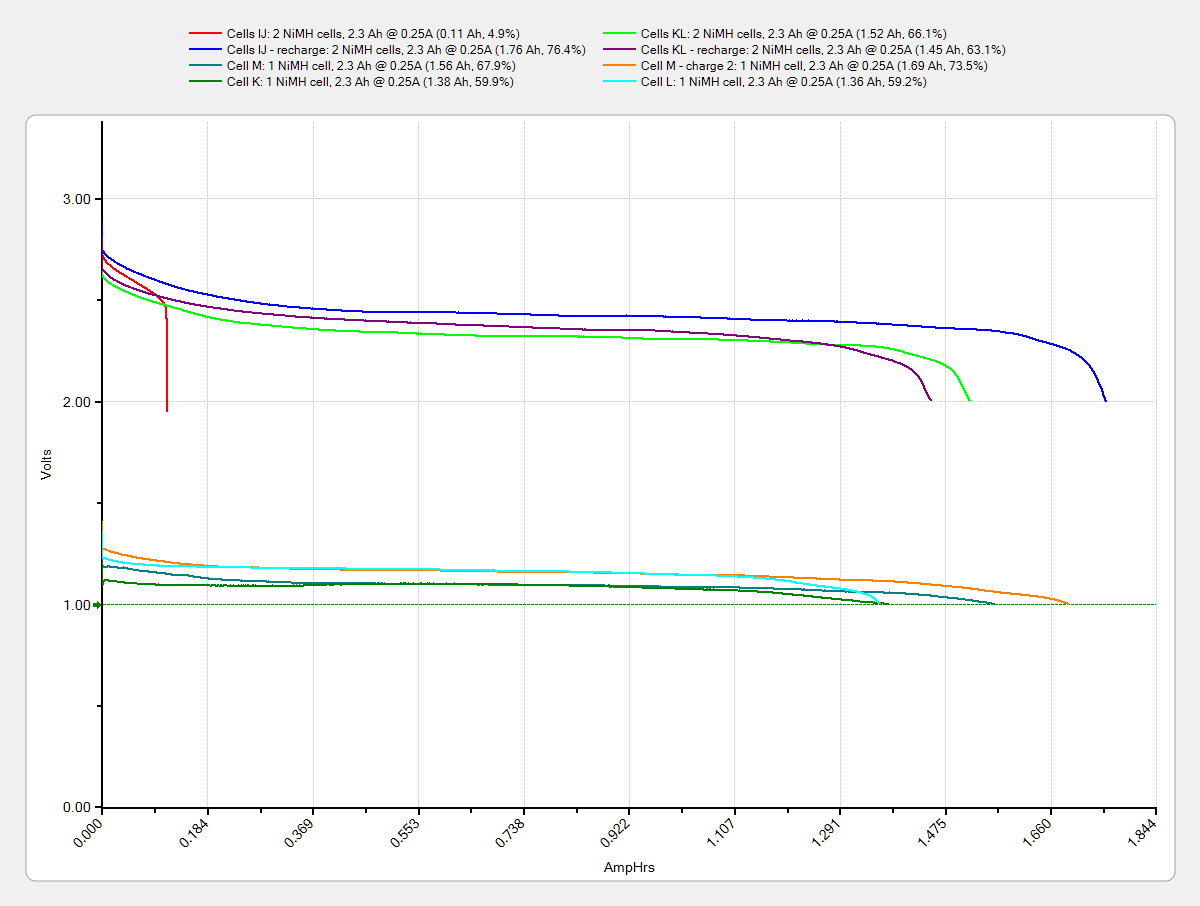
Nowadays, they’re a bit less peppy:
Tenergy RTU – 2014-01 – loose cells
The red blooper shows that you can’t trust a smart fast charger to get the right answer; it concluded that pair was fully charged. After the discharge test and an overnight C/10 charge, they regained as much enthusiasm as they’ll ever have.
They have slightly less capacity than in 2009 and also a somewhat lower terminal voltage. That shouldn’t matter here, as the frequency meter has a power supply to take care of that problem.
Although I’ve sometimes been able to (quickly!) solder directly to ordinary AA cells, a trial run on a defunct RTU cell showed that wasn’t going to work on whatever variety of steel they used, no matter how much I scuffed it and despite using aggressive flux that normally blends silver solder onto stainless steel.
Fortunately, the top half of a four cell case fit exactly in the space available, so I used woven copper fabric tape inside the case to interconnect the cells, then lashed everything together with the obligatory Kapton tape:
FC1002 Frequency Counter – battery pack
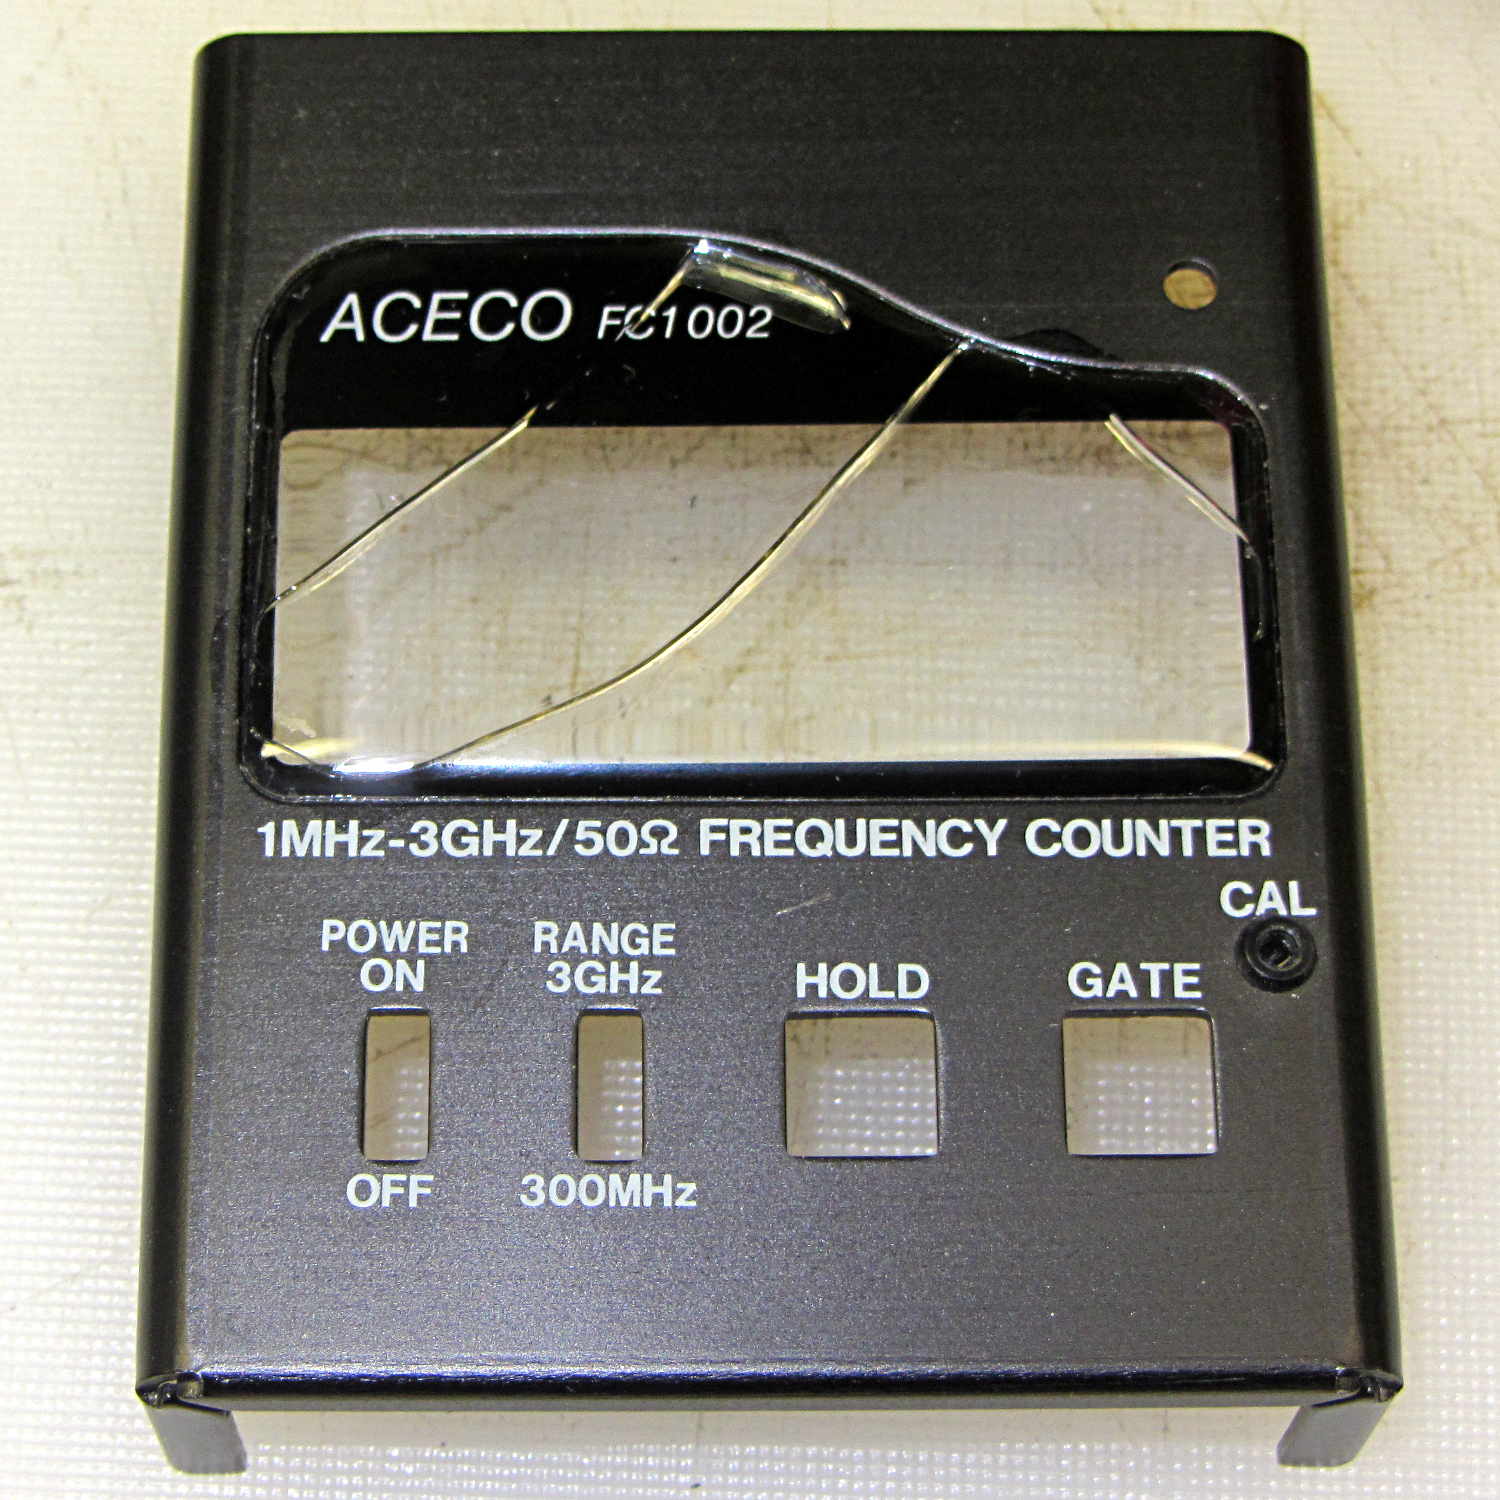
That cracked faceplate isn’t the nicest thing to confront, but it’ll suffice until I get more motivation:
The plastic faceplate over the display cracked quite a while ago:
FC1002 Frequency Counter – cracked plastic
I don’t recall dropping the poor thing. Given the interesting pattern, it could be inherent stress that finally let loose as the plastic aged.
While I have it apart to rebuild the battery pack (more on that later), I’ve been easing acetone/MEK into those cracks by capillary attraction in the hopes of dissolving just enough plastic to rejoin them, without slobbering solvent all over the faceplate and scarring it.
If all else fails, I suppose I can mill out a replacement from thin acrylic sheet, but those nicely rounded cast / molded edges lie well beyond my abilities…
Although automobile batteries have “standard” sizes designated by BCI Group numbers, this Group 34R Sears Diehard battery was about an inch shorter than the previous one:
Toyota Sienna – short Group 34 battery
It arrived with a plastic grid embossed with the helpful notation “Use this height adapter under battery if necessary”, but I figured lower was better. A little bending, two snippets of mouse pad (remember mouse pads?), and a section of white plastic rod faced off / drilled on the lathe anchored it flat on the platform with no wiggle room at all.
With any luck, that’s the last battery the van will ever need…
One of the battery packs powering the GPS+audio interface on our bikes has completely failed, with zero volts at the output and no charge indication. The other five chug along as well as can be expected:
Initial-brand DVD External Packs – 2013-11
The push-to-test button on Pack 4 has become increasingly erratic over the last few months, rendering the charge status LEDs mostly useless, so it has two curves: the lower capacity came directly from the bike, the higher hot off the charger.
For reference, here’s what they looked like in May 2012:
External Li-Ion packs – 2012-05
And right after they arrived:
Initial External Li-Ion packs
Given their nearly constant use and charge cycling, I’m impressed.
The DCRT folks held a “soft opening” last week at the bridge over Rt 55 completing the rail trail from Hopewell Junction to the Walkway Over the Hudson; the Hudson Valley Rail Trail continues westward to Lloyd. I hadn’t actually planned to ride the whole thing, but Monday was a lovely day and, hey, why not?
So here’s what a pleasant, mostly off-road 36 mile ride looks like:
KE4ZNU Rail Trail Ride – 2013-10-14
Hadn’t realized it was Columbus Day until well into the ride, which accounted for a Hudson River crossing at 3 mph embedded in a solid 1.5 mile scrum. Being no fool, I returned over the Poughkeepsie (a.k.a. Mid Hudson) Bridge.
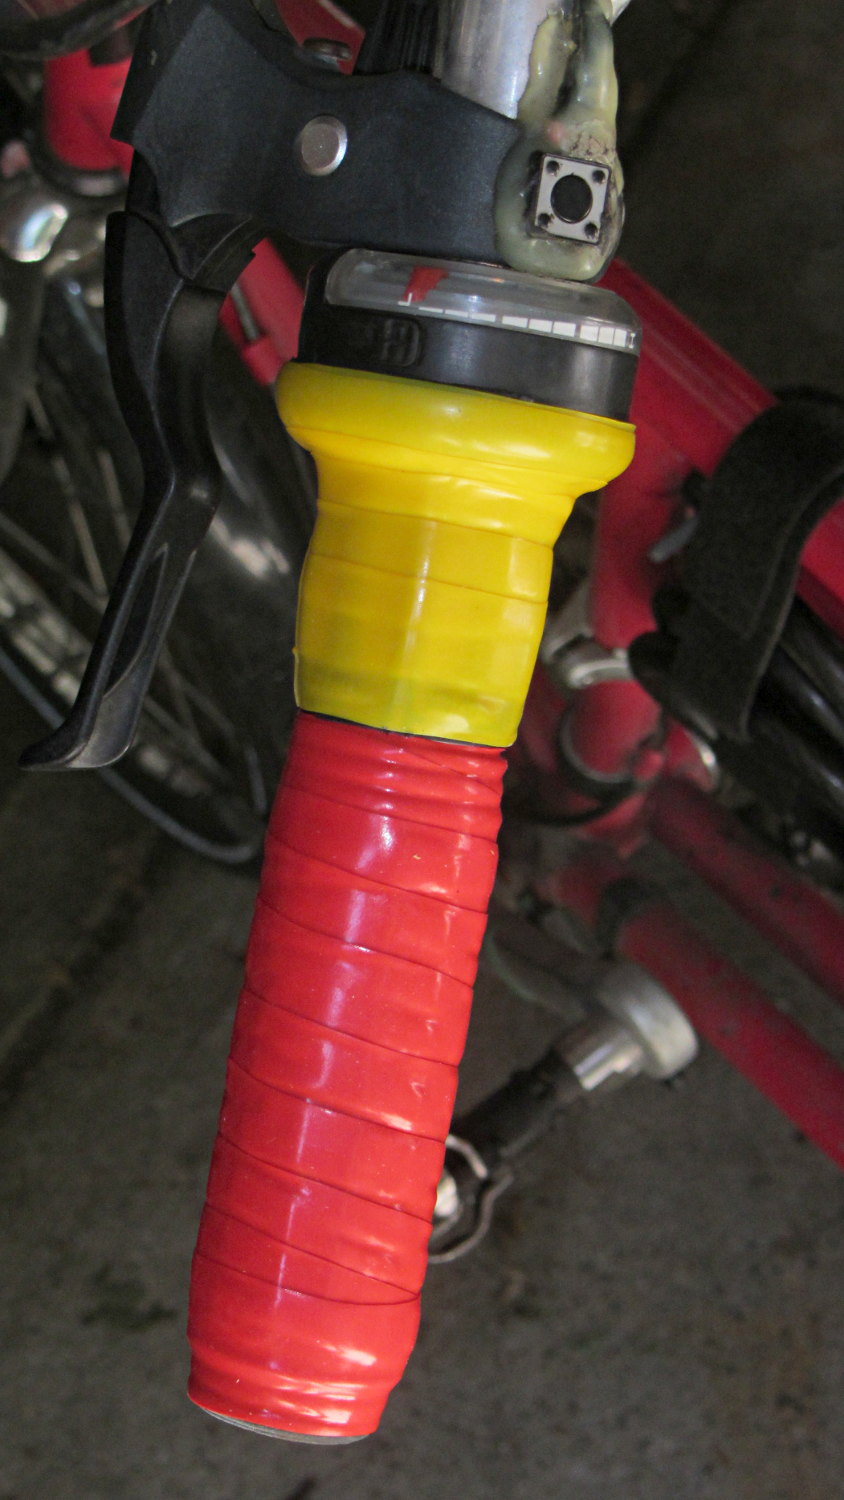
After more than a few years, the handlebar grips on my Tour Easy are rather worn, so I recently wrapped them with cheerful red and yellow silicone tape.
Back in the day, you wrapped with cork tape and had to worry about the direction on each side. Silicone tape fuses into a solid mass and the orientation shouldn’t matter; that’s a Good Thing, because I’m not sure what direction would be correct in this situation.
The yellow section covers the SRAM twist grip, which means it has a moving joint at each end. I suspect the tape will pull back from the larger part of the grip and form an unsightly lump just behind it.
It’s certainly much grippier than I expected…
(The small pushbutton switch is the PTT for the amateur radio HT that does voice and APRS/GPS.)