Ed Nisley's Blog: Shop notes, electronics, firmware, machinery, 3D printing, laser cuttery, and curiosities. Contents: 100% human thinking, 0% AI slop.
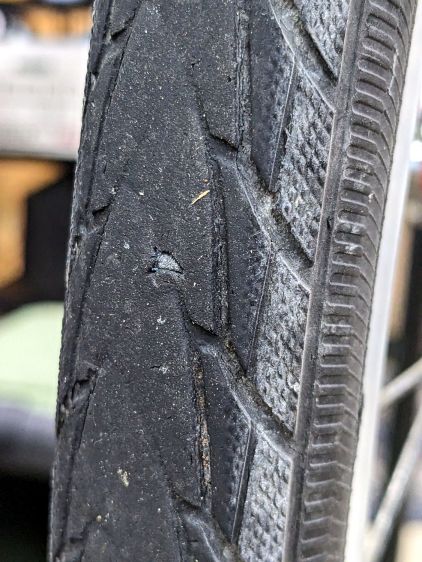
My pre-ride thumb check showed a flat rear tire on Mary’s Tour Easy:
Glass chip – end view in tread
So we fetched groceries with the car.
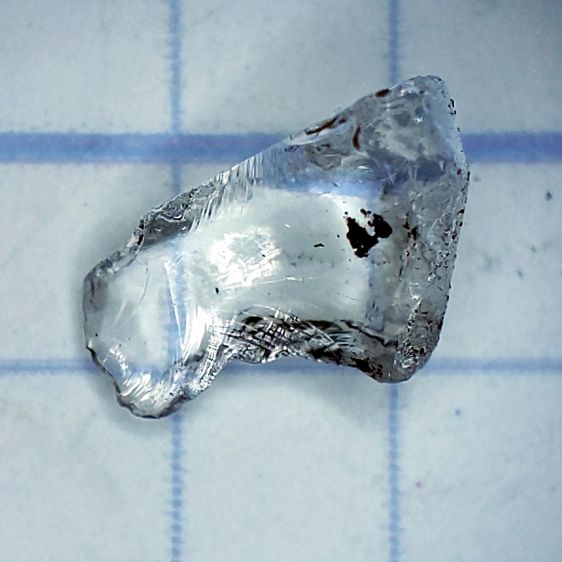
As usual, no tire armor can withstand a glass blade:
Glass Chip – side view
It’s a bit over 5 mm from the knife edge to the ground-flat end, just long enough to punch through a rather well-worn Schwalbe Marathon Plus tire and poke a slow leak in the tube.
The tire has covered enough miles to wear the tread down to maybe half a millimeter over the blue armor layer:
Glass chip – tire damage
Time for a new tire!
For the record, the odometer is just shy of 35 k miles and she rides about 1500 miles a year; somewhat less over the last year for reasons not relevant here. As best I can tell, the tire has been on there for about five years and 7000 miles.
That’s made of rags from the box o’ wipes out of view on the right, laid out in no particular order, on a contrasting background to simplify the next step.
Tap the Trace button and fiddle with the sliders to get a nice solid outline, along with other junk off the edge of the cardboard:
Random fabric – LB trace
All of the traced vectors will be in a group:
Random fabric – LB shapes
Ungroup them, select the outline in the middle, invert the selection, and mass-delete the junk around the edges.
If you don’t move anything, the outline will be exactly over the shape on the platform. This will come in handy later.
Import all the shapes you want nested inside the outline, group them with the outline, and hand them to the Arrange → Nest Selected tool:
Random fabric – LB nesting setup
LightBurn saves the selected objects as an SVG file with the file name in the clipboard and fires up a browser tab at https://svgnest.com/. Upload the SVG and let the nesting algorithm chew away for a while:
Random fabric – LB nested
The weird triangles come from the Dot Mode perforations that ought not be there; inner shapes get subtracted from outer ones, which makes perfect sense. Your shapes will differ.
Download the nested shape SVG, load it back into LightBurn at the prompt generated after exporting the shapes, and LightBurn will apply the transforms to the original shapes. Put the outer shape on a tool layer and the inner shapes on whatever cutting layer you like, snap the outer shape (with the nested shapes inside) to the previously undisturbed outline of the stuff on the platform, and Fire The Laser!
Now there’s a pretty good chance I can do that again …
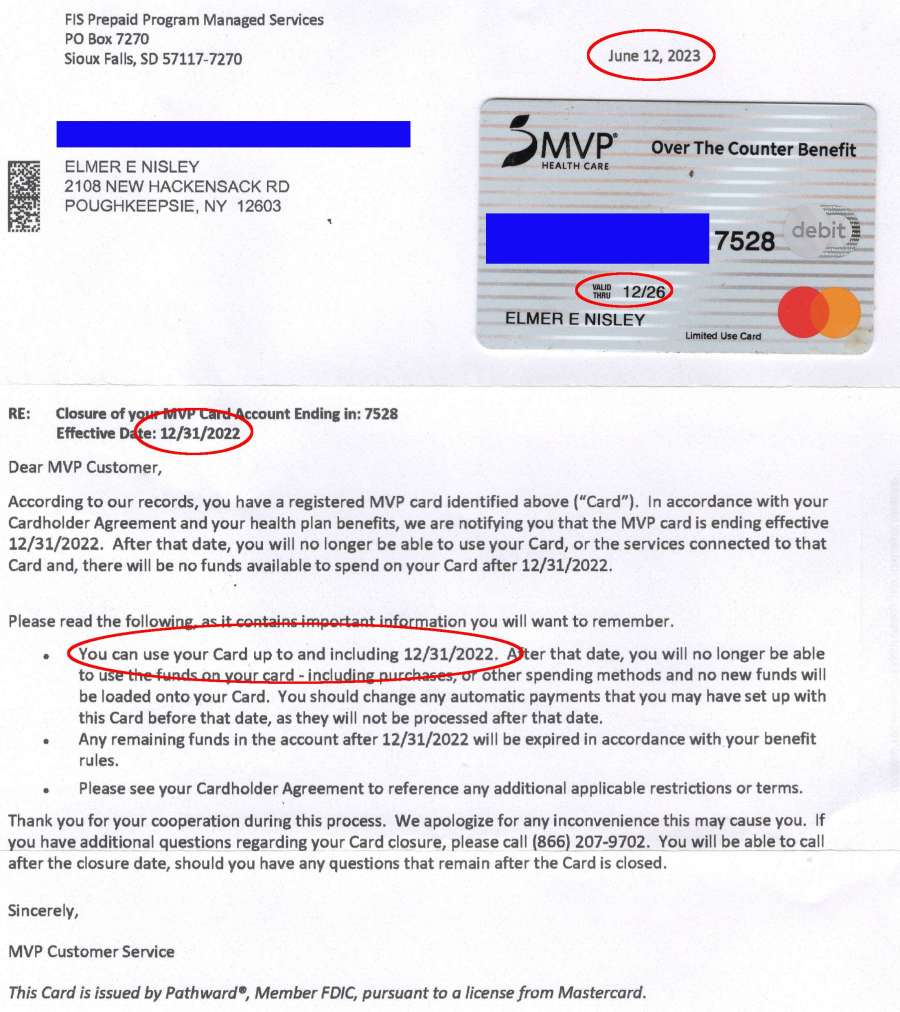
This year’s MVP health plan has a different “OTC Benefit” than last year, even though MVP is contracting with the same company to provide what seems to be essentially the same benefit.
This arrived half a year after the new OTC benefit card showed up:
MVP OTC Card Expiry
I suppose somebody noticed MVP hadn’t gotten around to telling us they were cancelling the old card, despite its Valid Thru 12/26 notation. Well, the card isn’t exactly cancelled, it just stopped working when all the money evaporated.
This not being my first ride in this particular rodeo, I spent all those sweet OTC benny bucks days after they become valid on the first day of every quarter-year, buying up my stock of overpriced OTC stuff.
In theory, you could buy the stuff elsewhere, but you had to scan each item in the retail store using the worst app imaginable to determine its eligibility and coverage. If the store was in a no-wireless-data phone zone: too bad, so sad.
This year’s program is simpler: you must buy everything from the sole-source supplier, even though it costs four times more than the comparable item at, say, Walmart or even Amazon.
A month or so ago a Manjaro update caused all file loading to take minutes, rather than seconds. This sort of breakage seems endemic to rolling update distros, although most glitches vanish within a few days as more knowledgeable users track down the problems and apply the fixes.
File loads and program startups continued to be achingly slow, so I trawled the Interwebs in search of a resolution, tried various suggestions, and had no success until:
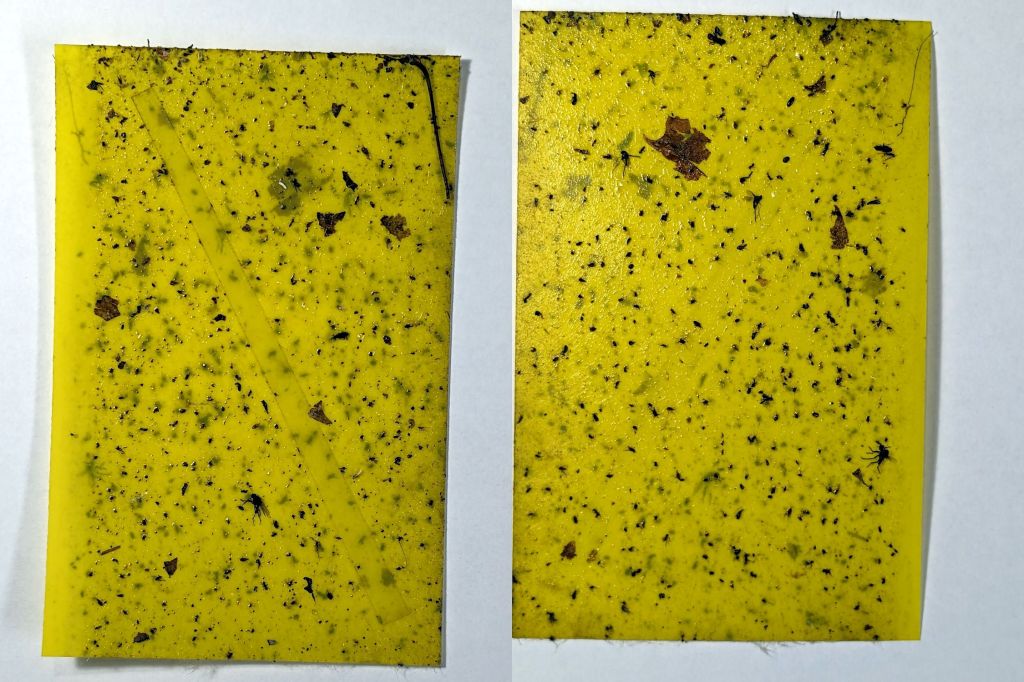
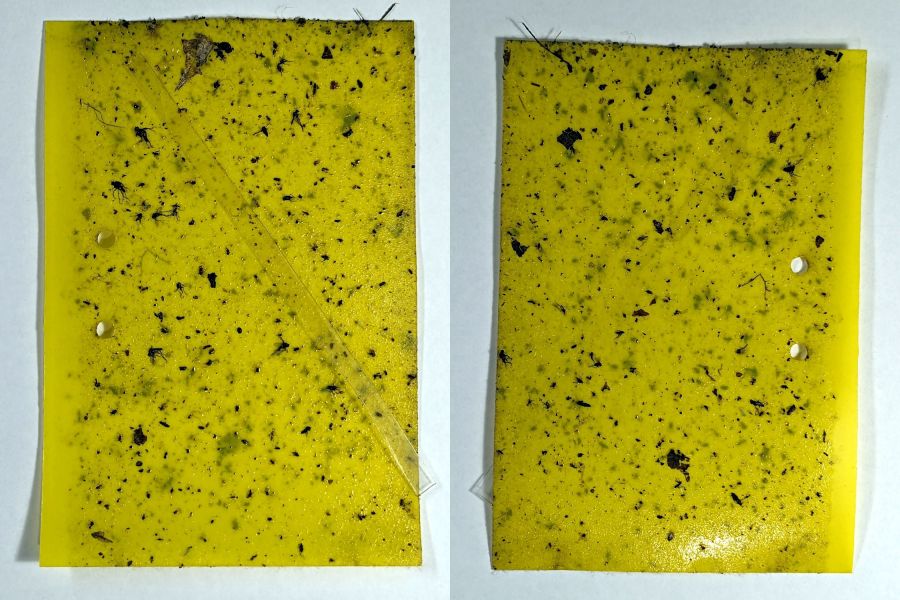
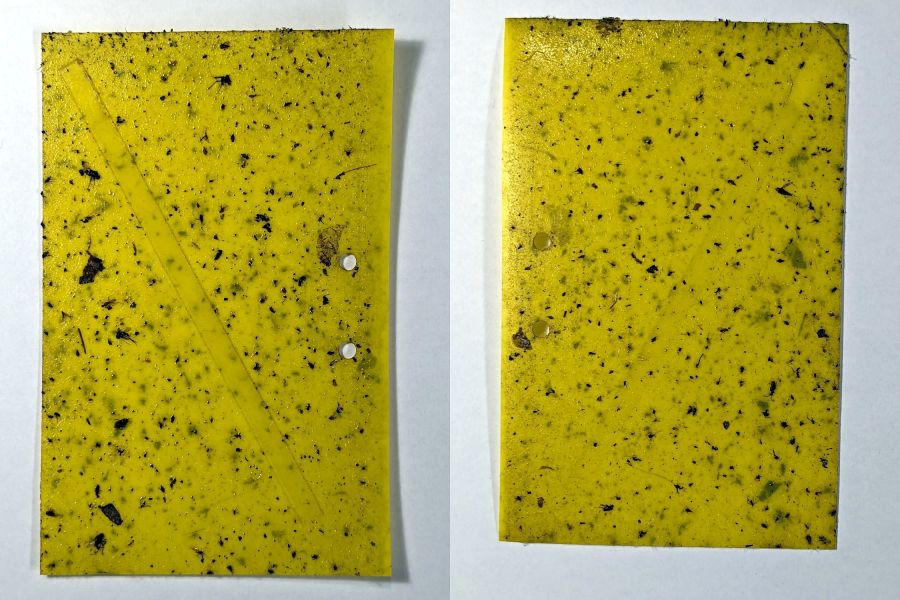
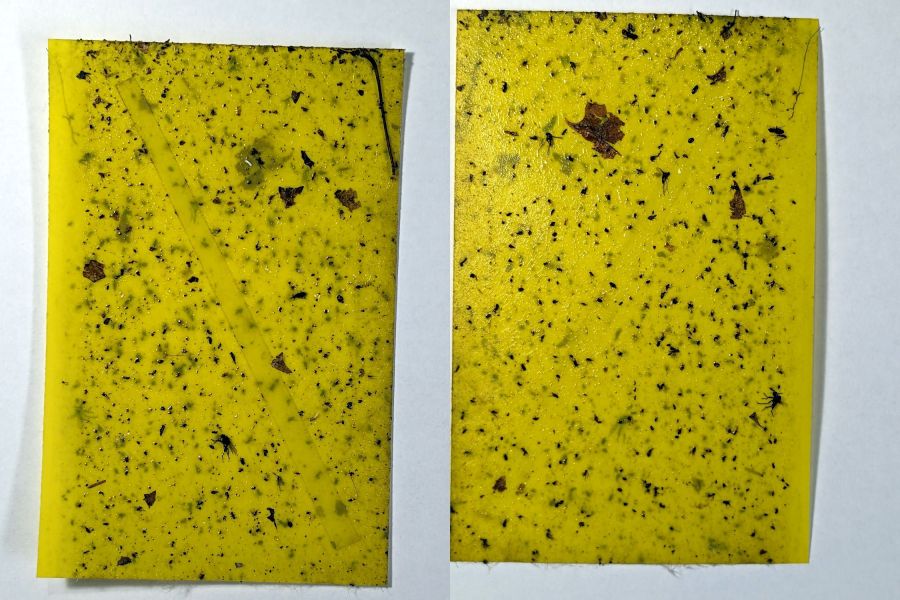
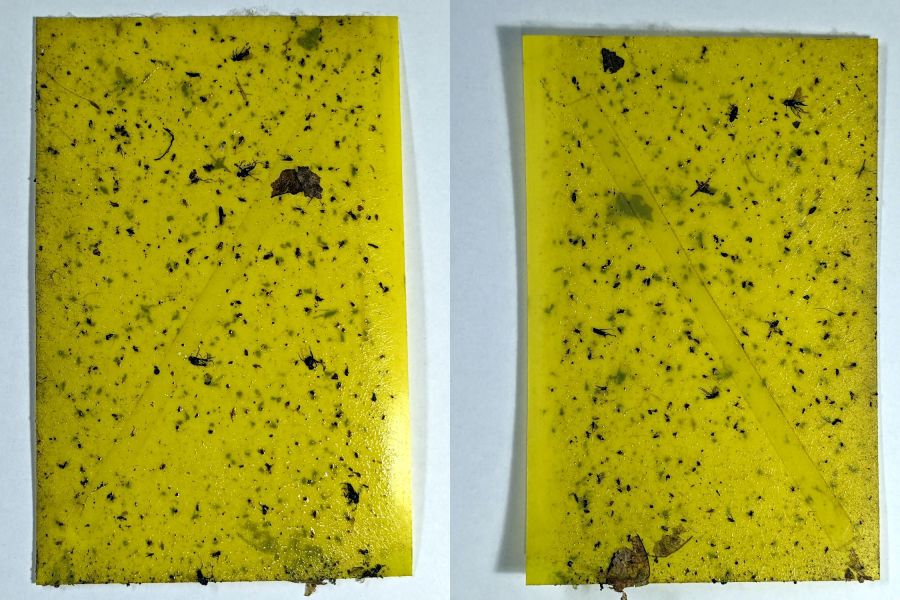
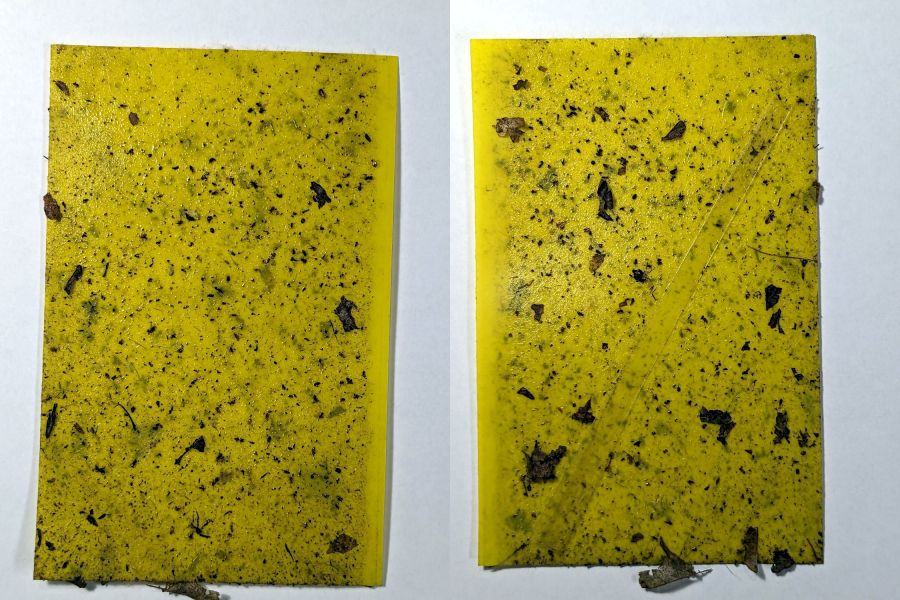
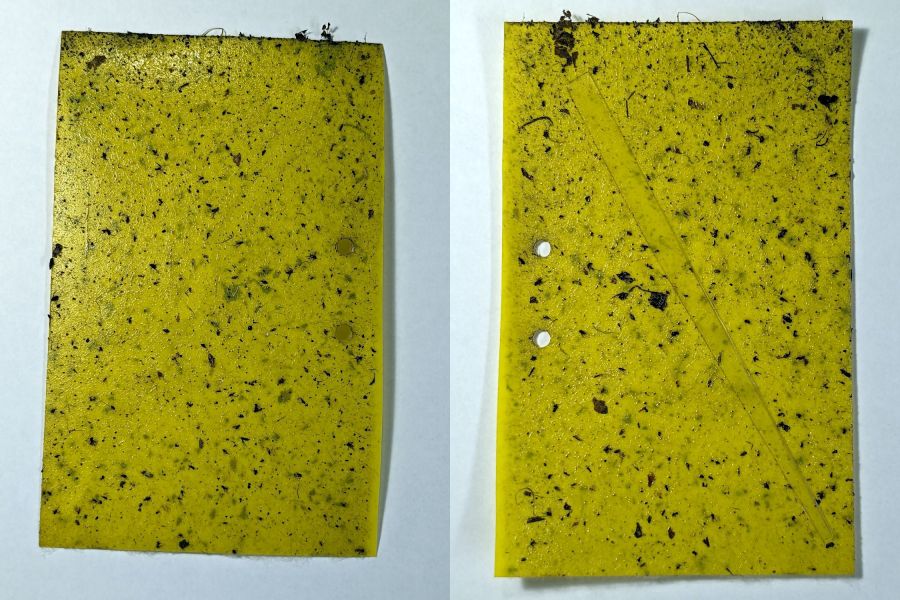
Six sticky traps have been out in Mary’s Vassar Farm onion bed from mid-April through mid-July, collecting onion maggot flies, other flying insects, and a bunch of shredded leaf mulch. Having just replaced all the sticky sheets, these are the results so far:
PXL_20230711_215255180 – VCCG Onion Maggot Trap F
PXL_20230711_215229538 – VCCG Onion Maggot Trap E
PXL_20230711_215159950 – VCCG Onion Maggot Trap D
PXL_20230711_215129817 – VCCG Onion Maggot Trap C
PXL_20230711_215041012 – VCCG Onion Maggot Trap B
PXL_20230711_215002214 – VCCG Onion Maggot Trap A
Each image is the front and back of a single sticky sheet flipped over left-to-right; I did not keep track of the original trap locations.
If you need the original camera images to get enough pixels for itemizing the smaller dots, let me know.
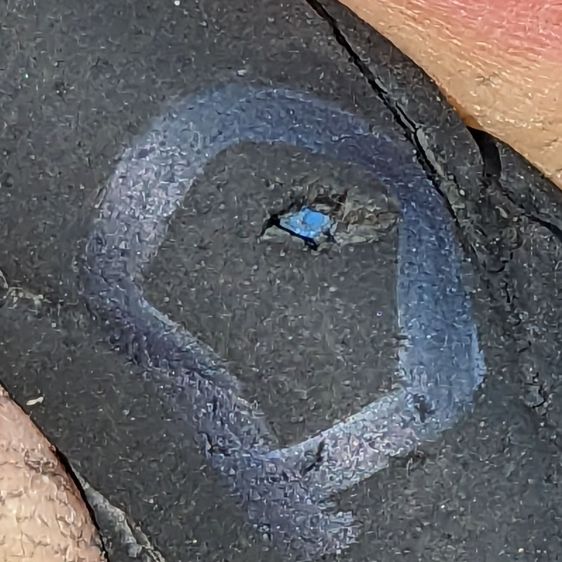
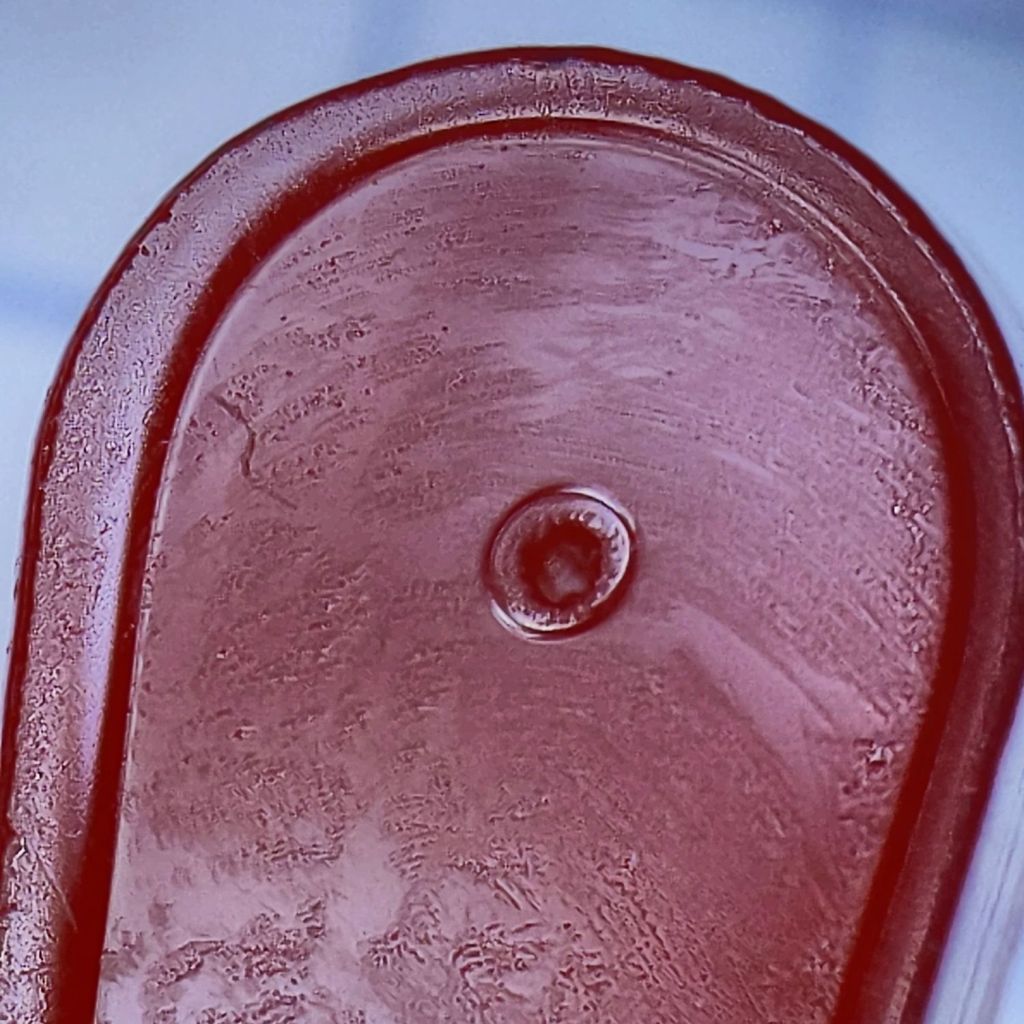
That’s the 0.3 mm exit wound in 3 mm acrylic, one of the mini-lathe chuck stops, carefully hand-held to align the channel.
Squinting at similar holes through clear acrylic shows they’re smoothly melted (as you’d expect), but not exactly perpendicular to the surface. I’m sure the acrylic gas pushes the beam around and erodes the sides of the channel as it boils out of the progressively deepening hole.
The entry wound is about half a millimeter:
Laser-cut pinhole – entry
The heat-distorted strip around the perimeter is less obvious in real life without magnification. The protective plastic film over the surface melts easily and, although it does keep the fumes from condensing, causes a bit of damage.
Each pinhole comes from a single dot in LightBurn’s Dot Mode, so you must arrange the dot spacing to match the path:
Lathe Chuck Stop – Pinhole distance
The pockets are on a 40 mm BCD, so they’re out 20 mm from the center and the hole-to-hole distance is:
34.64 mm = 2 × 20 mm × cos(30°)
Set the dot distance to that exact number and It Just Works.
The laser turns on for a specific number of milliseconds at each dot. In this case, I used 50 ms with the layer set to 70% PWM. You could surely optimize the values.
The starting pinhole gets drilled twice, which happens because Dot Mode expects to make a line of perforations with one dot at each end. In this case, the end of the last line overlaps the start of the first line; two lines would work better than a triangle.
You could make a square array from a single line with (many) dots at the desired spacing, separating the lines by the same spacing.
A circular array might work, too, with a straight line joining successive holes.
Undo would definitely be my copilot while figuring those out.
This could make an easily clogged trash strainer or a filter for small chunks.