Ed Nisley's Blog: Shop notes, electronics, firmware, machinery, 3D printing, laser cuttery, and curiosities. Contents: 100% human thinking, 0% AI slop.
Magnet wire wants to unspool itself, so it comes with a wrap of tape that eventually turns into a gummy layer. Rather than put new tape on the spool, gash a notch in the rim with a utility knife and capture the wire therein.
Notched Wire Spool
If you’re really clever, you’ll angle the notch so the wire folds backwards and holds itself snug. If you’re not, well, there’s nobody going to notice having two opposing notches in the spool, right?
They used to do this with thread and string, back in the old days when such stuff came on wooden spools, but it seems a lost art…
My buddy Eks once observed that knurling is something you want to do on somebody else’s lathe, because it puts so much stress on the bearings. As it happens, both Home Shop Machinist and Machinist’s Workshop have run several articles / series on improved knurling, ranging from better clamp knurling tools to a wonderful widget that turns your lathe into something like a shaper with a rotary axis.
I wondered if a touch of G-Code could do the same thing on my Sherline CNC milling machine, using an ordinary end mill…
Pretty much, yes, it can.
The knurled diamonds aren’t raised above the surface, as they are in classical crush-rolled knurling, but my fingers can’t really tell the difference. That’s a chunk of 1-inch PVC pipe, turned smooth in the lathe and knurled with a 2-mm end mill; the fluff is left over from wiping off the swarf with a rag.
The setup mounts the workpiece in the rotary table on the right with the tailstock on the right end. In this case, a little boring (on the lathe) produced a slip fit on the tailstock ram, but you probably should have a plug that supports the tubing with a center-drilled hole for the tailstock’s dead center.
CNC Knurling SetupGeometry Sketch
The general idea is to do the cutting at a 45-degree angle in front of the workpiece, where the end mill will carve a neat 90-degree recess almost like a real 90-degree conical engraving point. This sketch shows the layout, albeit for a very large cutter and a very small workpiece. The YZ origin is at the center of the workpiece, with the X origin at the left edge of the knurled region.
The Z axis remains constant at the level where the bottom of the cutter intersects the 45-degree angle at the proper depth-of-cut. Then you drive Y into the workpiece and drag the end mill along X while twirling A to make a single cut. Move Y out to clear, return X to the start, index A by the angle between the knurls, repeat.
This isn’t perfect, because the bottom of the cutter isn’t parallel to the cut between the knurl diamonds. The leading edge cuts too high / low and the trailing edge cuts too low / high (depending on which way you’re moving X and twirling A), but for small cutters and large workpieces the approximation is probably Close Enough.
Machined Knurl Measurements
The key number is the diametral pitch DP: the number of knurl diamonds around the workpiece divided by the workpiece OD in inches. Machinery’s Handbook suggests that a DP of 48 is coarse and 96 is fine. Measuring some knurled tools lying around the shop shows those values aren’t hard numbers, but they’re a start.
Given an initial DP and the workpiece diameter, figure an actual DP that will produce an integral number of knurl diamonds around the circumference (call it NA):
NA = round (DP * OD) to the nearest integer
Actual DP = NA / OD
Knowing the number of diamonds NA, figure the width of a diamond in degrees (call it the Width-in-Angle):
WA = 360/NA
and also as a fraction of the circumference in inches:
W = π * diameter / NA
Typical knurl diamonds seem to be about twice as long their width, so the nominal aspect ratio is 2. Given the desired length-of-the-knurled-region, figure an actual aspect that will produce an integral number of diamonds along the length (call it NX):
NX = round (length-of-knurl / nominal-aspect) to the nearest integer
Knowing NX, figure the angle to turn (call it TA) while making the cut along X:
TA = WA * NX
Depth of Cut Sketch
This sketch shows the depth-of-cut geometry, with the cutter producing skeletal points where the cut just touches the next knurl over. With a 45 degree angle between the diagonal, all the trig boils down to factors of √2.
The perimeter of an NA-sided polygon inscribed in a circle of radius R (which is just the OD/2 is:
Perimeter = 2 NA R sin (180 / NA)
which simplifies to
Perimeter = NA OD sin (180 / NA)
The length of the chord L from tip to tip for such a polygon:
L = Perimeter / NA
The side of the triangle from the corner of the cut perpendicular to the chord is half the chord length, because it’s an isosceles triangle with angles of 45 and 90 degrees.
The height of the segment above the chord:
(L / 4) tan (WA / 4)
The total depth-of-cut along the diagonal is the sum of those two numbers. Given that, figure the coordinates (Y is negative because it’s out in front):
Z = (radius – depth) / √2
Y = -Z
Now, because the end mill has a nontrivial length along the X axis, it’s doing too much cutting. Reductio ad absurdum, imagine putting a 1-inch knurl along a pencil using a 6-inch end mill: the thing would cut a horizontal swath the entire length of the knurled region, leaving no material behind.
So it makes sense to heave in a Fudge Factor limiting the actual depth-of-cut to some percentage of that value. The knurl above was with that factor set to 0.50, but (as with rolled knurls) be sure to test in an inconspicuous spot before actual use. Subtract the shrunken depth-of-cut from the radius as above to get the YZ coordinates.
Notice the difference between the ends of the cut in that first picture: you can clearly see the shape of the end mill’s cylindrical cut. I ran the cutter at 2500 rpm to avoid overheating the PVC, so you can see the cuts on the top edges of the diamonds: the trailing edge makes neat little swipes. In actual practice, you’d run it much faster to get a smooth cut.
Then it’s just a matter of writing some G-Code…
Knurled Pencil
Herewith, the G-Code that did the pencil, with depth-of-cut set to 0.30. It cuts to the right and cuts to the left, then indexes to the next cut by unwinding the A axis. The nominal DP = 48 makes for a coarse, yet oddly attractive, knurl. The variable names don’t track what you see above, but should be pretty obvious. Also see the notes on optimizations down near the bottom.
(Engraved knurling)
(Ed Nisley - KE4ZNU - May 2010)
(G55 Coordinate Origin: 	X to left of checkering)
(							YZ on centerline of workpiece)
(							A = 0 wherever you like)
(Touch off tool center at Y = workpiece radius)
(				   tip at Z = workpiece radius)

(-- Input dimensions)

#<_Outer_Dia>			= 0.324					(outside dia of workpiece - INCHES)

#<_Knurl_Start_X>		= 0.0					(X offset to start of kurling)
#<_Knurl_Length>		= 1.0					(length of knurled section)

#<_Diamet_Pitch>		= 48					(96 = fine 48 = coarse)
#<_Depth_Fraction>		= 0.3					(fraction of max cut depth)
#<_Aspect_Nominal>		= 2.0					(desired knurl diamond length-to-width ratio)

#<_Tool_Dia>			= 0.078					(end mill diameter)
#<_Feed>				= 20					(cutting speed, inch/min)

#<_Traverse_Clear>		= 0.050					(clearance for traverse moves)

(-- Calculated dimensions)

#<_PI>					= 3.14159265358979323

#<_Outer_Radius>		= [#<_Outer_Dia> / 2]
#<_Tool_Radius>			= [#<_Tool_Dia> / 2]

#<_Num_Points_A>		= ROUND [#<_Diamet_Pitch> * #<_Outer_Dia>]	(points around circumference)
#<_Point_Width_Deg>		= [360 / #<_Num_Points_A>]					(degrees per point)
#<_Point_Width>			= [#<_PI> * #<_Outer_Dia> / #<_Num_Points_A>]

#<_Num_Points_X>		= ROUND [#<_Knurl_Length> / [#<_Aspect_Nominal> * #<_Point_Width>]]
#<_Rotation_Per_Cut>	= [#<_Point_Width_Deg> * #<_Num_Points_X>]
#<_Point_Length>		= [#<_Knurl_Length> / #<_Num_Points_X>]		(actual point length)
#<_Aspect>				= [#<_Point_Length> / #<_Point_Width>]		(actual aspect ratio)

#<_Perimeter>			= [2 * #<_Num_Points_A> * #<_Outer_Radius> * SIN [180 / #<_Num_Points_A>]]
#<_Chord>				= [#<_Perimeter> / #<_Num_Points_A>]		(across one point)
#<_Segment_Height>		= [[#<_Chord> / 2] * TAN [#<_Point_Width_Deg> / 4]]

#<_Cut_Depth_Max>		= [#<_Segment_Height> + #<_Chord> / 2]
#<_Cut_Depth>			= [#<_Depth_Fraction> * #<_Cut_Depth_Max>]

#<_Cut_Z>				= [[#<_Outer_Radius> - #<_Cut_Depth>] / SQRT [2]]	(corner of cut)
#<_Cut_Y>				= [0 - #<_Cut_Z>]

#<_Tool_Z>				= #<_Cut_Z>									(tool bottom)
#<_Tool_Y>				= [#<_Cut_Y> - #<_Tool_Radius>]				(tool centerline)

#<_Safe_Z>				= [#<_Outer_Radius> + #<_Traverse_Clear>]	(clear workpiece top)
#<_Safe_Y>				= [0 - #<_Safe_Z> - #<_Tool_Radius>]		(clear workpiece side)

#<_Retract_Y>			= [0 - [#<_Safe_Z> / SQRT [2]] - #<_Tool_Radius>]	(clear cut)

(-- Start cutting!)

G40 G49 G80 G90 G94 G97 G98		(reset many things)

G55					(working coord system)
G20					(inch!)

F#<_Feed>			(set cutting speed)

(debug,Num points AX: #<_Num_Points_A> #<_Num_Points_X>)
(debug,Pt Width Deg Len: #<_Point_Width> #<_Point_Width_Deg> #<_Point_Length>)
(debug,Aspect: #<_Aspect>)
(debug,Cut Depth: #<_Cut_Depth>)
(debug,Cut YZ: #<_Cut_Y> #<_Cut_Z>)
(debug,Tool YZ Retract: #<_Tool_Y> #<_Tool_Y> #<_Retract_Y>)

(msg,Press [Resume])
M0

G0 Z#<_Safe_Z>					(get air)
G0 Y#<_Safe_Y>					(move to cutting side)

G0 X#<_Knurl_Start_X> A0		(get to knurl XA start)

G0 Y#<_Retract_Y> Z#<_Tool_Z>	(get to clearance point)

#<This_Point> = 0				(loop setup)
#<This_Angle> = 0

O1000 DO

;(debug,Angle: #<This_Angle>)

#<Far_A> = [#<This_Angle> + #<_Rotation_Per_Cut>]
#<Near_A> = [#<This_Angle> + 2 * #<_Rotation_Per_Cut>]

G1 Y#<_Tool_Y>					(cut into workpiece)
G1 X[#<_Knurl_Start_X> + #<_Knurl_Length>] A#<Far_A>	(cut right)

G1 X[#<_Knurl_Start_X>] A#<Near_A>						(cut left)

G0 Y#<_Retract_Y>				(get air)

#<This_Point> = [#<This_Point> + 1]
#<This_Angle> = [#<This_Point> * #<_Point_Width_Deg>]

G0 A#<This_Angle>				(index to next cut)

O1000 WHILE [#<This_Point> LT #<_Num_Points_A>]

G0 Y#<_Safe_Y> Z#<_Safe_Z> A0	(get big air)

M2
Some obvious improvements:
Use G92.whatever to whack A appropriately or
Fiddle the angle variable to track the actual A windup and
Figure the shortest direction to unwind A & tweak the variable
Cut in only one direction to reduce backlash or
Make all the cuts with common endpoints in one pass
Knurl along a known taper by interpolating Y & Z along X
Offset the workpiece axis to match the knurl angle (ugh!)
Although I find it hard to believe I’m the first person to figure this out, a search on CNC knurling using an end mill doesn’t provide any meaningful hits. If you get rich using this idea, send me a generous donation…
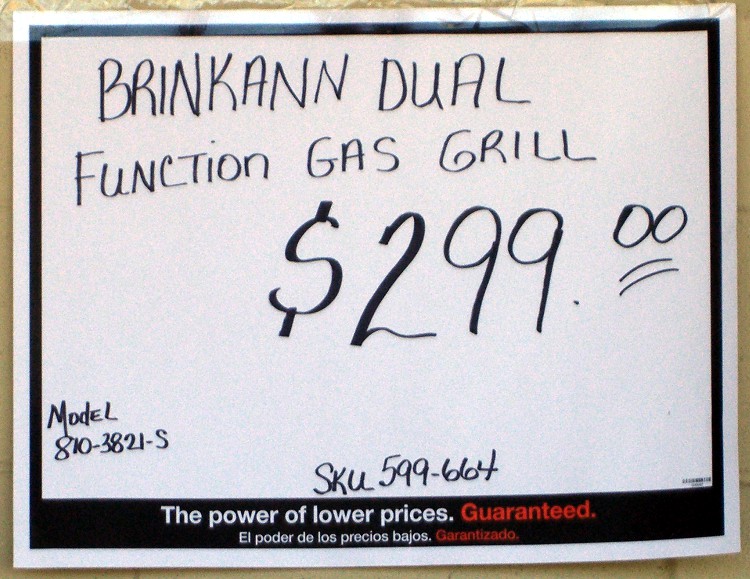
Spotted these signs on the outside wall of a local Big Box home repair store. It’s not as if I’ve never misspelled anything, but this required consistent effort by two of the three folks who wrote up the signs.
I finally rebuilt the snowblower gas cap, this time before the splash cone worried its way through the plastic stem and dumped all the parts into the tank.
The black rubbery domed thing conceals a chunk of open-cell foam that evidently separates the gasoline from the vent channels under the rim. The plastic stem was quite eroded, but probably had another season or two left in it; now I need not worry about it.
Unlike with the shredder cap, this time I put the screw head on the outside and the jam nuts on the inside; there’s also a jam nut under the cap to keep the screw from walking outward. Just in case, I wrecked the threads to keep the nuts from walking off the end, too; you can see the gouge just above the nut.
For some reason, the default character style automagically applied to URLs uses English… which means the spellchecker doggedly attempts to make sense out of that gibberish.
Solution (at least for OOo 3.2):
F11 to get the Style and Formatting dialog up
Click Character Styles
Click Hierarchical in the lower drop-down list to see ’em all
Right-click Internet Link, select Modify
Select [None] in the Language drop-down list
OK your way back out
There, now, wasn’t that easy?
Oh, yeah, you’ll want to do that to all the templates you use to create blank documents, too.
As part of the Kmail blank email problem, I conjured up a new, shrunken maildir structure with just the most recent 30 days of email. However, I want to keep all the same folders, even if they have no current email messages, so my filters can sort the incoming mail properly.
The sequence of events:
shut down Kmail!
move existing email directory out of the way
set up a new directory
copy the directory structure
copy the most recent 30 days of email
delete the existing index files
That’s straightforward, at least after you figure it out. Took me a while to get it right, but here ya go…
cd to the directory holding the Mail folder
mv Mail Mail.base
mkdir Mail
cd Mail.base
find . -type d -print0 | cpio --null -dmpv ../Mail
find . -type f -mtime -30 -print0 | cpio --null -apdv ../Mail
cd ../Mail
find . -type f -name ".*index" -print0 | xargs -0 rm
find . -type f -name ".*index.ids" -print0 | xargs -0 rm
Then fire up Kmail and let it rebuild all the index files.
You ought to try that out on a dummy version of your email, as something may have gotten clobbered in the transition from my terminal to your fingertips, OK?
Of late, Kmail has been turning email messages into complete blanks: the Subject, From, Date, and body are all completely blank. This is evidently a problem of long standing with Kmail and has something to do with fumbling the indexes that point to the emails within its maildir directory structure.
You have empty ‘ghost-mails’ in your inbox (or other folder)
Symptom: For some reason, certain messages aren’t accessible in KMail. They show up in the message list window but selecting them there results in a blank message window. I can’t open them or reply to them, etc.
Solution: This problem ist most likely due to corrupted index files, see issue ‘You are loosing mail’ above. So just follow the advice given there.
Well, yeah, except that rebuilding the indexes more than once a day seems excessive… and the problem is, intermittently, much worse than that.
I’m running KMail in XFCE, which introduces some complexity, but other folks with the same problem are running it in bone-stock KDE. Surprisingly the recent 4.x upheavals haven’t changed the problem in the least.
I’ve been keeping the maildir structure on the file server, rather than my local drive, and symlinking to it from my home directory through NFS. That also doesn’t seem to change the symptoms, although putting a heavy load on either the network or the server sometimes increases the number of blank emails.
Over the last few months I’ve tried a number of things, like tweaking NFS buffer sizes & timings, to no avail. Time to start writing this stuff down…
With that as prologue, here’s how to recover those blank emails.
Most important: when you see a blank email, get out of Kmail. Nothing you do within Kmail will help and many things will hurt, so just bail out.
Fire up a terminal window and cd to the directory representing that email folder. First-level folders have the obvious name, but all the second-level folders are in hidden directories. For example, I have a top-level folder called Bulk Stuff, with one sub-folder (among many) being EMC.
The directory structure:
Mail/Bulk Stuff/
Mail/.Bulk Stuff.directory/EMC/
Yeah, embedded blanks. Sue me.
Each of those directories has three subdirectories: cur, new, and tmp.
The problem seems to arise when a new message gets transferred from new to cur, although sometimes existing messages in cur go bad. The index entry seems to point to the wrong place; the actual mail message file is in cur, but the index points off into the bushes somewhere.
The solution is to manually move the file from cur back to new, then rebuild the offending index. Leaving it in cur and just rebuilding the index does not always work, for reasons I do not understand.
The easiest way to find the newest messages:
cd "Mail/.Bulk Stuff.directory/EMC"
ll cur | tail
This will show the most recent few entries, which will look something like this:
-rw-r--r-- 1 ed ed 22256 2010-04-19 20:48 1271724492.2194.DbdZD:2,S
-rw-r--r-- 1 ed ed 23513 2010-04-20 13:09 1271783386.2232.jxmG6:2,S
-rw-r--r-- 1 ed ed 20901 2010-04-20 17:10 1271797805.2232.i6fP3
The last line shows the most recent files hasn’t been read yet, which is a tipoff that something’s wrong. If you have an older message with a rotten index entry, use grep (or some such) to find it.
Move the file back to new and delete the corresponding index files:
mv cur/1271797805.2232.i6fP3 new
cd ..
rm ".Bulk Stuff.index*"
Then fire up Kmail again and it’ll automagically rebuild the indexes. That’ll work fine for a while, then it’ll screw up again.
I suspect that the problem is related to either the number of messages or the index file size for each maildir directory. I have, in round numbers, 3 GB of mail stashed away. As with anything, most of it is useless , but I occasionally need one of those messages ever so urgently.
I set up a new maildir structure with only the last 30 days of email transactions, which should be enough to either eliminate the problem or show that Too Many Messages is just another dead end.