Ed Nisley's Blog: Shop notes, electronics, firmware, machinery, 3D printing, laser cuttery, and curiosities. Contents: 100% human thinking, 0% AI slop.
The fourth Sony MicroSDXC card went into service in late September 2015 and has now failed after about 60 sessions in my Sony HDR-AS30 Action Camera. This one sported a U3 speed rating and I had hopes that would improve its longevity, but that doesn’t seem to be true.
The defunct Sony card (marked in red to avoid confusion) will join its defunct compadre and the Sandisk Extreme Pro card goes in the camera:
Sony 64 GB MicroSD SR-64UX – failure
The 16 bike rides in December added up to 220 GB; call it 13.75 GB/trip. January 2016 shows only three rides and it failed after two February rides: barely 60 rides for a total of 825-ish GB of video data. The three previous Sony cards failed after less than 1 TB of data, putting this one in the same ballpark.
I have no way to measure the actual write speed, but the camera shuts down after recording less than a minute of 1920×1080 @ 60 f/s video. Previous cards worked fine at lower video resolutions and recording speeds; I’ll assume this one behaves similarly. It might make a capacious “disk” for a Raspberry Pi.
When the previous card failed, Sony’s “customer support” decided that there might be something wrong with the camera’s firmware causing it to trash the cards, so there was no point in replacing the card under warranty and I should send the camera in for a checkup. When I pointed out that they’d strung me along for a year, until the camera was out of warranty, without mentioning even the possibility that the camera might be at fault and asked whether they’d pick up the $100+ bill for having the camera “examined”, the Nice Man said Level 2 would get back to me after “48 working hours”. When prodded, he agreed that “48 working hours” equaled “6 working days” and didn’t include weekends; when we had that settled, I knew they had no further interest in this matter.
Sony hasn’t called back and, by now, I don’t expect they ever will. It’s not worth my time to pursue this any further, but if you’re wondering how well Sony MicroSD cards work in Sony cameras and how well they support the failures, now you know.
So, starting with this riding season, we’ll see how long a Sandisk Extreme Pro card survives…
The library kiosk that handles paying your overdue book fines:
Fine payment kiosk with driver info
Now, you’d need to know a few things about what’s going on inside, but I’d say they’re pretty much rolling out the welcome mat for you to find those things out…
Wanna bet it’s running Windows, just like all the electronic voting machines?
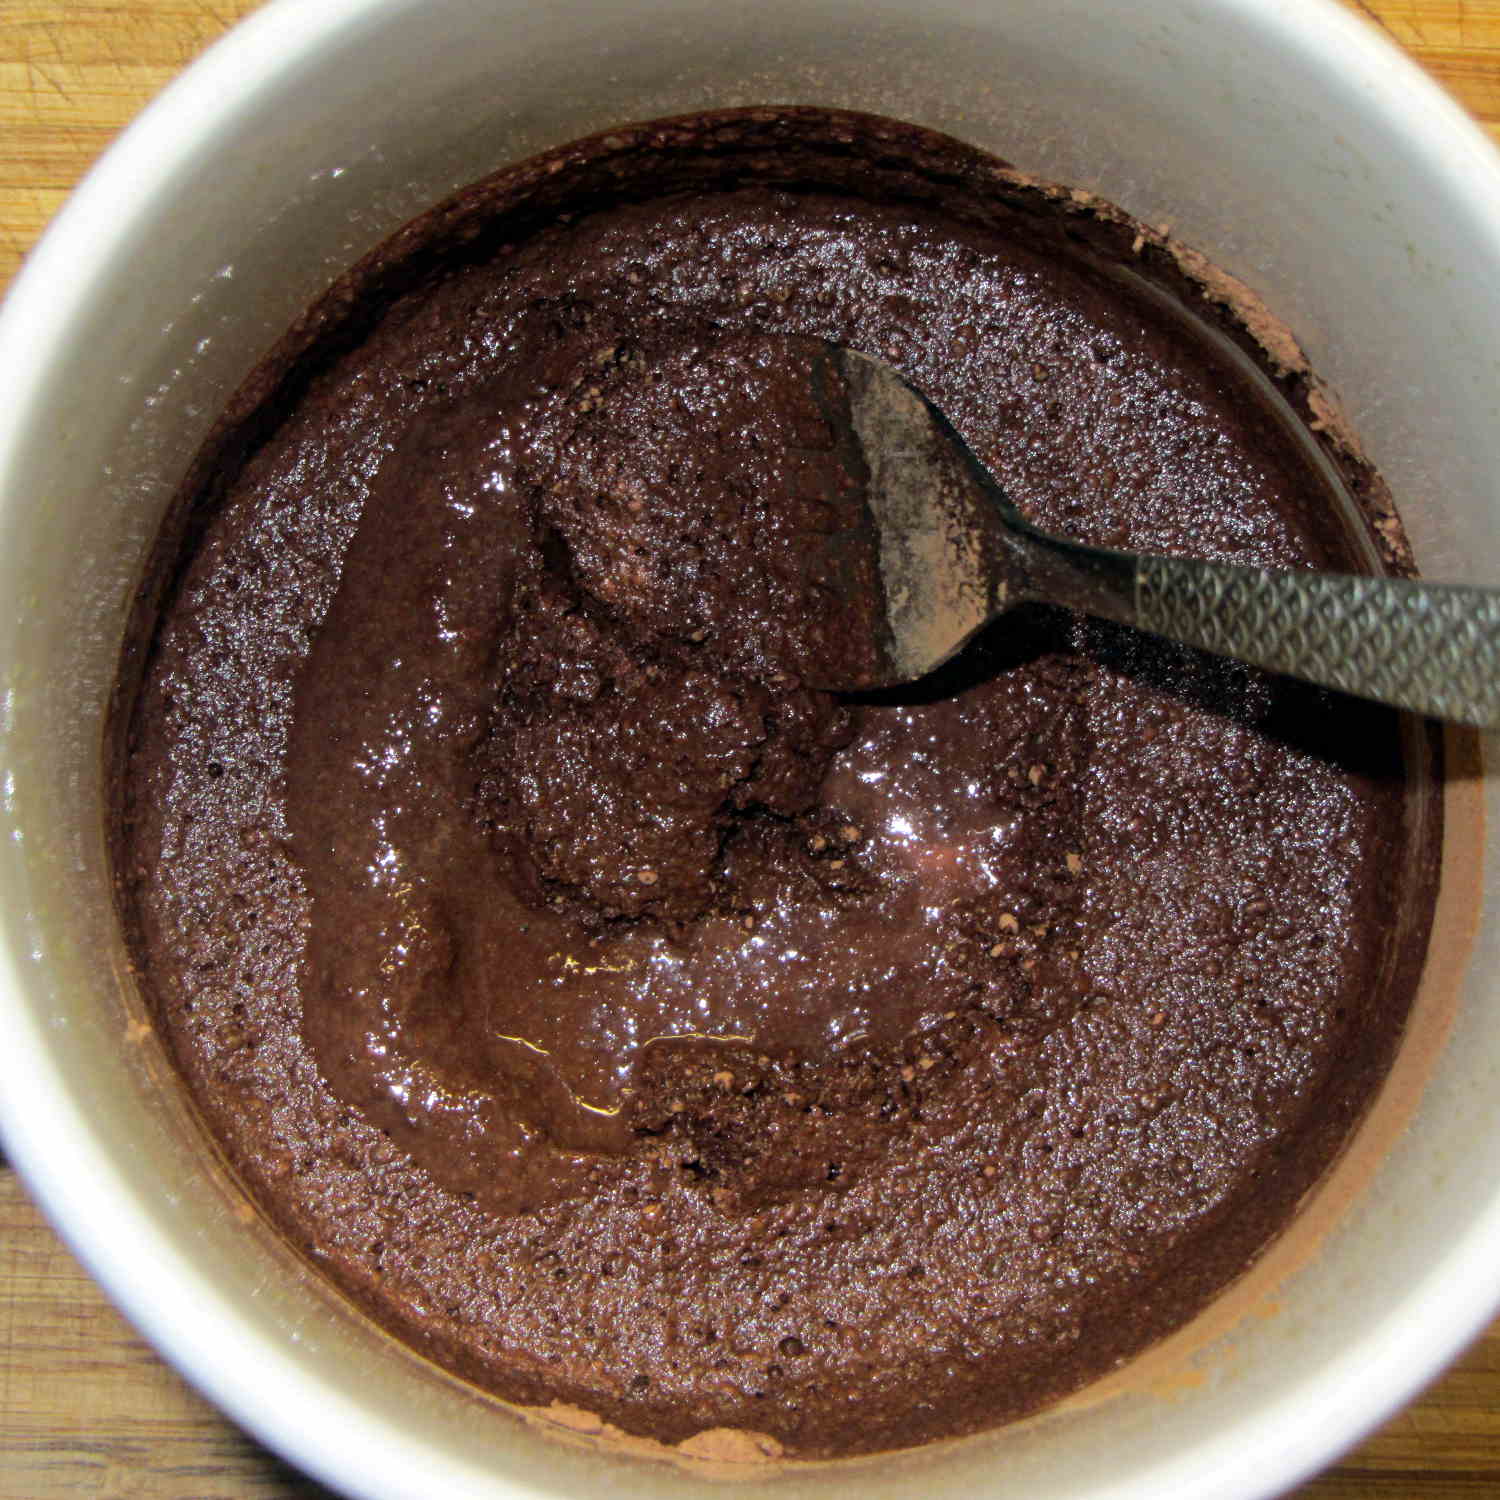
It turns out that non-alkalized / non-Dutch-process cocoa has a much lower surface energy than good old Hershey’s, to the extent that my Fireball Cocoa Recipe produces powder bombs, even after far more stirring than I’m willing to exert.
The trick is to stir the mud for a while, then let it set for 15 minutes:
Cocoa mud
That apparently gives the cocoa time to get along with the milk and join forces. Stir it up again, let it sit for a few minutes, then proceed with the recipe: smooooth cocoa with no powder bombs.
A bit more Vietmamese cinnamon is no bad thing, either …
At least on my network, disabling the IPv6 functions makes Avahi start up faster. You do that by tweaking the obvious IPV6 line in /etc/avahi/avahi-daemon.conf:
Sorta like wedding pictures: you can expose for the groom-in-black or the bride-in-white, but not both at the same time.
The wireless keypad does not have a slot for the USB radio: put ’em in a bag to keep ’em together when not in use.
The general idea is to create a standard name (/dev/input/keypad) for either keypad when it gets plugged in, so the program need not figure out the device name from first principles. This being an embedded system, I can ensure only one keypad will be plugged in at any one time.
The wired keypad has an odd name that makes a certain perverse sense:
That may be because the 0x06a2 Vendor ID was cloned (that’s pronounced “ripped-off”) from Creative Labs. My guess is they ripped the entire chipset, because the 0x4101 device ID came from a Creative Labs wireless keyboard + mouse:
lsusb
... snippage ...
Bus 001 Device 011: ID 062a:4101 Creative Labs
... snippage ...
Because it’s a dual-mode wireless device, we need more information to create the corresponding udev rule. The keyboard part appears (on this boot) as event0, which we find thusly:
ll /dev/input/by-id
total 0
lrwxrwxrwx 1 root root 9 Feb  5 17:39 usb-Burr-Brown_from_TI_USB_Audio_CODEC-event-if03 -> ../event1
lrwxrwxrwx 1 root root 9 Feb  5 17:39 usb-MOSART_Semi._2.4G_Keyboard_Mouse-event-kbd -> ../event0
lrwxrwxrwx 1 root root 9 Feb  5 17:39 usb-MOSART_Semi._2.4G_Keyboard_Mouse-if01-event-mouse -> ../event2
lrwxrwxrwx 1 root root 9 Feb  5 17:39 usb-MOSART_Semi._2.4G_Keyboard_Mouse-if01-mouse -> ../mouse0
Some spelunking suggests using the environment variables set up by the default udev rules, which we find thusly:
sudo udevadm control --reload
sudo udevadm trigger
And then It Just Works:
ll /dev/input/by-id
total 0
lrwxrwxrwx 1 root root 9 Feb  5 17:39 usb-Burr-Brown_from_TI_USB_Audio_CODEC-event-if03 -> ../event1
lrwxrwxrwx 1 root root 9 Feb  5 19:03 usb-MOSART_Semi._2.4G_Keyboard_Mouse-event-kbd -> ../event0
lrwxrwxrwx 1 root root 9 Feb  5 19:03 usb-MOSART_Semi._2.4G_Keyboard_Mouse-if01-event-mouse -> ../event2
lrwxrwxrwx 1 root root 9 Feb  5 19:03 usb-MOSART_Semi._2.4G_Keyboard_Mouse-if01-mouse -> ../mouse0ll /dev/input

ll /dev/input
total 0
drwxr-xr-x 2 root root     120 Feb  5 19:03 by-id
drwxr-xr-x 2 root root     120 Feb  5 19:03 by-path
crw-rw---- 1 root input 13, 64 Feb  5 19:03 event0
crw-rw---- 1 root input 13, 65 Feb  5 17:39 event1
crw-rw---- 1 root input 13, 66 Feb  5 19:03 event2
lrwxrwxrwx 1 root root       6 Feb  5 19:03 keypad -> event0
crw-rw---- 1 root input 13, 63 Feb  5 17:39 mice
crw-rw---- 1 root input 13, 32 Feb  5 19:03 mouse0
My configuration hand is strong…
Note: Once again, I manually restored the source code after the WordPress “improved” editor shredded it by replacing all the double-quote and greater-than symbols inside the “protected” sourcecode blocks with their HTML-escaped equivalents. Some breakage may remain and, as always, WP can shred sourcecode blocks even if I don’t edit the post. They’ve (apparently) banned me from contacting Support, because of an intemperate rant based on years of having them ignore this (and other) problems. I didn’t expect any real help, so this isn’t much of a step backwards in terms of actual support …
Mostly, I don’t worry about the accumulation of old kernels building up in /boot and sudo apt-get autoremove may scrub most of them, but sometimes it doesn’t when I’m doing something else and I must wade through the accumulation of old packages in Synaptic. Removing all those packages by hand gets tedious, but I’m reluctant to unleash a rarely used script on the clutter for fear of creating a worse problem.
The iterator in this burst of Bash line noise:
for f in $(ls /boot | grep vmlinuz | cut -d\- -f2,3 | sort | head -n -1) ; do dpkg -l | grep "^ii\ \ linux-" | grep $f | cut -d" " -f 3 >> /tmp/pkgs.txt ; done
… parses the list of kernels in /boot into version numbers, finds the corresponding installed packages, sorts them in ascending order, discards the last entry so as to not uninstall the most recent kernel, and passes each line of the resulting list into the loop.
N.B: The grep argument has two spaces after the ii that WordPress would destroy without the escaping backslashes. You can try "^ii linux-", but if the loop puts nothing in the file, that’s why.
Given each kernel version number, the loop extracts the package names from the installed kernel packages and glues the result onto a file that looks like this:
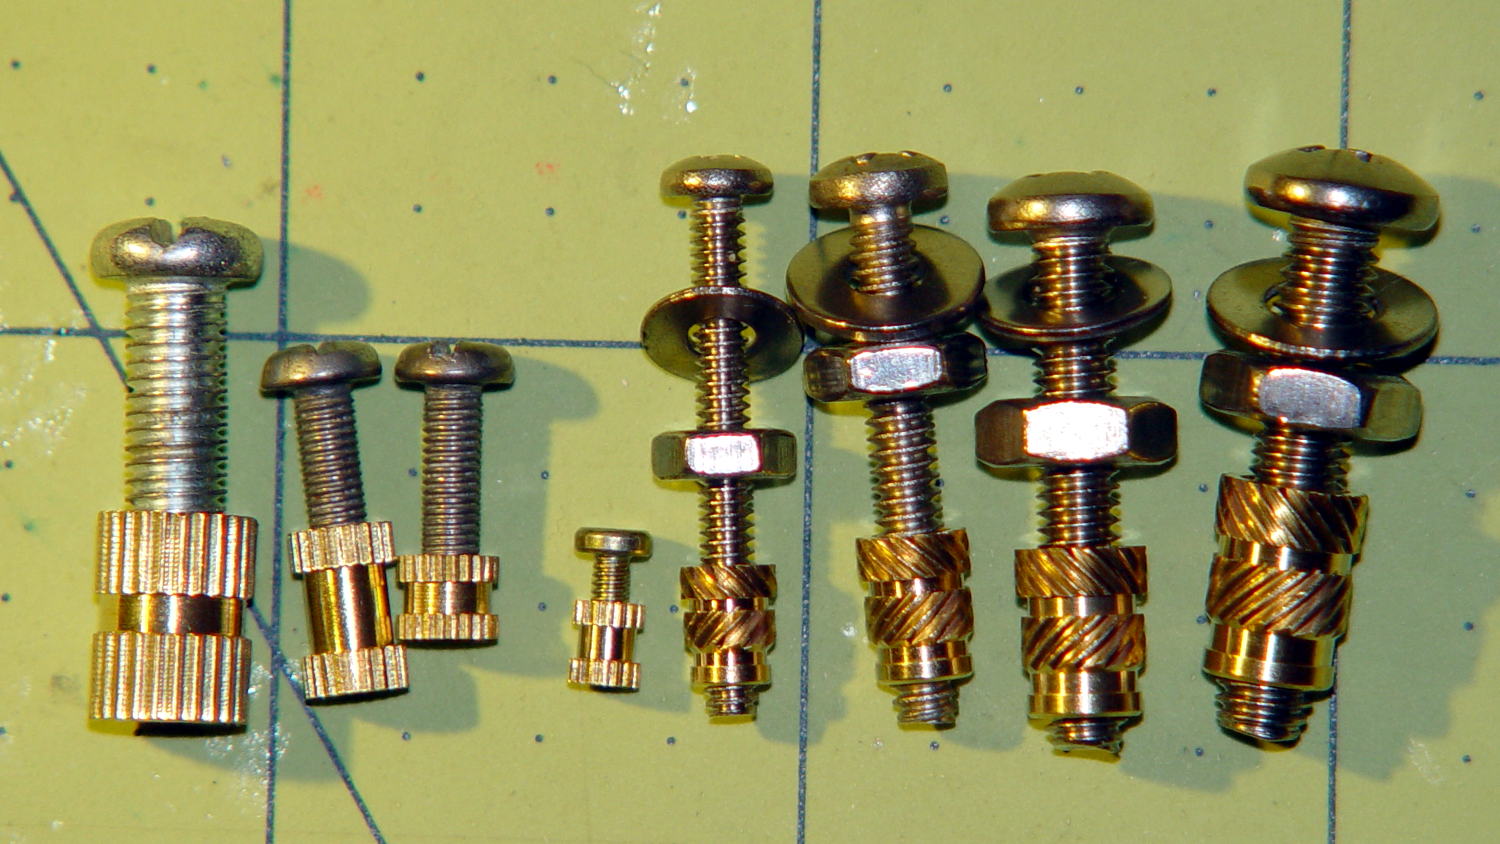
The nice stainless steel screws on the right range from 4-40 to 10-32, which suffice for nearly everything I build around here.
Unlike the splined metric inserts on the left, these inserts have actual knurls and ridges that should hold them firmly in place. The specs give hard-inch dimensions, of course, that (seem to) correspond to the root diameter of the knurls. You can find nice engineering drawings of precise tapered holes (by drilling down into the Heat-Set Inserts for Plastics item on that page), but a few metric measurements of the actual parts on hand should suffice for my simple needs.
Thread: overall length x small rim OD x (knurl length x larger knurl OD)
4-40: 5.8 x 3.9 x (4.0 x 4.6)
6-32: 7.1 x 4.7 x (4.6 x 5.5)
8-32: 8.1 x 5.5 x (5.9 x 6.3)
10-32: 9.5 x 6.3 x (7.0 x 7.1)
Rather than fussing with a tapered hole, just punch a cylinder with the small rim OD (to clear the screw) through the part and put a cylinder with the knurl OD x length at the surface.
Using cylinders without diameter correction will make them slightly undersized for heat bonding. The usual 3D printing tolerances don’t justify anything fussier than that.
Using PolyCyl diameter correction will make the holes nearly spot on for epoxy bonding: butter ’em up, ram ’em in, pause for curing, done.