Ed Nisley's Blog: Shop notes, electronics, firmware, machinery, 3D printing, laser cuttery, and curiosities. Contents: 100% human thinking, 0% AI slop.
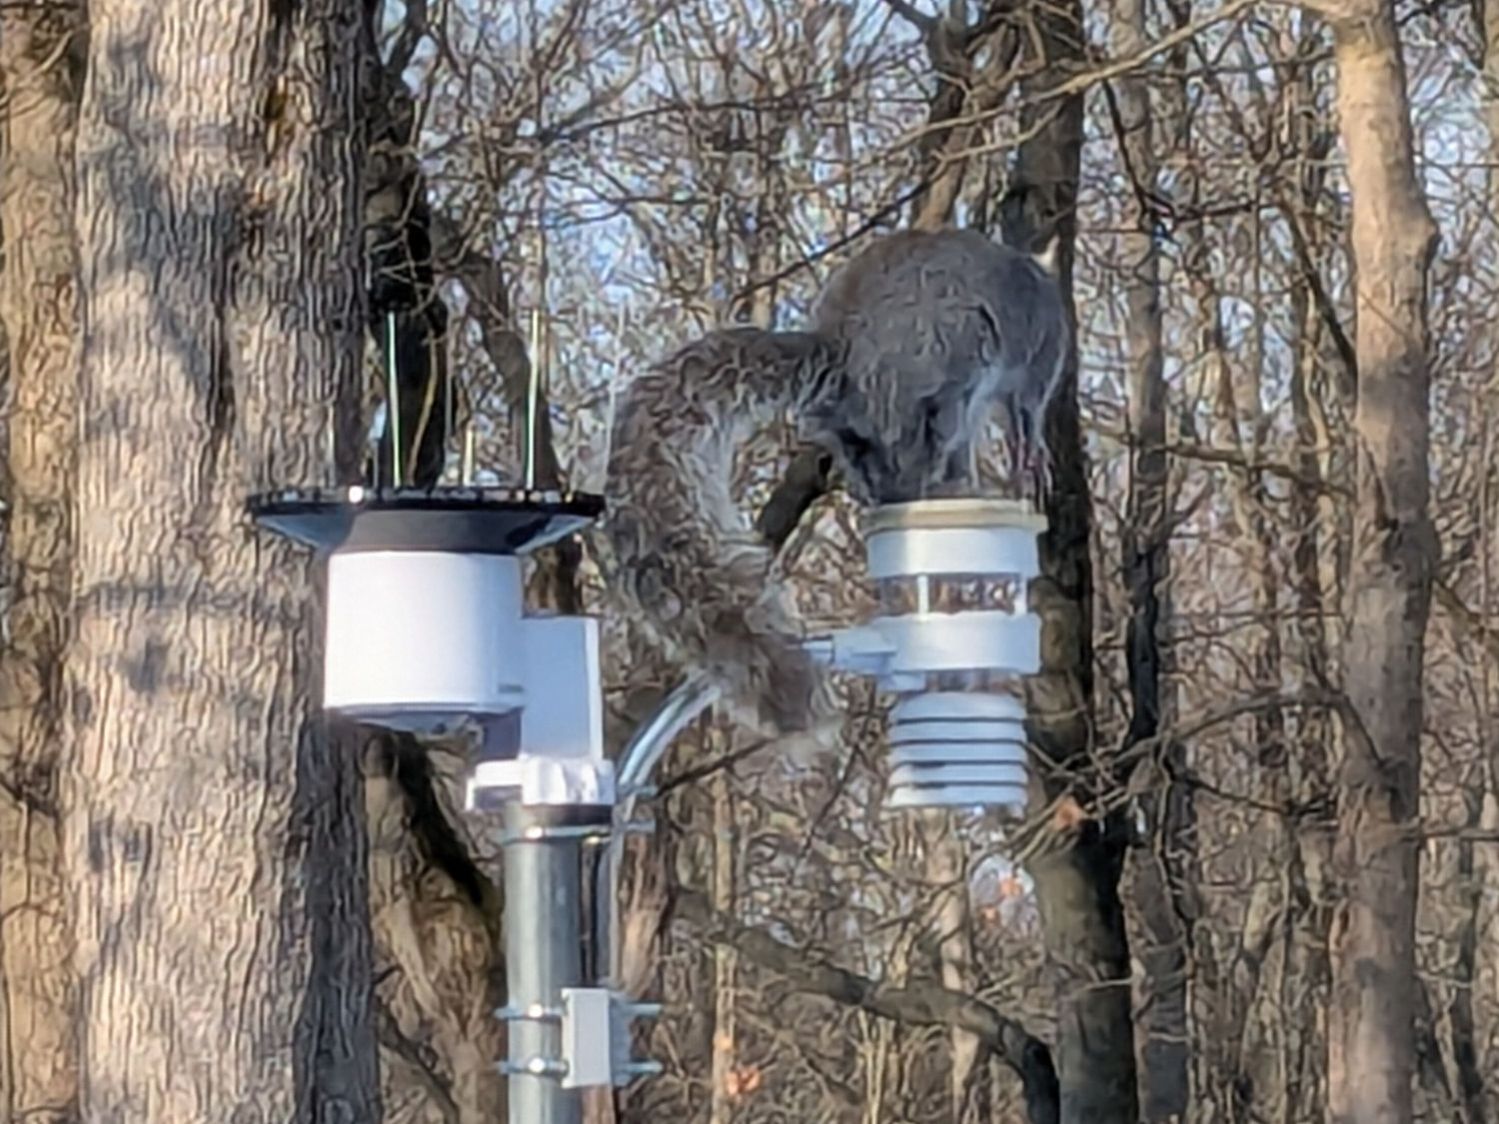
The deer managed to unfurl enough tongue to reach over the edge, but the birds leave very few intact seeds and I suspect the result was just a mouthful of dry hulls.
The woods beyond that large tree is Vassar College territory, with its conspicuous lack of undergrowth due to the overly large deer population eating essentially everything. Vassar has an annual deer cull in the Preserve, but plenty of deer remain in the surrounding area and it’s not unusual to see six deer browsing in our yard.
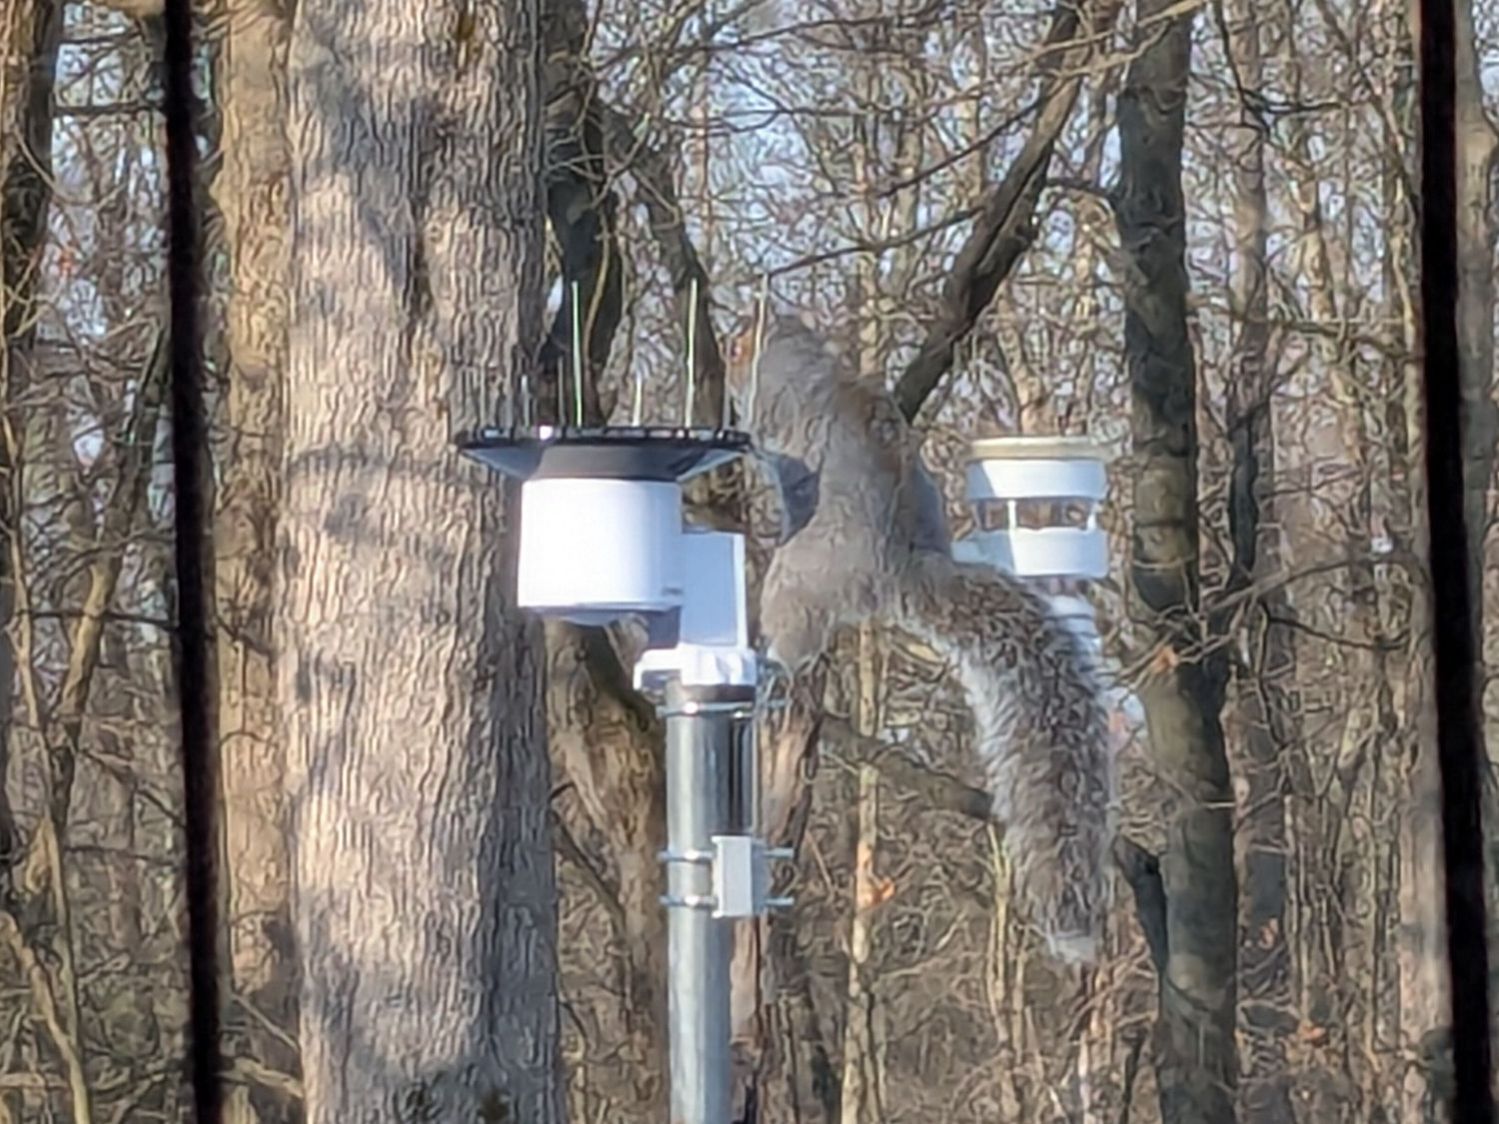
Chickadees can perch between the wires and squirrels apparently just ignore the sharp ends:
Squirrel on WS-5000 Anemometer spikes
No matter how hard that squirrel looked, there were no nuts to be found anywhere in that tree. Moments later it ran down the pole and loped across the yard to forage under the seed feeder.
The terrible picture quality comes from a Pixel 6a phone camera zoomed all the way tight. I want an optical telephoto lens built into the phone, but those phones seem intended to reduce the risks of having severe wallet overpressure.
(The last three digits in the caption tick along at 60 frame/s. Opening each iamge in a new tab will let you embiggen the details, although the images aren’t all that great.)
The second wingbeat, over on the left, is more visible as the hawk lifts off:
Hawk with snake 2025-11-04 – 112
This was about when I figured out what was going on:
Hawk with snake 2025-11-04 – 151
A hawk can easily outfly me!
Hawk with snake 2025-11-04 – 207
The snake dangling from the hawk’s talons didn’t see it coming, either:
Hawk with snake 2025-11-04 – 213
Up and away!
Hawk with snake 2025-11-04 – 225
About 2.3 s of elapsed time: plenty for a hawk and not nearly enough for me. Or the snake, for that matter.
The day after I set up the Wasp Blower, the carnage was terrible to behold:
Wasp Blower – carnage
Two weeks later, the blower is chopping up two or three wasps each day.
As far as I can tell, the blower killed essentially every wasp leaving the nest and most of the returning foragers:
Wasp Blower – shattered wasps
After two weeks, (nearly?) all of the eggs remaining in the nest have hatched, the larvae / pupae have starved for lack of incoming food, and I’ve put out ant bait traps to discourage scavengers.
The plan is to keep running the blower until a week goes by without any kills, then seal the crack under the door sill.
I have no idea how the queens (Yellowjacket wasp nests have multiple queens!) are doing in there, but they must be getting pretty hungry and, we hope, will not survive the winter.
This makes me feel awful, but not nearly bad enough to regret dealing with the critters.
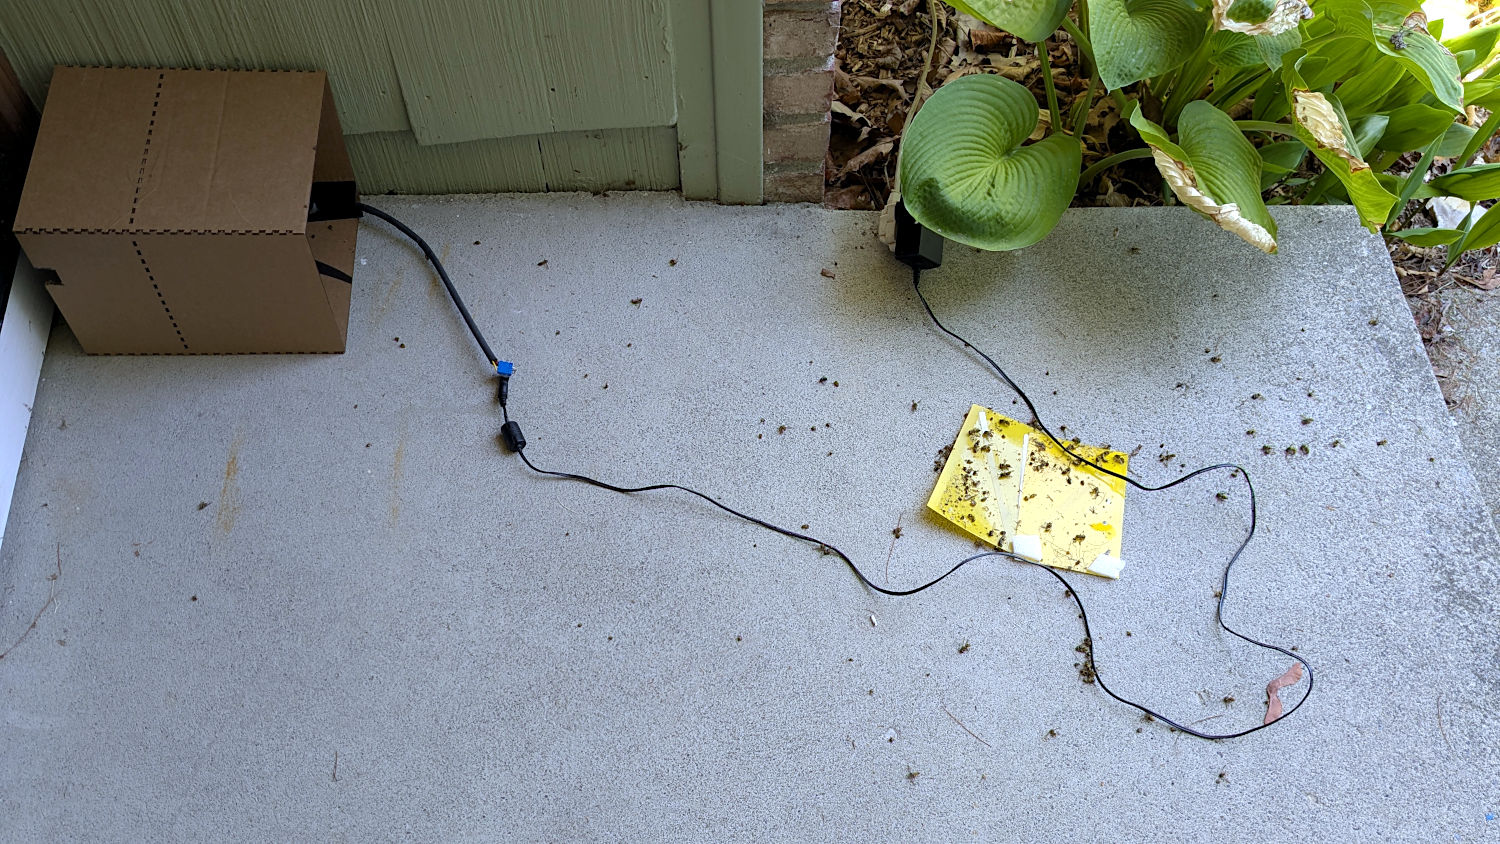
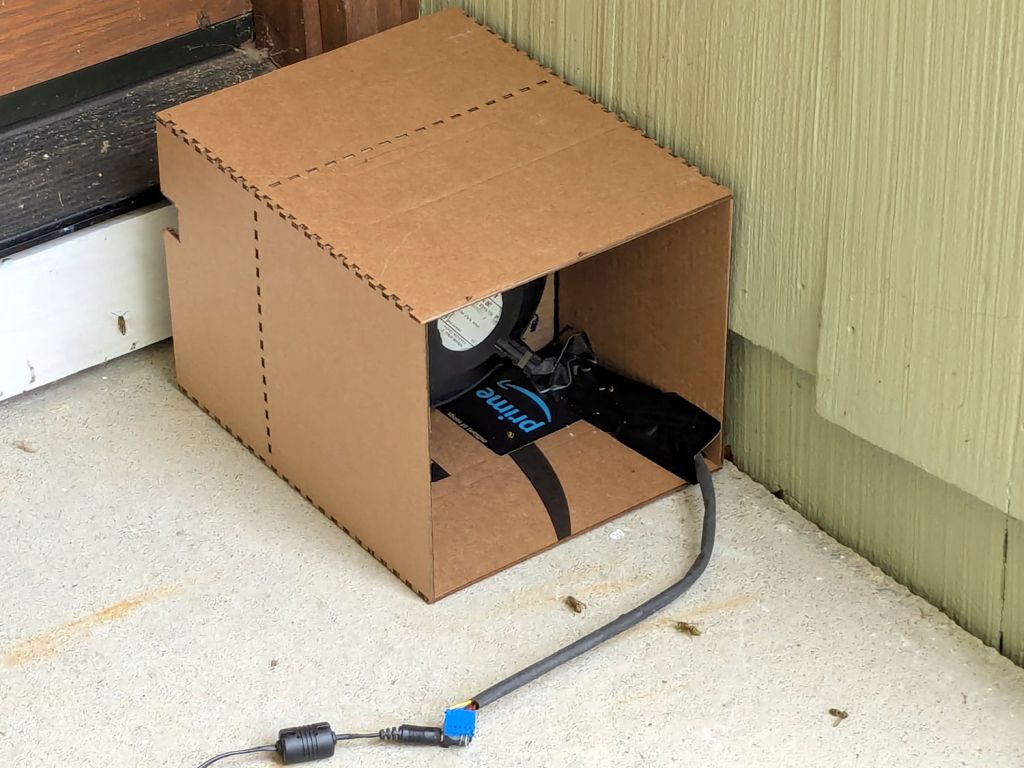
A colony of Yellowjacket wasps moved into a gap somewhere inside our front door, which we noticed only after they set up a heavy traffic pattern over the front step. The nest is far enough up inside the door frame (or, shudder, the wall) to be immune to rattlecan insecticide spray and the wasps simply tiptoe across sticky-trap sheets laid on their entrance paths.
That’s a hulking 12 V electronics case fan mounted on a cardboard bulkhead inside what’s basically a tunnel, with its power supply plugged into a widowmaker extension cord screwed into the light fixture next to the door.
The fan blows away from the door, with the general idea of killing wasps leaving the nest. Arriving wasps can walk home around the box, but departing wasps always take flight from the small crack under the door sill, whereupon they’re sucked into the fan, shattered by the blades, and blown out onto the step.
A Yellowjacket can make headway into a 1 m/s wind, but not for very long, which explains why most of them prefer walking home.
The carnage looks awful, so it seems to be working …
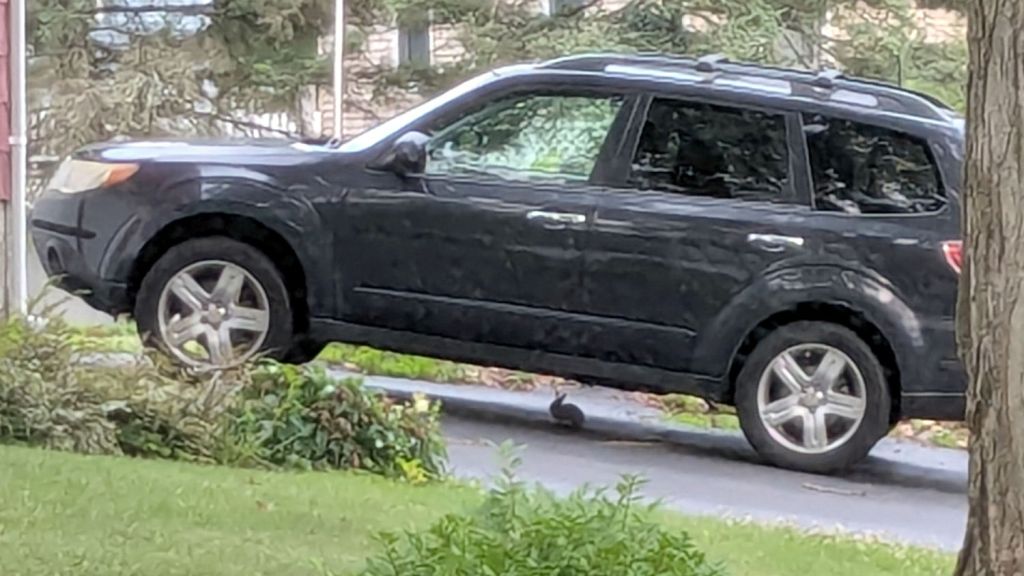
We’ve seen several new rabbits munching greenery in the back yard, but this little one may be studying auto repair under our neighbor’s car:
Rabbit – automotive hiding place
Unlike mice, even a small rabbit won’t take up residence in the air cleaner.
The weird granulated look comes from a Pixel 6a camera zoomed all the way tight through two layers of 1960-era window glass at an acute angle. The bad camera you have is always better than the good camera you don’t.
A critter made off with our battered plastic rain gauge, so I set up an Ambient Weather WS-5000 station to tell Mary how much rain her garden was getting. I added the Official Bird Spike Ring around the rain gauge to keep birds off, but robins began perching atop the anemometer while surveying the yard and crapping on the insolation photocell.
After a few false starts, the anemometer now has its own spikes:
Weather station with additional spikes
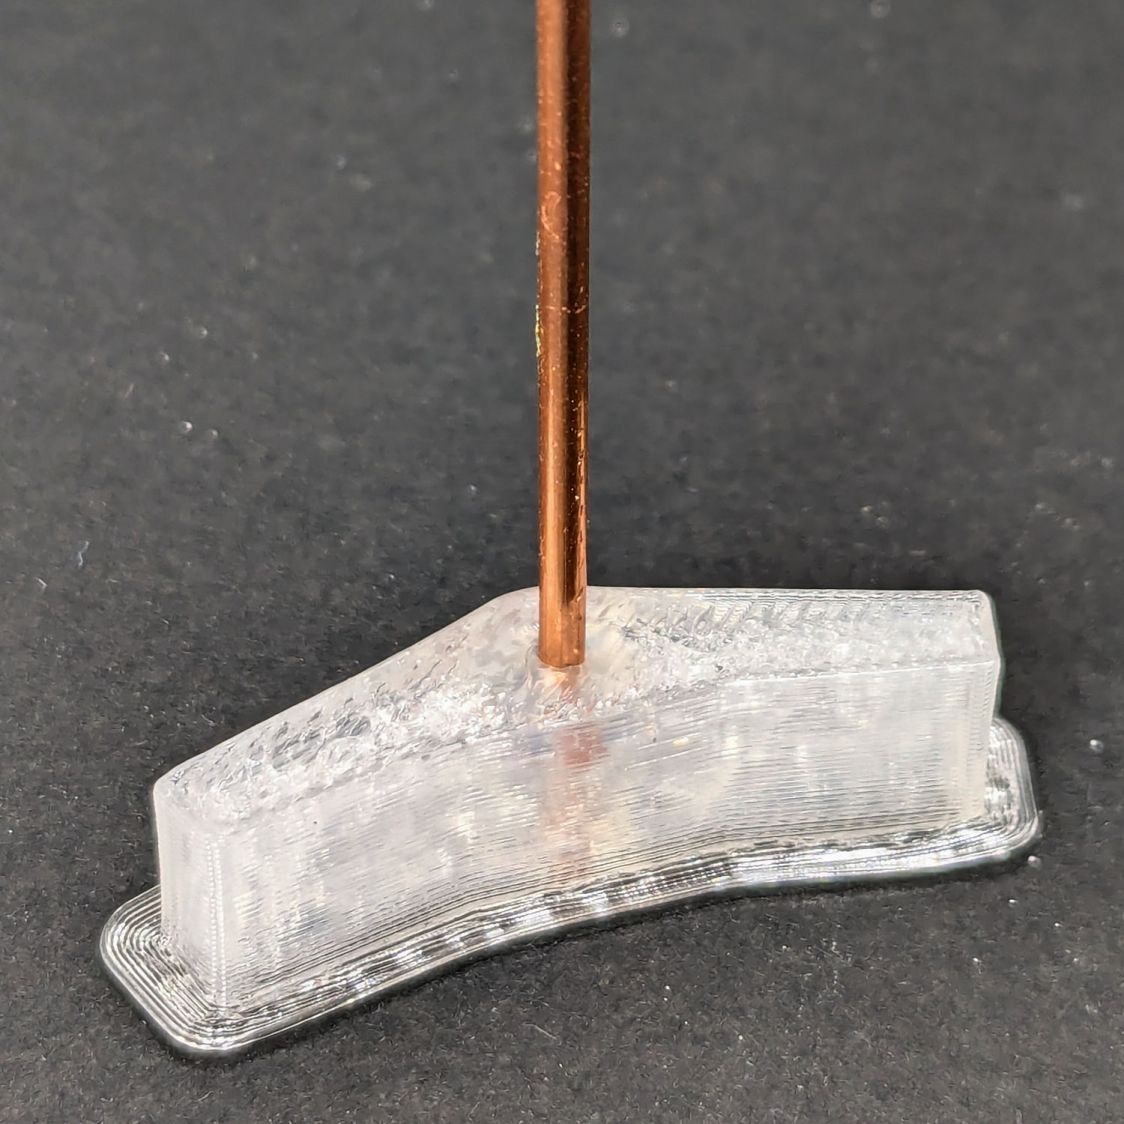
It’s a snugly fitting TPU ring:
Weather Station Spikes – build test piece
The spikes are Chromel A themocouple wire, because a spool of the stuff didn’t scamper out of the way when I opened the Big Box o’ Specialty Wire. As you can tell from the picture, it’s very stiff (which is good for spikes) and hard to straighten (which is bad for looking cool).
The shape in the middle is a hole diameter test piece. Next time around, I’ll use thicker 14 AWG copper wire:
Weather station spikes – test piece
The test piece showed I lack good control over the TPU extrusion parameters on the Makergear M2, as holes smaller than about 2 mm vanish, even though the block’s outside dimensions are spot on. This application wasn’t too critical, so I sharpened the wire ends and stabbed them into the middle of the perimeter threads encircling the hole.
This file contains hidden or bidirectional Unicode text that may be interpreted or compiled differently than what appears below. To review, open the file in an editor that reveals hidden Unicode characters.
Learn more about bidirectional Unicode characters