Ed Nisley's Blog: Shop notes, electronics, firmware, machinery, 3D printing, laser cuttery, and curiosities. Contents: 100% human thinking, 0% AI slop.
A recent Manjaro update killed whatever magic held the passwords used for public-key ssh access from my desktop box, requiring me to remember the passords and type them correctly.
After considerable thrashing around doing what I thought I knew about ssh_agent (which, yes, was being autostarted to no avail), it seems that thread applies and the fix now requires creating /etc/profile.d/gcr-keyring.sh with this burst of line noise:
Whereupon, after a reboot presumably causing systemd to make the right thing perform the right act at the right time, It Just Worked™.
I used to have some mild sysadmin mojo, but obviously if you don’t do it all the time, everything you think you know becomes wrong.
The WordPress AI did generate an image based on the above text and the prompt linux overlapping windows on monitor:
WP AI Image – linux overlapping windows on monitor
Which looks a lot like those stock photos filling otherwise empty space in spammy web pages, doesn’t it? In point of fact, the AI Feedback on Post had this to say:
While the AI-generated image may align with the content, consider using original or more contextually relevant visuals to maintain the professional look of the website.
Couldn’t have put it better myself. Thank you, AI image & text generators, for your help.
What I do not understand is the lack of a license plate on that front bumper, here in New York State where front license plates are mandatory. I’ve noticed several Tesla vehicles (in their S3XY automotive series, among which I cannot distinguish) without front plates, so it must be a Tesla owner thing.
The WordPress AI image for this post gets the angular aspect right, along with the missing plate:
The Samsung over-the-range microwave (ME18H704SFS, should you care) that Came With The House™ coughed up a C-11 error code resolving to “replace the gas / humidity sensor”. Replacement DE32-60013A sensors are readily available, although if you’re expecting a Genuine Samsung Part from Amazon, that is not the universe I live in.
You can remove the upper front bezel from the microwave to reveal the slotted front cover of the compartment containing the sensor, but you cannot replace the sensor without extracting the microwave from above the stove and removing its shell. The bottom of the microwave sits about 18 inches above the stove, so I put a 16 inch cubical moving box (of which we have a near-infinite supply) on the stove to reduce the risk of dropping the mumble thing while removing it.
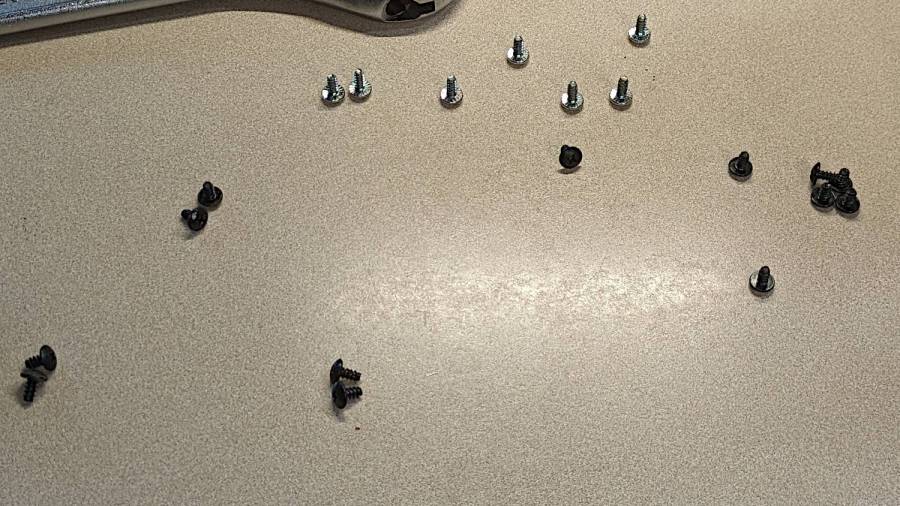
A total of 20 screws, here laid out in roughly geographic order, hold the shell to the inner frame:
Samsung microwave – cabinet screws
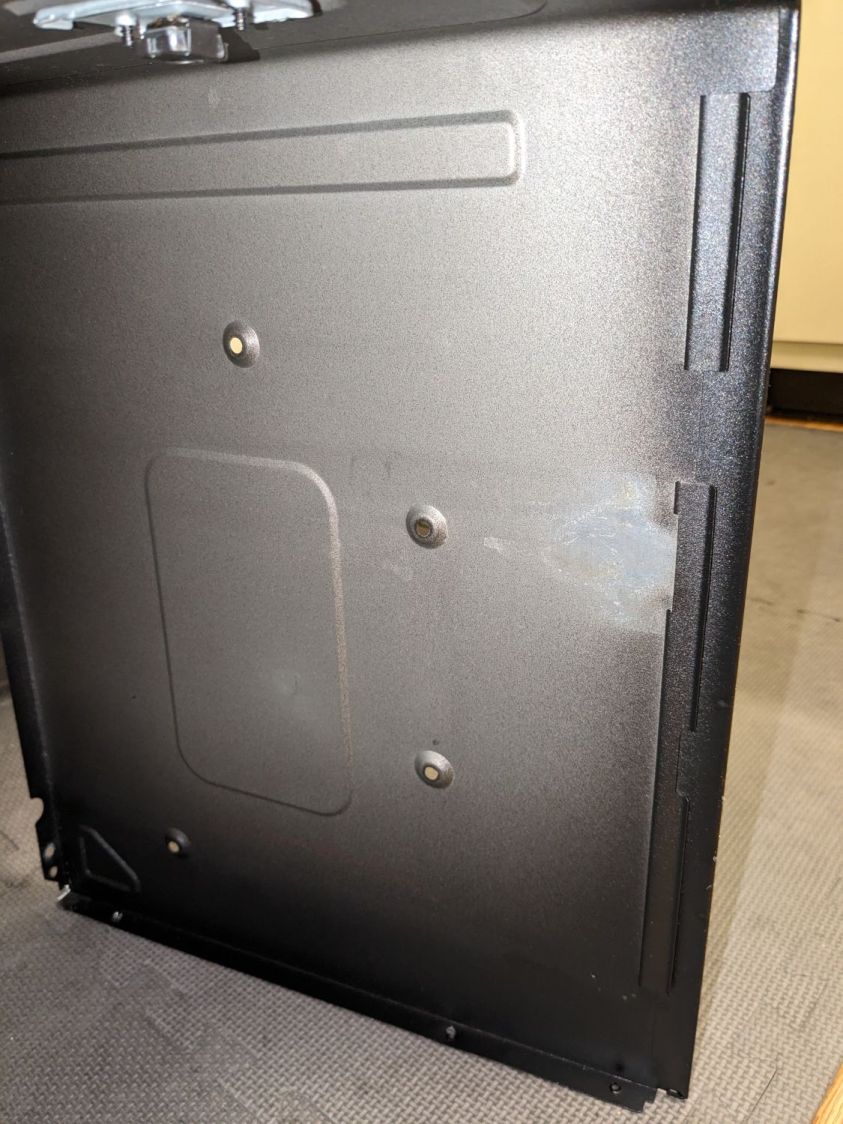
With all the screws out, slide the shell toward the rear by more than you might think to clear the latches along both sides. The latches along the front of the right side look like this:
Samsung microwave – shell side latches
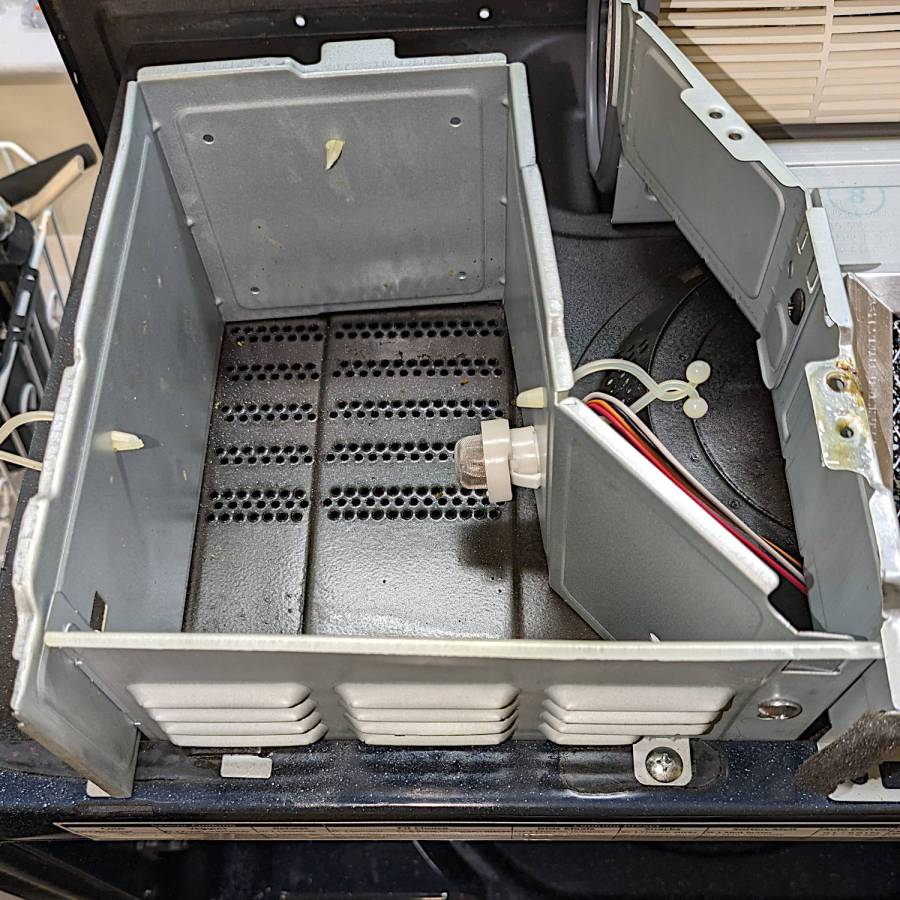
With the shell off, the sensor compartment on the top of the microwave enclosure is revealed:
Samsung microwave – TGS880 enclosure
Although you might think removing those two screws would grant access to the sensor compartment and let you replace the sensor (if you have very long fingers), that is not the case: the small tab toward the left side of the louvered front plate prevents you from sliding it and the plate is not hinged along its left side.
The sensor is held into the socket by a clip snapping into the arms that, in turn, hold the socket into the side wall:
Samsung microwave – TGS880 mount detail
A small screwdriver will assist in releasing the latches on the clip arms; squeezing them in the obvious way didn’t get the job done.
The old sensor then unplugs and the new one plugs in the obvious manner; it is not polarized and either orientation works.
For completeness, the top of the electronics bay:
Samsung microwave – top interior
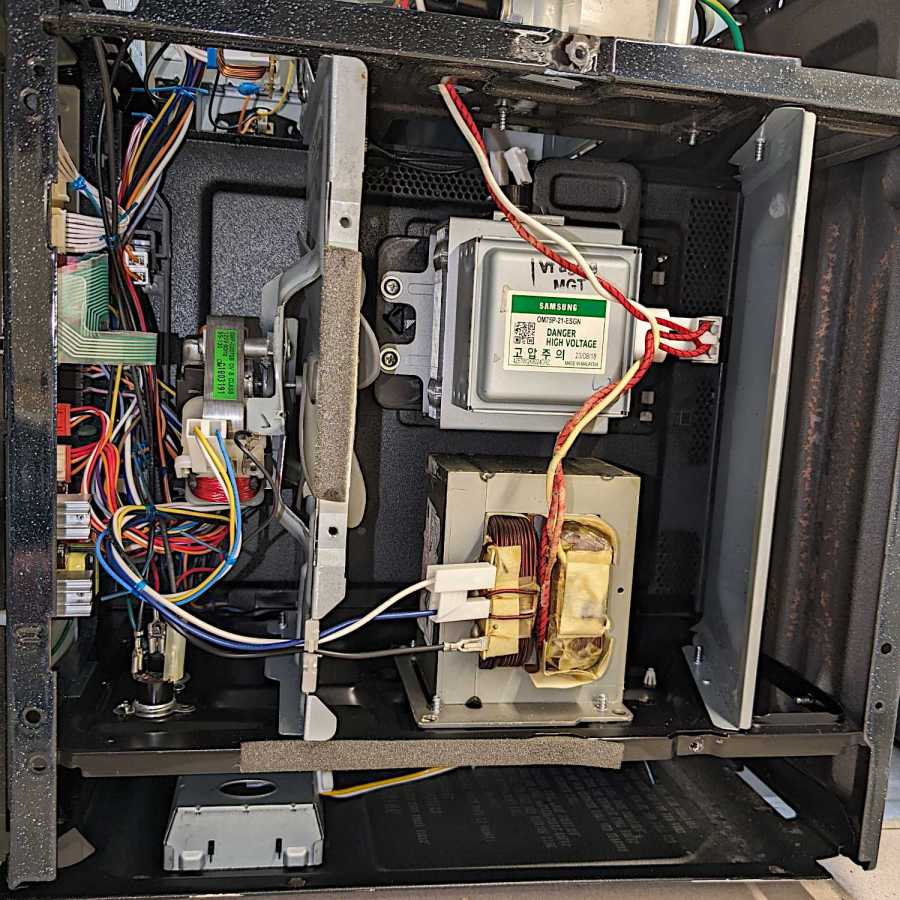
The magnetron and HV transformer live on the right side:
Samsung microwave – left interior
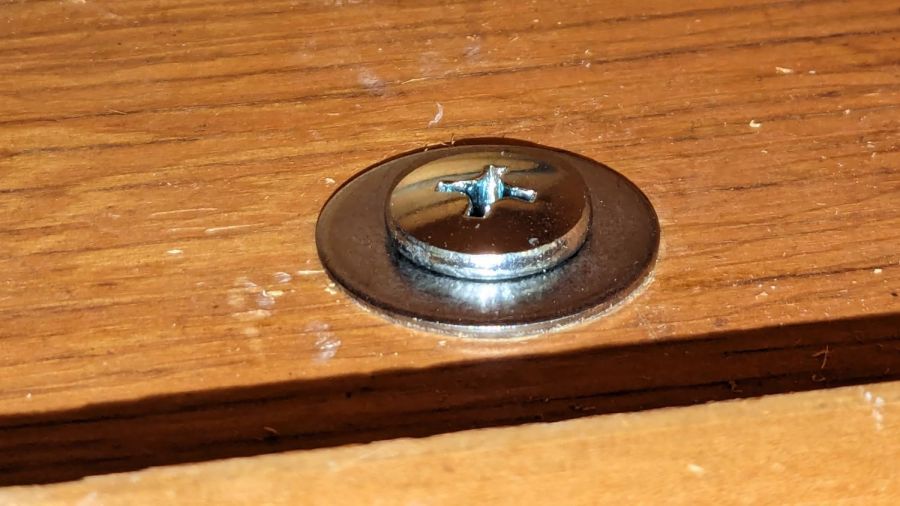
Then you reassemble in reverse order, heave the microwave atop the 16 inch cubical box, hoist it onto the rail along the back, and install the two loooong screws from the top while holding the front upward with one knee. I took the liberty of replacing the janky steel plates pretending to be washers with actual fender washers:
Samsung microwave – mounting screw
And now it works the way it should.
Of course, the microwave’s “beverage” mode assumes you’re drinking a piddly 8 ounces, rather than sipping from a manly 20 ounce mug:
Magnetic stirrer – vinyl surface
It heats 9 ounces of milk + cocoa just fine, but those 18 ounces of water for tea become just barely tepid.
WordPress has gone full-frontal AI and suggested I use this AI creation as the Featured Image:
The WordPress AI generated this evaluation of my writing:
The content provides a detailed guide on replacing the gas/humidity sensor in a Samsung over-the-range microwave. Consider adding subheadings to break down the process for easier reading. Additionally, including a brief introduction and a conclusion summarizing the key points would enhance the post. The technical details and images greatly support the instructions. Great job!
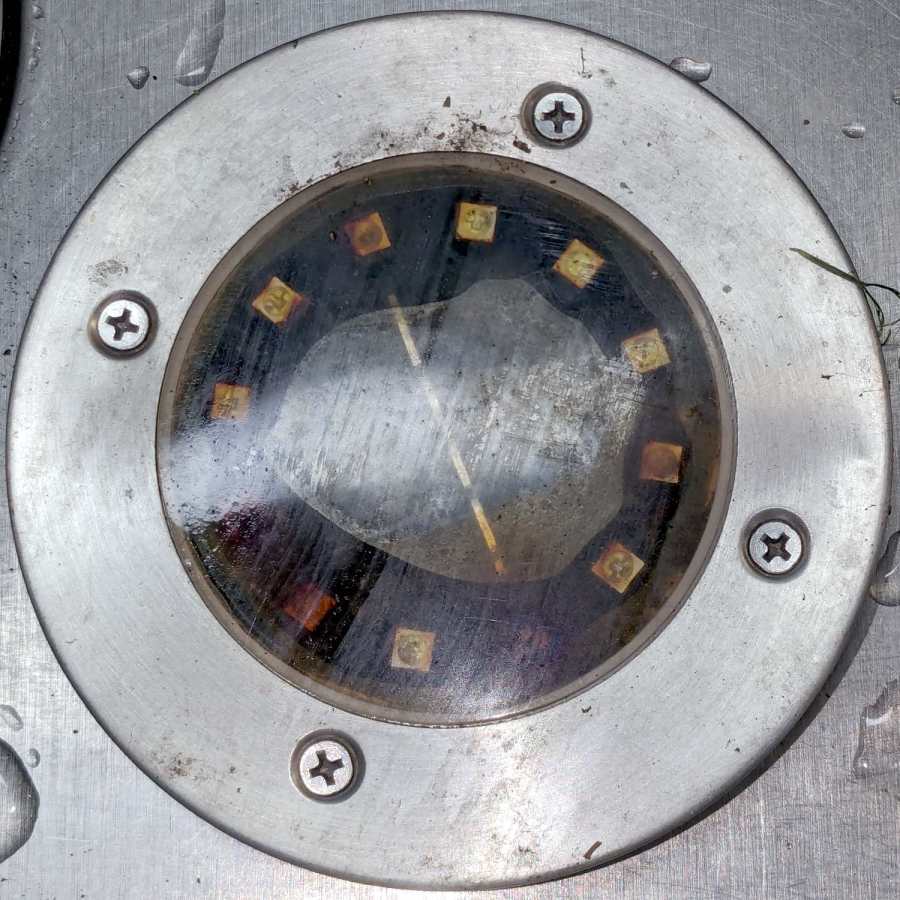
A solar yard / walkway light appeared in the far back reaches of the yard while mowing:
Solar yard light – bubble
Yes, that’s an air bubble in the middle, so you know the light hasn’t been staying in its Happy Place™.
As the djinn in the bottle put it, “Pop the top and let’s get started”:
Solar yard light – cover off
Those light emitting diodes around the photovoltaic cell in the middle can’t light up any more.
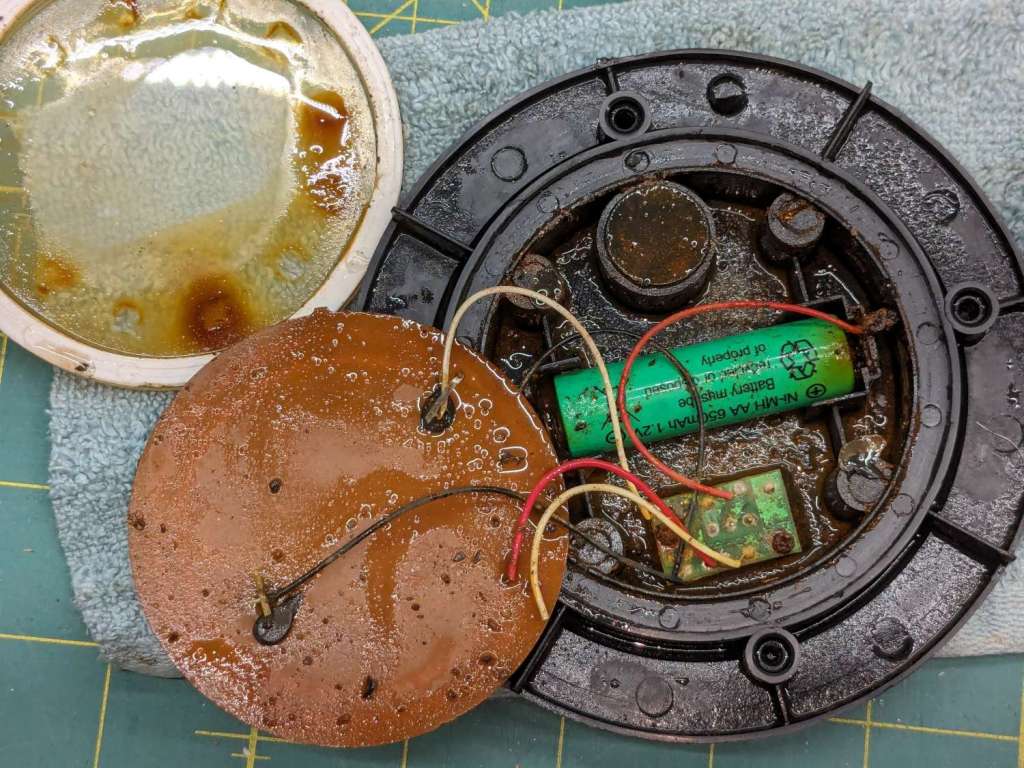
A little more effort with the Designated Prydriver reveals the guts:
Solar yard light – components
That’s an NiMH cell, so the light has been abandoned out there for quite a few years.
The photovoltaic element still worked, but the LEDs were defunct. The corpse will be a guest of honor at the next electronics recycling event down the road from here.
Someday, our great-to-the-nth grandchildren will curse our ways …
Our new-to-us house included a heavy-duty basement dehumidifier with a blower motor calling for a few drops of SAE 20 oil twice a year. Some searching turned up a specialized flavor of 3-In-One Oil for motors.
It arrived with free inclusions:
3-in-One Motor Oil – top inclusion
Backlighting makes them more obvious:
3-in-One Motor Oil – top inclusion – backlit
There’s also a free-floating jellyfish slightly denser than the oil:
3-in-One Motor Oil – bottom inclusion – backlit
As is now the typical case with Amazon purchases, the only choices are to return / exchange the item, as the seller cannot be contacted directly. I tried sending 3-In-One a question through their website, en passant discovering they’ve been Borged by The WD-40 Company, only to be rejected by the site’s Captcha without ever seeing the test images.
AFAICT, it’s oil and the motor will just have to get used to it.
As a temporary expedient while awaiting more outlets in the basement, I screwed several hundred watts of LED strip lighting to the floor joists so I could see where I was going:
First pass at basement lighting
The switch seemed to run warm, which I attributed to being snuggled up against one of the LED strips, eventually became intermittent, and finally failed with the lights out.
Prying apart the snapped-together case destroyed it, but that didn’t really matter when I saw the innards:
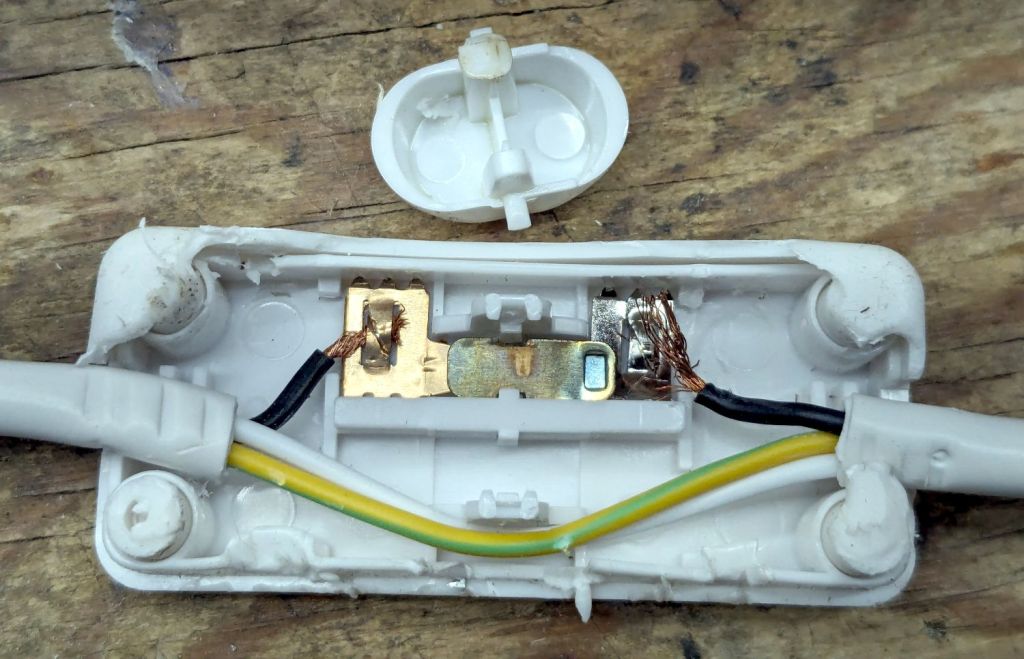
T8 LED power switch
The “intermittent” action came from the melted post on the switch actuator at the top of the photo. The “warm” came from the barely crimped black wire on the right side of the switch, which *might* have had half a dozen strands caught in the flattened crimp triangles.
I replaced it with an identical switch from the assortment that came with the lamps. That one seems to run cooler, although I doubt the crimps are really up to any reasonable quality standards.
In addition to adding basement outlets & lighting circuits, the rest of the house has some electrical wiring peculiarities; the kitchen microwave really shouldn’t share a circuit with the dining room lights.
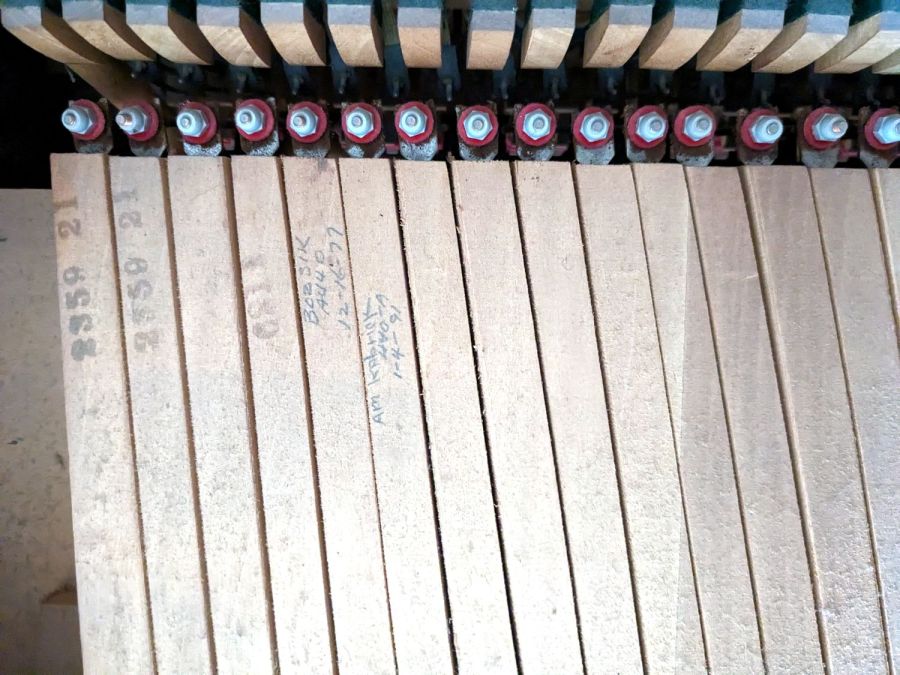
It’s apparently customary for piano tuners to annotate their work on the keys, starting after the serial numbers on the bass notes at the left end:
Piano tuner notes
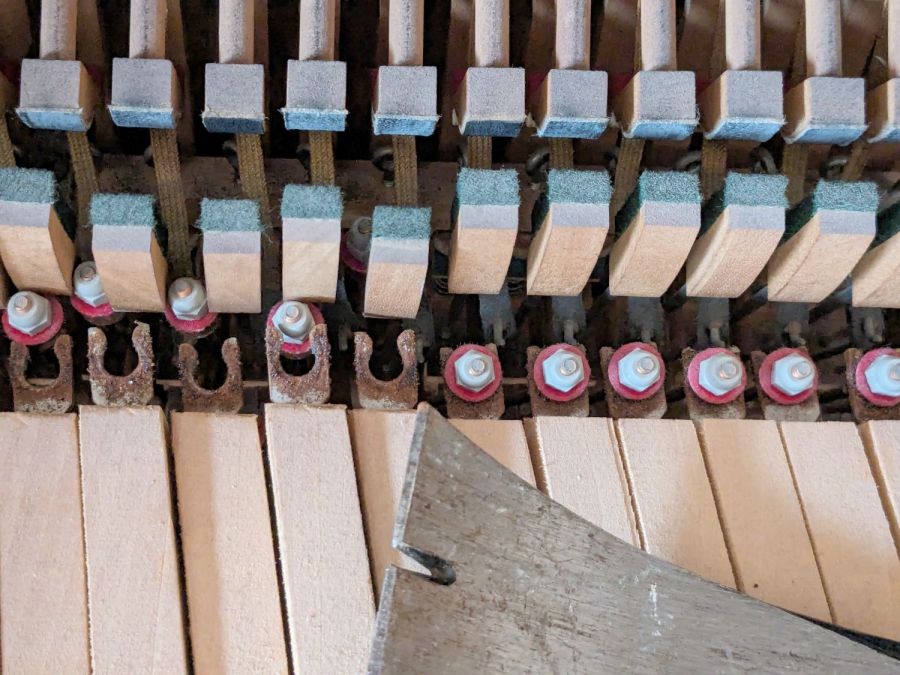
After admiring that, you can pop the hammer links off with a prybar:
Detaching piano keys
All 88 keys stack neatly into a Home Depot Extra Small moving box, filling it about 2/3 full, starting with the bass keys on the bottom:
Boxed piano keys
I harvested the lovely wood panels, then the scrapper hauled the carcass to the transfer station. Perhaps it raised the secret chord when it hit the bottom …
Lest you wonder why we didn’t try to contact X, who would surely be interested in a free piano: we did. Believe me, we tried, for many values of X, only to find nobody wants a piano in this day and age.