-
Layered Paper: Inkscape Random Block Setup
The random block layered paper design starts as an Inkscape layout, although the amount of manual intervention required to make it happen suggests it’s not really worthwhile. With that in mind, this is how to make it happen …
Draw a 9×9 mm square with these properties:
Undefinedfill: each block will become differentFlat colorstroke set to black with 100% alpha0.2 mmstroke width: so LightBurn will see it
Because the squares will be on 10 mm centers, draw a 159 mm square:
No fill(this is different fromUndefinedfill)Flat colorstroke set to LightBurnT2color0.2 mmstroke width
Align the big square on the grid, which should have 10 mm spacing because that’s convenient. This will become the way you align the array of squares in the LightBurn layout, so you really want the array to fit neatly and symmetrically inside the 159 mm square.
Iterate 16 times, all in
T2layer color:- Create a layer with a name like
H000throughH337 - Create a corresponding text string
- Align fussily
- Duplicate the 159 mm square
- Put the block and the text string on the new layer
- Lock the square and text so they can’t move
Which will look like this:

Random Blocks – 16×16 159mm – Inkscape layer labels Unlike LightBurn, the color is not linked directly to the layer, so each of those text strings is on the corresponding named layer and there are 16 duplicates of the large box at exactly the same coordinates. Plus the original 159 mm square, which remains unlabeled and unlocked.
Select the black 9 mm block and create a 16×16 clone
armyarray:
Random Blocks – 16×16 159mm – Inkscape clone setup The
Initial Coloris critical:
Random Blocks – 16×16 159mm – Inkscape clone color The layer names come from the 6.25% hue steps, starting with H=0, which will look like this:

Random Blocks – 16×16 159mm – Inkscape hue steps Note that LightBurn absolutely does not care about the colors. All it will get is the outlines corresponding to the strokes, with the colors collecting them into separate groups for the paper layers.
Go to the
Layerswindow, select the original block (which is likely onLayer 1or some such), cut it, and paste it somewhere outside the 159 mm square where it won’t cause any trouble.Iterate 16 times in the
Layerswindow:- Select one of the 256 clone squares, which will have an automagic name like
use1272 - Right-click, hit
Select Same → Fill Color - Right-click, hit
Move to Layer … - Pick the layer name matching the hue
Select all the squares and
Distributerandomly:
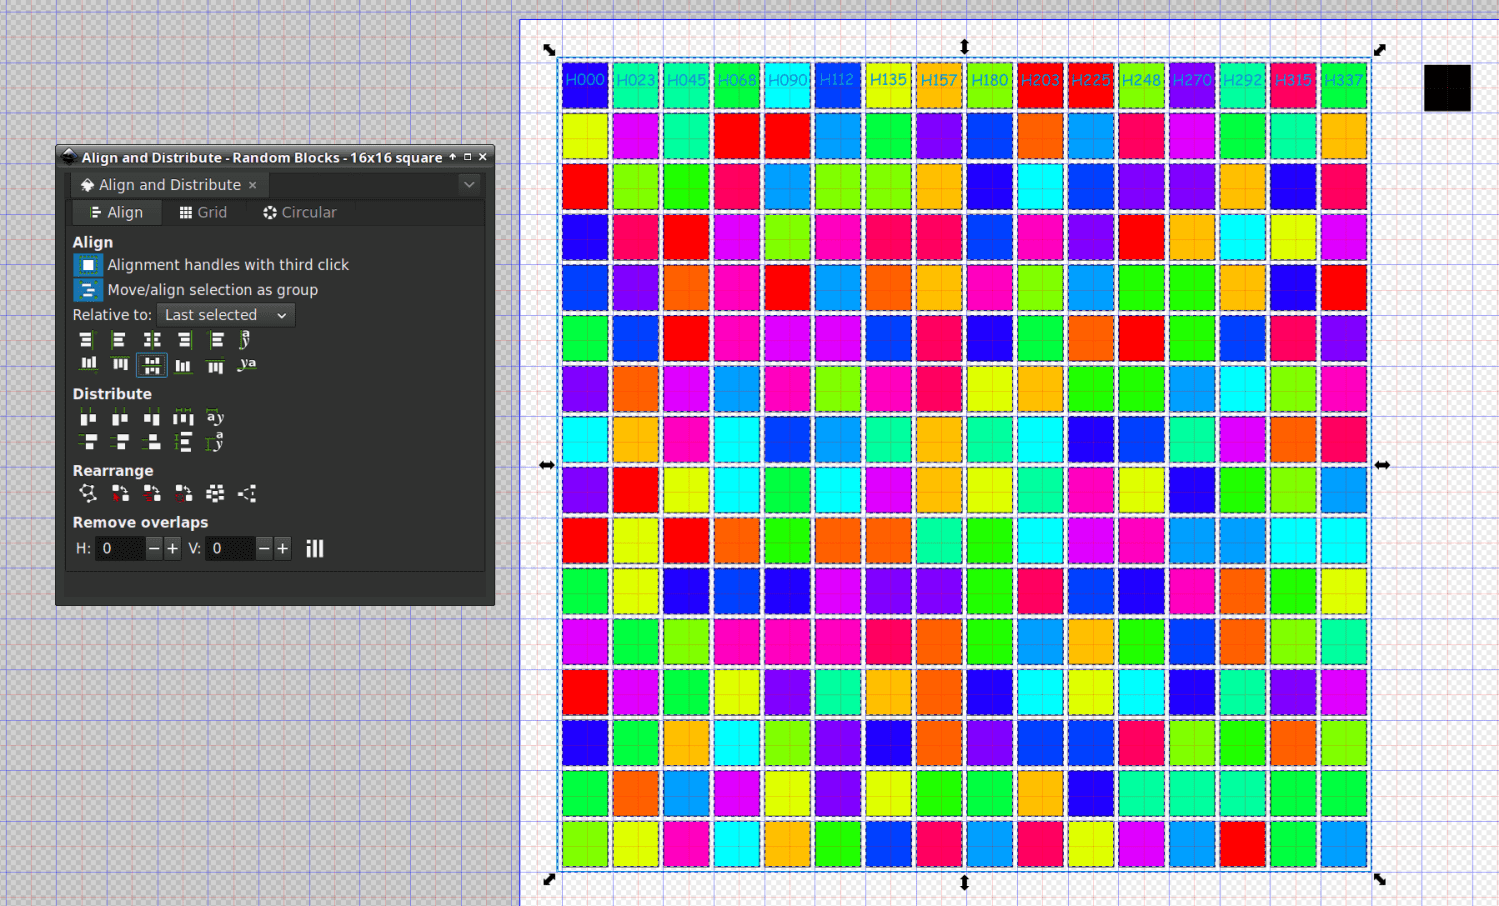
Random Blocks – 16×16 159mm – Inkscape rearrange Then
Alignthem in a grid:
Random Blocks – 16×16 159mm – Inkscape grid distribute The 0.8 mm
Spacingis the distance between 9 mm blocks with 0.2 mm strokes.Shift-click on the 159 mm square to add it to the selection, then hit the two center-align buttons to center the 16×16 array in the square:
Random Blocks – 16×16 159mm – Inkscape center align Save that sucker as an Inkscape SVG and it’s ready to import into lightBurn.
With all that done, you can generate different random layouts by:
- Select the existing 16×16 array (but not the outer 159 mm square;
Undois your friend) - Randomize the array
- Align it
- Center it
The colored blocks remain in their corresponding layers, so you need not go through all that overhead ever again.
Whether that’s worthwhile is up for grabs, but now I have a faint chance of getting it right the next time.
-
Subscribe
Subscribed
Already have a WordPress.com account? Log in now.
