Ed Nisley's Blog: Shop notes, electronics, firmware, machinery, 3D printing, laser cuttery, and curiosities. Contents: 100% human thinking, 0% AI slop.
If you’re building an Arduino shield, you must align the connectors & holes with the Arduino board underneath. That seems to be easy enough, assuming you start with the Eagle CAD layout found there, but when you’re starting with your own layout, then things get messy.
Here’s how to verify that you have everything in the right spot, at least for Diecimilla-class boards. Start by holding the Arduino board with the component side facing you, USB connector on the upper left. Rotate your own PCB layout appropriately or stand on your head / shoulders as needed.
With the exception of J3, the center points of the connectors & holes seem to be on a hard 25-mil grid with the origin at the lower-left corner of the board (below the coaxial power jack):
J3 (AREF) @ (1.290,2.000)
J1 (RX) @ (2.150,2.000)
POWER @ (1.550,0.100)
J2 (AIN) @ (2.250,0.100)
Upper-left hole = 0.125 dia @ (0.600,2.000)
Upper-right hole = 0.087 dia @ (2.600,1.400)
Lower-right hole = 0.125 dia @ (2.600,0.300)
Reset button = (2.175,1.065)
Offsets between points of interest:
connector rows Y = 1.900
right holes Y = 1.100
UL hole to UR hole = (2.000,-0.600)
UL hole to J3 X = 0.690
J3 to J1 X = 0.860
J3 to POWER X = 0.260
POWER to J2 X = 0.700
J1 to UR hole = (0.450,-0.600)
J2 to LR hole = (0.350,200)
Note that the three etched fiducial targets are not on the 25-mil grid. They’re not on a hard metric grid, either, so I don’t know quite what’s going on. Fortunately, they’re not holes, so it doesn’t matter.
Memo to self: perhaps I’ve measured & calculated & transcribed those values correctly. Double-check before drilling, perhaps by superimposing double-size PCB layouts on a light table or window. Finding it then is much less annoying than after drilling the board… ask me how I know.
Mary intercepted a complete, albeit defunct, garden fork on its way to the trash and brought it home for repair. It turns out that the handle’s socket had loosened and split around the tine shank, but all the pieces were pretty much in place.
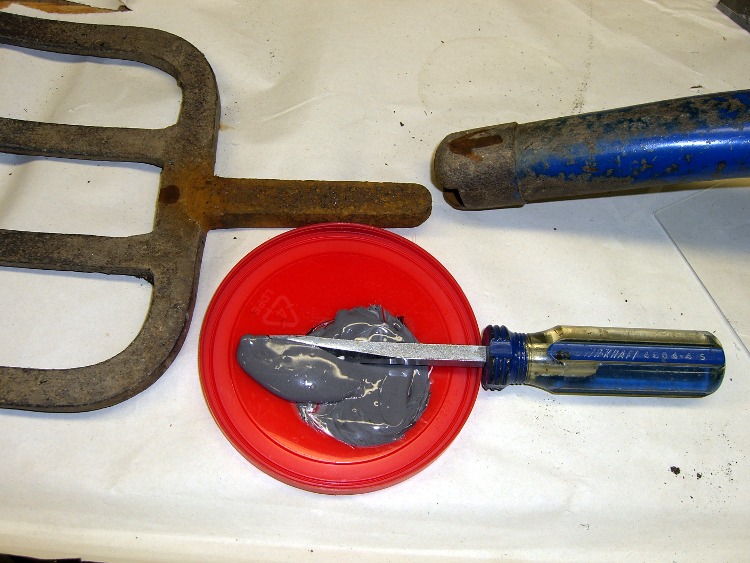
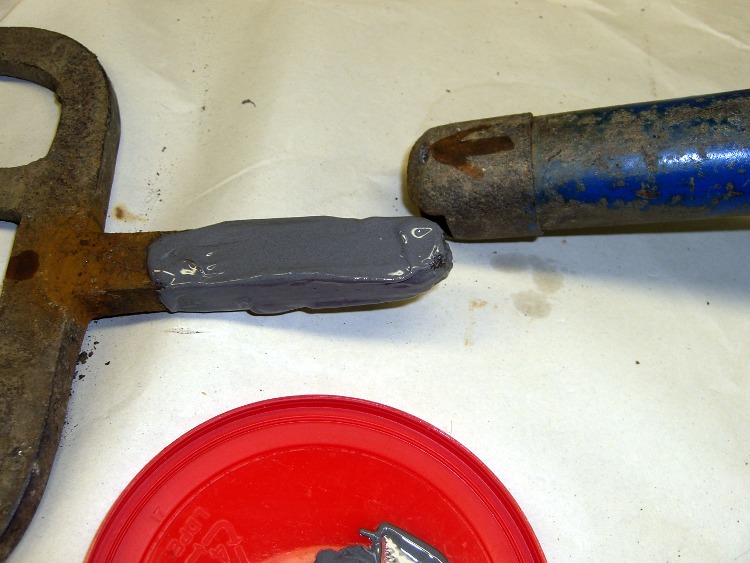
Mix the epoxy with my dedicated mixing screwdriver, butter up the shank, blob the excess epoxy into the socket, shove the parts together, clean off the outside globs, and let it cure overnight.
The trick is to get enough epoxy in the socket to fill the voids and mechanically lock the shank in place. This probably won’t work for forks used by burly guys who heave rocks over the horizon, but for our simple needs it’ll do just fine.
Pitchfork repair – epoxy mix
Pitchfork repair – buttering up the shank
Every now and again it’s OK to do an easy repair without a trace of CNC…
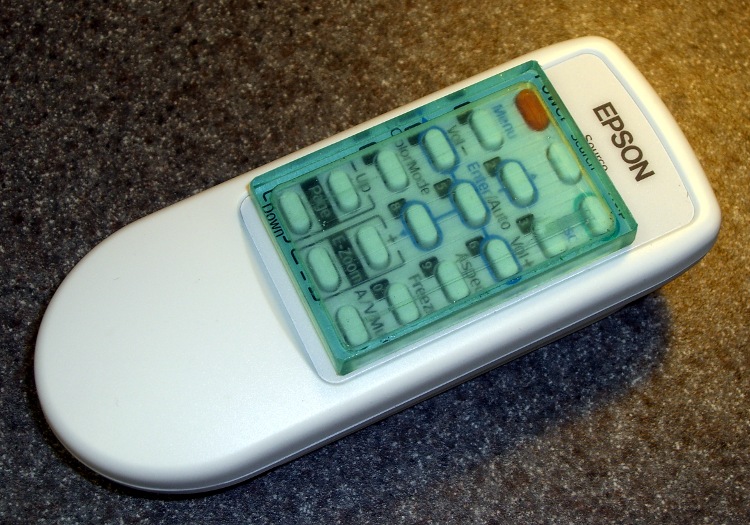
Mary was giving one of her vegetable gardening presentations and had the projector go into Mute mode all by itself. It’s hard to debug something like that under pressure, but (as nearly as we can tell) the projector’s remote control (!) got squashed inside the tote bag and managed to tell the projector to go mute itself…
The remote control has buttons that stand proud of the surface by about 2 mm and, worse, they’re exposed from all sides. There seems to be no way to turn the mumble thing off, other than by removing the batteries, so I conjured up a quick-and-dirty button shield. Not the fanciest thing I’ve ever made, but it’s sufficient for the purpose.
[Update: Apologies to all you Arduino fans who think this should have something to do with a remote-control circuit board plugged atop a Diecimila, but I think the Arduino designers could have picked a more descriptive term than “shield”. Plenty of folks seem to arrive here by searching for the obvious keywords and go away unhappy. If you’re looking for Arduino stuff, click on the obvious tag in the right-side column that’ll call up everything I’ve written about on the subject… ]
Sizing the perimeter
I thought about making a tidy form-fitting slab that would fill the entire space between the button matrix and the case, but that gets into curved edges and fussy fitting; fortunately, I came to my senses. Without wanting to make a prototype to get the second one right, I simply trimmed the outside of the polycarbonate slab to a ruthlessly rectangular 33×50 mm. That gives about 2 mm clearance on each side of the button matrix and fits with about 1 mm clearance from the case. The lengthwise dimension is what it is.
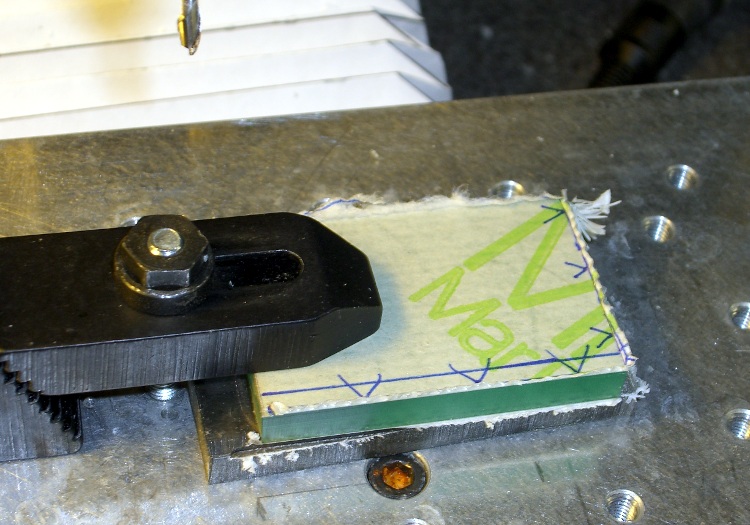
The 29×46 mm pocket must be about 3 mm deep to clear the button tops.
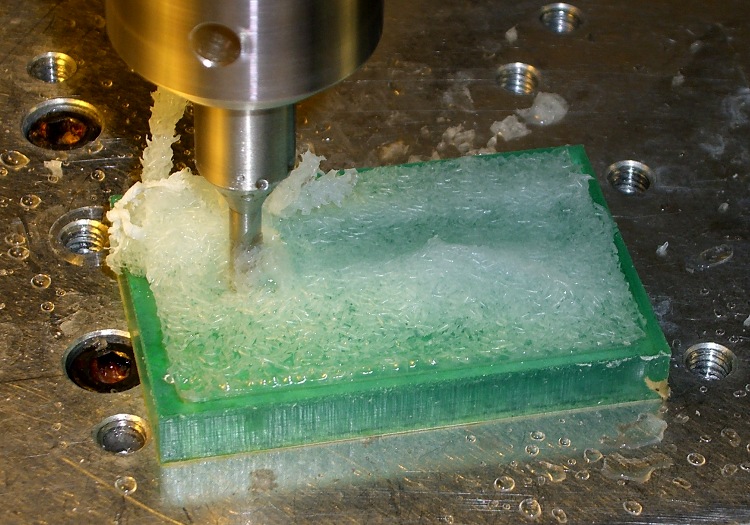
The G-Code came from the Hugomatic pocketRect2points generator, which worked just fine; normally I hammer out my own G-Code, but I was leaving on a trip the next day. The cut depth of 1 mm per pass was probably too conservative. A cutting speed of 300 mm/min with a 2000 rpm spindle worked reasonably well with water cooling.
Pocket milling with water coolant
A 1/8″ end mill produced corner radii that matched the buttons fairly well, which means it took a loooong time to chew out the pocket. The picture shows the mill knee-deep in a pool of water and swarf; I vacuumed the chips out at the end of each pass and added more water.
Double-stick tape held the polycarb & sacrificial plate to the tooling plate, which worked surprisingly well given that I just wiped the grunge off and squashed it down. A machinist’s square aligned the rectangle closely enough and, of course, I used the laser aligner to set the coordinate zero to the left-front corner.
For lack of anything smarter, a rubber band holds the shield in place on the remote. I thought about fancy hinges and Velcro and stuff like that, but the projector is used by non-technical folks and, as nearly as I can tell, the remote control never gets used at all.
Quick and dirty, indeed: about two hours, first doodle to snapping the rubber band, including a bit of time wasted on an ancient G-Code generator that spat out bad coordinates.
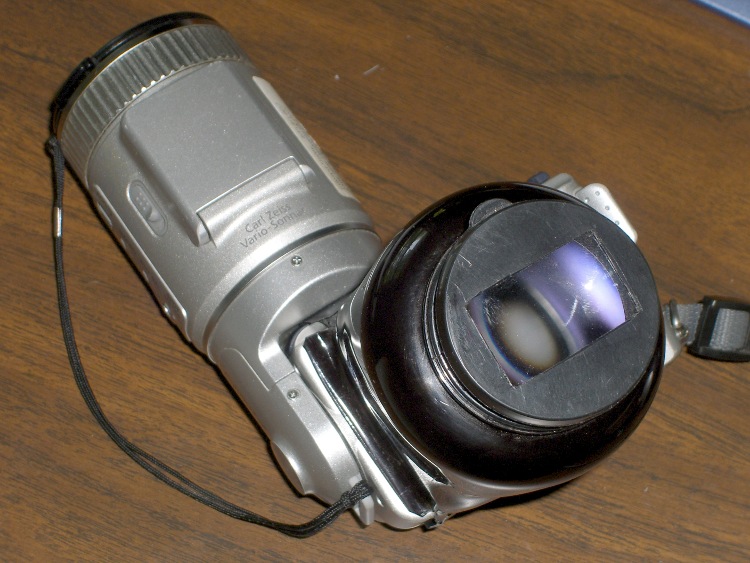
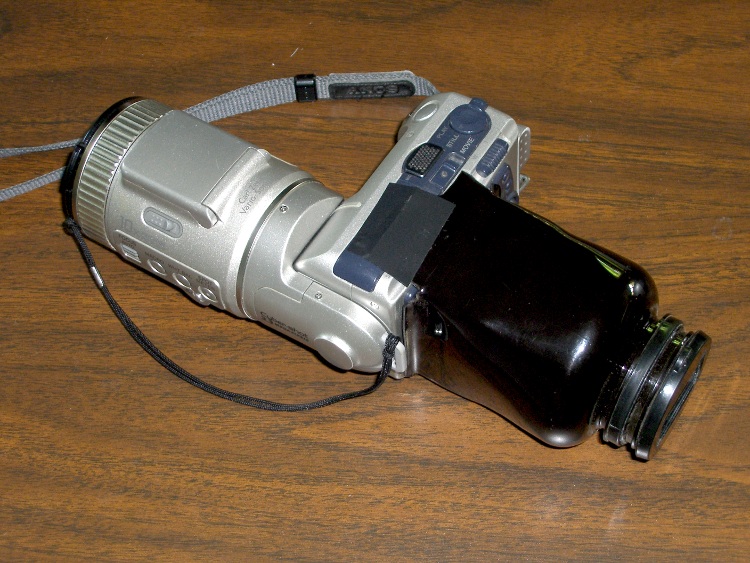
With the bottle formed & trimmed to shape, it’s time to mount the lens. This view shows the final result, with the camera body angled upward.
The general idea is that the bottle cap already attaches securely to the bottle, so I can just cut a rectangular hole in the lid, make it just slightly smaller than the lens, and affix the lens inside with the planar surface facing outward.
Two motivations for making the hole slightly smaller than the lens:
The lens has rounded corners, as it was cut from a 38 mm diameter round lens
It won’t stick out, get bumped, and fall off
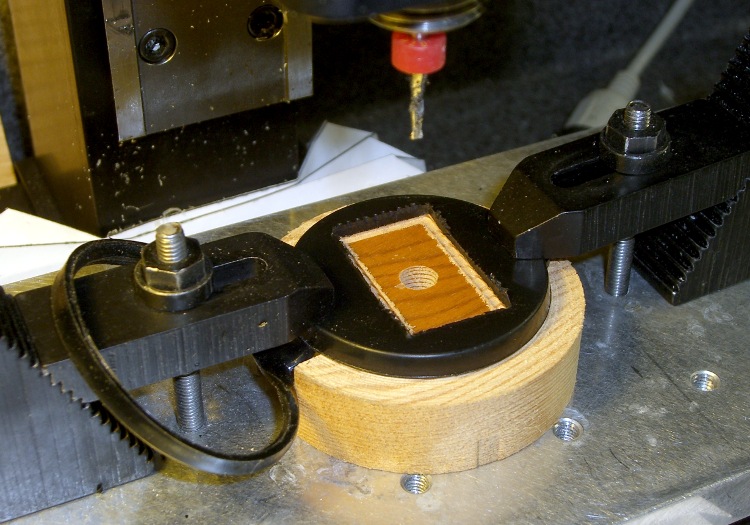
Lens opening cut in bottle cap
The first step was, of course, to make a fixture: a sacrificial wood block with a raised section that fits snugly inside the cap. I found a nice maple disk in the scrap bin, chucked it in the lathe, and turned a section to fit. I don’t have a dust extraction system, so I did this one-handed with another on the shop vac to suck up the swarf. Yuch, wood is dusty!
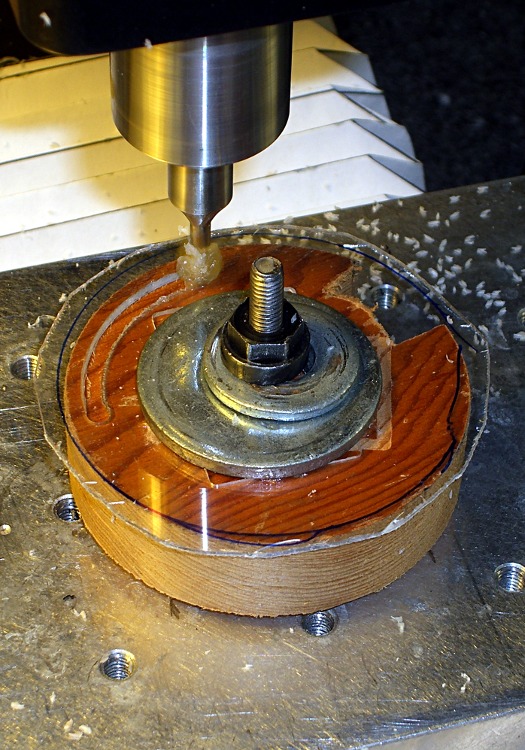
That simplified clamping the rather slippery lid in place. It’s probably polyethylene that would slide away under heavy cutting loads, but with a 2 mm end mill that wasn’t a problem. The origin is at the center of the cap, directly atop the convenient injection-molding sprue button.
The lens is 34.4×22.1 mm, so I cut a 32×20 mm opening using manual CNC. Given a 1 mm cutter radius, the G-Code looked something like this:
That’s from memory, so it might not work quite right. Basically, store the key variables in parameters and use those instead of mistyping a digit somewhere.
The opening even has nicely rounded 1-mm radius corners from the 2 mm cutter…
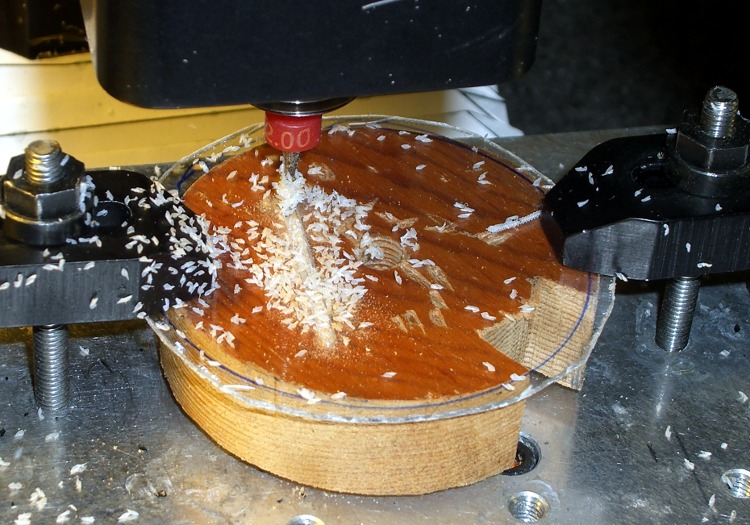
Cutting acrylic lens holder
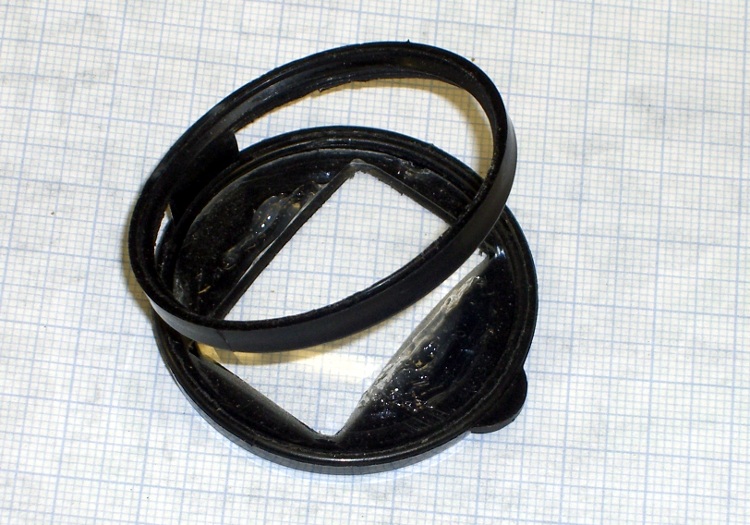
I added a sheet of acrylic inside the lid to hold the lens in position and provide a more glue-attractive surface. The lens opening here was a slip-fit for the lens: 34.5×22.2 mm. The G-Code looks pretty much the same:
The wood disk even had a convenient hole in the middle, making it easy to re-clamp the acrylic from the center with a stack of washers. The laser aligner made alignment easy: make the nut finger-tight, put the spot on the left edge near the front, jog to the rear, twist to split the difference, iterate a few times, then snug down the nut.
Then the origin is halfway between the edges. Knowing the opening size, find one edge and touch off by half that amount.
The cardboard lid liner was 43 mm in diameter, so I figured that would work for the acrylic sheet. Circular interpolation makes getting a precise diameter trivially easy, after you remember that this is outside milling so you must add the cutter radius:
What’s not shown there is the blob of acrylic that welded itself to the cutter because I was taking picures rather than dribbling water on the workpiece to keep it cool. I hate it when that happens.
But everything pretty much worked out. The holder was a snap fit inside the cap, just like it was supposed to be.
I glue the lens to the acrylic holder with silicone snot (aka “adhesive” or “caulk”), let it cure overnight, snapped the cap on the bottle, and iterated once to get the lens properly aligned with the opening (the acrylic sheet rotates freely inside the cap).
Viewer attached to camera
The end result is, admittedly, ugly on a stick, but the first reports from the user community are encouraging!
We may add a dark cloth ruffle around the bottle cap as an eye shade and eyeglass protector, but that’s in the nature of fine tuning.
Mary take her gardening pictures with our Sony DSC-F505V camera, which has one compelling advantage for the job: the lens and body pivot, so you can take pix at odd angles without groveling in the dirt or hovering over the camera staring downward. Alas, it lacks an optical viewfinder, which means she does a lot of outdoor close-up photography peering into a washed-out LCD panel in full sun. Worse, she’s far-sighted and can’t see fine details without her reading glasses or bifocals, so it’s really hard to get proper focus.
Something must be done!
The general notion is to put an opaque shield around the LCD with a lens that magnifies the viewfinder. If you happen to have perfect near vision, the lens is optional and you can probably use one of the commercial sunshades that attach with hook-and-loop strips. That isn’t going to work for us.
With inspiration from that project, I retired to the Basement Laboratory. [Update: a somewhat less intricate do-it-yourself project starting with a slide viewer. I suspect it works better for normal-looking cameras, not this one.]
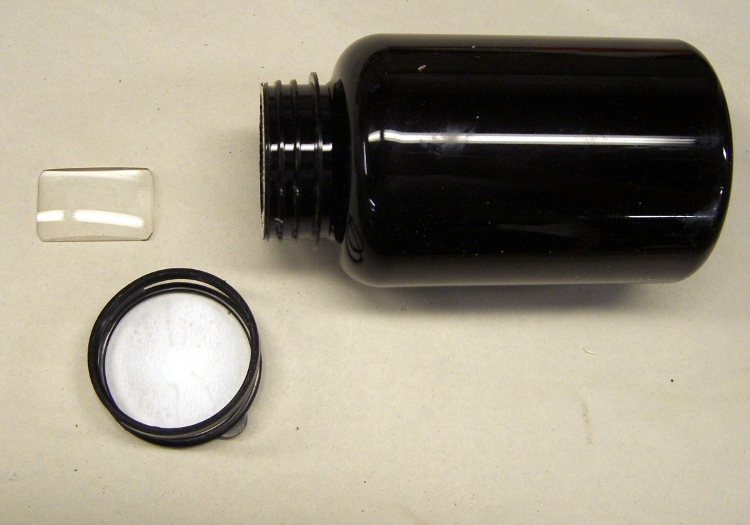
Raw material: rectangular lens and opaque bottle
Rummaging in the Bottle Supply turned up a dark brown plastic bottle made from PETE, the same stuff that makes soda bottles, with a black plastic snap-cap lid. PETE has a glass transition temperature around 75C, which means you can reshape it with a heat gun (not, alas, a hair dryer). Actually, I found two bottles, so I have a backup.
A bit of soaking in water, followed by a generous application of xylene, got rid of the label & adhesive residue. You can get xylene in small quantities as Goof-Off adhesive remover or just buy a quart at your local big-box home-repair store. Do the xylene part outdoors and don’t toss the rags in the trash until they’re dry.
Further rummaging in the Lens Supply turned up a 34.4×22.1 mm plano-convex rectangular lens with perhaps a 100 mm focal length. Haven’t a clue where it came from, but perhaps from the Surplus Shed optical supply shop. Pretty nearly any lens with those general specs will work, so use what you have. You do have a box of lenses, don’t you?
Putting the flat side of the lens close to my (distance-corrected, I’m nearsighted) eyeball and looking through it at the LCD from about 75-125 mmm produces a very nicely enlarged, distortion-free image. This will work!
Bottle cutting and forming
The bottle is much thicker than a soda bottle, but easily cut with a razor knife and a bit of care. I removed the bottom and measured the ID as 68 mm. The circumference is, obviously, 214 mm, which is a key dimension: it must fit around the LCD’s perimeter with a bit to spare.
I made a wood mould block that’s sized and shaped roughly like the back of the camera around the LCD: Mr Block, meet Mr Belt Sander. This avoids the prospect of melting the camera with the heat gun, as it’s largely plastic, too.
The block is 52×57 mm, for a perimeter of 218 mm, and a totally non-critical 38 mm tall (it came from a 2×4″ chunk of lumber). The pyramidal section acts as a forcing cone to persuade the bottle to stretch around the slightly larger block and become nicely rectangular as it does.
Wood forming block
Position the bottle over the block, apply the heat gun all around, and ram the bottle downward as it softens. Eventually the bottle will eat the block, even though it’s not completely happy about doing so, at which point you can concentrate on heating each side separately. The bottle will settle down and stretch neatly around the block, giving it a rectangular base with a smooth transition from the round top. The cut edge tends to curl outward in the middle of each flat side, so don’t overheat it.
Cut the corners back so there’s about one focal length from the cap to the cut, then heat the side flaps (the shape is rectangular: get this right!) and bend them back. I flattened them against the bench to remove the curve. The top and bottom flaps will fit over the top and bottom of the camera and hold the whole affair in place.
Trim the side flaps to a few mm, as they’ll just form a light shield, and shape them to clear the controls as needed. Form the top & bottom flaps to fit snugly around the camera and trim to fit; they cover up the buttons just under the camera’s LCD, but those aren’t used in normal operation.
I used plain old electrical tape to hold the bottle in place, as anything thicker will interfere with the lens rotation. If you have a box-shaped camera, hook-and-loop may be your friend.
The charger pedestal includes an LED to light up the dosimeter’s graticule. I seated a 10 mm white LED into a polycarbonate ring that also serves as the base for the stiff spring that presses the contact assembly against the dosimeter’s internal spring.
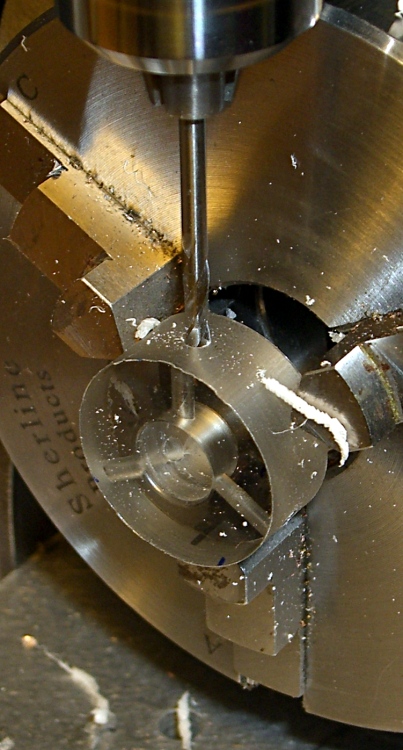
I made the base while I was doing the lathe work for the contact assembly, then grabbed it in the Sherline mill’s 3-jaw chuck to drill the 4-40 holes with a touch of manual CNC.
As before, I manually tapped the holes, but it’s a lot easier with each hole at the right location and pointed in the right direction!
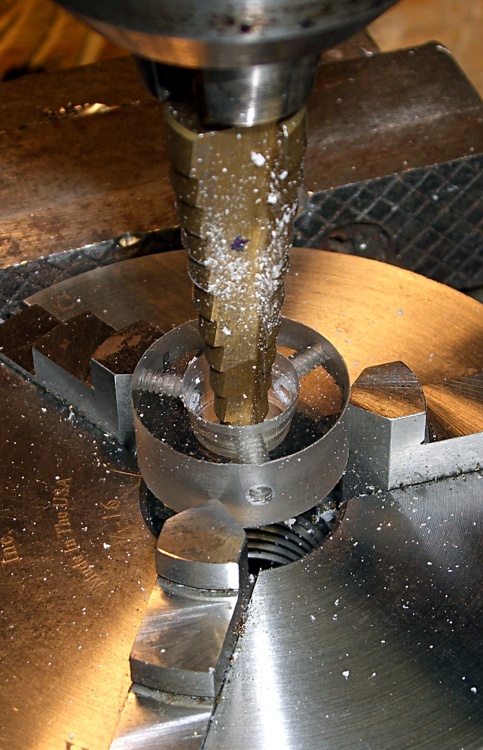
Step bit making an annular ring
I described the step-drilling that produced the correct hole and shoulder sizes there. That won’t work every time, but in this situation it was just about perfect.
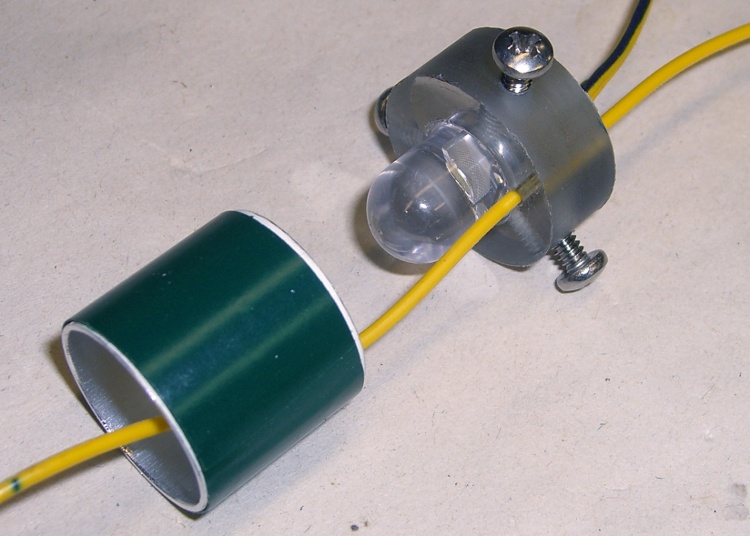
The LED power wires pass through the central hole in the ring. I used a blob of hot-melt glue to hold the LED in place; epoxy would be more in keeping with the nuclear weapons theme, but HMG is just fine with me.
There’s another hole just to one side of the LED, more or less centered between the mounting screws, that passes the wire from the dosimeter charging contact out of the pedestal. This wire starts at the center of the top, passes inside the spring, and must not be pinched along the way.
LED in base with spring positioning ring
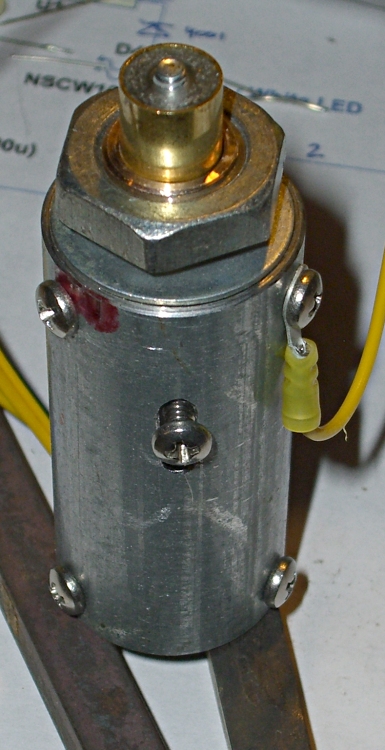
I added an aluminum cylinder as a positive stop to prevent the dosimeter contact assembly from getting pushed too far into the pedestal. The length matches up with the anti-rotation slot in the EMT: the screw doesn’t quite hit the top or the bottom of the slot.
A wrap of green electrical tape around the outside made the cylinder a slip fit inside the EMT shell. It shouldn’t move at all.
The cylinder also holds the spring in place so it can’t rub against the charging wire, but I’m pretty sure that isn’t necessary.
The spring comes from my parts heap. It must provide a bit under 8 pounds of force to activate the dosimeter charging spring with about 3 mm of travel. I picked the length of the EMT shell to preload the spring to make the answer come out right, which also affects the length of the aluminum cylinder.
The spring OD must fit into the EMT and the ID must clear the 10 mm LED and charging wire in the base. Your mileage will most certainly vary.
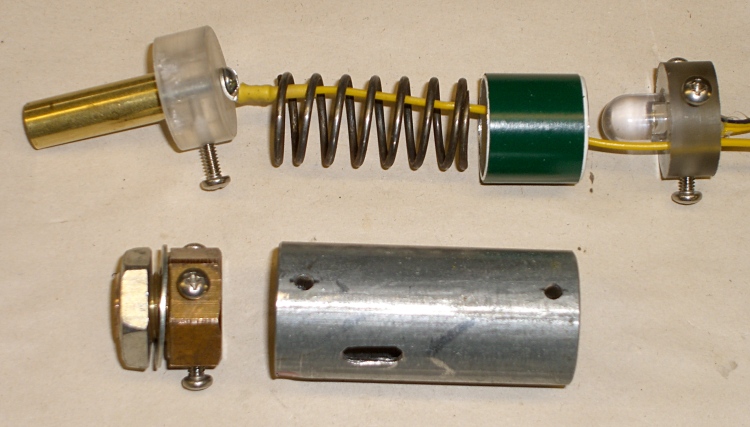
Charging pedestal components
Assembly is straightforward, but goes much more easily with three hands.
Screw the panel mount bolt into place
Attach the charging wire to the central contact & remove the anti-rotation screw
Slide the central contact in place, reinstall the screw through the slot
Slide the spring & aluminum cylinder in place, wire in the middle
Pass the wire through the LED base ring
Press the base assembly into position and hold while installing the screws
Finished charging pedestal
The charger I built turns the LED and charger power on with a push-to-activate digital encoder knob, so there’s no need for the 1 lb spring & switch found in the V-750 charger.
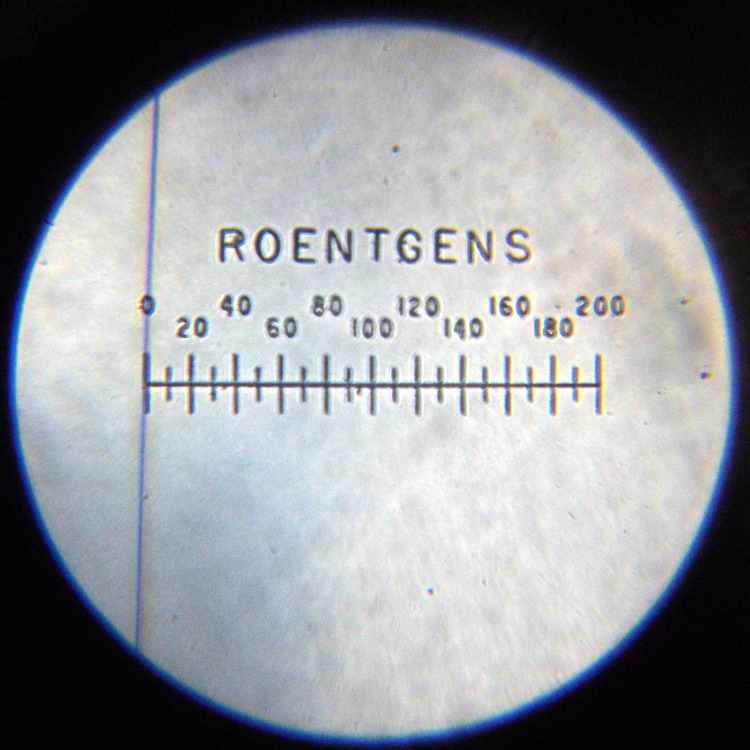
To read the dosimeter, just hold it loosely atop the pedestal, push the twiddle knob down, and the LED comes on.
To zero the dosimeter, press it firmly and twiddle the knob for zero!
I’ll describe the charger circuity at some point; it’s detailed in my Circuit Cellar column in the August 2009 issue.
This is a chunk of EMT (Electrical Metallic Tubing) with 4-40 clearance holes that attach it to the panel mounting bolt, hold the base disk in place, and keep the central contact assembly from rotating. The overall view gives you a good idea what’s involved.
The nominal EMT size is 3/4″, which (of course) means the ID is about 0.8″ and the OD is a bit over 0.9″. There’s a weld seam running the length of the tube that I cleaned up on the lathe, so the actual ID is slightly enlarged. While it’s in the lathe, face off both ends to whatever length suits the spring you’ll eventually use.
There’s nothing tricky about this, other than getting the three holes on each end lined up properly with their mating parts. Once again, manual CNC comes in handy: grab it in the 3-jaw on the rotary table, use G81 to drill the hole and G0 A120 and G0 A240 to index the locations. Make sure you retract the drill bit far enough to clear the chuck jaws!
The two sets of holes need not be perfectly aligned with each other.
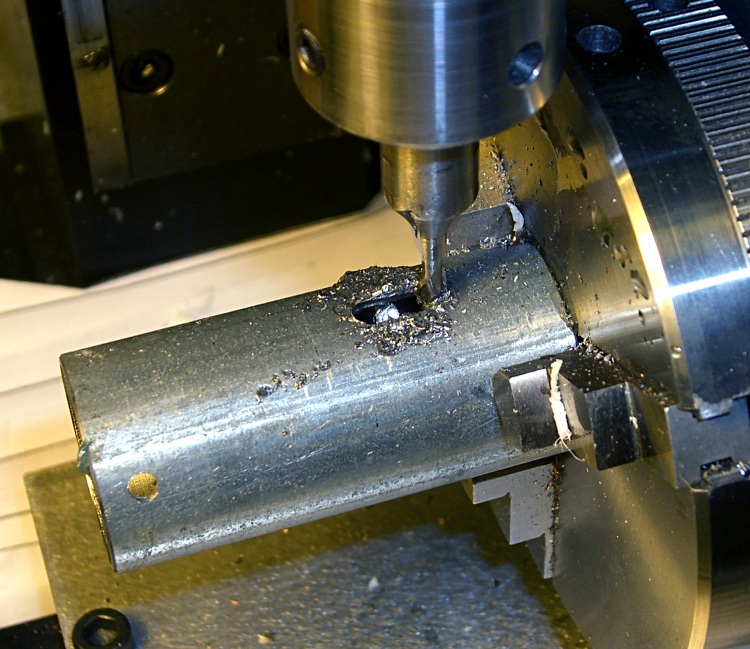
Milling rotation stop slot in shell
The photo shows that I milled the rotation stop slot after drilling the holes. It’d be easier to do that without removing the cylinder from the chuck, but this was one of those incremental designs where I was checking the fit as I built it.
The slot should be long enough to allow the contact assembly to slide almost completely into the pedestal. That prevents you from crunching the dosimeter’s innards when you’re pressing it down on the spring.
The clearance from tool holder to chuck isn’t all that large; you might want to put the slot at the far end of the cylinder… but then I’d have to conjure up a pipe center for the Sherline tailstock and figure out how to mount it high enough to match the rotary table’s axis.