Ed Nisley's Blog: Shop notes, electronics, firmware, machinery, 3D printing, laser cuttery, and curiosities. Contents: 100% human thinking, 0% AI slop.
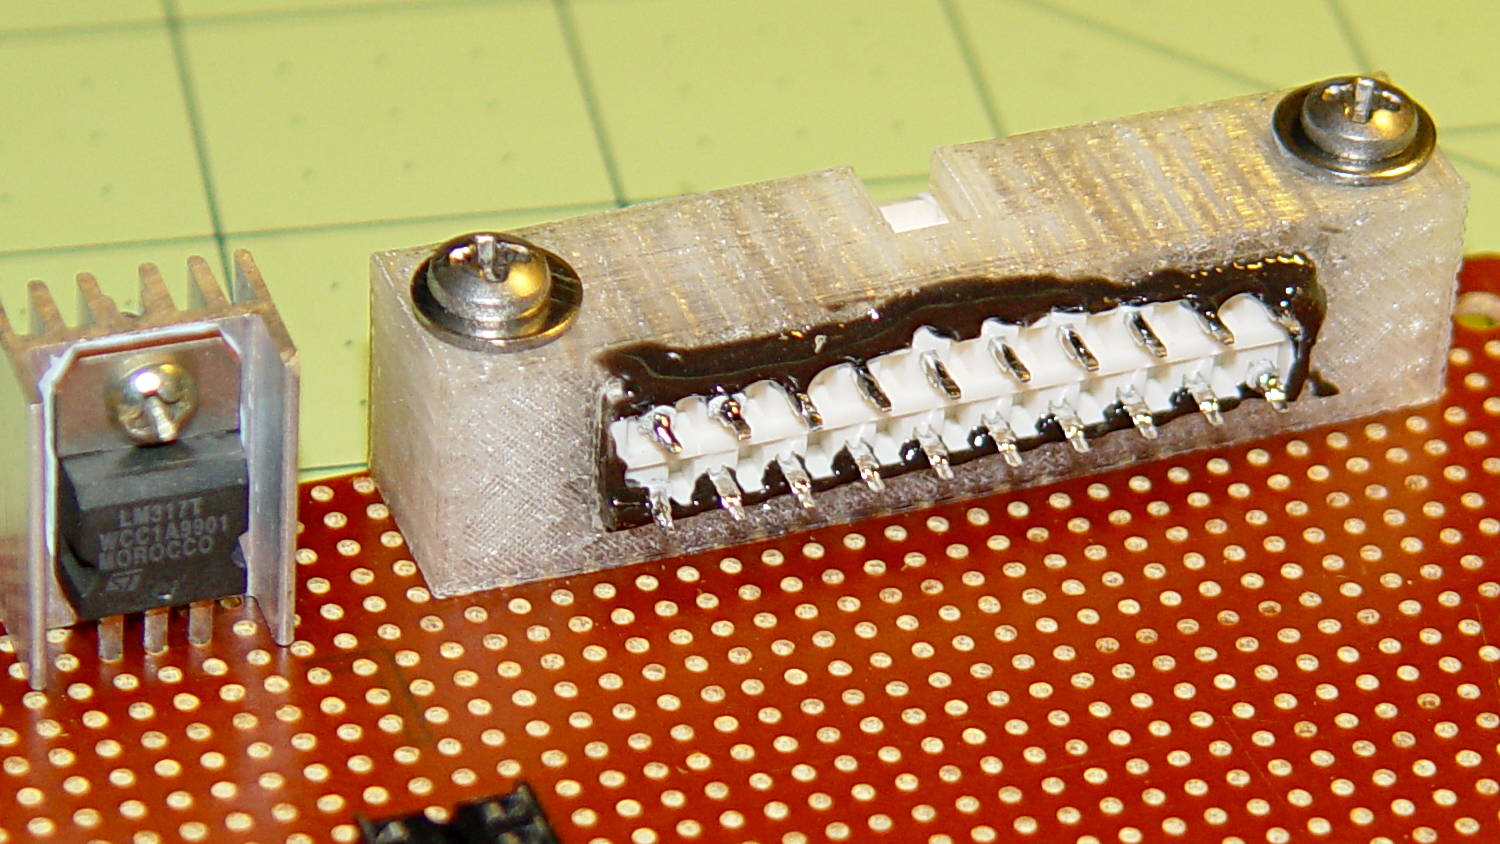
The GX270 case contains a perfectly serviceable ATX power supply that can power all the bits & pieces that don’t run directly from the AC power line. I torched the connector off the system board, but there’s no practical way to mount it standing up through the prototyping board I’m using for the low voltage electronics. This bracket surrounds that connector and holds it at right angles to the board, with a pair of screws clamping it in place:
ATX Connector Bracket – front
I invoked the shade of Willy McCoy, slashed the outside of the connector with a razor knife, buttered it up with epoxy, and shoved it flush inside the adapter. That messy epoxy bead around the joint should prevent it from pulling out to the front:
ATX Connector Bracket – rear
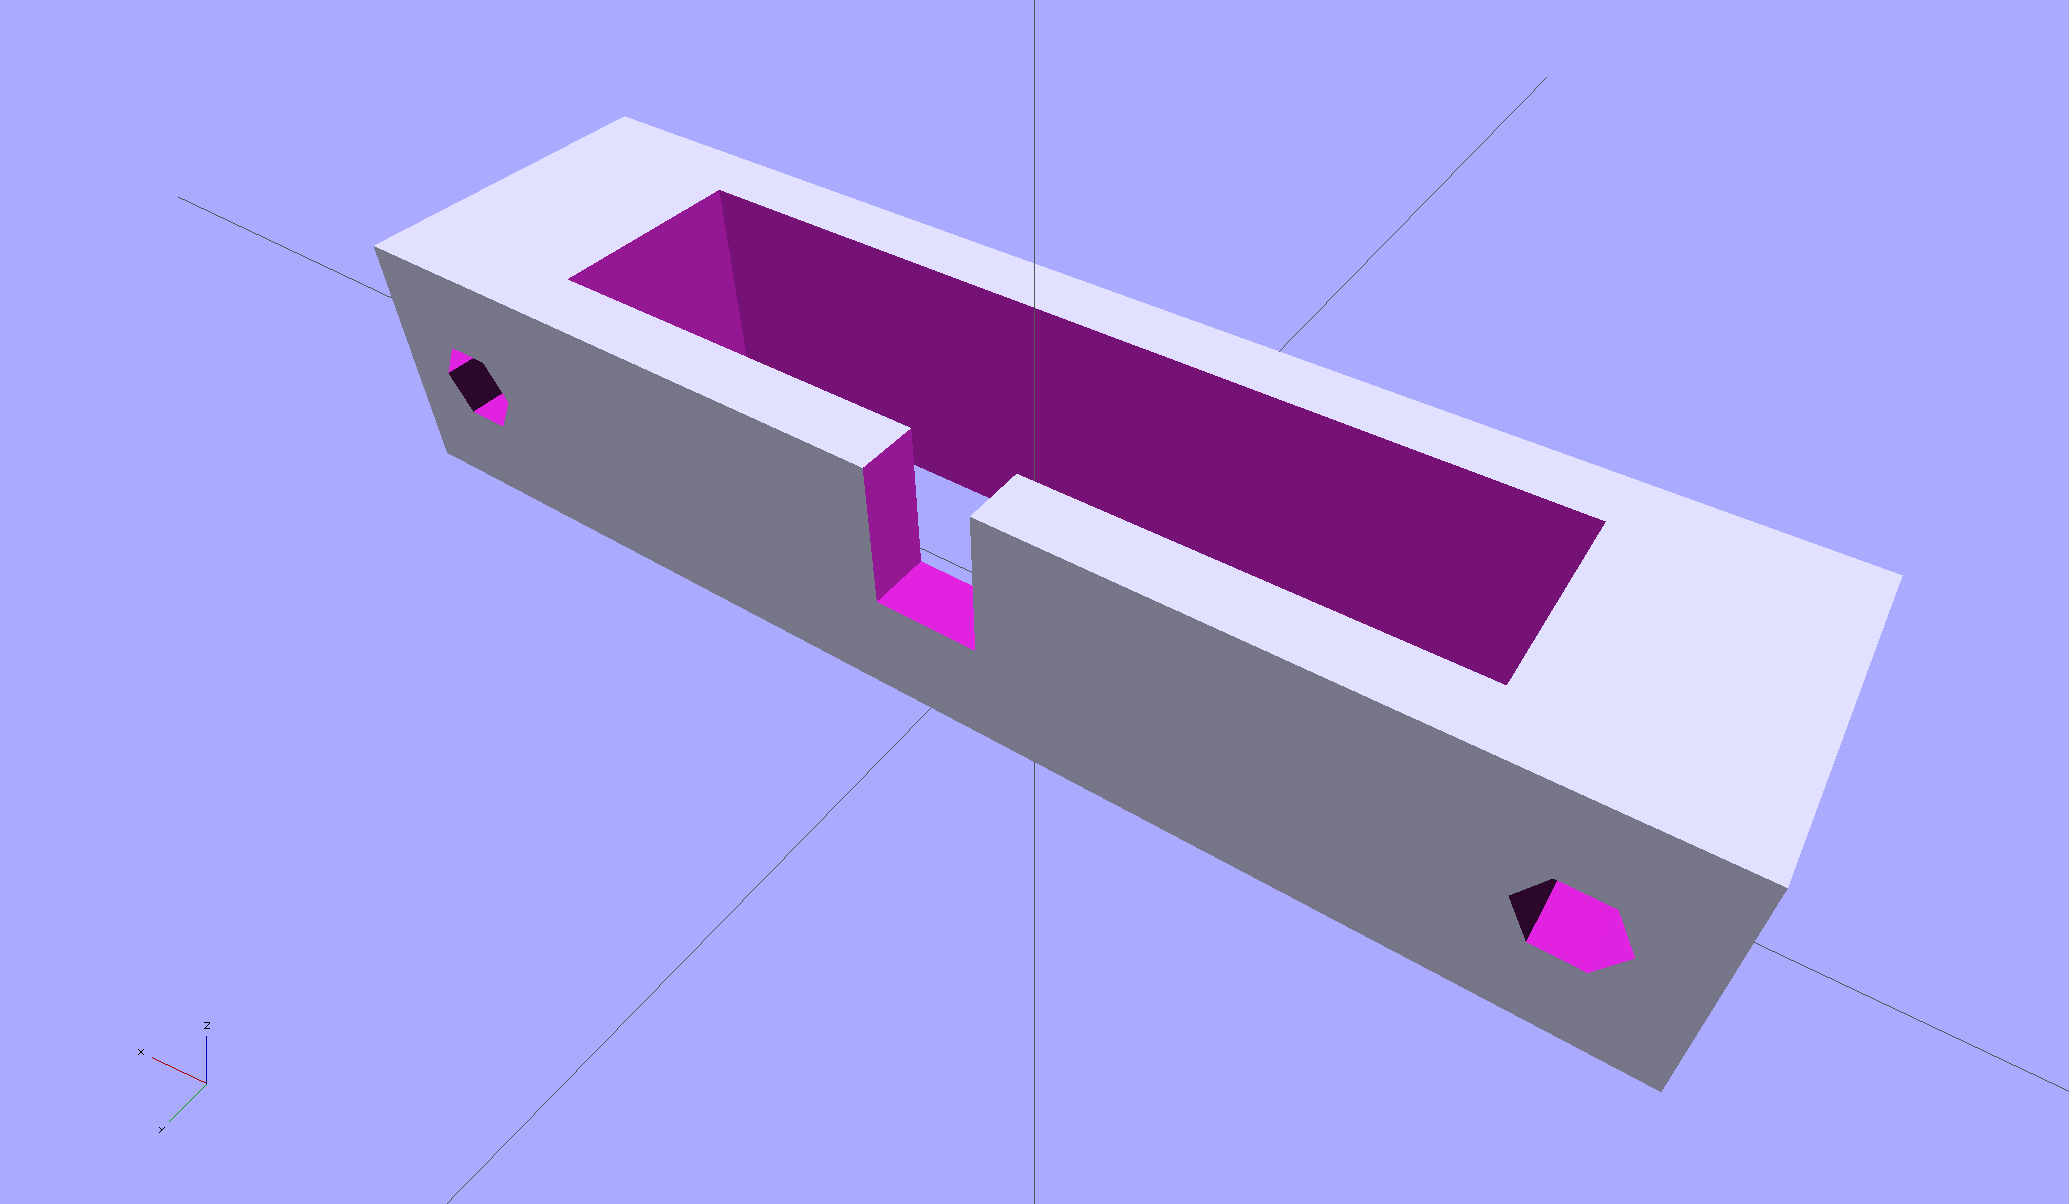
The solid model looks like you’d expect:
ATX Connector Mount
In the unlikely event you need one, make sure the slot clears the locking clip on your ATX connector, as they differ between (at least) the 20 and 24 pin versions. This is actually a split 20/24 connector, with the smaller connector terminating elsewhere to power the LED strips.
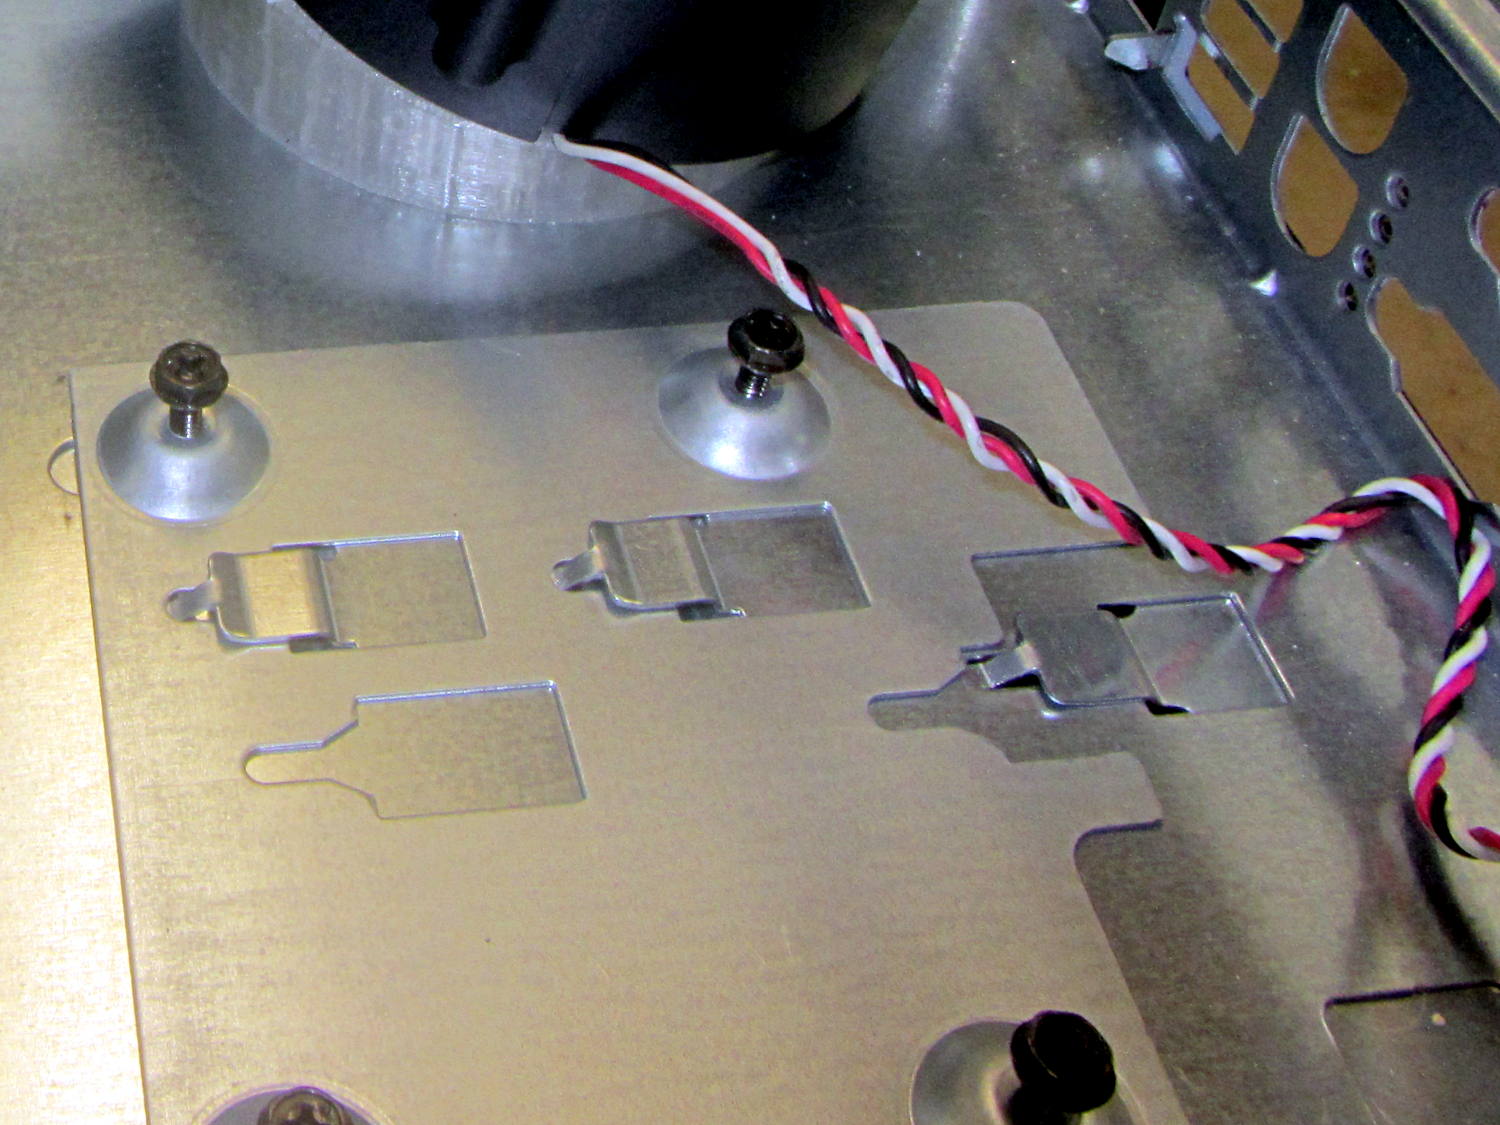
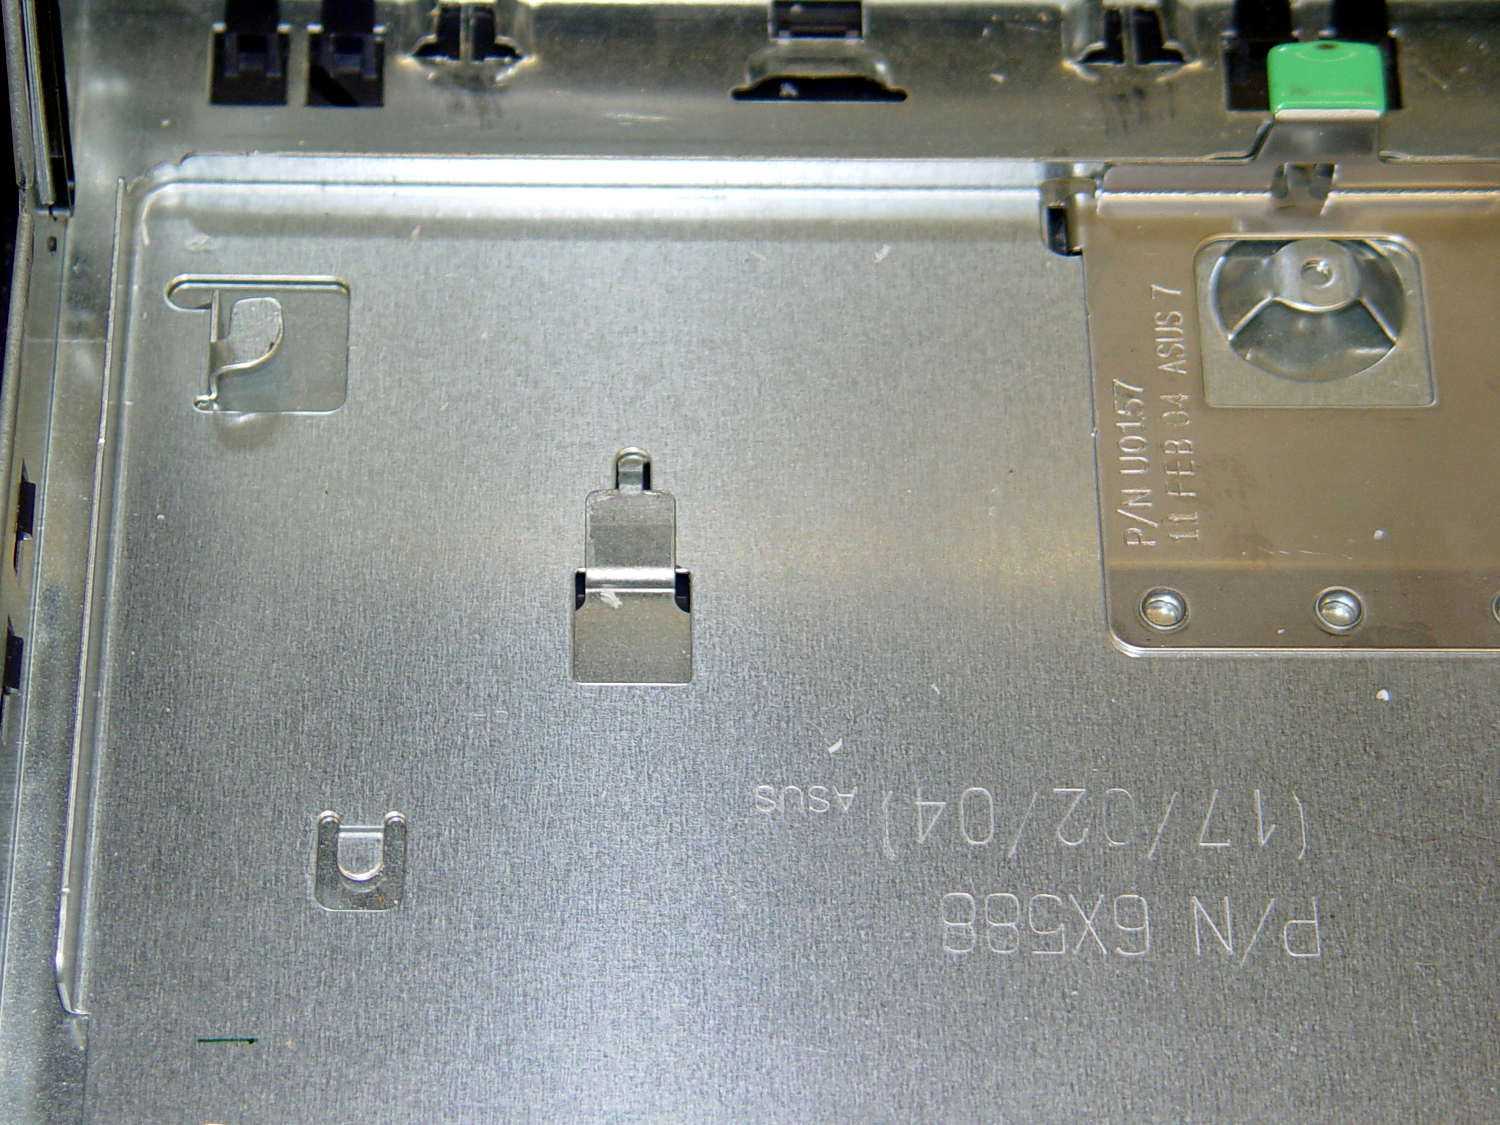
The Dell GX270 chassis has a small support plate under the CPU, evidently to support the heatsink and fan:
Optiplex GX270 CPU heatsink mount
It slides neatly into those clips on the system board tray, but it’s not actually locked into position. I think that allows it to slide around a bit under the system board, providing vertical support without constraining the board’s horizontal position. Anyhow, it looked like the easiest way to support the prototyping board that will hold the low voltage interface circuitry.
By some mischance, I found a nice aluminum plate exactly the right width, so only one side needed a saw cut and squaring. Coordinate drilling four #6 clearance holes matched the support:
LV Interface Adapter Plate – drilling
That corner of the tray had another system board retaining clip, but rather than bashing it flat, I just sawed a slit in the plate so it can slide right into position. Note the perfect alignment of that screw hole:
LV Interface Adapter Plate – retainer
I love it when all my mistakes cancel out!
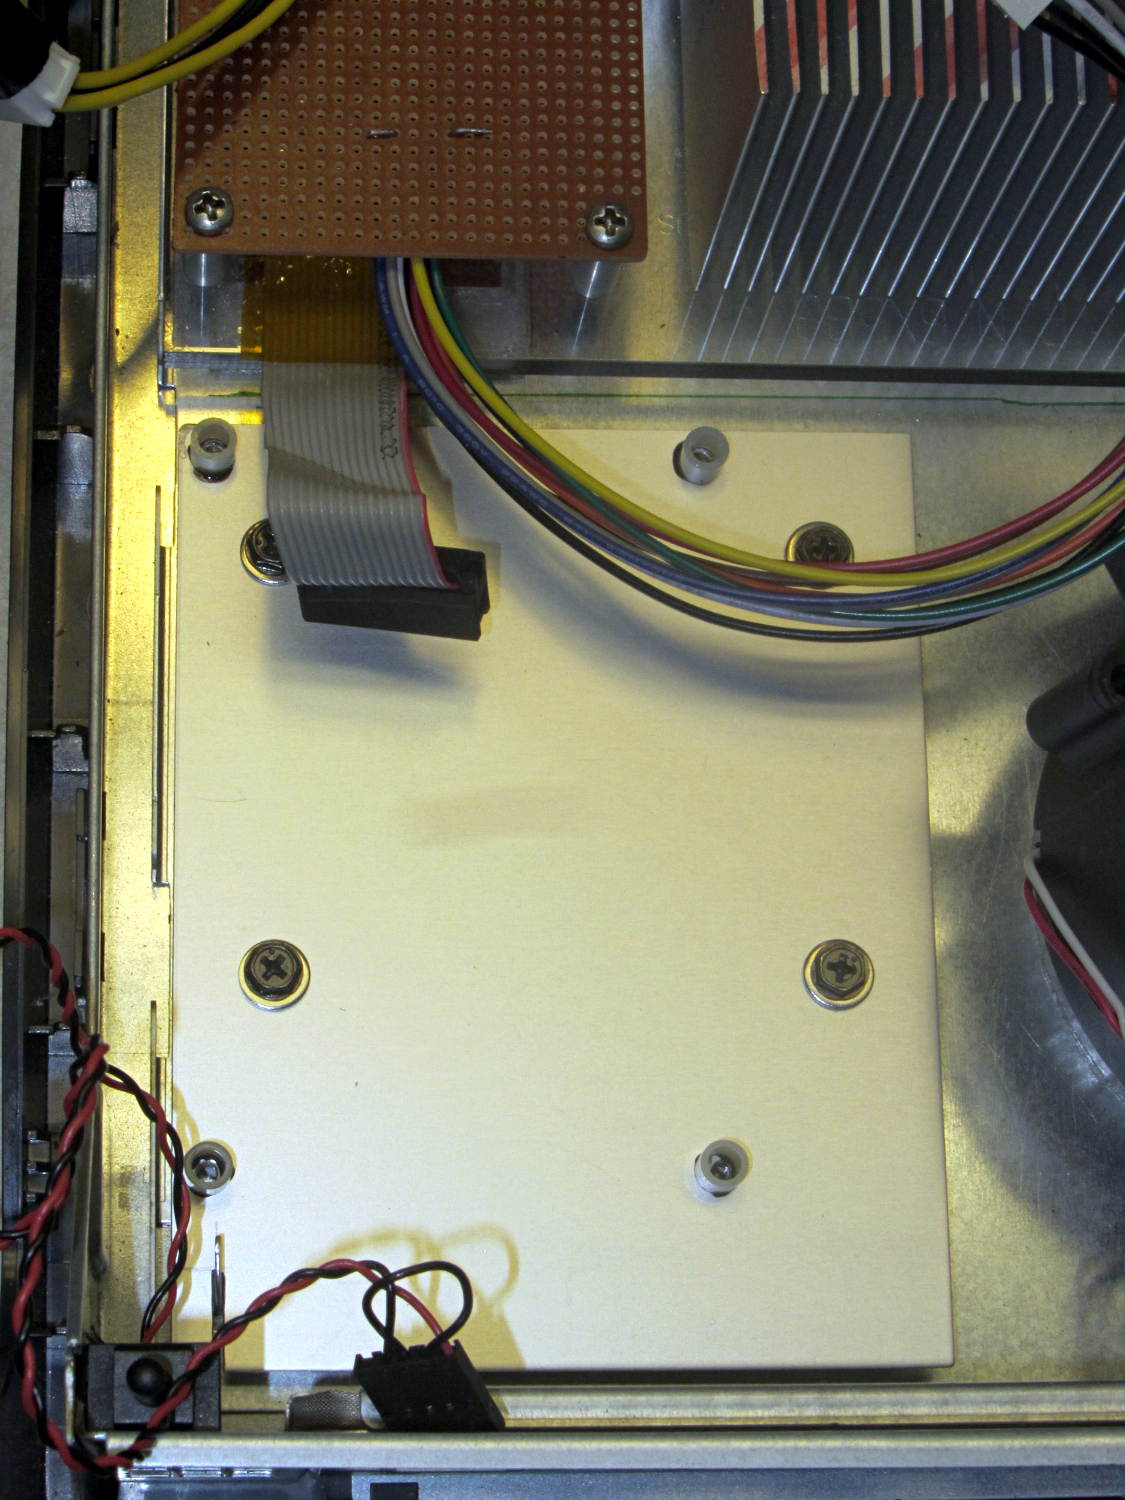
Four more holes matched the prototyping circuit board and, while I had some epoxy mixed up for another part, I fastened four standoffs over the holes. A washer under each original screw soaked up exactly enough space that the screws barely indented the case and, as if by magic, hold the support plate firmly in place:
LV Interface Adapter Plate – installed
Of course, that means I must remove the circuit board to get the tray out, but the AC interface board must also come out, so we’re not talking a spur-of-the-moment operation.
The switch in the lower left corner is the original Dell “intrusion monitoring” switch harvested from a complex metal stamping in the diagonally opposite corner of the case. It’s epoxied to the case wall, with the plunger contacting a shim epoxied to the top of the case, and will eventually disconnect the AC line power from the drive electronics: case open = switch closed = lethal power off.
Back in the day, heatsinks like this sat atop Moah Powah Pentium CPUs:
ET227 transistor on heatsink
I picked it because the hulking ET227 transistor fit neatly on its backside, it seemed capable of handling 30 to 50 W of power, and I have several of them in the Big Box o’ Heatsinks. No careful thermal analysis was involved…
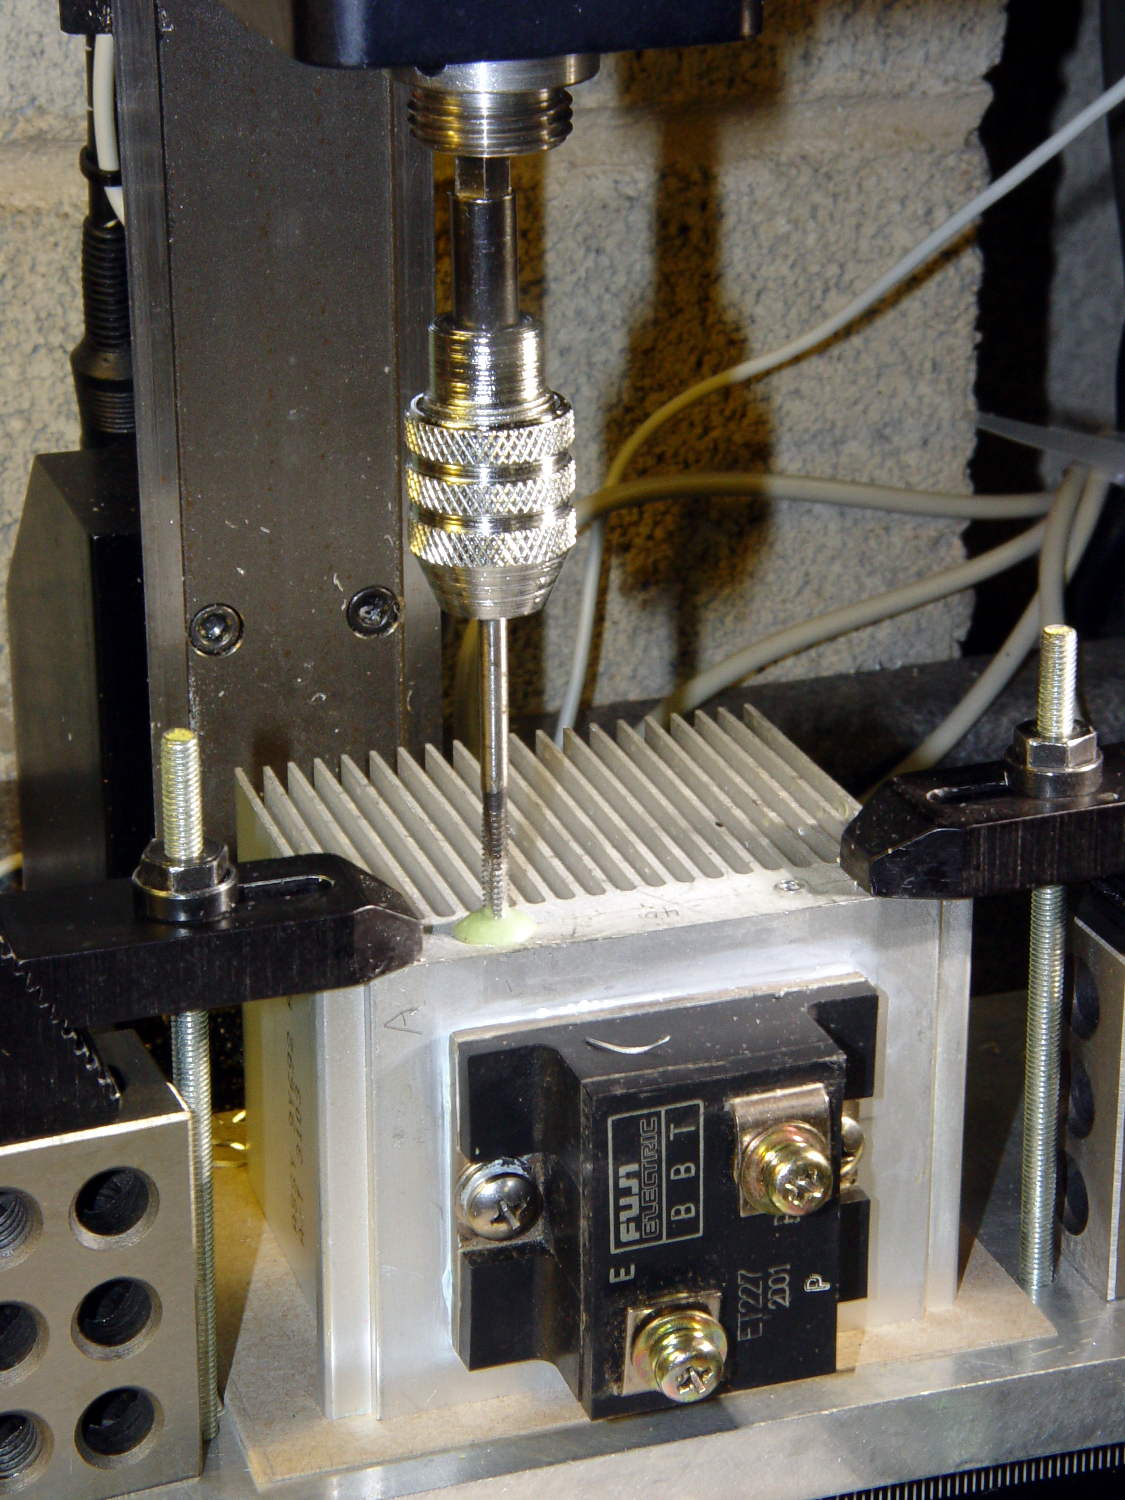
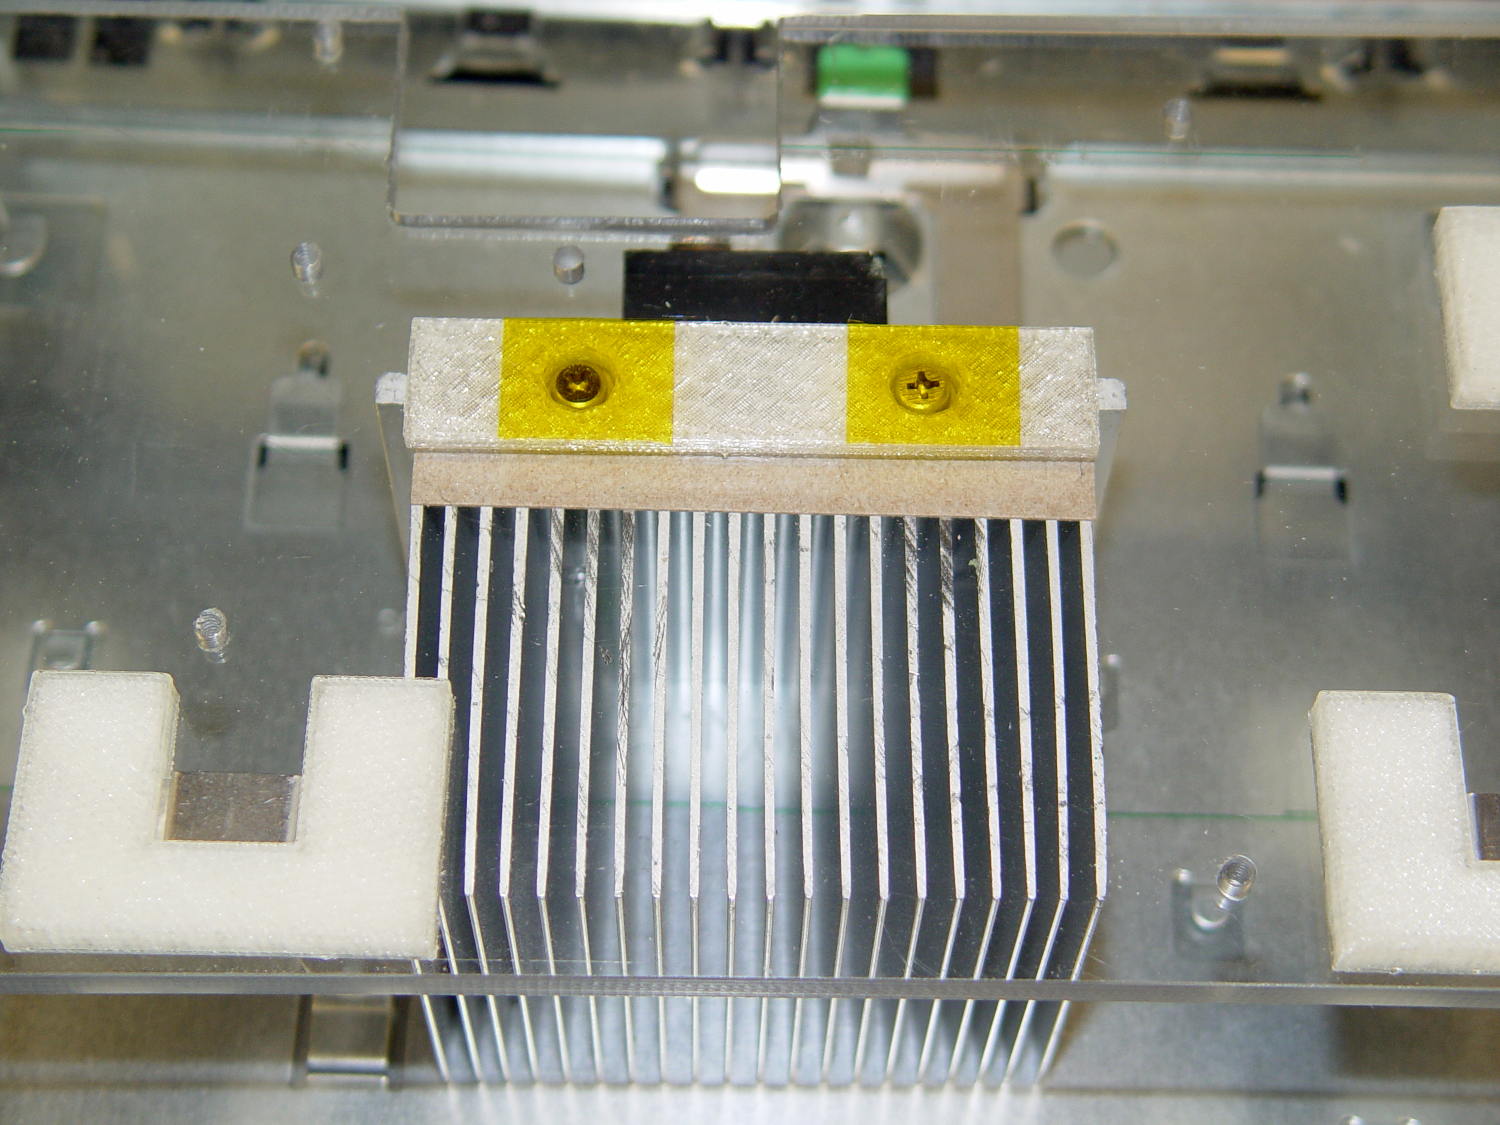
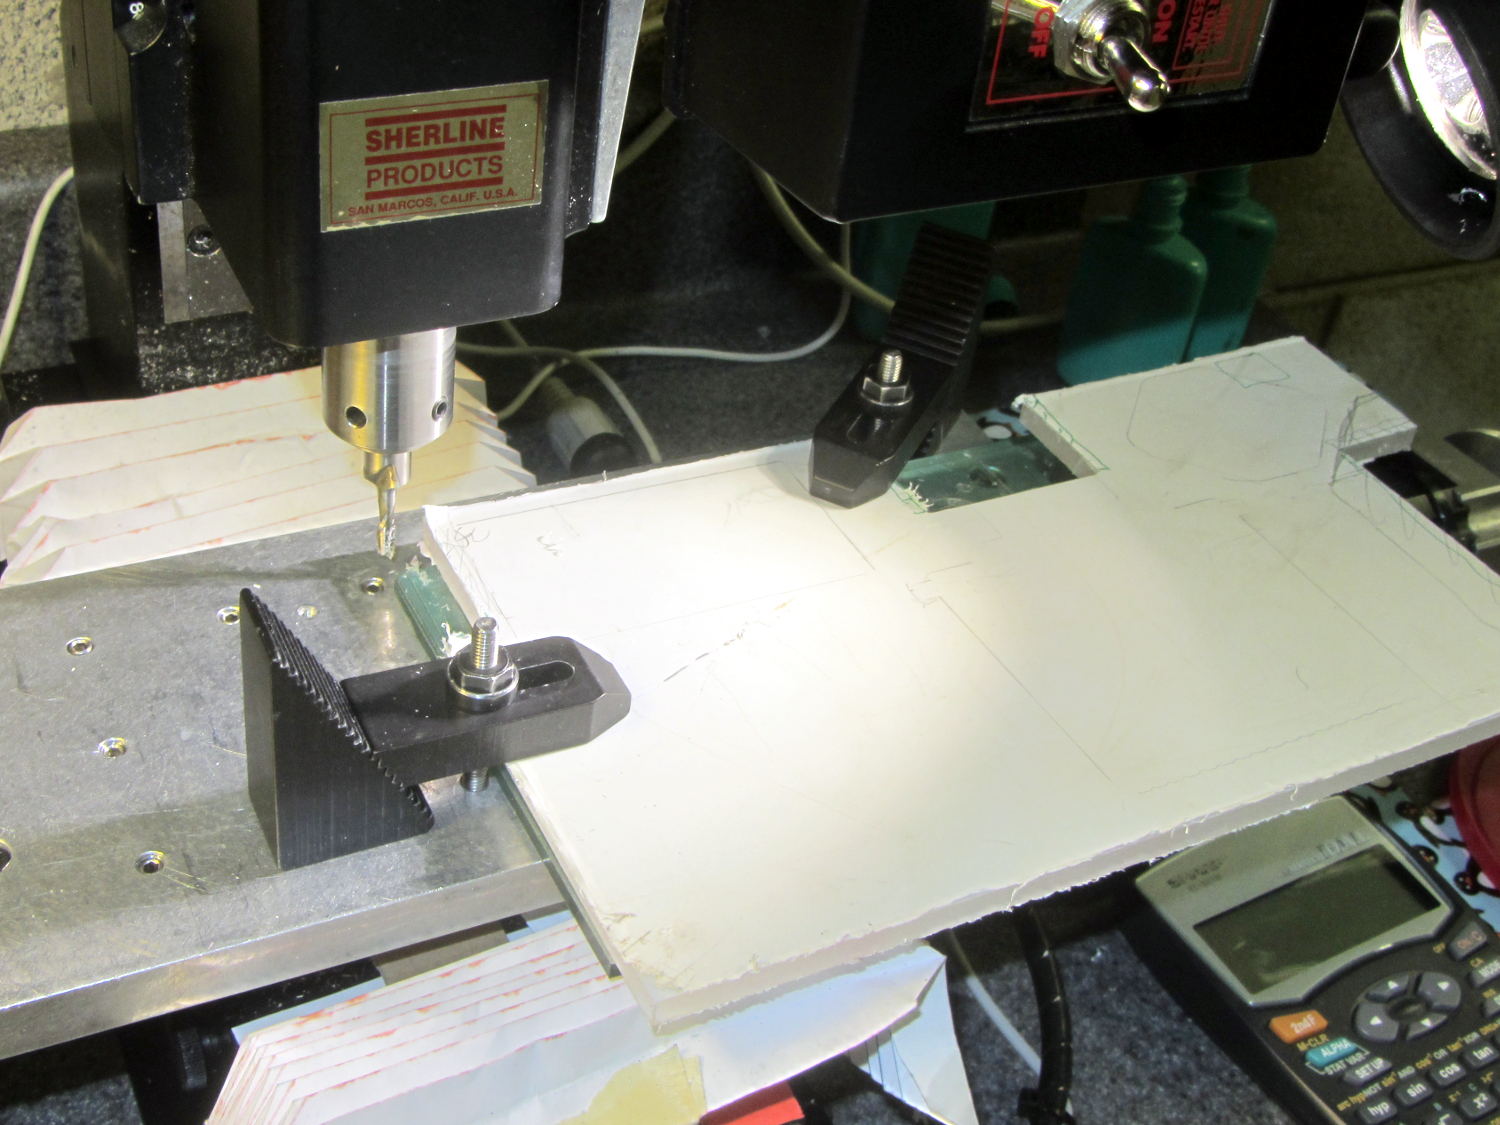
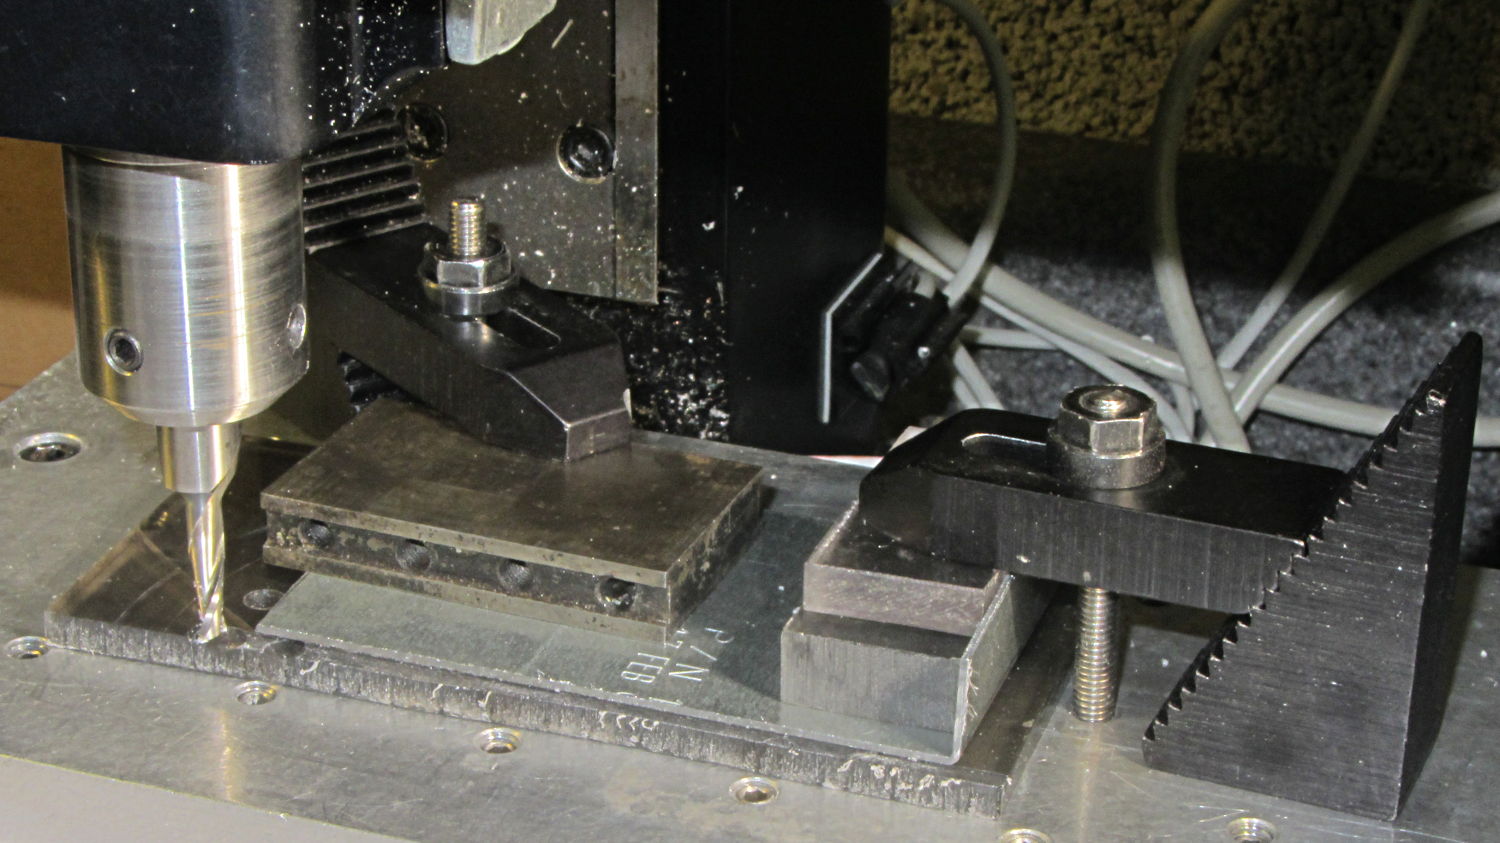
Mounting it on the polycarbonate sheet inside the repurposed GX270 case involved drilling & tapping a pair of 6-32 holes in one side:
ET227 Heatsink – tapping
That’s not rigid tapping on a Sherline, it’s aligning a hand-turned tap in the spindle bore. Sorry.
And, yeah, you’re not supposed to leave the semiconductors mounted when you’re drilling the heatsink. I figure there’s nothing I can possibly do without using a hammer that will bother that transistor in the slightest. What, me worry?
The transistor collector runs at line voltage, which means the entire heatsink will pose a lethal shock hazard. I thought about isolating the collector and failed to come up with anything I’d trust to be both thermally conductive and electrically insulating over the long term; the screw heads must be isolated from the collector plate, too.
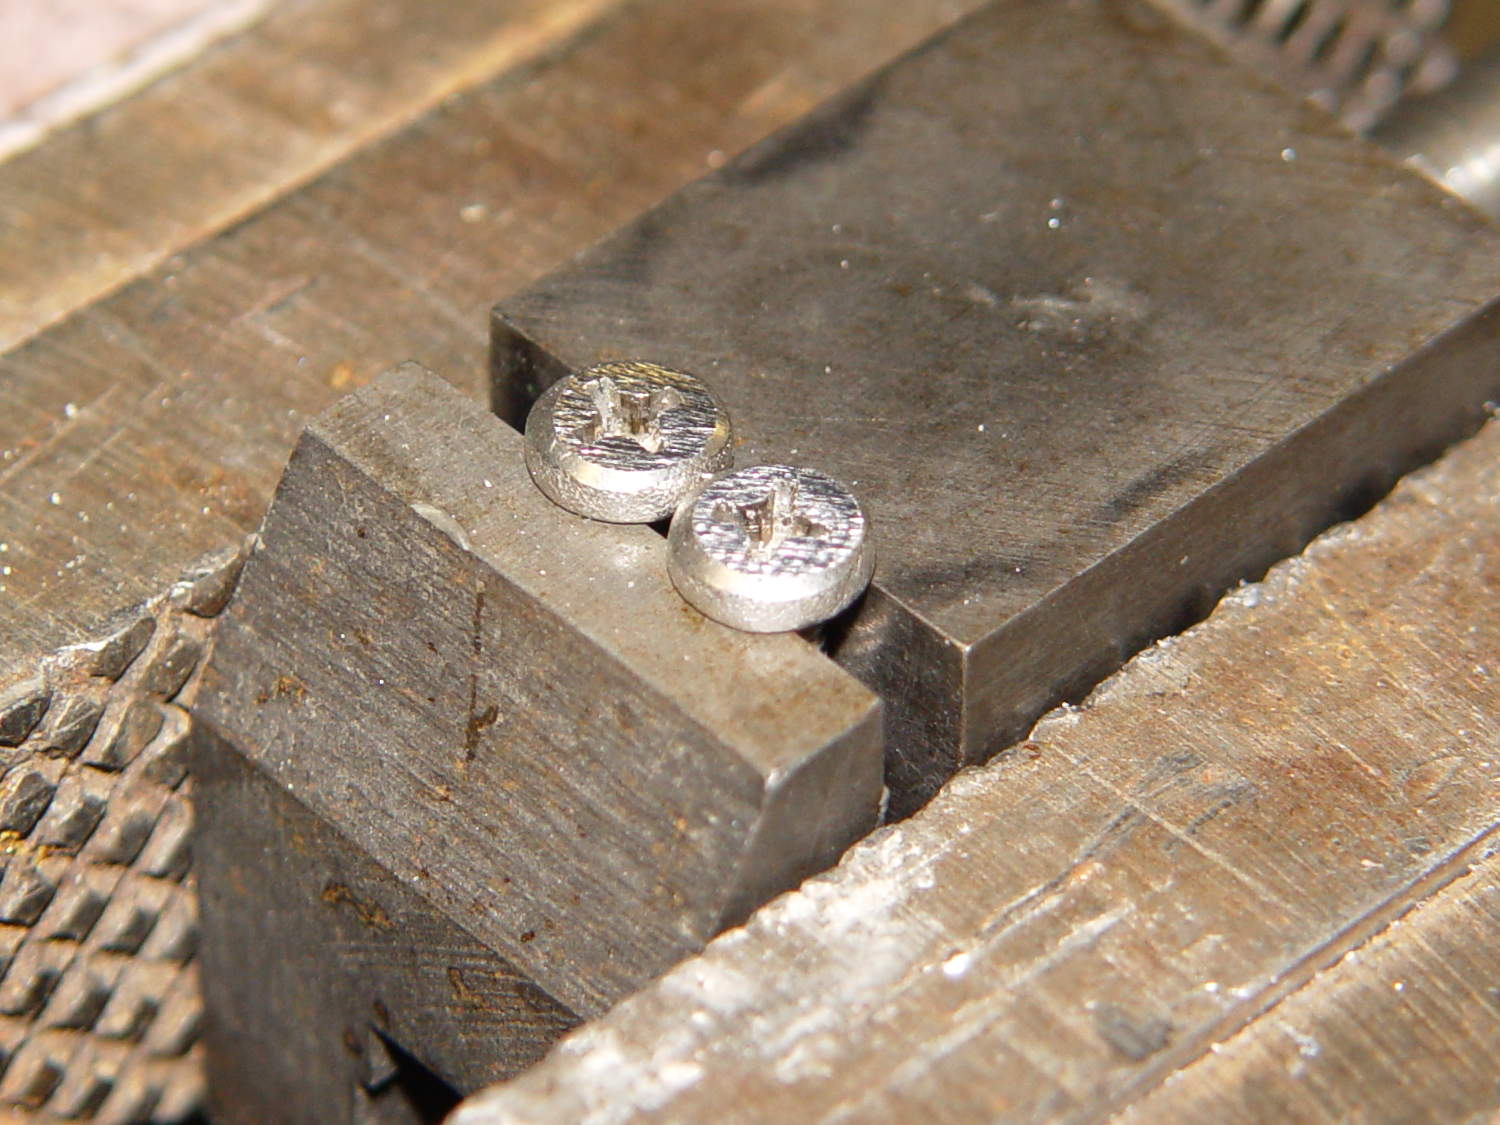
The screws stick out below the polycarbonate sheet, just above the grounded EMI shell lining the case, so I flattened them a bit:
ET227 Heatsink – mounting screws
The simple rectangular strip to the rear of the chassis mounting clips is just slightly thicker than the screw heads, so they can’t possibly contact the case:
Chassis Clips
It gets glued to the underside of the nearly invisible sheet:
ET227 heatsink – gluing screw shield
With Kapton tape over the heads, Just In Case:
ET227 Heatsink – mounted
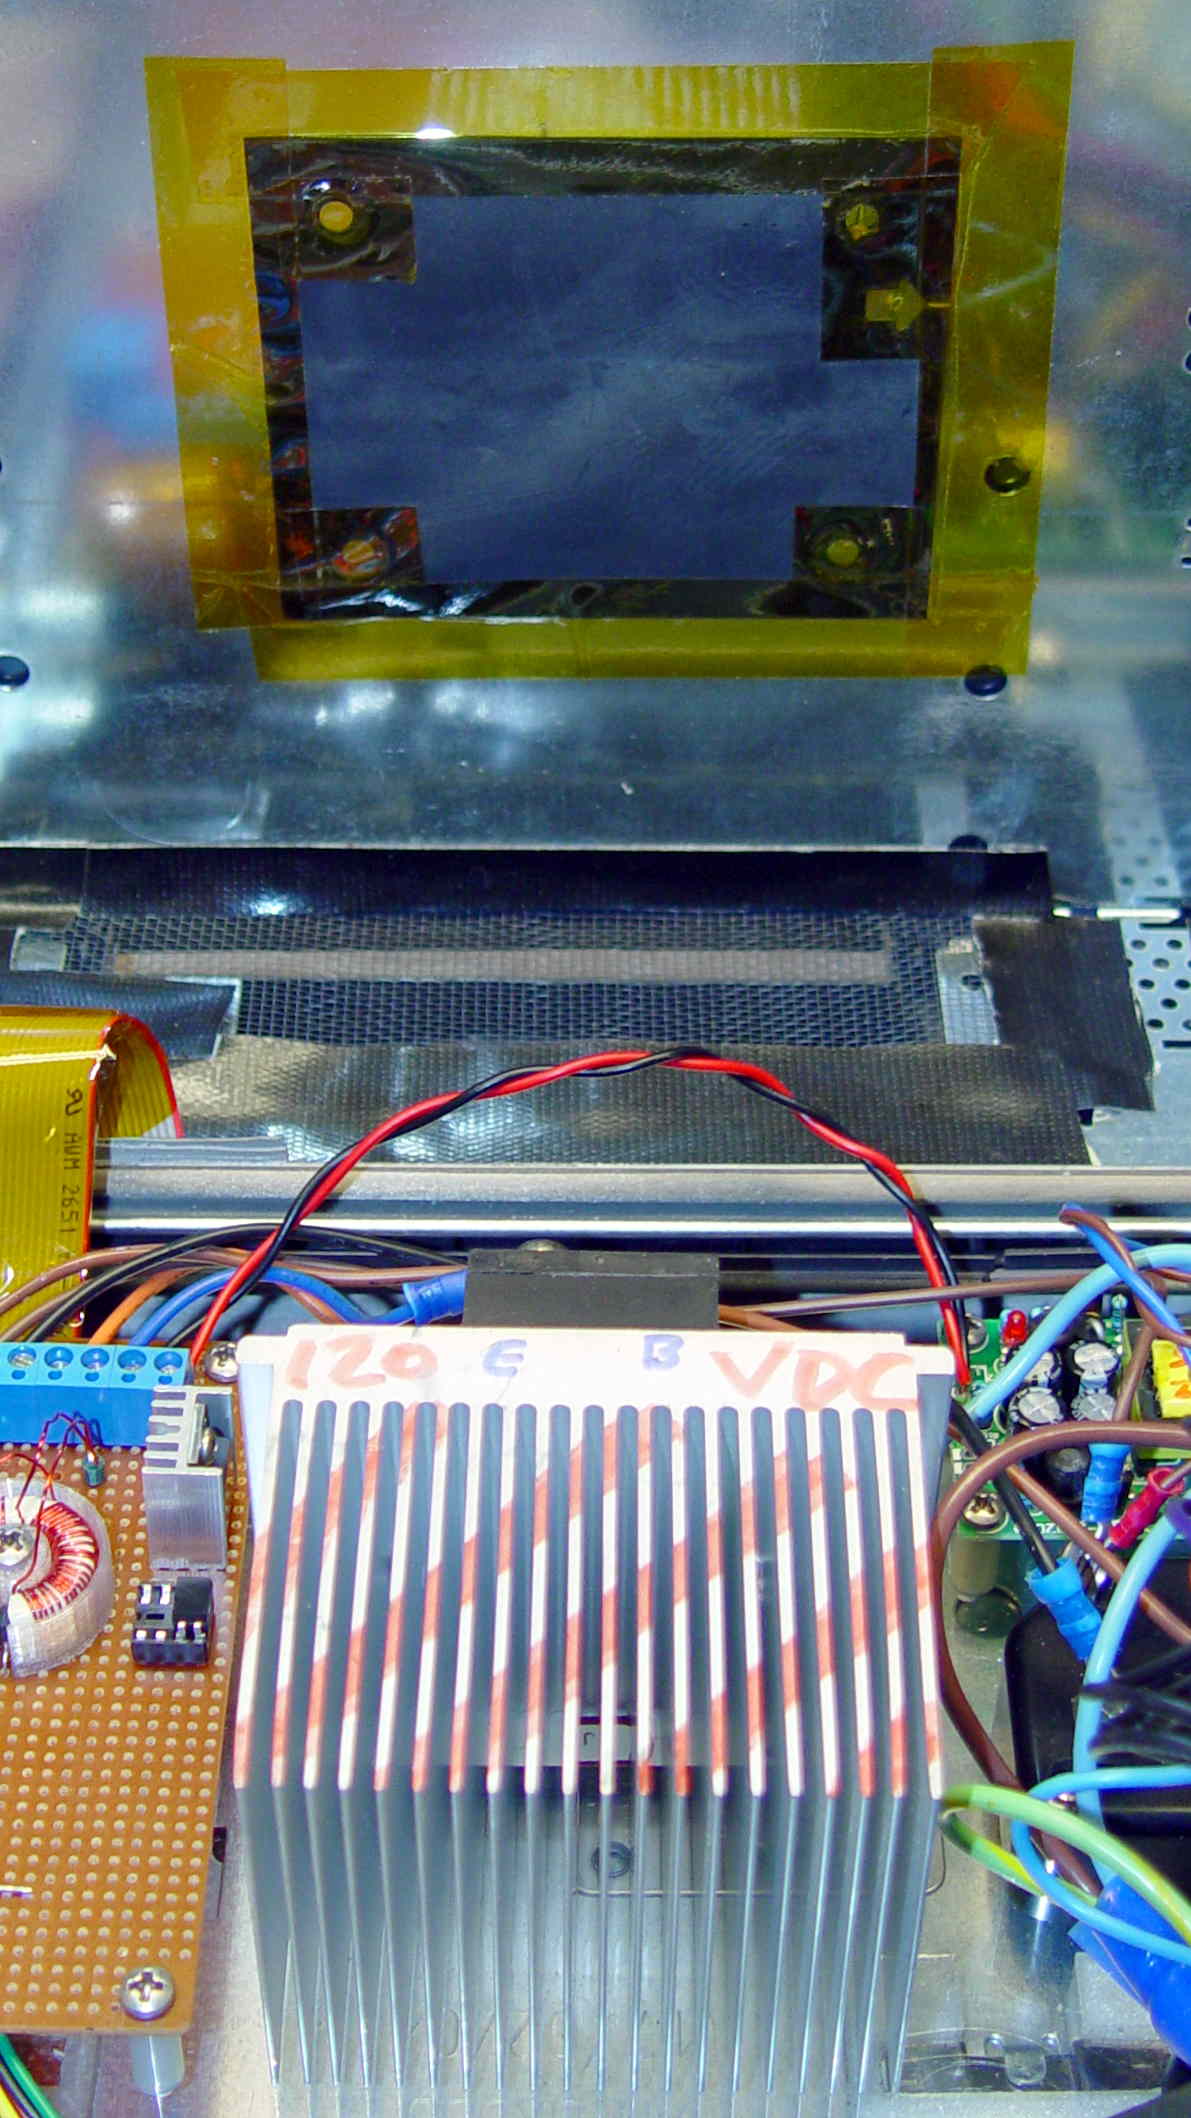
It makes a nice linear counterpoint to the jumble of AC interface wiring:
AC Interface Chassis
The insulating sheet on the case lid came from the bottom of the original GX270 system board, where I think it served much the same purpose. It’s surely not rated for AC line voltages, but the thought must count for something:
The sewing machine motor runs from 120 V AC or DC, drawing a few amps with the rotor locked, so a hulking 300 V 10 A bridge rectifier (Motorola MDA962-4, if you’re keeping score) seems grossly overrated. On the other paw, I have one, so why not?
The mounting holes pass 6-32 machine screws, but the recesses in the top seem meant for fillister head screws that I don’t have. Fortunately, I do have a lathe:
MDA962-4 rectifier – screw head adjustment
And then they just drop into place:
MDA962-4 Bridge Rectifier – installed
You can see why recessing the screw head below the top of the rectifier is a Good Thing.
The Dell GX270 system board mounts on a tray, latching into small tabs, with a single screw locking it in place. The tray then slides into the metal EMI shield / case, latching onto more tabs, with a spring-loaded pair of tabs snapping into a slot under the green latch:
Optiplex GX270 – system board tray
All that is well and good for a mass-production PC system board, but poses a problem for mounting anything else: there’s no room for screw heads below the tray, adhesives really don’t bond to slightly flexible aluminum sheets, and I definitely can’t do large-scale precision metal bending.
So a cheat seems in order. The general idea is to support a 6 mm polycarbonate sheet on clips that slide under the small tabs along the front, support the sheet on the rear tabs, and secure it with the screw. That’s thick enough to allow tapping holes for mounting screws, so everything else can mount to the sheet.
The sheet fits around the power supply on the right, protrudes over the rear of the tray to the back of the case (with a recess around the green latch), and clears the hinge assembly on the left. There are no dimensions, as it’s all done by eye with the Joggy Thing.
AC Chassis Shaping
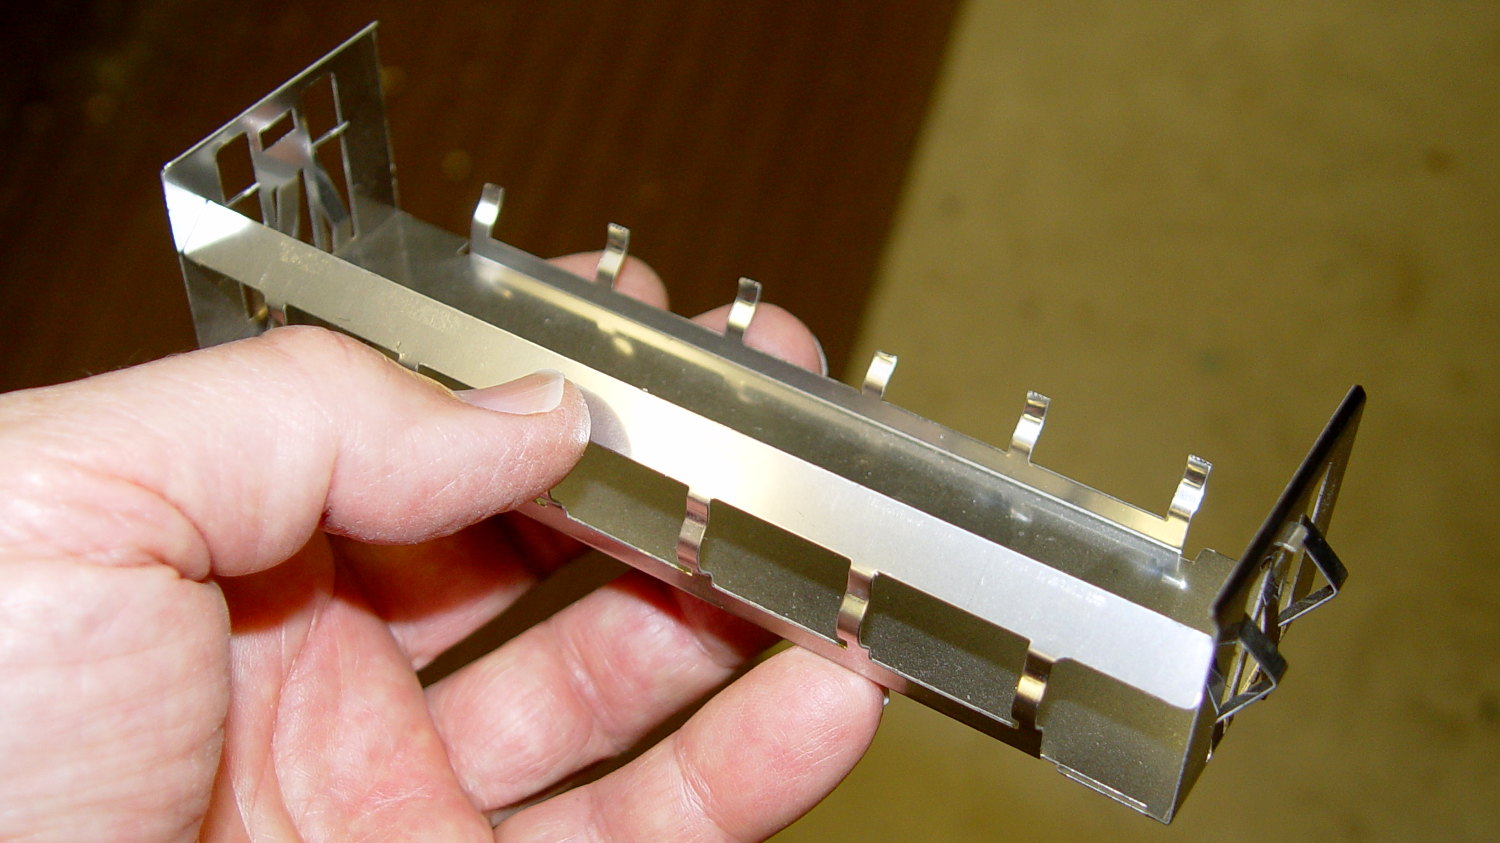
A drive bay EMI plug from a long-discarded PC provided some nice springy steel strips that slide neatly under those tray tabs:
Drive EMI shield
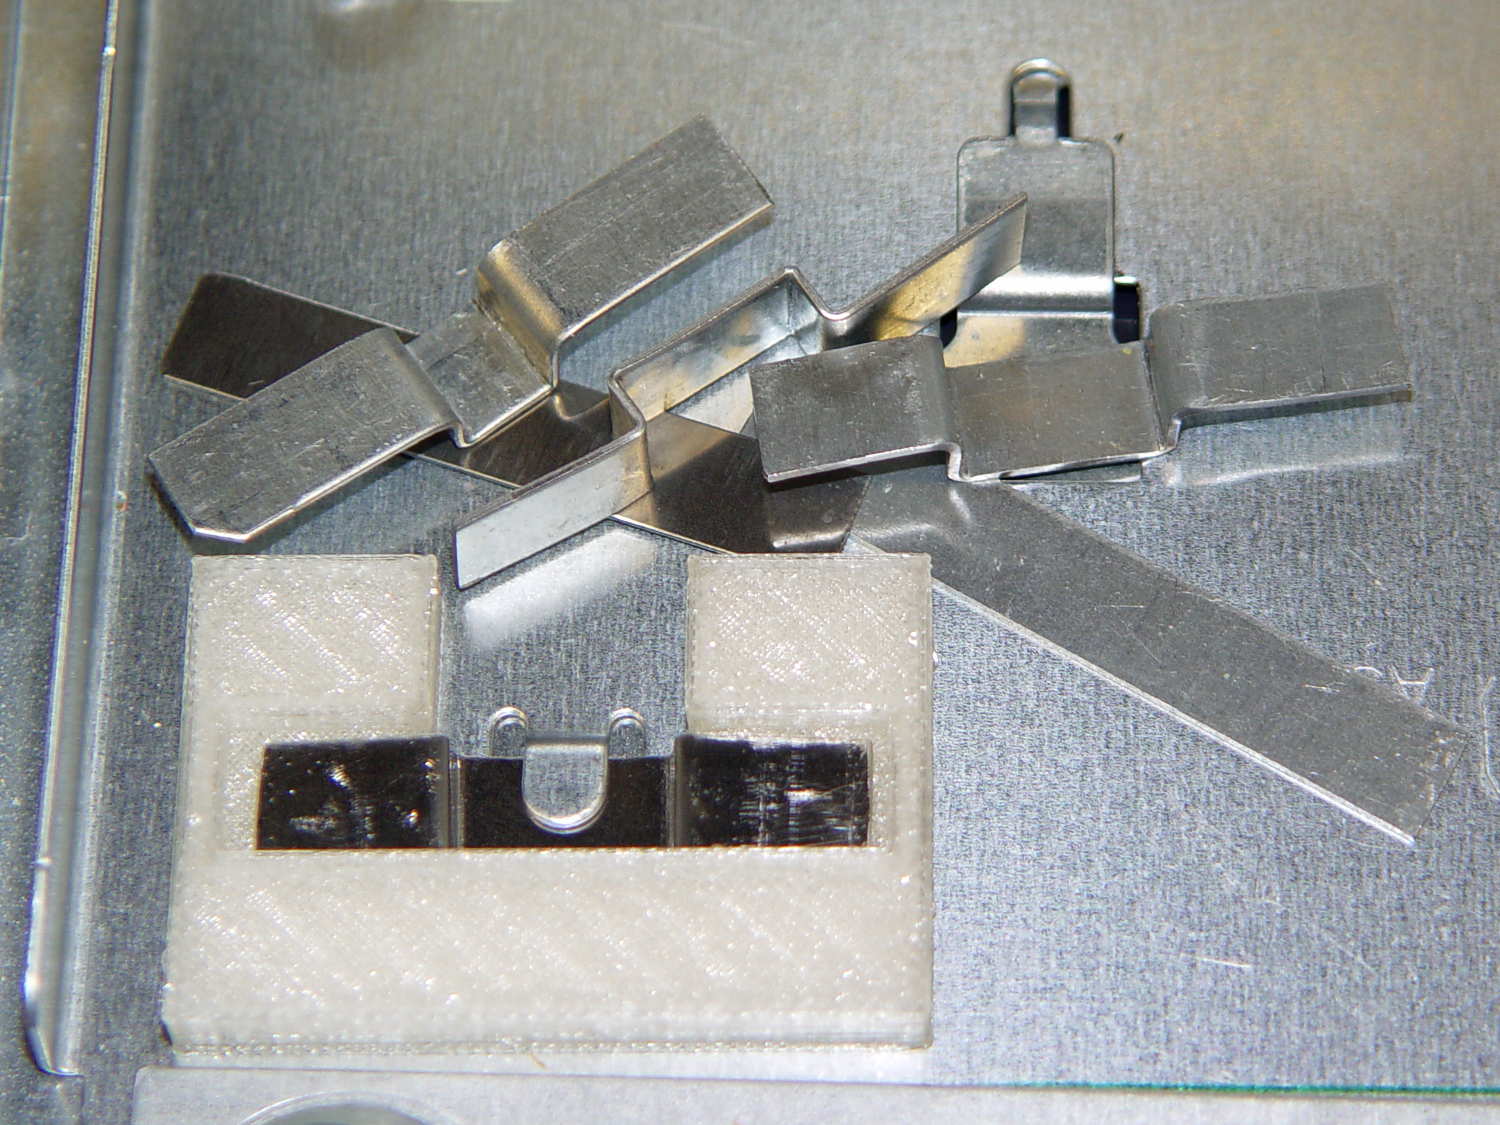
That actually took a bit of trial-and-error:
AC Chassis mounting brackets – practice makes perfect
My first attempts used slightly thicker steel that didn’t fit nearly as well, plus I wasn’t quite sure how wide they should be.
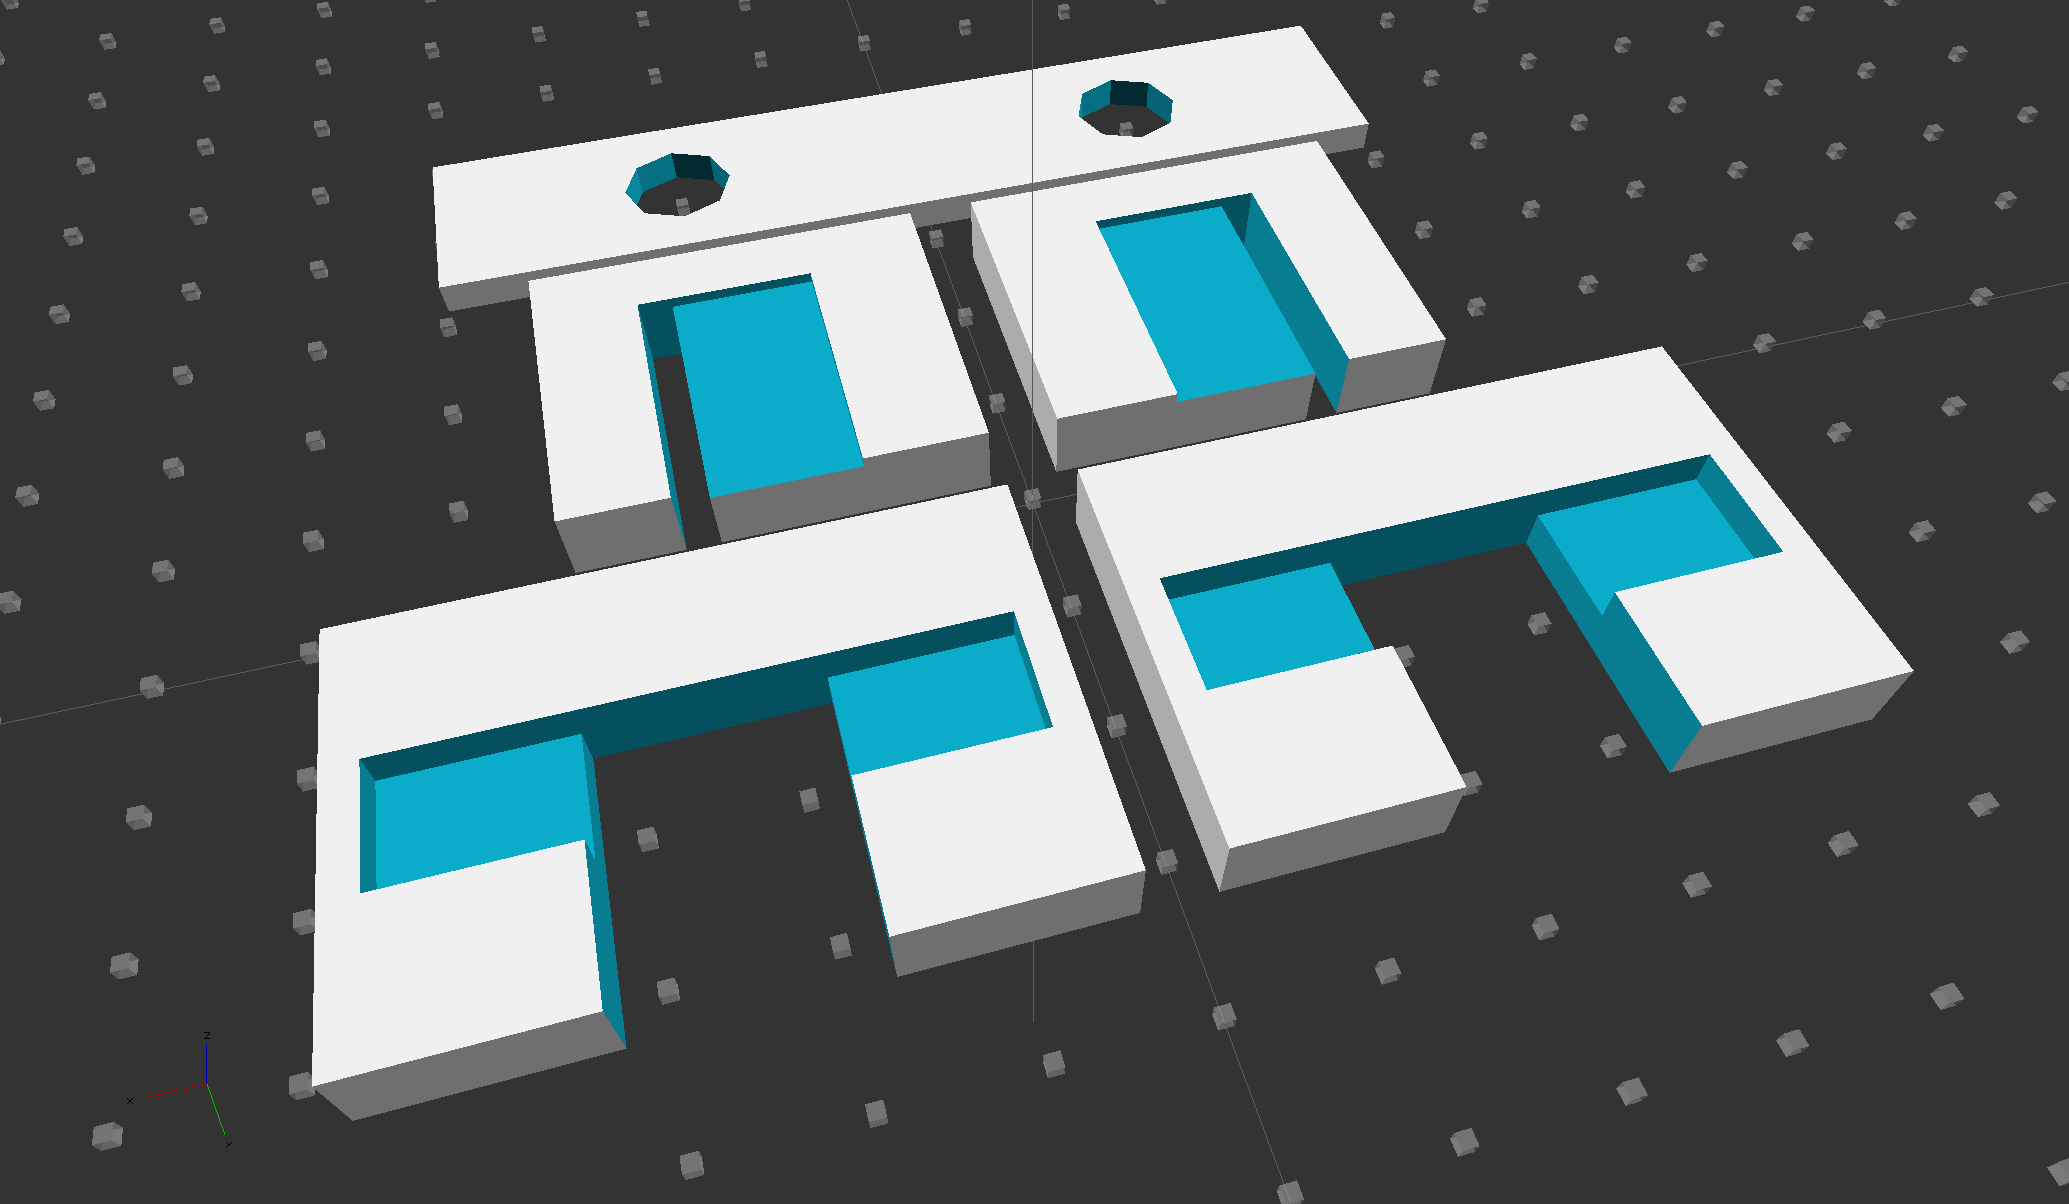
As with nearly all plastic doodads around here, the white plastic mounting clips / brackets come from the M2:
Chassis Clips
The two brackets in the middle of the solid model slide around the tabs at the rear corners of the tray and capture the bent-over top section below the polycarbonate sheet.
The strip in the rear goes around the screws holding the heatsink to the sheet; more on that later.
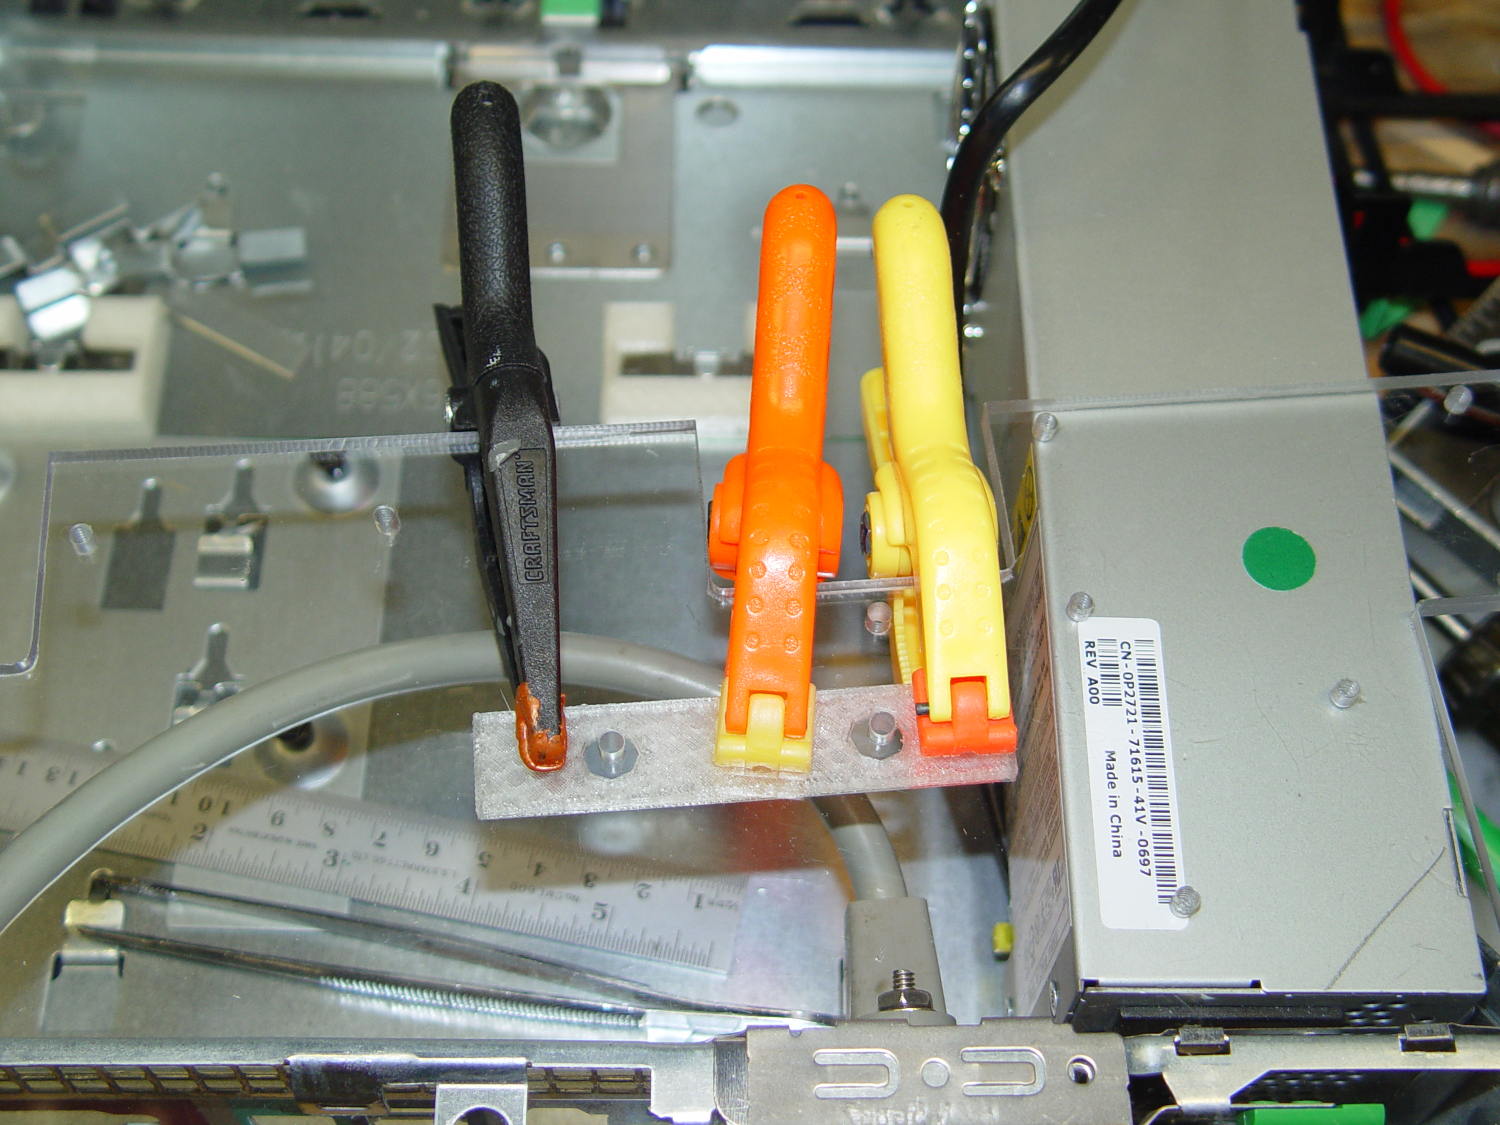
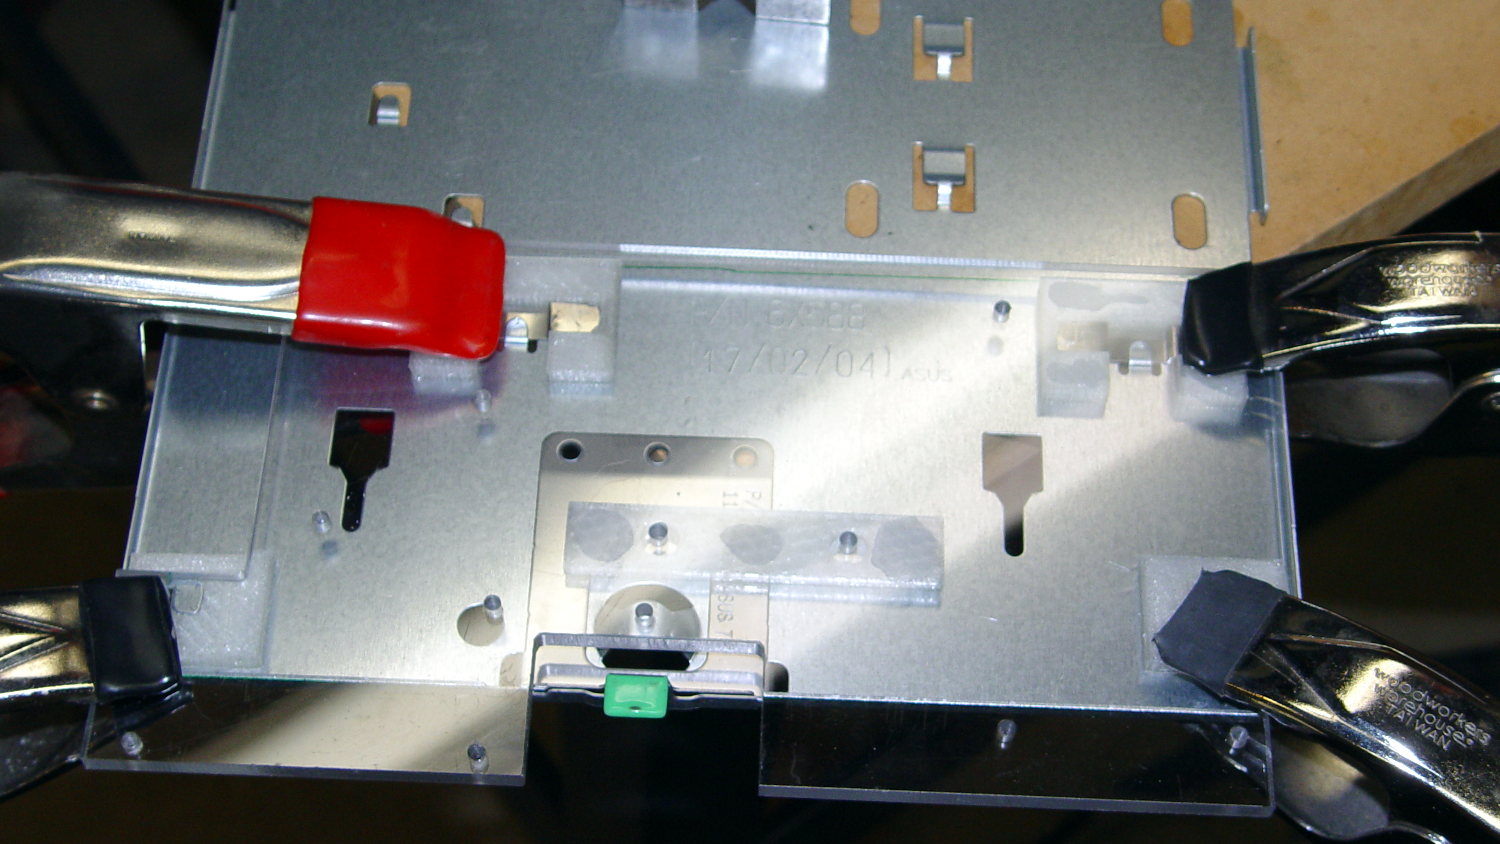
The PLA brackets get themselves glued to the sheet with IPS #4 solvent adhesive, a hellish mixture of chlorinated hydrocarbons that attacks most plastics with gleeful enthusiasm. I positioned the brackets on the tray, slobbered adhesive on their tops, slapped the polycarbonate sheet in place, and applied clamps:
AC Chassis – gluing bracket blocks
The final bonds weren’t as uniform as I’d like, but they seem rugged enough. The lip along the rear of the tray was slightly higher on the left edge, which may have interfered with the clamping pressure; it’s obviously not a controlled dimension.
The tapped holes in the sheet accommodate screws for various bits & pieces.
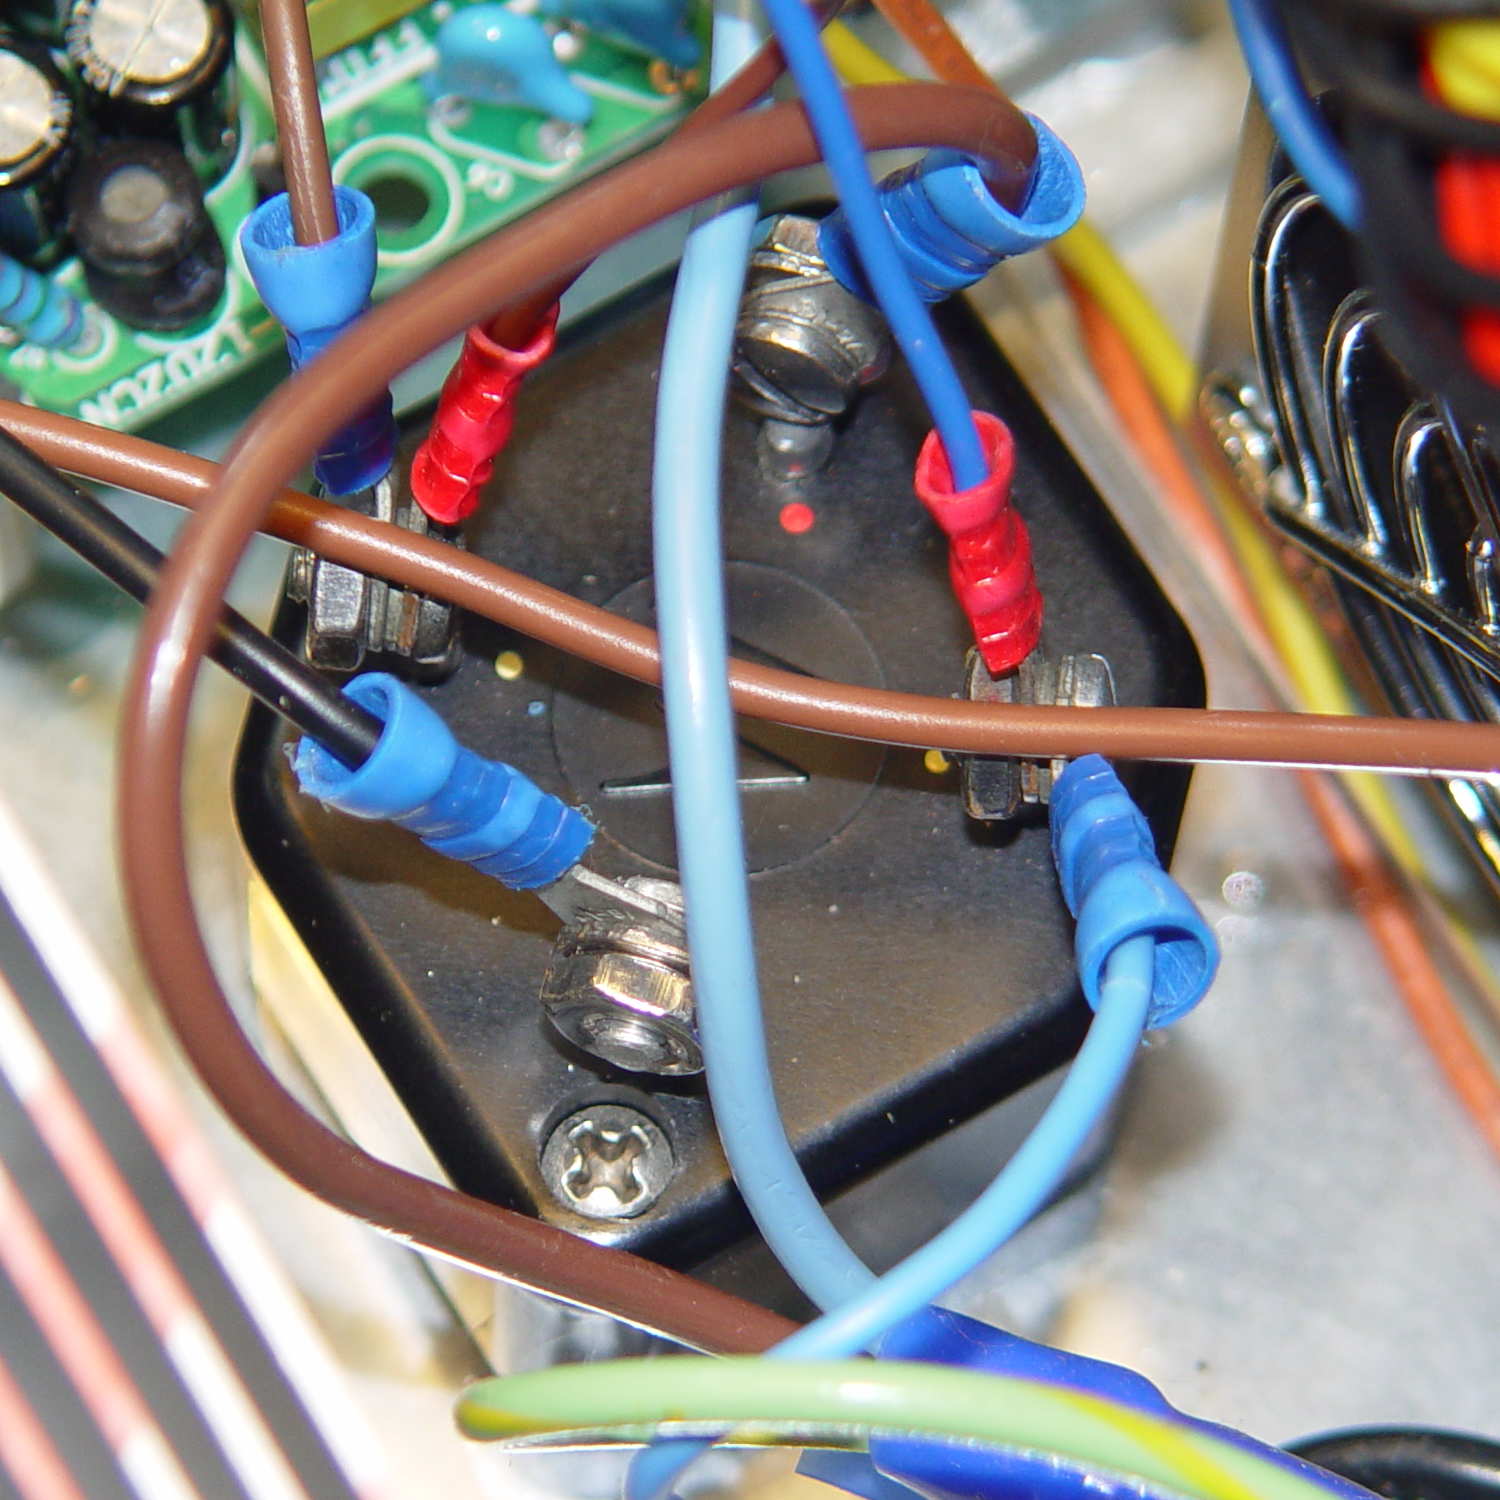
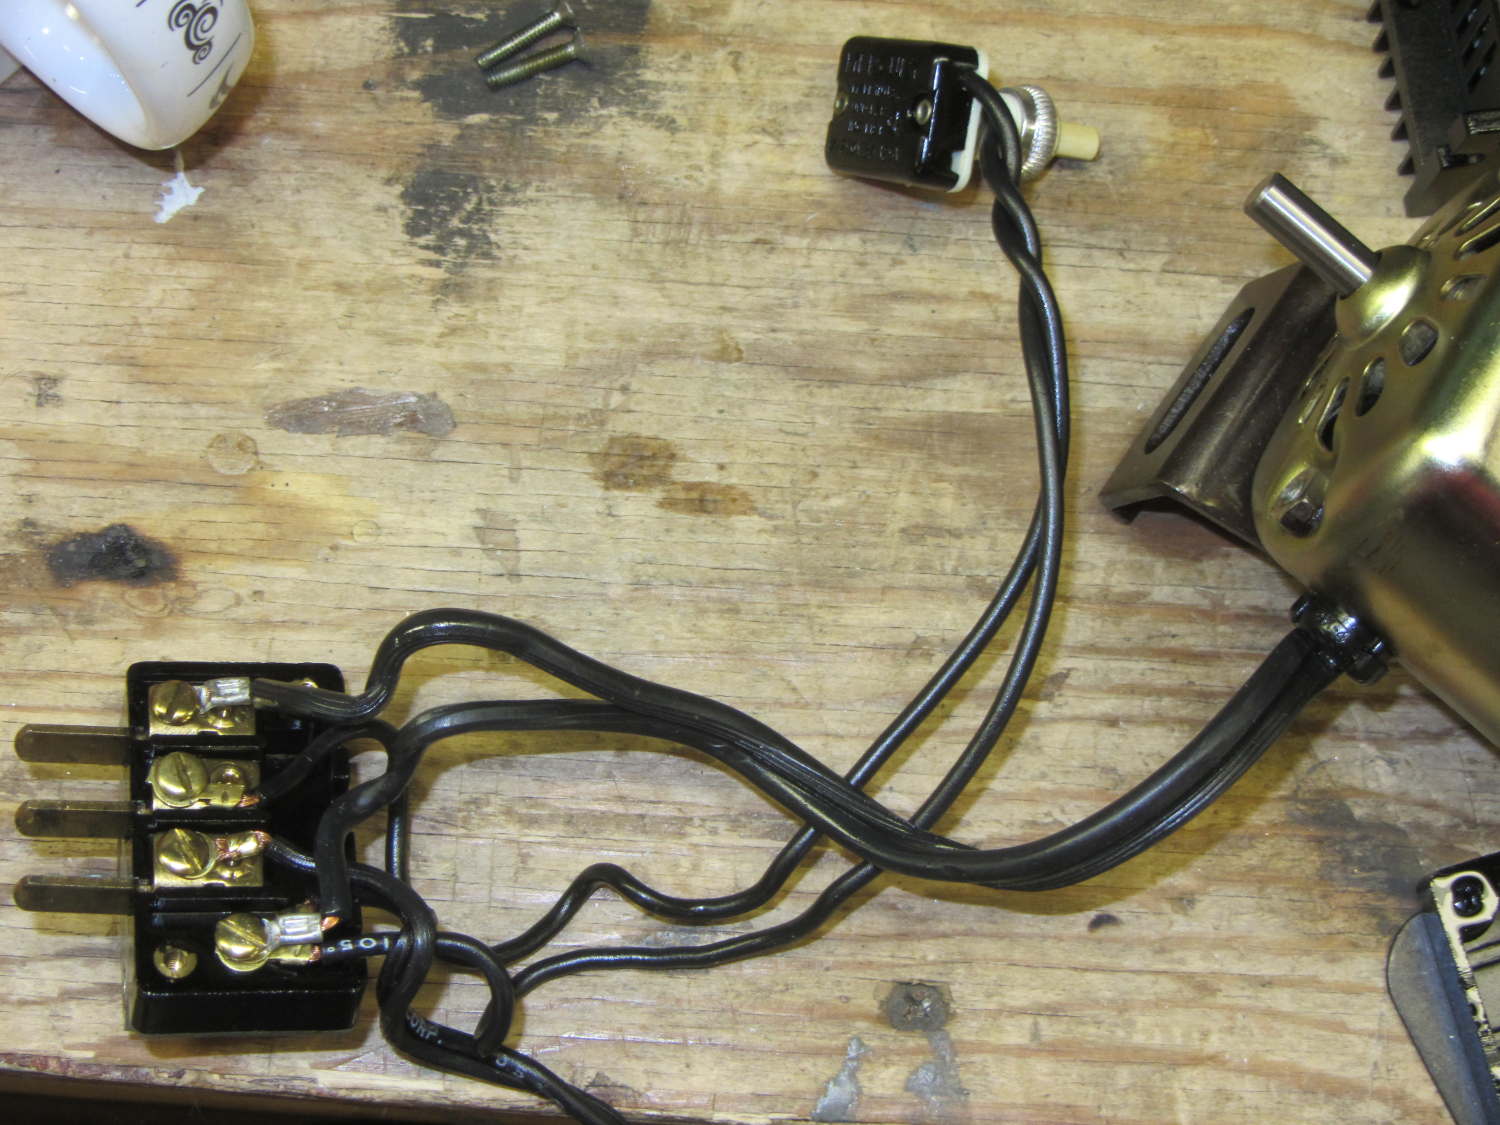
The original Kenmore Model 158 sewing machine used a two-wire line cord:
Kenmore 158 – terminal block
In light of my modifications, grounding the frame seems prudent. The heap produced a long IEC extension cord with screw-mounting ears on the socket end that fit neatly into the GX270’s rear panel area occupied by two PCI cover plates, so a bit of Quality Shop Time seemed in order.
The GX270’s carcass yielded a complex bit of sheet metal that held the hard drive and a few other odds & ends, with some clean right-angle bends in exactly the right places:
Dell drive bracket – intact
Some bandsaw work removed the gimcrackery:
Dell drive bracket – first bandsaw pass
More bandsawing produced a rough outline:
Dell drive bracket – second bandsaw pass
Sawing to length, removing the small flanges, and squaring the sides:
Dell drive bracket – squaring edges
I traced the existing PCI cover tabs, bandsawed the outlines, and filed to suit:
Dell drive bracket – basic outline
They look a bit ragged, but fit well enough:
Dell drive bracket – trial fit – interior
From the outside, it looks like it grew there:
Dell drive bracket – trial fit – exterior
The divider between the PCI slots succumbed to tin snips and a bit of filing. The tabs climbing over the bottom edge come from the internal EMI shield covering the entire back surface.
A bit of coordinate drilling and manual milling produced the IEC socket outline
Dell drive bracket – drilling and milling
Which looks pretty good from the inside:
Dell drive bracket – IEC socket – interior
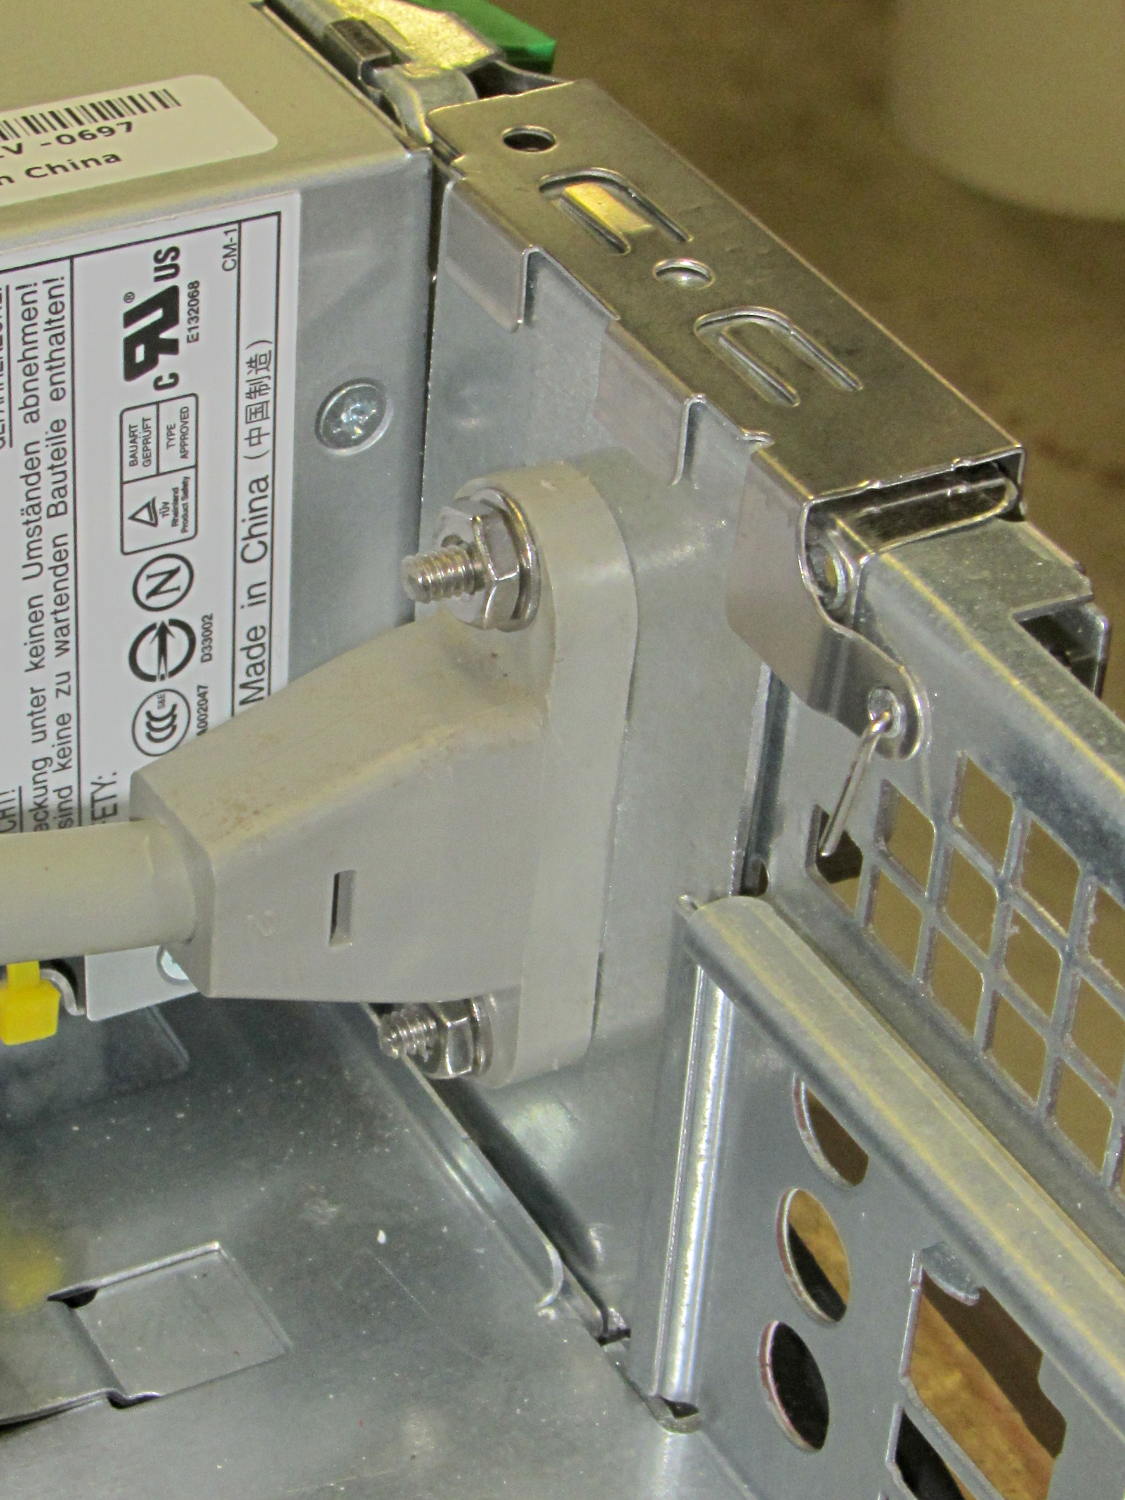
And great from the outside, if I do say so myself:
Dell drive bracket – IEC socket – exterior
Match-drilling a #6 clearance hole below the hole in the clamp arm, then ramming a self-tapping case screw into it, provides a convenient grounding point for the sewing machine cord:
IEC Socket Mount – ground screw
The chassis lid has two matching holes for those screw heads, which would ordinarily hold the two PCI cards in place. I could remove the clamp arm, but it doesn’t get in the way of anything.
Under ordinary circumstances, a fuseholder mounts in a square-ish panel cutout, but there’s no convenient panel to be found in the repurposed GX270 case. So now there’s a holder for the fuseholder stuck to the side of the power supply inside the case:
Fuseholder – installed
The square tube covers the entire fuseholder, with the quick-connect tabs protruding from the back, to provide enough surface area for the double-stick foam tape.
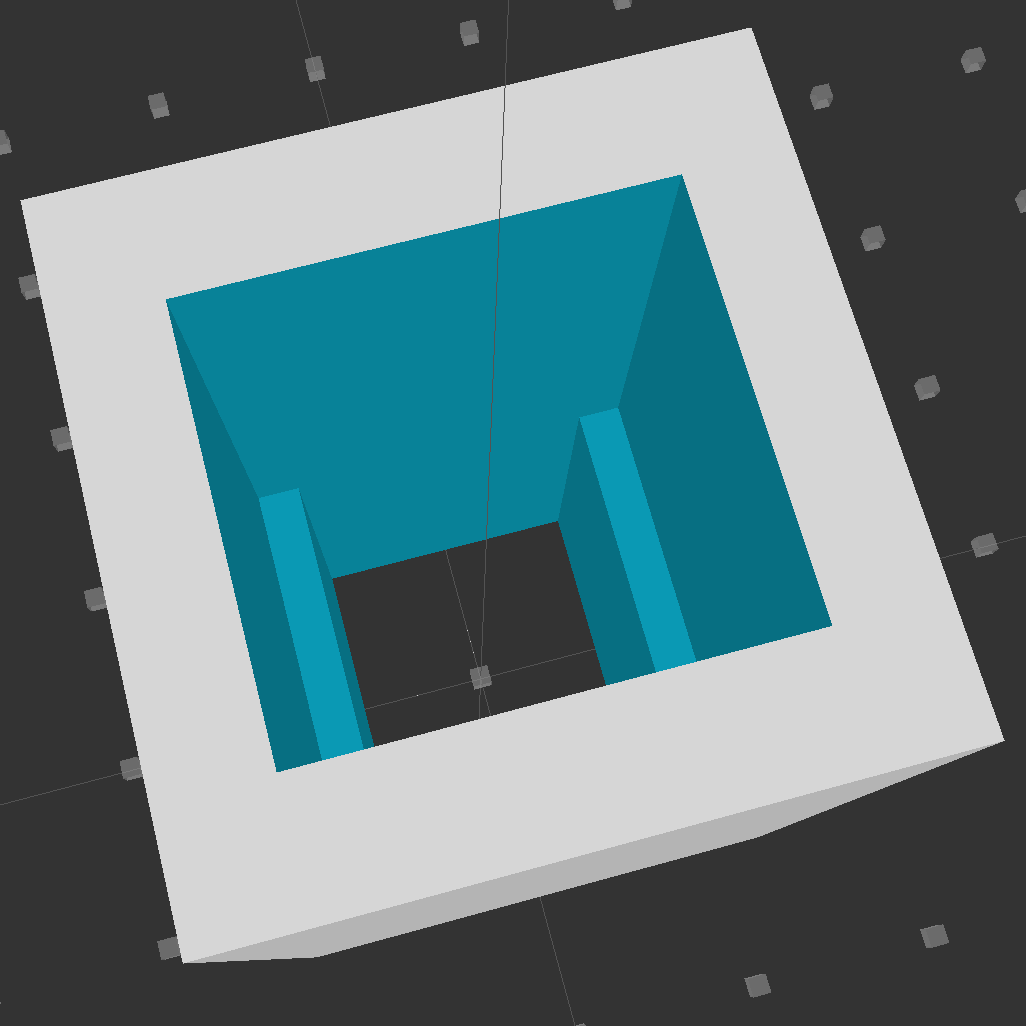
Looking down into the solid model, you can see the reduced width near the back end:
Fuseholder Holder
The black fuseholder contains a 5 A fast blow fuse, which should be entirely adequate for normal operation. In the event that a wire breaks loose and contacts the metal shell surrounding the whole chassis, it will pop instantly. That won’t disable the power supply, but it will remove line voltage from the entire motor controller chassis.
Remember that the source power line goes to the center QC tab, thus burying the always-hot contact deep in the fuseholder.
The OpenSCAD source code:
// Fuseholder mount
// Ed Nisley - KE4ZNU - August 2014

//- Extrusion parameters must match reality!

ThreadThick = 0.20;
ThreadWidth = 0.40;

HoleWindage = 0.2;			// extra clearance

Protrusion = 0.1;			// make holes end cleanly

AlignPinOD = 1.70;			// assembly alignment pins: filament dia

function IntegerMultiple(Size,Unit) = Unit * ceil(Size / Unit);

//----------------------
// Dimensions

Shell = [25.0,25];						// outside = bezel size + some stiffening

Mount = [17.3,15.7,21.0];					// mount section = slight compression in X
Base = [13.5,15.7,17.0];					// clearance over crimped contact

OAL = Mount[2] + Base[2];

//----------------------
// Useful routines

module PolyCyl(Dia,Height,ForceSides=0) {			// based on nophead's polyholes

  Sides = (ForceSides != 0) ? ForceSides : (ceil(Dia) + 2);

  FixDia = Dia / cos(180/Sides);

  cylinder(r=(FixDia + HoleWindage)/2,
           h=Height,
           $fn=Sides);
}

module ShowPegGrid(Space = 10.0,Size = 1.0) {

  RangeX = floor(100 / Space);
  RangeY = floor(125 / Space);

	for (x=[-RangeX:RangeX])
	  for (y=[-RangeY:RangeY])
		translate([x*Space,y*Space,Size/2])
		  %cube(Size,center=true);

}

//----------------------
// Build it

ShowPegGrid();

difference() {
	translate([0,0,OAL/2])
		cube([Shell[0],Shell[1],OAL],center=true);
	translate([0,0,Base[2] + Mount[2]/2])
		cube(Mount + [0,0,2*Protrusion],center=true);
	translate([0,0,Base[2]/2])
		cube(Base + [0,0,2*Protrusion],center=true);
}