Ed Nisley's Blog: Shop notes, electronics, firmware, machinery, 3D printing, laser cuttery, and curiosities. Contents: 100% human thinking, 0% AI slop.
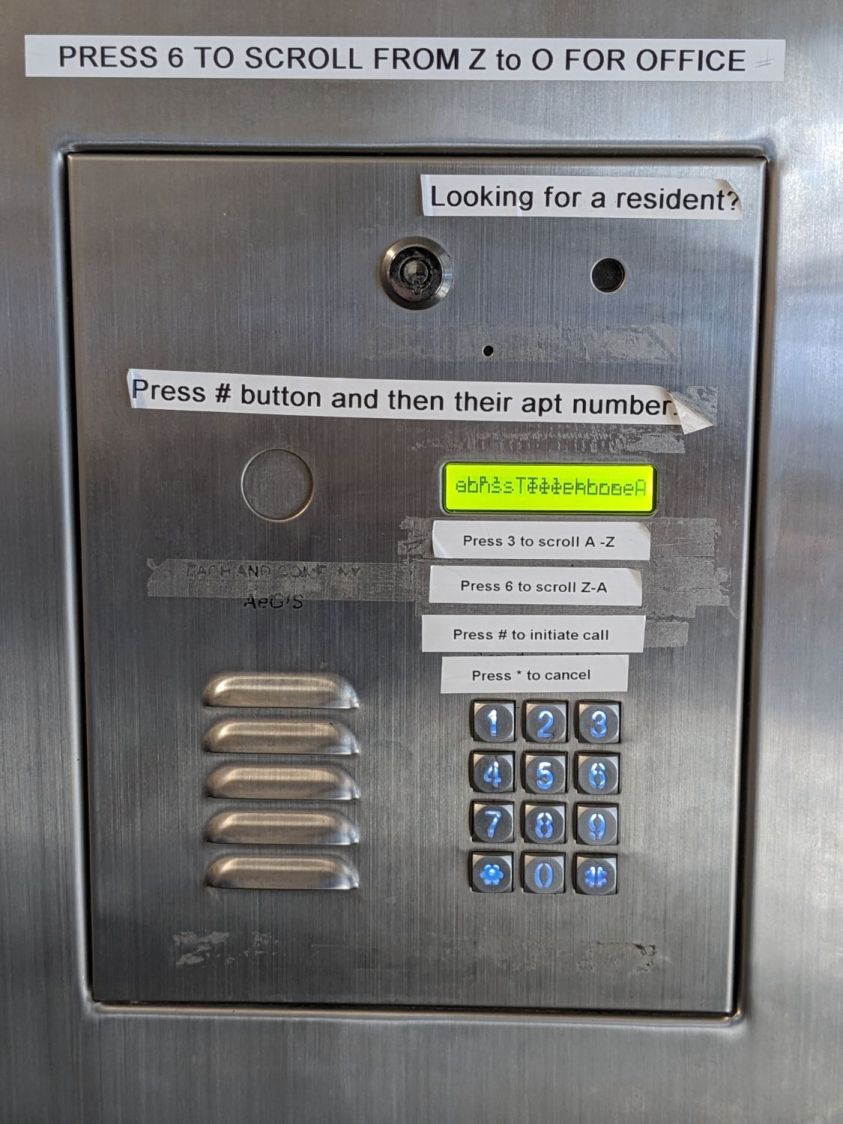
The LCD gibberish comes from an interaction with the camera shutter. It scrolls a lengthy set of instructions, but the peeling labels demonstrate ain’t nobody got time for that.
You were supposed to figure out how to use this thing with no instructions other than the scrolling display. In particular, the multi-multi-function keypad has no labels.
I suspect most folks just haul out their phones and call the tenant.
As practice in using the laser to engrave a figure to a known depth, this seemed appropriate:
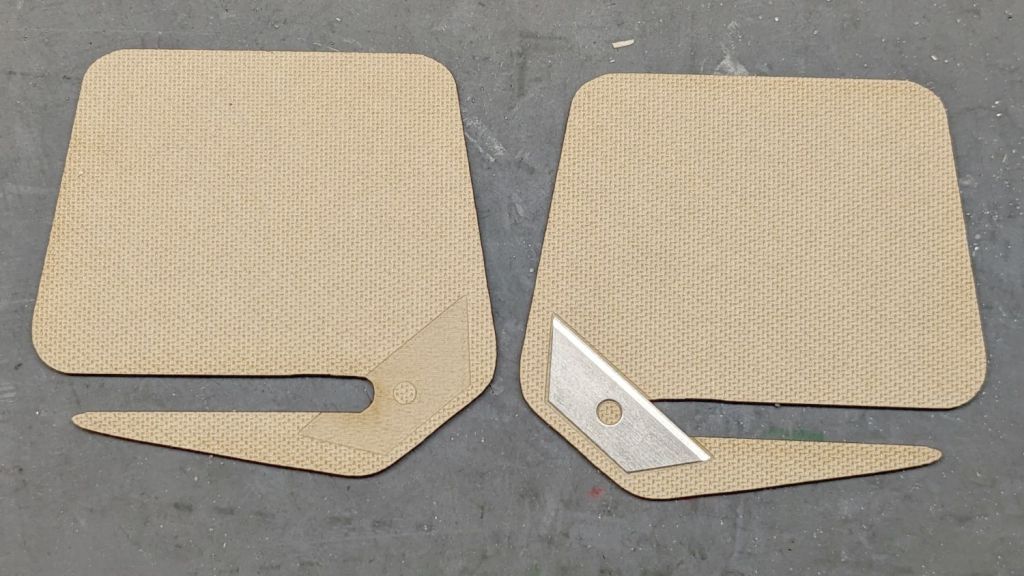
Envelope Opener – original
The black envelope opener on the right came in a long-ago surplus deal and worked really well, which I cannot say for the retail replacements I got a few years back.
The tan envelope opener on the left is an obvious case of IP theft, copying the size and shape using a scanned image:
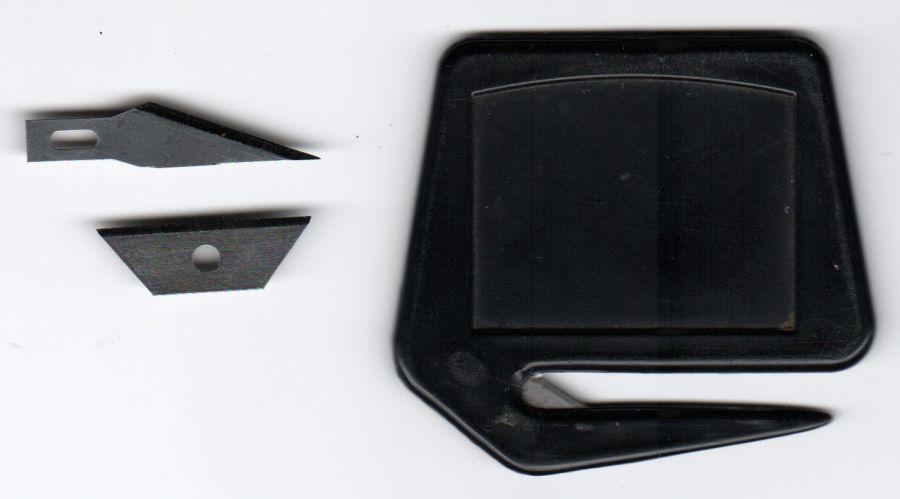
Classic opener – knife blades – scan
The two blades seemed like good candidates, with the lower one winning the contest:
Kobalt 78010 Mini Utility Knife Blade mask
Although the pack of “mini utility knife blades” sports a Lowe’s Kobalt part number, they no longer carry that item. You can find plenty of identical blades elsewhere, so they’re not a rare collectible and I have plenty of backup.
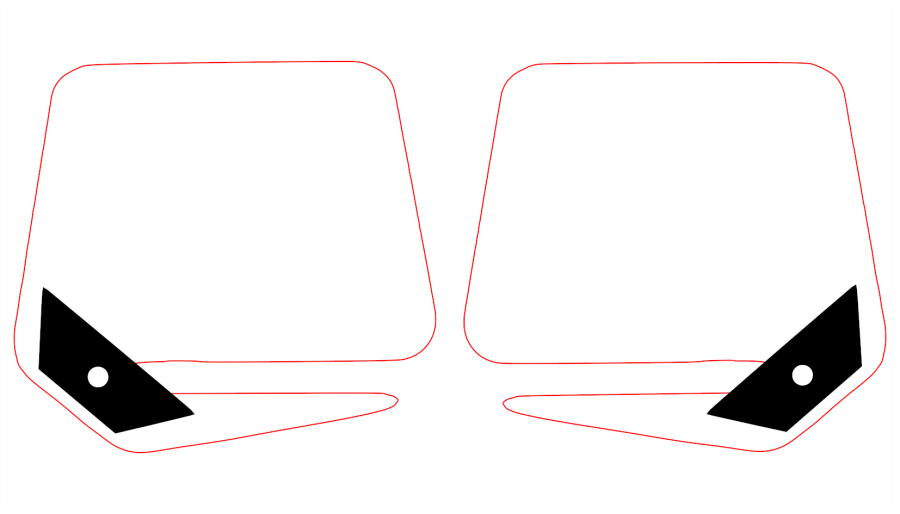
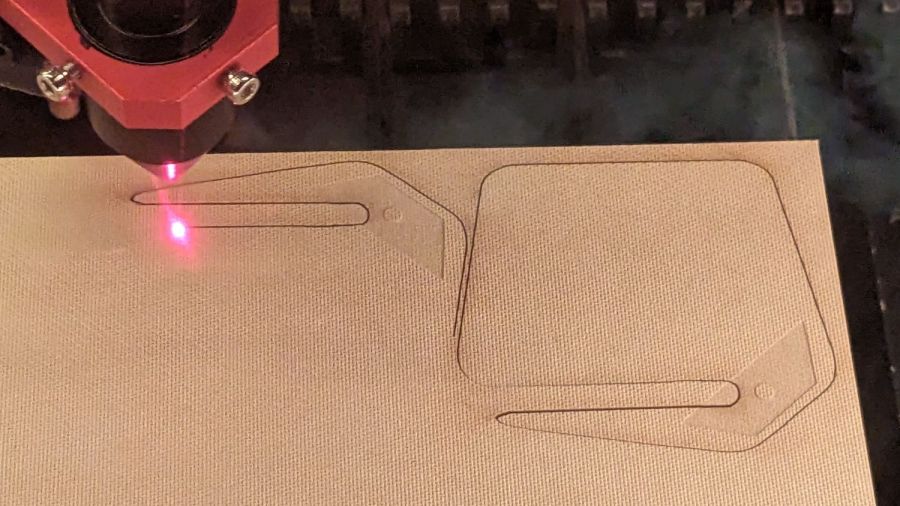
Put the outline of the opener on a cut layer, put the blade on an engraving layer, orient appropriately, and make a mirror-image duplicate:
Envelope Opener – LB Layout
The original opener is a touch over 3 mm thick, so the settings engrave 0.25 mm into the surface to make a blade pocket, then cut the shapes from 1.5 mm TroCraft Eco:
Envelope Opener – cutting
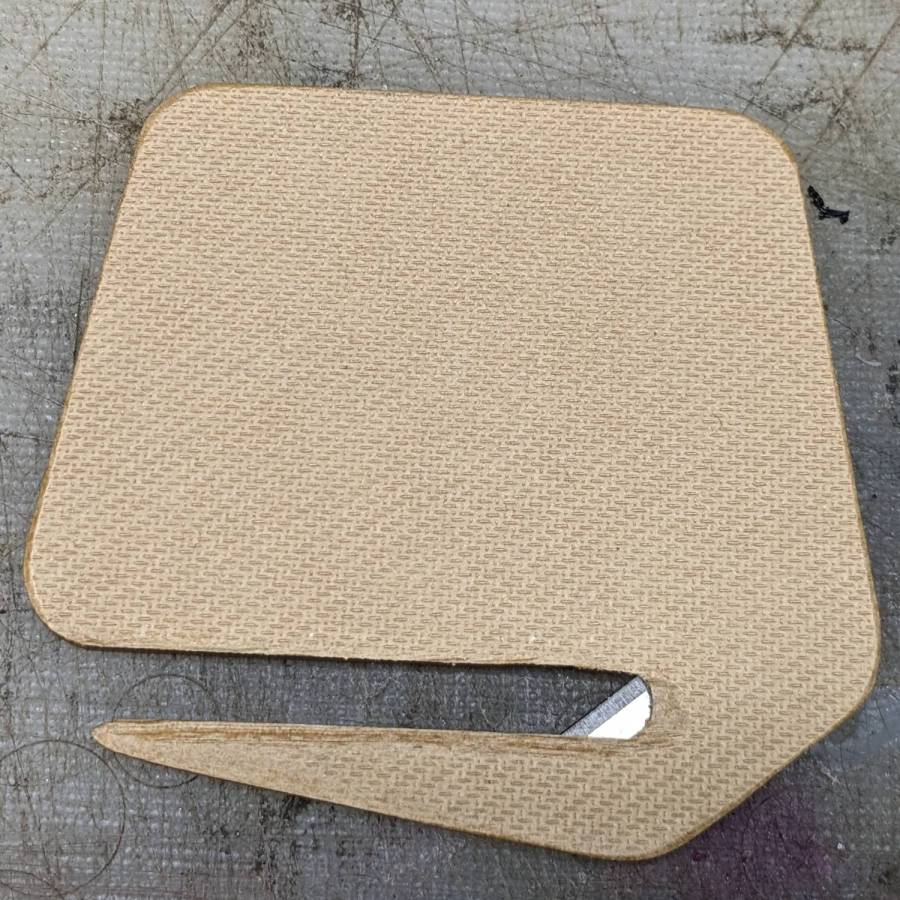
After all the cutting was done, it looks about as you’d expect:
Envelope Opener – interior layout
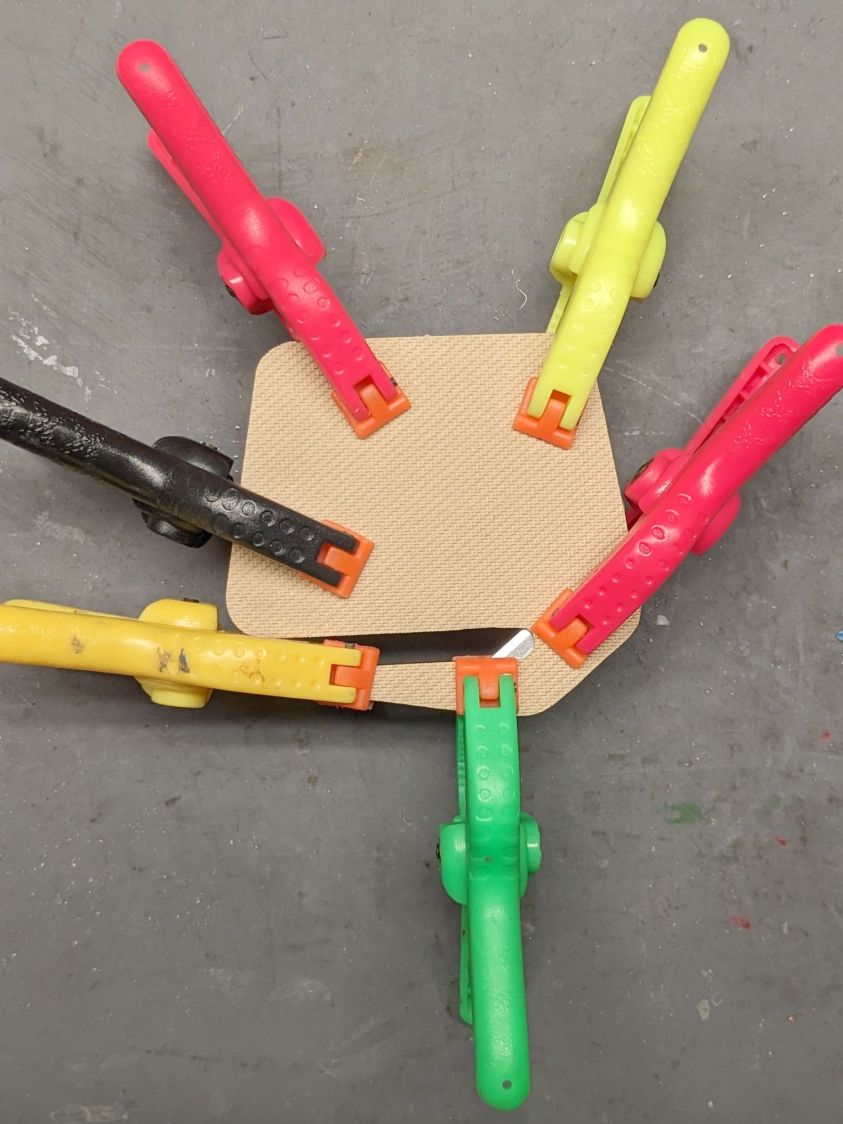
Slather with yellow PVA wood glue and apply too many clamps:
Envelope Opener – clamping
Next time around, I’ll round off the edges before assembly, but that’s in the nature of fine tuning:
Envelope Opener – detail
The TroCraft sheet engraves so cleanly that, were I to go into mass production, I’d set up a fixture for grayscale engraving shaping the perimeters.
Obviously, this makes no economic sense, but it does produce a considerable amount of satisfaction, which is pretty much all that matters for such things.
Spotted on a walk along the Mighty Wappingers Creek after a storm with plenty of gusty winds:
Tree-smashed guide rail
The tangle of branches and logs came from a tree that fell across the road from the far right side and put that crease into the guide rail. The vertical stump seems unrelated to that incident.
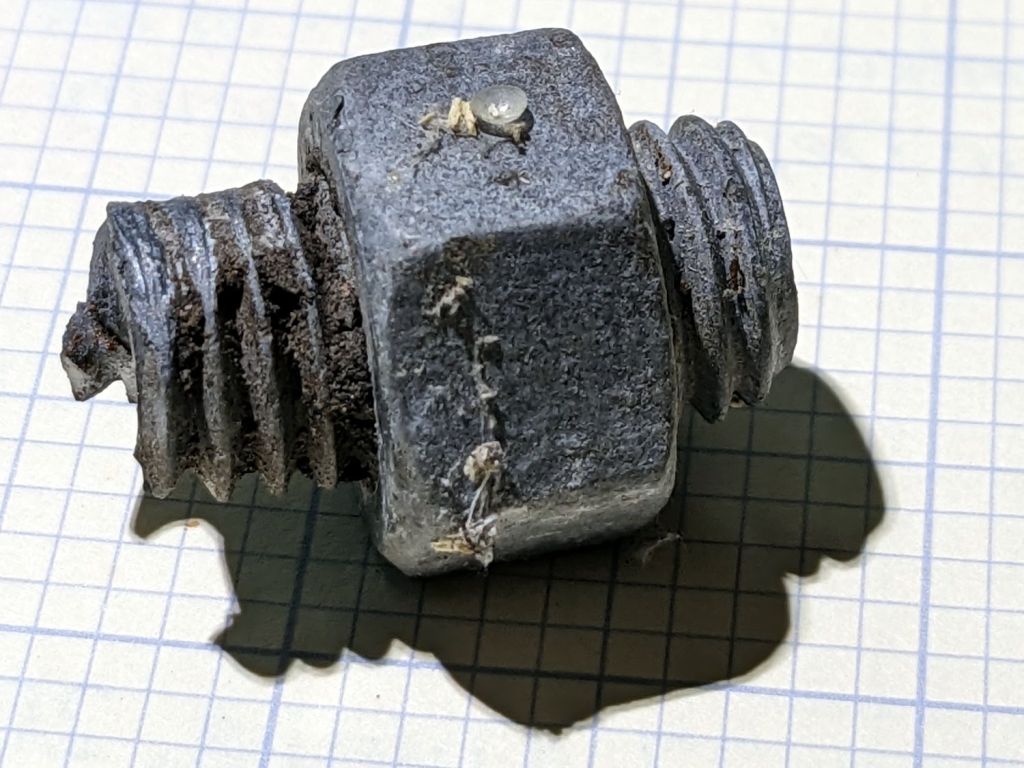
A bit of rummaging at the base of one post produced a victim:
Tree-smashed guide rail – sheared bolt – side
The impact produced enough force to turn the rail brackets into guillotine metal shears against the posts:
Tree-smashed guide rail – sheared bolt – end
It’s not a clean shear cut, which isn’t surprising under the circumstances.
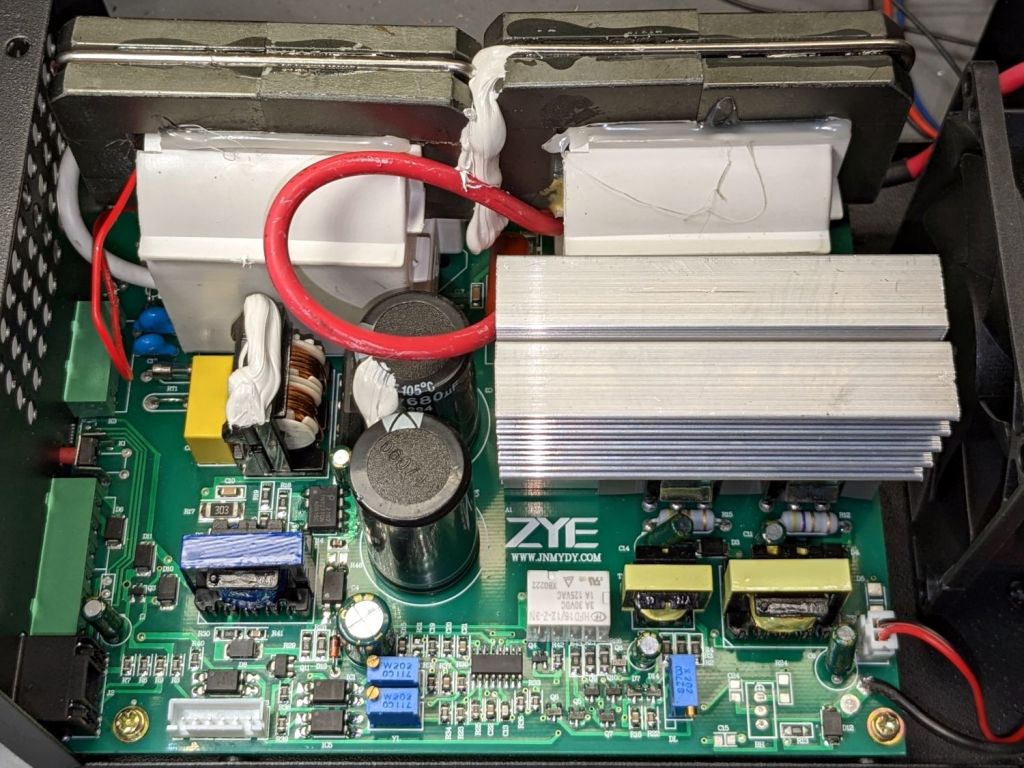
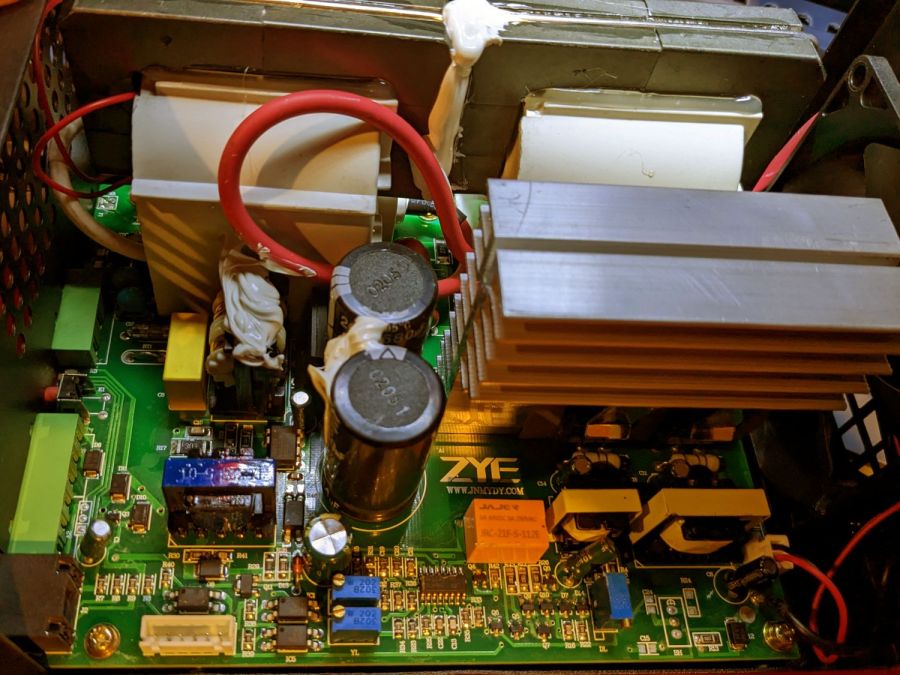
Without looking at the captions, match each of the following pictures with its description:
a failed ZYE MYJG60W-Y-1 (came with OMTech laser)
an unbranded MYJG60W replacement from OMTech
a Cloudray M60 (bought as a backup)
HV Power Supply – ZYE MYJG60W-Y-1 – failedHV Power Supply – unbranded MYJG60WHV Power Supply – Cloudray M60
That was easy, wasn’t it?
As I said in the forum:
My guess is there’s only one ZYE factory (or a dozen clones) producing all the power supplies, then applying whatever sticker the order calls for on the case before dropping it in the carton.
Perhaps Cloudray buys more quality control than the anonymous “brands”, but I wouldn’t lay much money on finding more than two QC bins at the end of the assembly line: either it runs or it doesn’t.
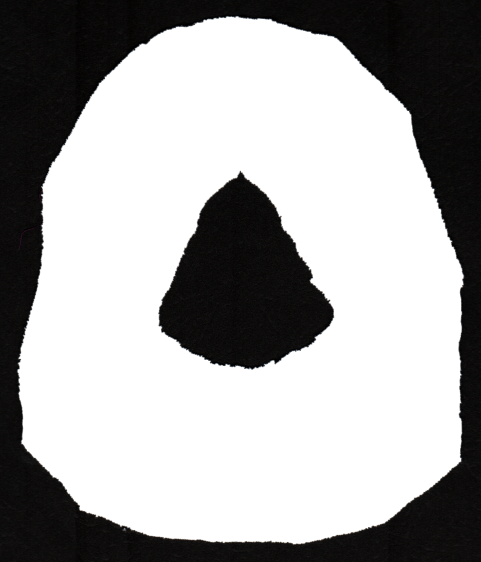
Mary cut out a simple cloth liner for her ResMed F20 CPAP mask (a.k.a. “cushion”) and snipped away at the fabric until it felt about right. I scanned the result and turned it into a bitmap mask (which is entirely different from a CPAP mask):
Mask liner – scanned
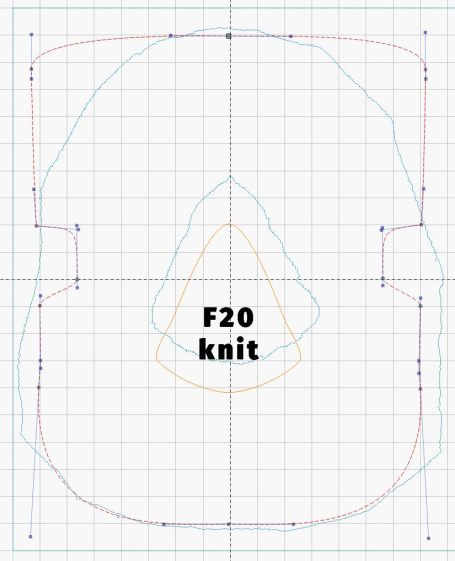
Given that as a start:
Import the scanned image into LightBurn
Fair a few curves around the perimeters by hand, rather than attempting to trace the thing
Rationalize the sizes
Make it symmetric
Cut a few prototypes while tweaking the fit
Which leads to a pattern like this:
CPAP Mask Liner – F20 knit – spline fit
The rectangular upper part forms a simple eyeshade that also keeps minor leaks from disturbing her sleep. Your mileage may vary, depending on how much you toss and turn during the night.
We found the fit depends on the fabric, with woven fabric requiring a taller opening:
CPAP Mask Liner – F20 knit woven – LB layout
The engraved legend verifies I used the proper design for the fabric:
Laser cut CPAP Mask Liner – F20 – knit fabric
The opening has tabs holding it in place while cutting, at least until we get this down to a routine.
Then make enough for a while:
Laser cut CPAP Mask Liner – F20 – production
The usual woodstove odor vanishes after half a day sitting atop the clothes washer. Putting them in a mesh bag and tossing them into the regular wash refreshes them after use.
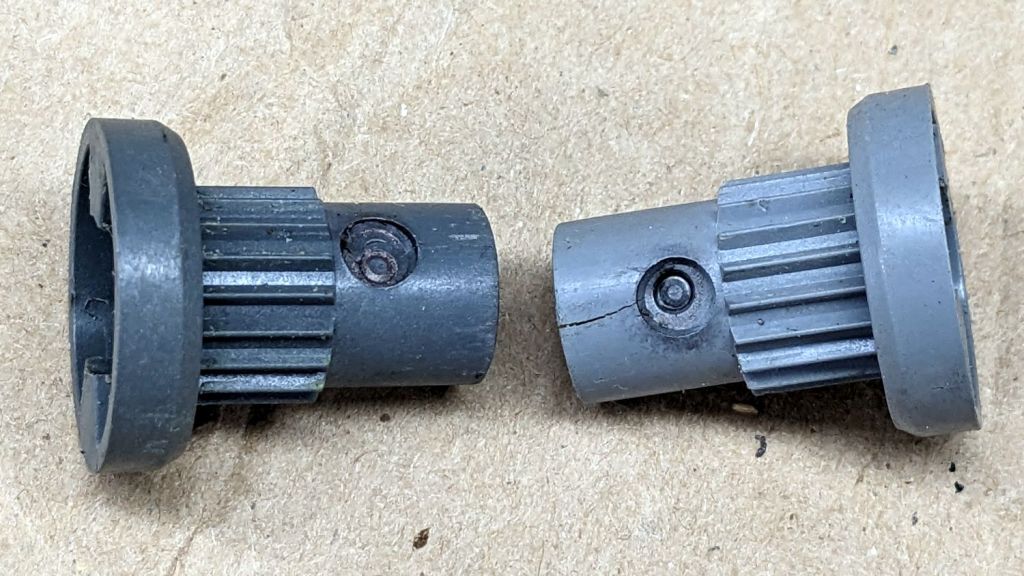
The shower faucet handles have been getting looser, but once a decade seems reasonable. This time around, however, the setscrews had dug themselves so far into the splined plastic fittings that they had run out of thread:
American Standard Shower Handle rebuild – gouged setscrew sockets
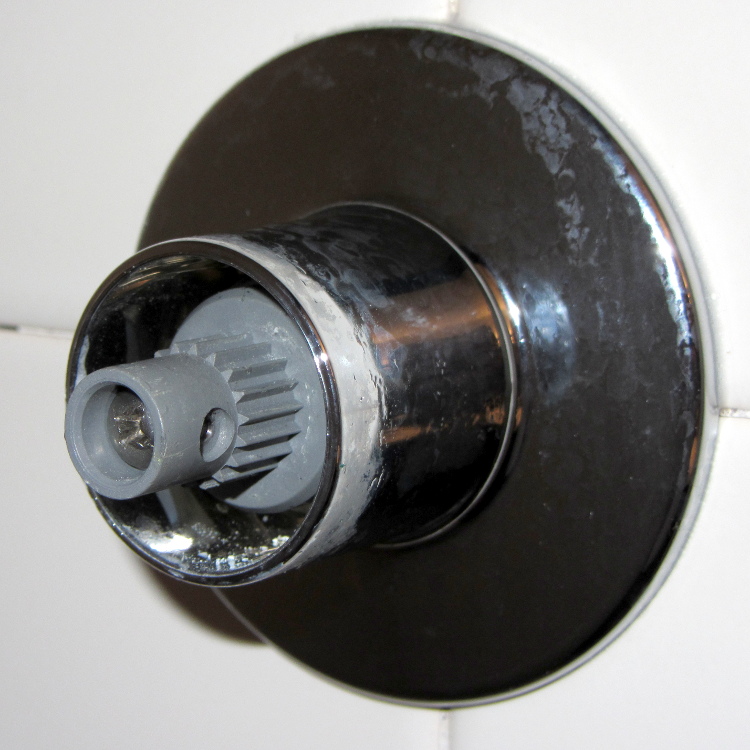
Wipe out the crud, clean out what’s left with alcohol to encourage stick-to-it-ivity, and fill the cavities with JB Kwikweld epoxy:
American Standard Shower Handle rebuild – epoxy fill
When it cures, file a flat across the sockets:
American Standard Shower Handle rebuild – flatted
Reinstall in reverse order with a dot of NeverSeez on the setscrews for good measure.
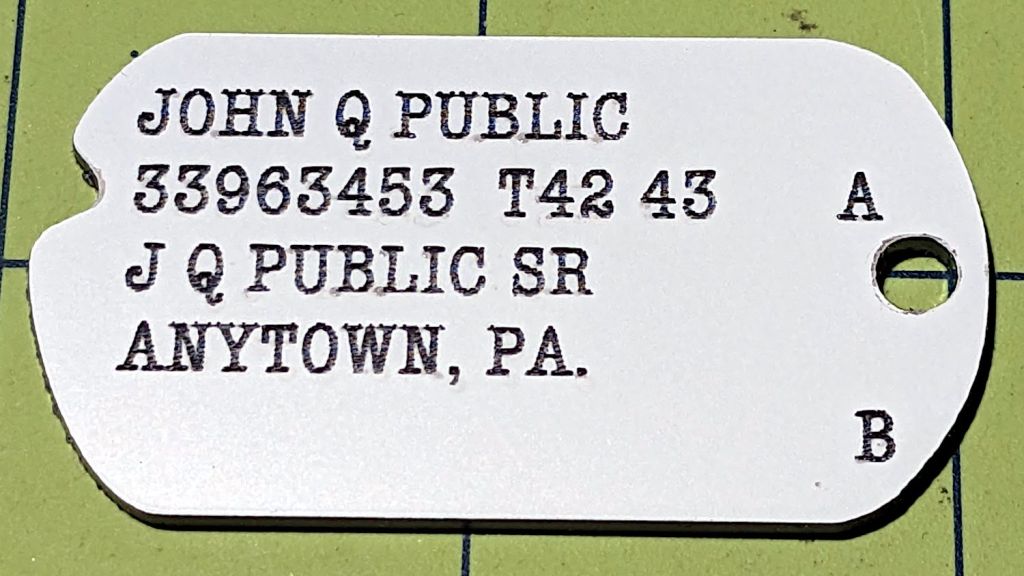
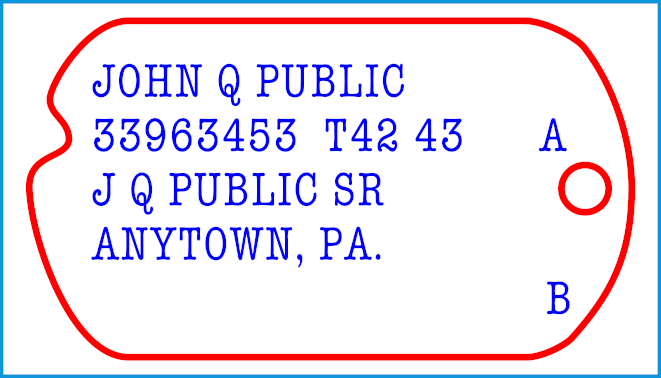
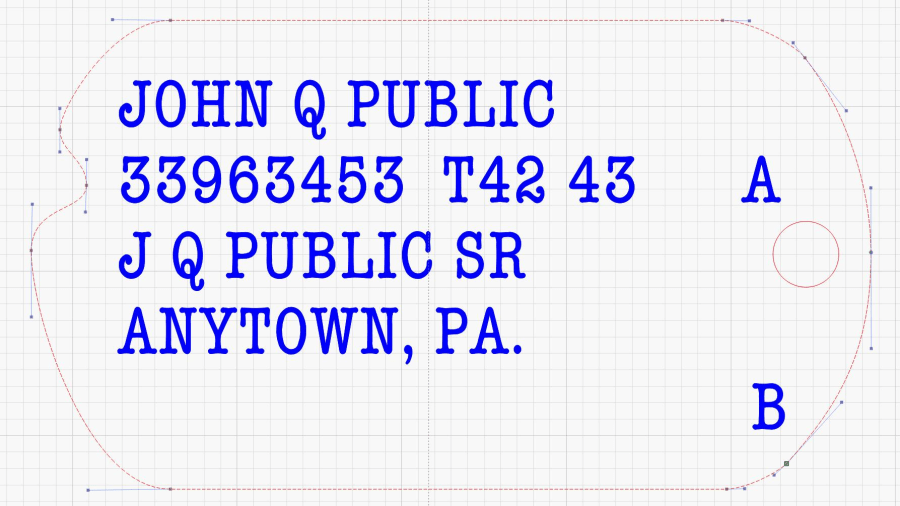
The outline traces a scanned image of my father’s tag, fitting a few hand-laid splines around the curves:
John Q Public – WWII dog tag – spline curves
I generated a random serial number based on my father’s draftee status (he was in his early 30s during his South Sea Island tour) and state of residence; my apologies to anyone carrying it for real. His blood type was A and (I think) the religion code marks him as “Brethren”, a common group in my ancestry.
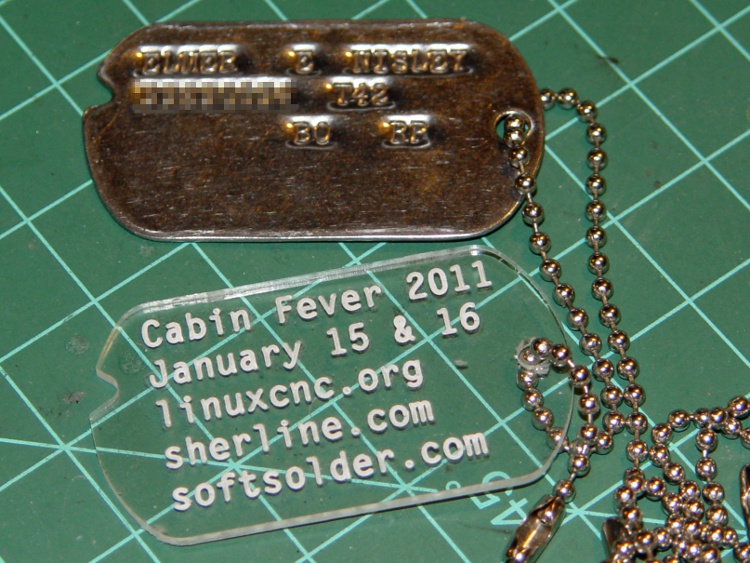
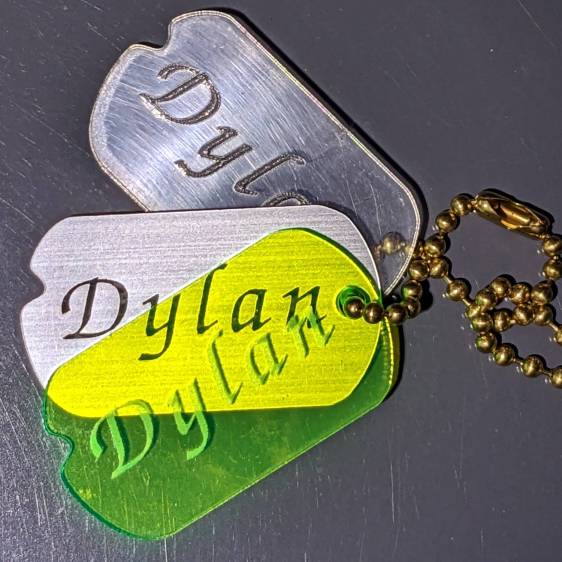
Given the outline, various plastics, and a laser, other effects become possible:


