The Smell of Molten Projects in the Morning

Ed Nisley's Blog: Shop notes, electronics, firmware, machinery, 3D printing, laser cuttery, and curiosities. Contents: 100% human thinking, 0% AI slop.

Month: August 2018

  • Park Spoke Tension Meter vs. 20 inch Wheel Spokes

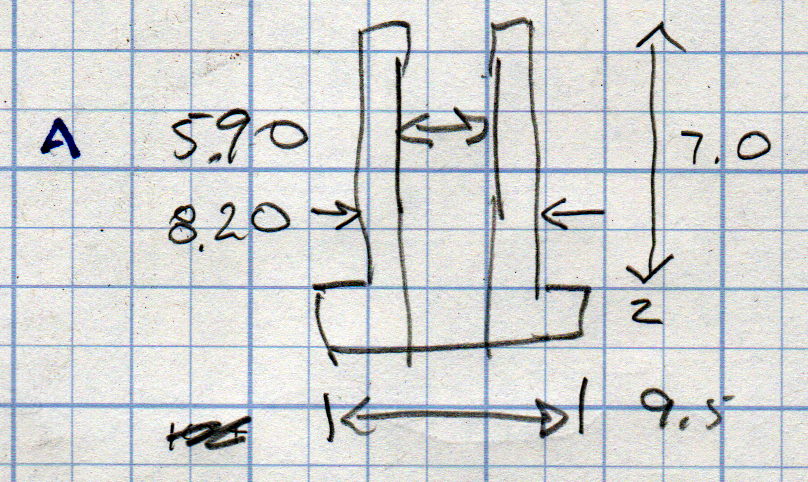
    Obviously, the good folks at Park Tool never anticipated a three-cross spoke pattern on a 20 inch wheel:

    Park Tool Spoke Tension Meter vs 406 wheel
    Park Tool Spoke Tension Meter vs 406 wheel

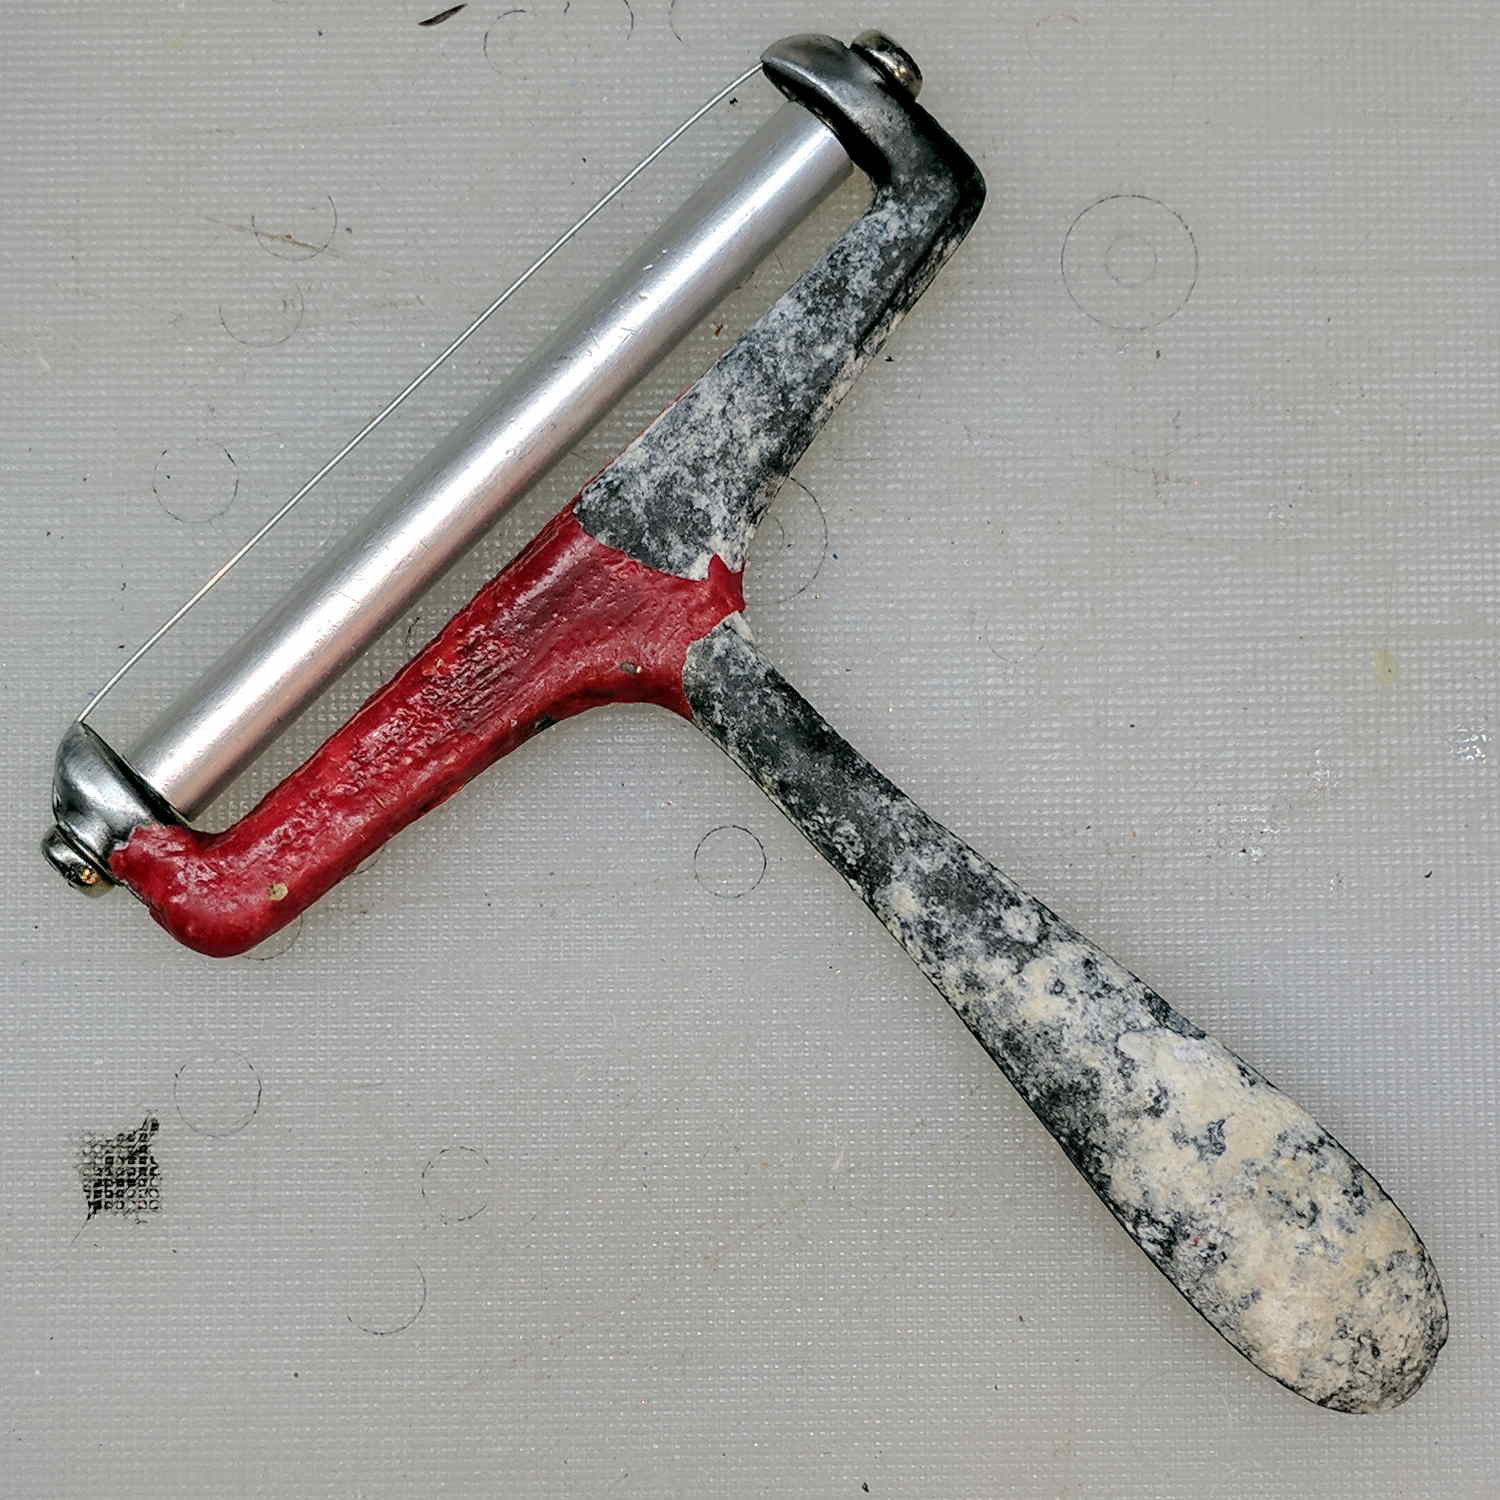
    It’s my trusty Park Tool TM-1 Spoke Tension Meter, unchanged since shortly after the turn of the millennium.

    For future reference, the rebuilt wheel spoke tensions came out around 25, slightly lower than the 27-ish I measured on Mary’s bike; it didn’t occur to me to measure the tension until after I’d relaxed the spokes. I’ll ride it for a while before doing any tweakage.

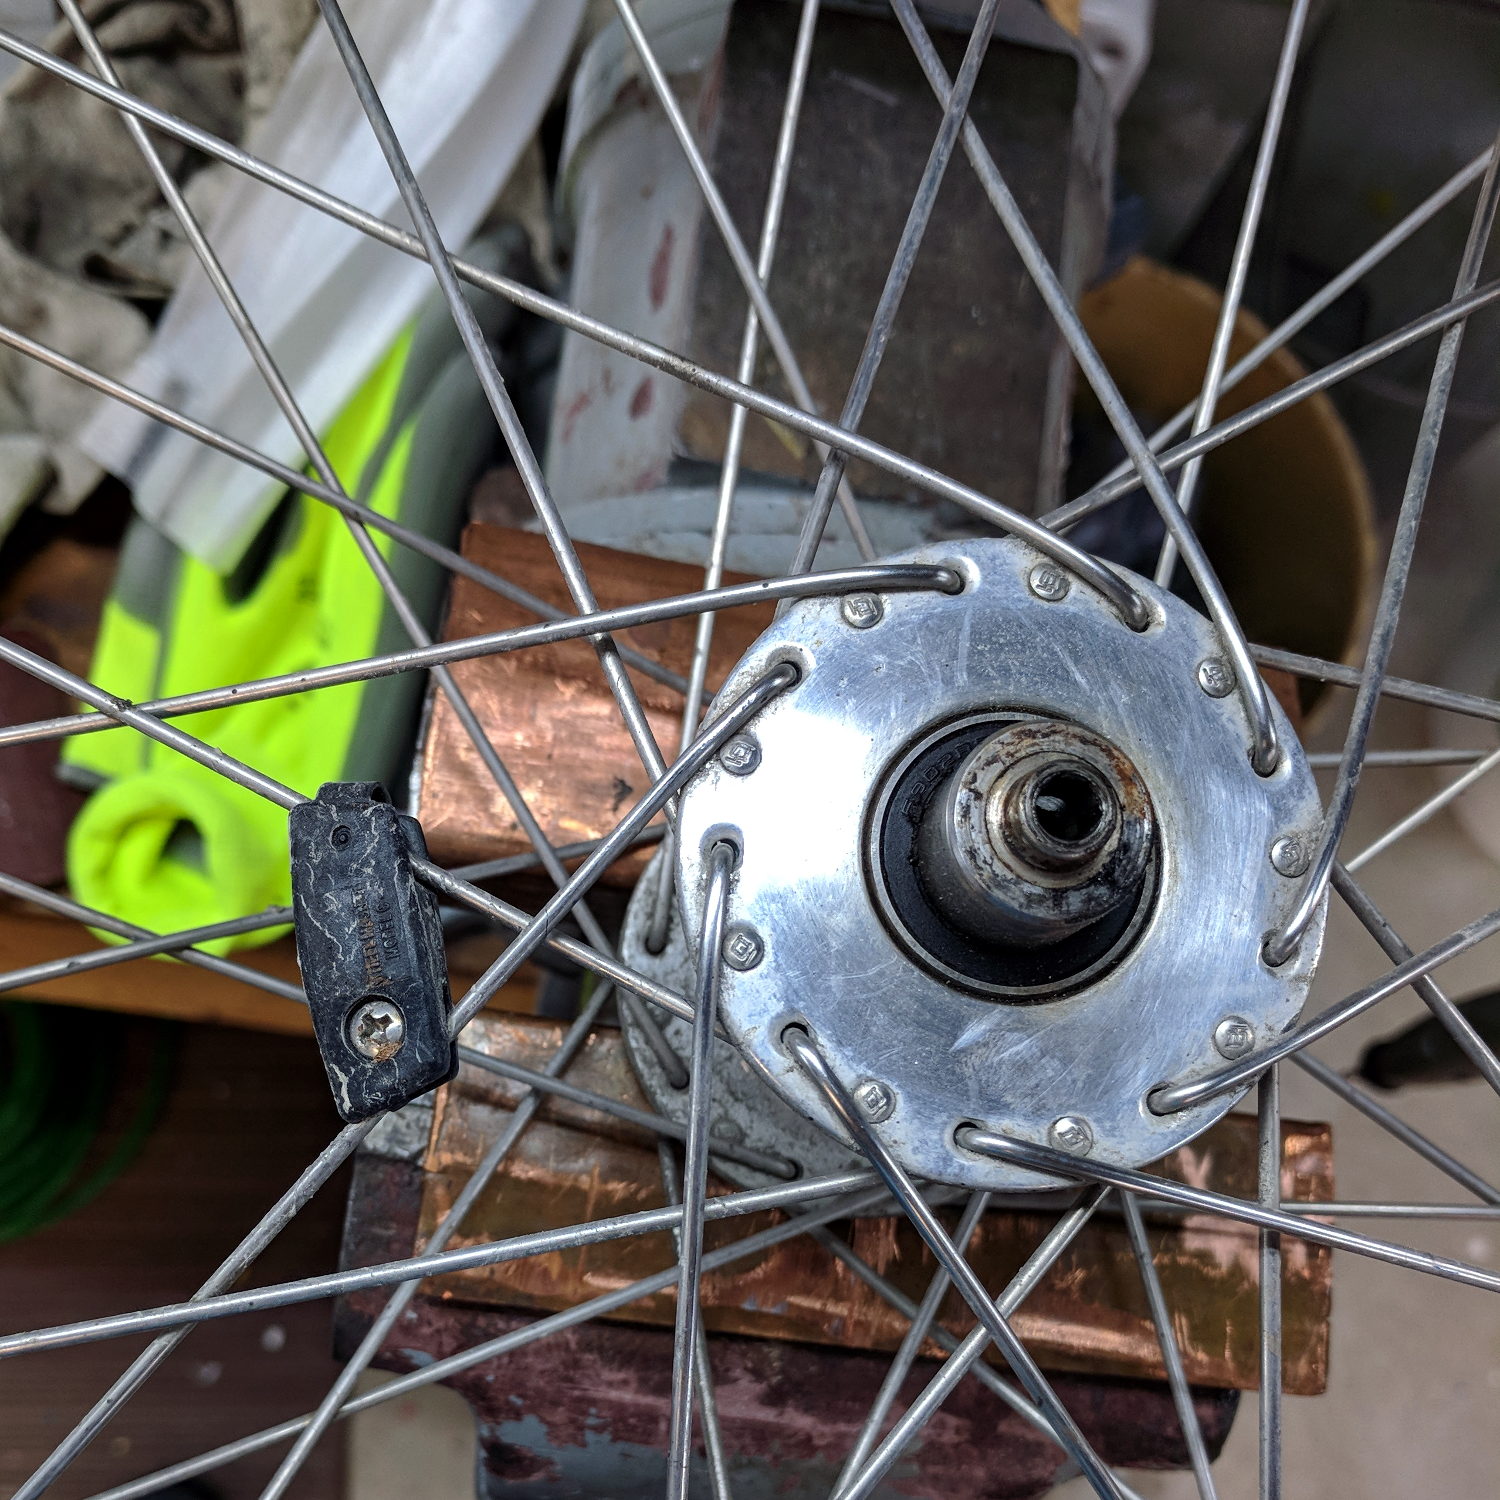
    The spoke pattern is pretty close to four-cross, due to the large-flange Phil Wood hubs:

    Tour Easy Front Spoke Pattern
    Tour Easy Front Spoke Pattern

    Which makes for a hella-strong wheel, particularly seeing as how it’s very lightly loaded. The Tour Easy we got for our lass came with a radially spoked rim around a Phil hub.

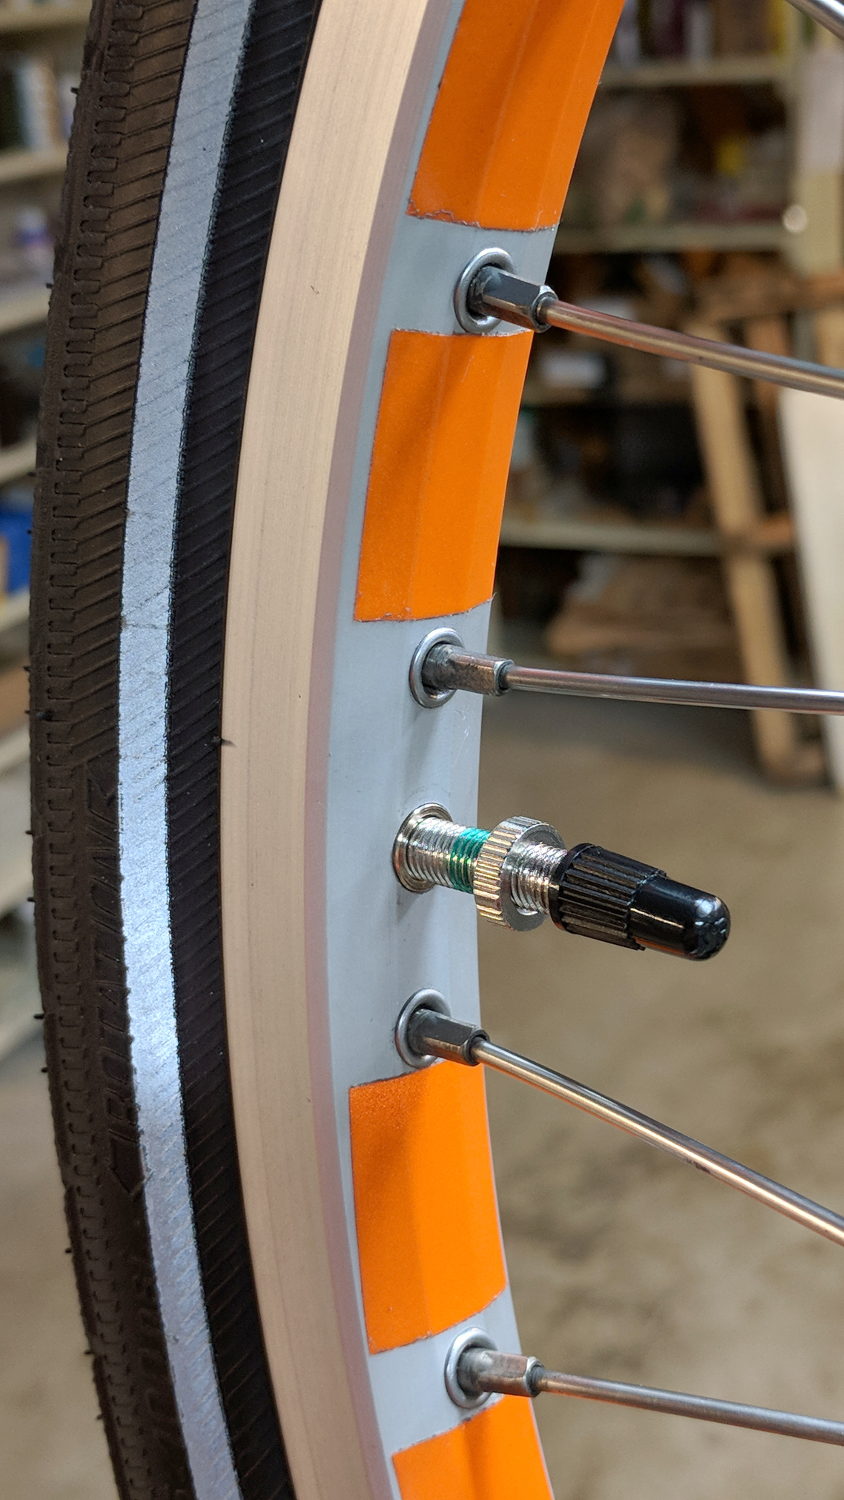
    I transferred the hub and laced spokes intact to the new rim by the simple expedient of duct-taping the spokes into platters, removing the nipples, stacking the rims, sliding the spokes across into their new homes, reinstalling the nipples, then tightening as usual.

  • Presta Valve to Schraeder Hole Adapter

    The front rim on my Tour Easy developed a distinct bulge, of the sort usually caused by ramming something, but I’m not Danny McAskell and the bulge got worse over the course of a few weeks, suggesting the rim was deforming under tire pressure. Having ridden it upwards of 35 k miles with plenty of trailer towing and too much crushed-stone trail riding, the brake tracks were badly worn and it’s time for a new rim.

    An Amazon seller had an identical (!) rim, except for the minor difference of having a hole sized for a Schraeder valve stem, rather than the Presta valves on the original rims. One can buy adapters / grommets, but what’s the fun in that?

    The brake track walls are 1.5 mm thick on the new rim and a scant 1.0 mm on the old rim, so, yeah, it’s worn.

    A few measurements to get started (and for future reference):

    Presta to Schraeder Adapter - dimension doodle
    Presta to Schraeder Adapter – dimension doodle

    If you don’t have an A drill, a 15/64 inch drill is only half a mil larger and, sheesh, anything close will be fine.

    Introduce a suitable brass rod to Mr Lathe:

    Presta-Schraeder Adapter - parting off
    Presta-Schraeder Adapter – parting off

    Break all the edges and drop it in place:

    Presta-Schraeder Adapter - installed
    Presta-Schraeder Adapter – installed

    One could argue for swaging the adapter to fit flush against the curved rim, but commercial adapters don’t bother with such refinements and neither shall I.

    The 7.0 mm length got shortened to fit flush with the center of the rim:

    Presta-Schraeder Adapter - valve stem installed
    Presta-Schraeder Adapter – valve stem installed

    It’s brass, because the rim is heaviest on the far side where the steel pins splicing the ends live, and, with the tube & tire installed, the rim came out almost perfectly balanced. Which makes essentially no difference whatsoever, of course.

    The shiny new rim sports shiny new reflector tape (from the same stockpile, of course).

    That was easy …

  • Monthly Science: Cheese Slicer Epoxy Coating vs. Water

    Ten months ago, I cleaned the corrosion off our favorite cheese slicer:

    Cheese slicer - aluminum corrosion
    Cheese slicer – aluminum corrosion

    After cleaning, I coated it with XTC-3D epoxy:

    Cheese Slicer - epoxy coat - detail
    Cheese Slicer – epoxy coat – detail

    We’ve been using it daily ever since and it spends most of its life drip-drying in the dish drainer. I added a third opening to the cheerful orange measuring spoon holder just for the slicer.

    A few weeks ago I noticed corrosion once again growing on the handle:

    Cheese Slicer - epoxy coat - corrosion - detail
    Cheese Slicer – epoxy coat – corrosion – detail

    I think the rot comes from water diffusing through the epoxy, rather than gross leaks through damage or pinholes. The tip of the handle has the most corrosion, probably due to the water drop hanging there, even though it also has the thickest epoxy coating: it cured with the handle pointing downward.

    Verily, rust never sleeps …