-
Sears / Kenmore Progressive Vacuum Cleaner: Motor FAIL
After seven years, our Sears / Kenmore Progressive vacuum cleaner gave off a horrible screech and an intense smell of electrical death, prompting me to tear it apart.
It’s easy to find the two front screws holding the top in place, although you’ll need either a bendy or offset screwdriver to remove them:

Sears Progressive Vacuum – front case screws Pull up hard on the cord retraction plunger to remove it, revealing the two rear screws:

Sears Progressive Vacuum – rear case screws Extract the wires and motor control PCB from their niches:

Sears Progressive Vacuum – motor assembly overview Prying the latch in the middle of the rear panel (over on the right) releases the motor assembly, which you can then wiggle-n-jiggle upward and out:

Sears Progressive Vacuum – extracting motor assembly Disconnect the wires, peel off various foam bits, and extract the motor from its carapace. Measure the blower diameter and cut a suitable plywood clamp for the bench vise:

Sears Progressive Vacuum – custom motor clamp I loves me some good laser cutter action, even when the plywood crate the laser came in doesn’t have much to recommend it:

Sears Progressive Vacuum – failed plywood clamp I vaguely recall reading the purple tinge comes from the bromine vapor used to dis-insect the wood during manufacturing, before shipping it halfway around the planet.
One area of the commutator looks like it’s in bad shape:

Sears Progressive Vacuum – as-found commutator Clean the commutator bars in the desperate hope it’s just random crud, even though that seems unlikely, then connect a widowmaker cord to the motor terminals:

Sears Progressive Vacuum – widowmaker line cord Use a Variac to spin the motor at a (relatively) low speed while watching the brushes and commutator:
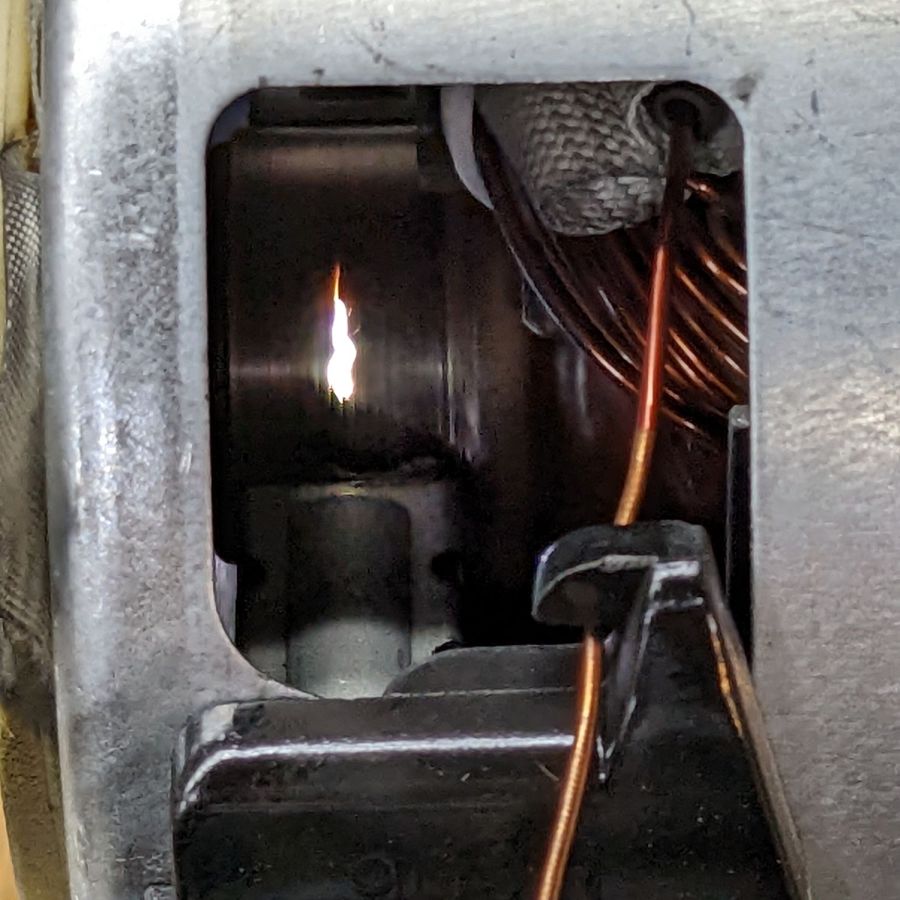
Sears Progressive Vacuum – commutator sparking Now, that is not a nominal outcome.
The cleaned commutator again shows signs of distress:

Sears Progressive Vacuum – scarred commutator Indeed, measuring the resistance across the line cord terminals shows a shorted winding: 0.0 Ω with the brushes aligned on the bars just antispinward of the scars.
So the motor is definitely, irretrievably dead.
Extracting the brushes shows the arcs have eroded their spinward edges:

Sears Progressive Vacuum – eroded motor brushes The dark smudge on the windings seems due to internal problems, rather than just the arcs, because the wiring crossing between the commutator and the smudge remains clean:

Sears Progressive Vacuum – charred motor windings One can buy a used motor assembly on eBay for about $40, with no assurance it doesn’t also have a shorted winding.
Dang, now I gotta make more adapters for whatever vacuum comes next …
-
Subscribe
Subscribed
Already have a WordPress.com account? Log in now.
