-
White LED QC Escape
Judging from the dates codes on the ICs inside, Mary’s HandiQuilter Sixteen long-arm machine is about two decades old and many of the white LEDs in the front handlebars have gone dark:
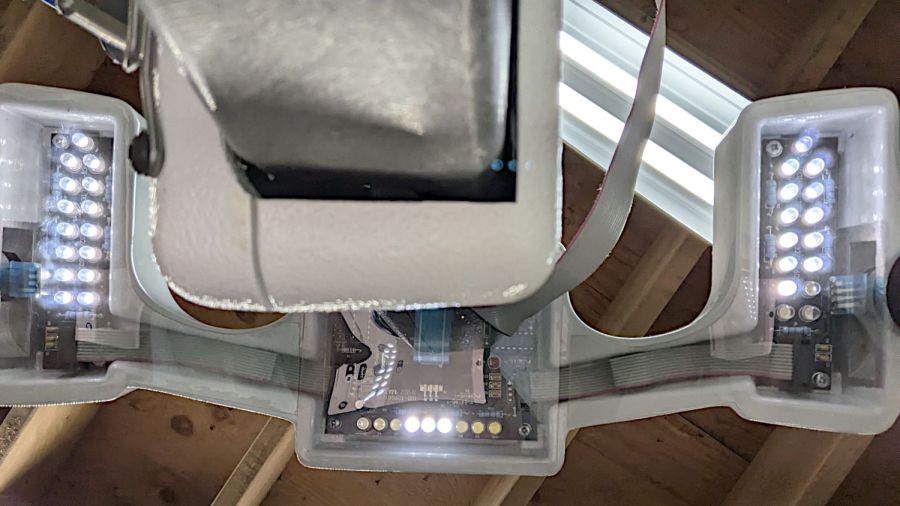
HQ Sixteen – dead handlebar LEDs The vertiginous view looks upward into the handlebar at the top of the machine (more on this later). The PCBs run strings of three series LEDs from a 16 VDC supply with a 390 Ω ballast resistor (oddly enough, on the ground end of the string), so one failed LED takes down all three.
I decided to replace all the LEDs, on the principle they’re surely dimmer than they used to be and to take advantage of a decade or so of improvement in white LEDs (yes, I have old stock).
After discovering that the HandiQuilter engineers violated the Principle of Least Surprise by orienting adjacent LED strings in opposite directions, I found one of the strings still didn’t light up.
Pop quiz: which one of these LEDs caused the problem?
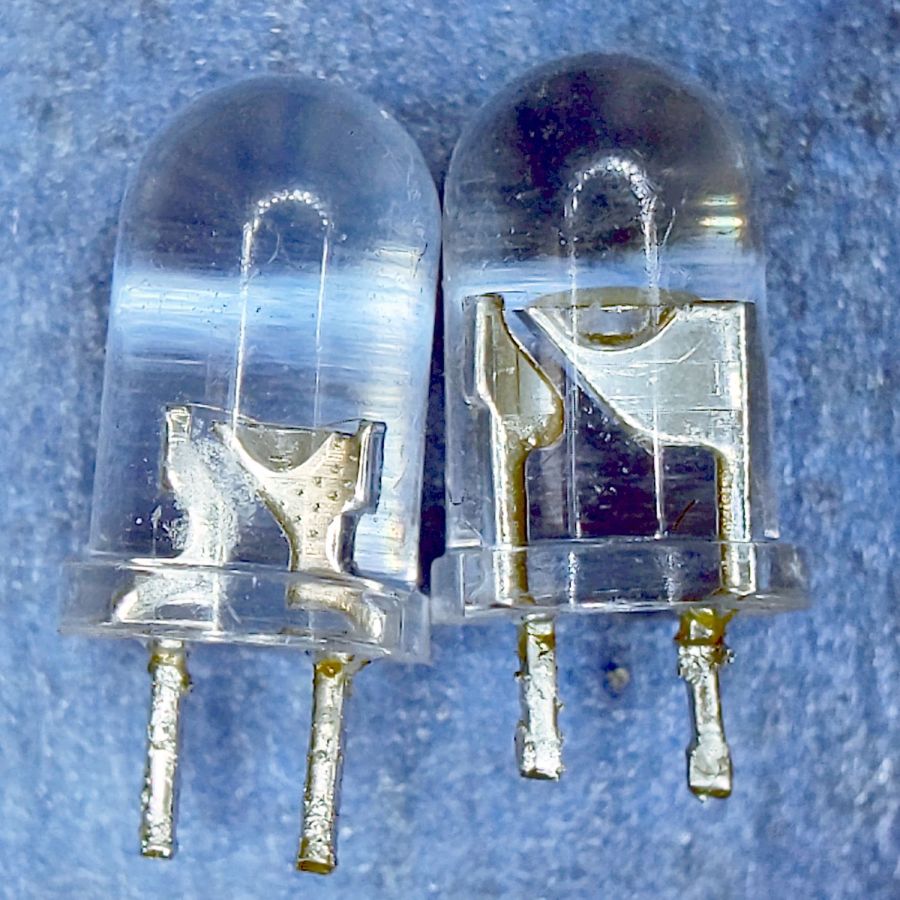
5 mm LEDs – swapped polarity To the best of my knowledge, all 5 mm round LED packages mark the cathode lead with a flat edge. It’s easy to remember, as the cathode side of the schematic symbol has a bar: straight bar = straight edge.
Inside, the LED chip’s cathode lead is bonded to the reflective cup, with the anode lead wire-bonded to the top.
Took me a while to see what was wrong, too.
For whatever it’s worth, the backward LED works fine.
-
Subscribe
Subscribed
Already have a WordPress.com account? Log in now.
