-
Chocolate Mold Height Map
Given that you really don’t care about the absolute dimensions, you can generate a positive mold from a height map image and avoid the entire solid modeling process. Having already solved the cookie press problem, this was a quick-and-easy feasibility study…
Start by selecting the logo, growing the selection by a few pixels, and feathering the edges to produce the mold draft. Then apply a square gradient behind the Squidwrench logo to produce the height map for the edge of the mold. This one is scaled at 3.0 pixel/mm and is 100×100 pixel, thus producing a 33 mm square mold:

One could, of course, produce a non-square mold with a different gradient outline shape.
Hand the image to a slightly modified version of the cookie press script (see below) to get an STL file of the mold:
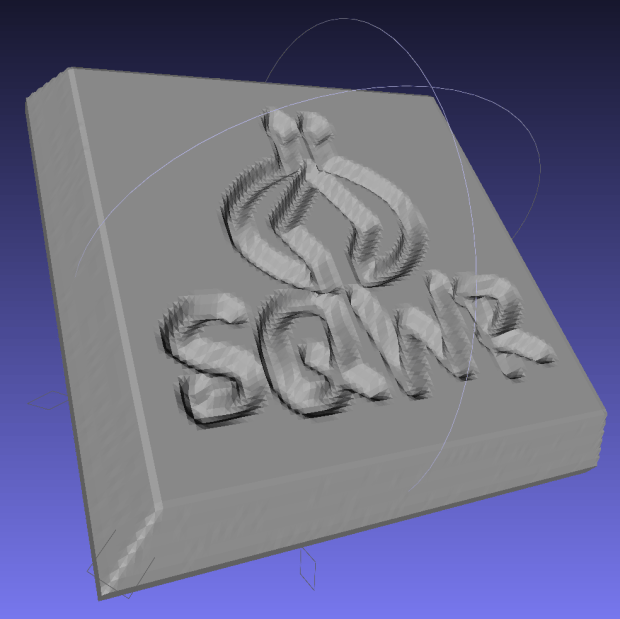
SqWr solid model – oblique view Feed the STL into Slic3r, hand the G-Code to Pronterface, fire the M2!, and you get a positive mold that looks enough like black chocolate to seem ready-to-eat:
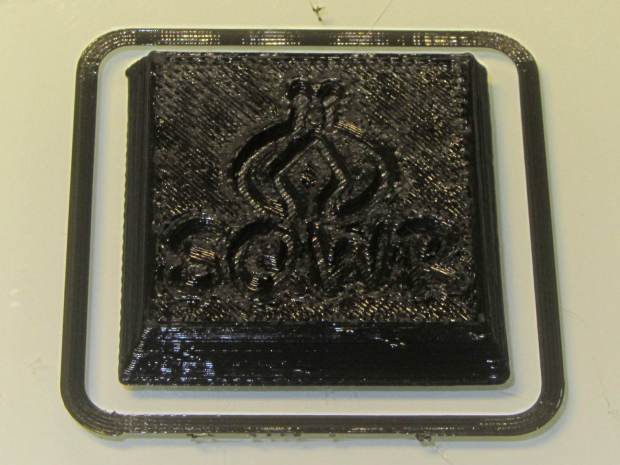
SqWr – mold positive I have no idea whether that will work as a mold, but I suspect flexy silicone putty won’t reproduce much of the fine plastic filament detail, so the negative mold won’t grab the chocolate. The logo is six threads deep with a little bit of draft, if that makes any difference.
The backing plate is 1 mm thick and the height map is 5 mm stacked atop that. A few iterations suggested using about 0.75 gray for the logo; working backwards says 5 mm = 25 layers @ 0.20 mm/layer, so a depth of 0.25 * 25 is about six threads.
For production use, I’d be tempted to import maybe a dozen copies of the STL into OpenSCAD, mount them on a platform with a gutter and a lip on the outside, and then print the whole positive multi-cavity mold in one shot.
The Bash script that produces the mold strongly resembles my cookie cutter script and contains about as much cruft as you’d expect. Because we need a positive mold, not a negative press, the script doesn’t invert the colors or flop the image left-to-right, nor does it generate the cookie cutter STL around the outside of the press:
#!/bin/bash
DotsPerMM=3.0
MapHeight=7
ImageName="${1%%.*}"
rm ${ImageName}_* ${ImageName}-press.stl ${ImageName}-cutter.stl
echo Normalize and prepare grayscale image...
convert $1 -type Grayscale -depth 8 -auto-level -trim +repage -flip +set comment ${ImageName}_prep.png
echo Create PGM files...
convert ${ImageName}_prep.png -compress none ${ImageName}_map.pgm
convert ${ImageName}_prep.png -white-threshold 1 -compress none ${ImageName}_plate.pgm
echo Create height map data files...
ImageX=`identify -format '%[fx:w]' ${ImageName}_map.pgm`
ImageY=`identify -format '%[fx:h]' ${ImageName}_map.pgm`
echo Width: ${ImageX} x Height: ${ImageY}
cat ${ImageName}_map.pgm   | tr -s ' \012' '\012' | tail -n +5 | column -x -c $((8*$ImageX)) > ${ImageName}_map.dat
cat ${ImageName}_plate.pgm | tr -s ' \012' '\012' | tail -n +5 | column -x -c $((8*$ImageX)) > ${ImageName}_plate.dat
echo Create cookie press...
time openscad -D BuildPress=true \
-D fnPlate=\"${ImageName}_plate.dat\" \
-D fnMap=\"${ImageName}_map.dat\" -D Height=$MapHeight \
-D ImageX=$ImageX -D ImageY=$ImageY -D DotsPerMM=$DotsPerMM \
-o ${ImageName}-press.stl Cookie\ Cutter.scad
The OpenSCAD program are unchanged from the cookie cutter process.


-
Subscribe
Subscribed
Have a WordPress.com account? Log in now.

