-
Newmowa NP-BX1: 2025 Batteries
A new sextet of NP-BX1 batteries for the Sony AS-30V helmet camera arrived:

Newmowa NP-BX1 – 2022 vs 2025 The traces:
- Blue = 2025 batteries
- Red = 2022 batteries when new
I don’t know what the bump in the middle of the new battery discharge curve means. Something weird in the chemistry, I suppose. Getting good batteries from Amazon surely remains a crapshoot and I now have four chargers.
Recharging all six batteries required 5488 mA·hr, just over 900 mA·hr apiece. Running the camera on a one-hour bike ride burns 600-ish mA·hr, so that’s comforting.
Comparing the new results with the 2022 batteries tested last month:
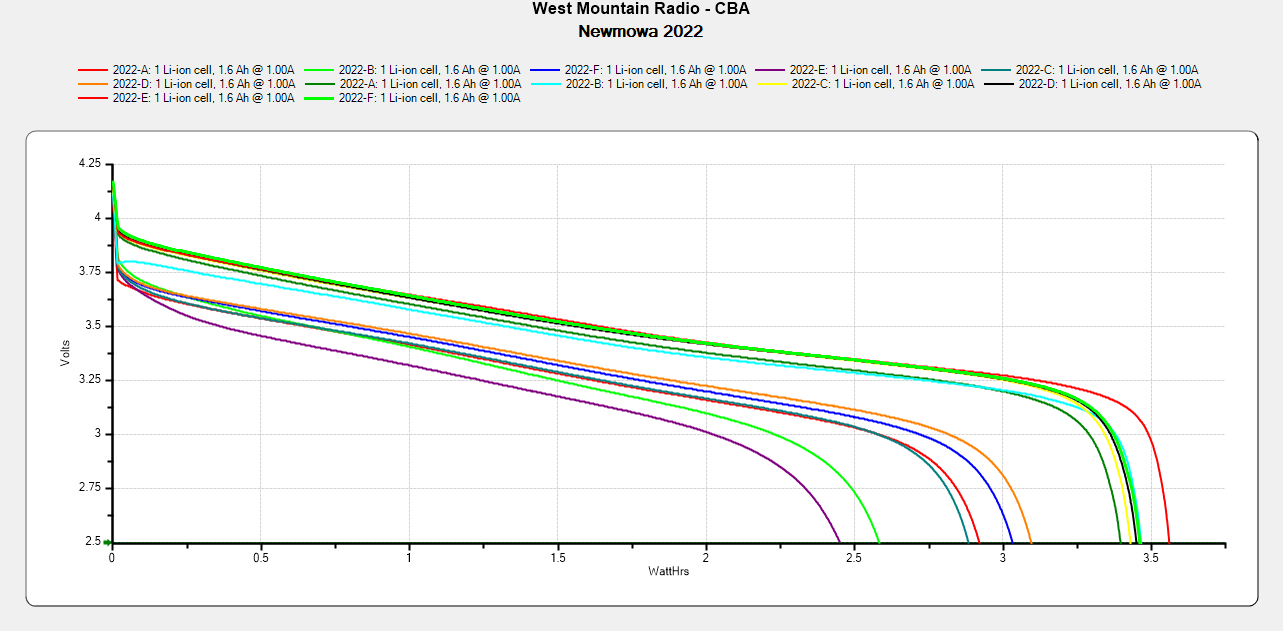
NP-BX1 – Newmowa 2022 in 2025-06 The upper traces appear in red in the first plot, the lower curves come from three years of use.
I’ll deploy the two best 2022 batteries (D and F) in the SJCAM M20 keeping watch from the Forester’s dashboard.
-
Subscribe
Subscribed
Already have a WordPress.com account? Log in now.
