-
OMTech 60 W Laser: Laser Power Indicator
Although the OMTech laser controls the laser power supply with a key-lock switch, there’s little visible difference between the OFF and ON positions. Having occasionally mistaken it in both directions, this seemed like a useful addition:
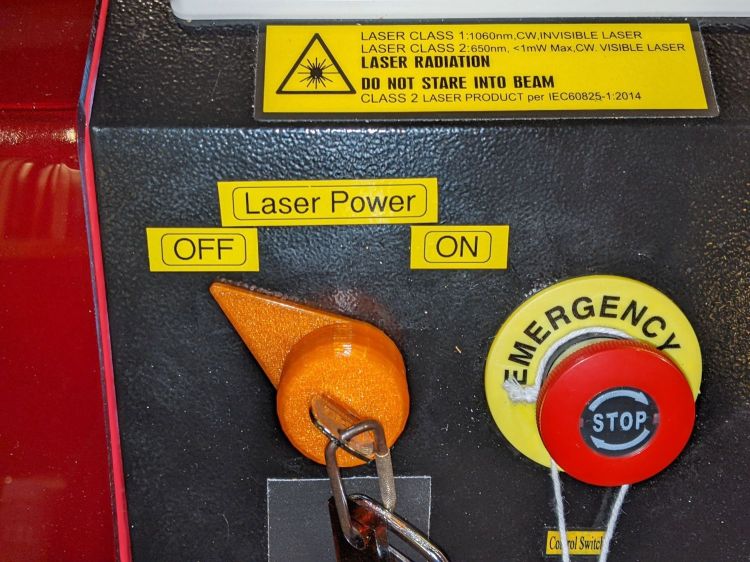
Laser Power Lock Indicator – installed The strip of black duct tape below the lock muffles the rattle of the triangle hatch key against the metal cabinet.
Two snippets of foam tape hold the knob to the lock cylinder, making an admittedly tenuous connection, but the knob fits around the outside of the switch housing with minimal clearance and
doesn’tshouldn’t suffer any torque or pulling, so it might work.The solid model looks about like you’d expect:
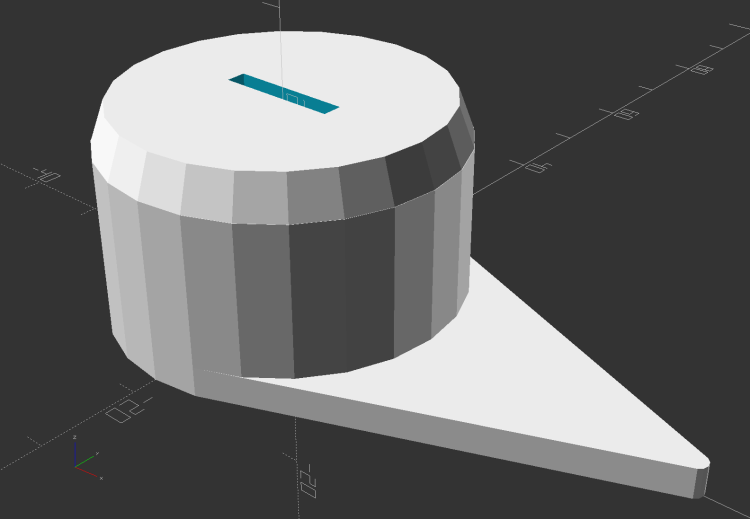
Laser Power Lock Indicator – solid model Unfortunately, it has no good orientation for printing, so I let PrusaSlicer generate support material inside the knob:
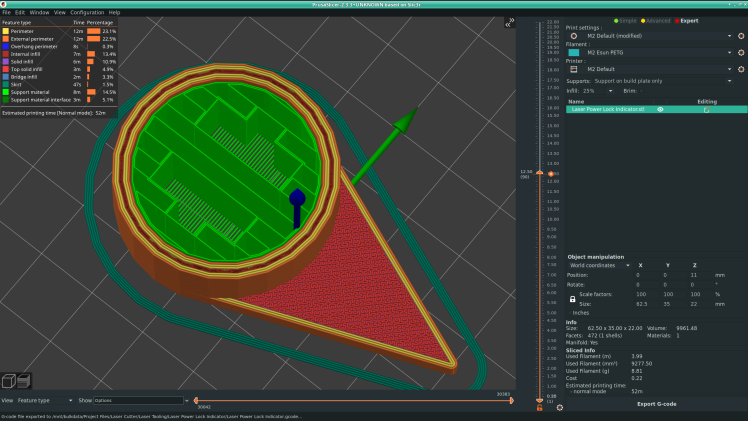
Laser Power Lock Indicator – Support structures Suffice it to say: removing all that plastic did not go well.
I eventually grabbed the knob in the lathe and bored the interior out to its more-or-less proper dimensions, figuring nobody would ever notice the carnage, and it worked reasonably well. In the unlikely event I need another pointer, I’ll add a support spider to hold up the interior with minimal contact and less plastic.
Yeah, the laser really needs a stack light showing its condition and safety status …
The OpenSCAD source code as a GitHub Gist:
This file contains hidden or bidirectional Unicode text that may be interpreted or compiled differently than what appears below. To review, open the file in an editor that reveals hidden Unicode characters. Learn more about bidirectional Unicode characters// Indicator for OMTech laser power lock // Ed Nisley KE4ZNU 2022-04-09 KnobOD = 35.0; KnobHeight = 22.0; KnobTaper = 4.0; PointerLength = 45.0; PointerThick = 3.0; TipOD = 2.0; /* [Hidden] */ //—— Protrusion = 0.1; // make holes end cleanly HoleWindage = 0.2; module PolyCyl(Dia,Height,ForceSides=0) { // based on nophead's polyholes Sides = (ForceSides != 0) ? ForceSides : (ceil(Dia) + 2); FixDia = Dia / cos(180/Sides); cylinder(d=(FixDia + HoleWindage),h=Height,$fn=Sides); } //———- // Create part // Plenty of magic numbers from actual measurements module Pointer() { difference() { union() { linear_extrude(height=PointerThick) hull() { circle(d=KnobOD,$fn=24); translate([PointerLength – TipOD/2,0]) circle(d=TipOD,$fn=12); } cylinder(d=KnobOD,h=KnobHeight – KnobTaper,$fn=24); translate([0,0,KnobHeight – KnobTaper – Protrusion]) cylinder(d1=KnobOD,d2=KnobOD – 3.0,h=KnobTaper + Protrusion,$fn=24); } translate([0,0,-Protrusion]) { PolyCyl(29.0,14.0 + Protrusion,24); PolyCyl(24.0,14.0 + 5.0 + Protrusion,24); // leaves clearance under pointer } translate([0,0,KnobHeight]) cube([12.0,2.0,2*KnobHeight],center=true); } } //———- // Build it Pointer(); And doodles giving the dimensions of the key lock, not all of which can be true at the same time:
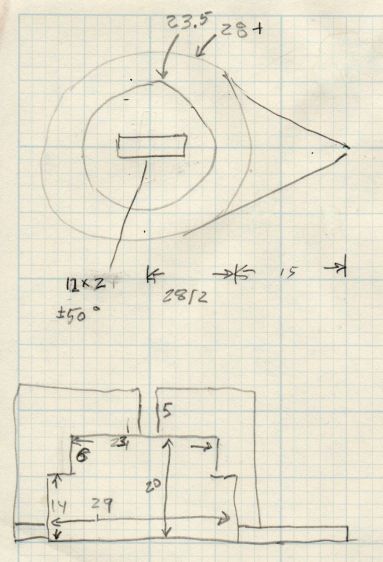
Laser Power Lock Indicator – Dimension Doodles
-
Subscribe
Subscribed
Already have a WordPress.com account? Log in now.
 The Smell of Molten Projects in the Morning