I laid out the cart coins in LightBurn for two reasons:
- It’s easy to use
- Making laser-cut cart coins is much faster than 3D printing
The LightBurn layout looks like this:

The red lines show cuts through the material to produce the overall shape with a hole for a keyring. The black areas show where the laser will raster-scan the surface at lower power to engrave the cart logo, which consists of vector outlines traced from a PNG file.
LightBurn can export that design as an SVG drawing with all the elements properly aligned and OpenSCAD can import SVG drawings as 2D shapes, but that file produces only the filled outline of the coin:
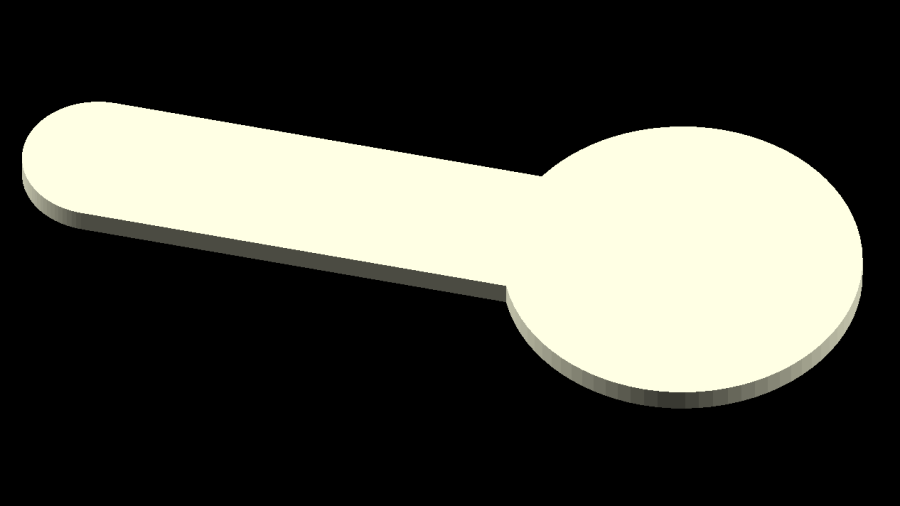
Presumably the other elements are still in there, but they’re hidden inside the outline and can’t be manipulated separately in OpenSCAD.
OpenSCAD can pick out named elements, groups, or layers from the SVG file, but, alas, the LightBurn SVG file has no named items, as shown in this chunk:
<?xml version="1.0" encoding="UTF-8" standalone="no"?>
<svg xmlns="http://www.w3.org/2000/svg" xmlns:xlink="http://www.w3.org/1999/xlink" width="57.096mm" he
    <path transform="matrix(-1,0,0,1,0,0)" style="stroke:none;fill:#a000a0;fill-rule:evenodd" d="M350.
    <path transform="matrix(-1,0,0,1,0,0)" style="stroke:none;fill:#00a000;fill-rule:evenodd" d="M357.
    <path transform="matrix(-1,0,0,1,0,0)" style="stroke:none;fill:#00a000;fill-rule:evenodd" d="M358.
    <path transform="matrix(-1,0,0,1,0,0)" style="stroke:none;fill:#00a000;fill-rule:evenodd" d="M359.
    <path transform="matrix(-1,0,0,1,0,0)" style="stroke:none;fill:#00a000;fill-rule:evenodd" d="M343.
</svg>
So I copied that LightBurn design to put the shapes on two different layers marked for Fill processing:
- The coin-with-handle
- The cart logo
It’s not absolutely necessary to use Fill layers, but they make it easier for me to visualize the shapes as solid objects.
Subtracting the keyring hole and the cart logo from the overall coin-with-handle produces a single shape (with holes) for one material, plus the logo shapes in another material:

Put the logo back in position before proceeding:

Unlike the first LightBurn layout, these two layers won’t cut & engrave a cart coin: they define the shapes in such a way that OpenSCAD can turn them into 3D solid models. It’s straightforward to convert between those layouts and they can reside in the same LightBurn file as the original design; just select the one you want to burn or export, as needed.
Note that LightBurn and Inkscape use the term “layer” in completely different ways:
- A LightBurn layer defines the laser control settings for all the geometry in that layer
- An Inkscape layer collects a bunch of shapes into a logical group, but does not otherwise influence them
In particular, even though we now have objects in two different layers, the exported LightBurn SVG file still has no names for those layers. Fixing that requires a trip through Inkscape.
Export the filled layout from LightBurn and open (or import) that SVG file with Inkscape, which automagically names the paths:

In order from 5 down to 1, those paths correspond to:
- The cart logo
- Three go-fast stripes
- The coin-with-handle outline with various holes
Create two layers with memorable names, then move the appropriate paths into those layers:

Save the Inkscape layout as an Inkscape SVG file, which will have contents something like this snippet:
inkscape:groupmode="layer"
id="layer2"
inkscape:label="Coin"><path
  transform="matrix(-1.000003,0,0,
  style="display:inline;fill:#a000
  d="m 350.58594,298.00879 0.58716
  id="path1" /></g><g
inkscape:label="Logo"
inkscape:groupmode="layer"
id="layer1"
transform="translate(0,5.4354331)"
style="display:inline"><g
  id="g1"
  transform="matrix(1.000003,0,0,1
    transform="scale(-1,1)"
    style="display:inline;fill:#00
    d="m 357.68781,313.02274 h -3.
    id="path2" /><path
    transform="scale(-1,1)"
    style="display:inline;fill:#00
    d="m 358.29401,310.65811 h -3.
    id="path3" /><path
    transform="scale(-1,1)"
    style="display:inline;fill:#00
    d="m 359.19412,307.96756 h -3.
    id="path4" /><path
    transform="scale(-1,1)"
    style="display:inline;fill:#00
    d="m 343.50088,317.48618 c -0.
    id="path5" /></g></g><metadata
Note the inkscape:label="Coin" and inkscape:label="Logo" stanzas corresponding to the layers.
Import that SVG file into OpenSCAD twice, once to extract each layer by name, extrude the 2D shapes to form a solid model with two parts, and give them distinctive colors:
    color("Gray")
    linear_extrude(height=1.6,convexity=10)
        import("/mnt/bulkdata/Project Files/Prusa Mk4/Models/Cart Coin/Cart Coin - Inkscape layers.svg",
                layer="Coin",convexity=10);

    color("Orange")
    linear_extrude(height=1.6,convexity=10)
        import("/mnt/bulkdata/Project Files/Prusa Mk4/Models/Cart Coin/Cart Coin - Inkscape layers.svg",
                layer="Logo",convexity=10);
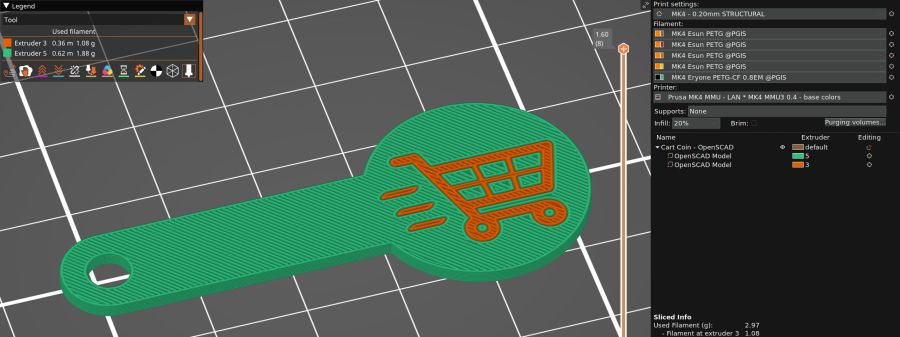
Which looks like this:

The cart logo exactly fills the matching holes in the coin shape, but because it’s a different OpenSCAD object, it won’t merge with its surroundings.
Export that model in 3mf format, because it seems better than stl for multi-material models, import it into PrusaSlicer, and get a helpful alert:

Yes, do that thing, then assign the appropriate filament to each object:
Arrange half a dozen instances on the platform and make yourself a set of cart coins:

Now, the obvious question: “Why not just do this in Inkscape, set up all the layers for OpenSCAD, then also export the geometry to LightBurn?”
LightBurn recently announced that Version 1.7 will be the last to support Linux, because Linux amounts to 1% of their users and we just don’t produce enough revenue to justify any effort to support us.
I don’t see standing up a Windows 11 box in the Basement Shop just to drive the laser and there is no way I’ll start running Windows as my daily driver just to design layouts in LightBurn. So, yes, I expect over the next year I’ll be transitioning away from LightBurn to Inkscape + Visicut, even though the latter has some rough edges.

Comments
One response to “LightBurn to PrusaSlicer via Inkscape & OpenSCAD”
[…] to what I thought a while ago, the least awful way to continue running LightBurn after Linux support goes away is to stand up a […]